To create GUI Interface on Raspberry Pi using Tkinter, follow this article.
Create a GUI Interface on Raspberry Pi Using Tkinter
To create a GUI interface on Raspberry Pi using Tkinter, follow the below-written steps:
Step 1: Update and Upgrade your Raspberry Pi repository from the following commands:
$ sudo apt upgrade
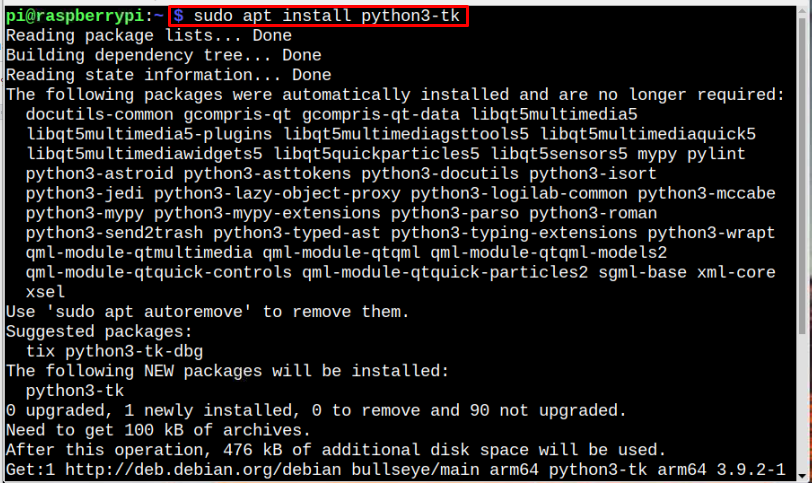
Step 2: Then install the Tkinter library using the below-written command:
Note: Ensure that Python and pip are preinstalled in your Raspberry Pi system.
Step 3: Once the installation is completed, run the below-written command to verify that Tkinter is installed correctly:
The Tkinter window will appear on the screen, which verifies that it is correctly installed. Close the window by clicking on the QUIT button:
Use Tkinter to Create a GUI Interface
Let’s create a simple GUI interface on Raspberry Pi using Tkinter and for that, follow the below-given steps:
Step 1: Create a python file (.py) by using nano editor:
Example
Step 2: Then import the Tkinter module into the file by using the below-mentioned command:
Step 3: Now create a window instance, which is Tkinter’s instance for the display:
Step 4: Now create a greet label widget which will be called to display the text.
greet.pack()
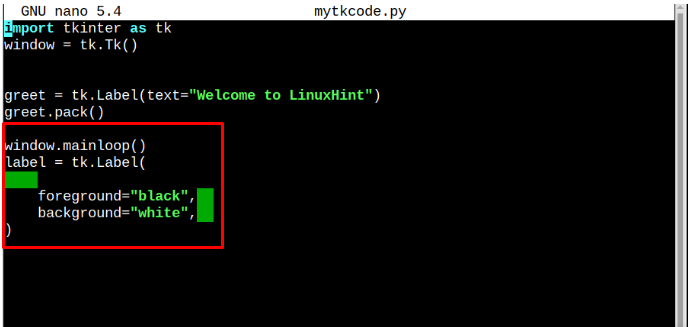
Step 5: Then finally in the mainloop(), call the created greet function:
label = tk.Label(
foreground="black",
background="white",
)
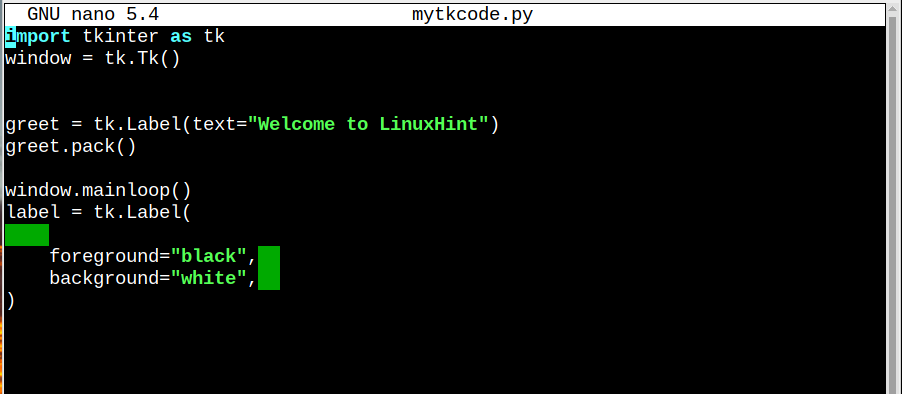
The entire code should be like as shown below:
window = tk.Tk()
greet = tk.Label(text="Welcome to LinuxHint")
greet.pack()
window.mainloop()
label = tk.Label(
foreground="black",
background="white",
)
Once you are done with the coding save the file by Ctrl+X and Y keys:
Finally run the code by using the below-mentioned command:
Conclusion
Tkinter framework can be used on Raspberry Pi to create GUI interface. To work with Tkinter, you must install it on Raspberry Pi from the “apt” command and then follow the above-mentioned guidelines to create a simple Hello GUI interface on the Raspberry Pi system.


