Displaying the data of the Arduino program in an effective way makes the project look cooler and more attractive. For displaying the data of a program or in a project there are a number of displays that can be used. The most commonly used display is the 16×2 LCD because of its less cost and its ease in interfacing it with microcontroller boards. Referring to the effective ways to display the data there are multiple ways by which we can display the data on the LCD. One way for displaying the data is by creating an animation and we can create animations by using different functions in the Arduino IDE.
How to create animation using LCD and Arduino Uno
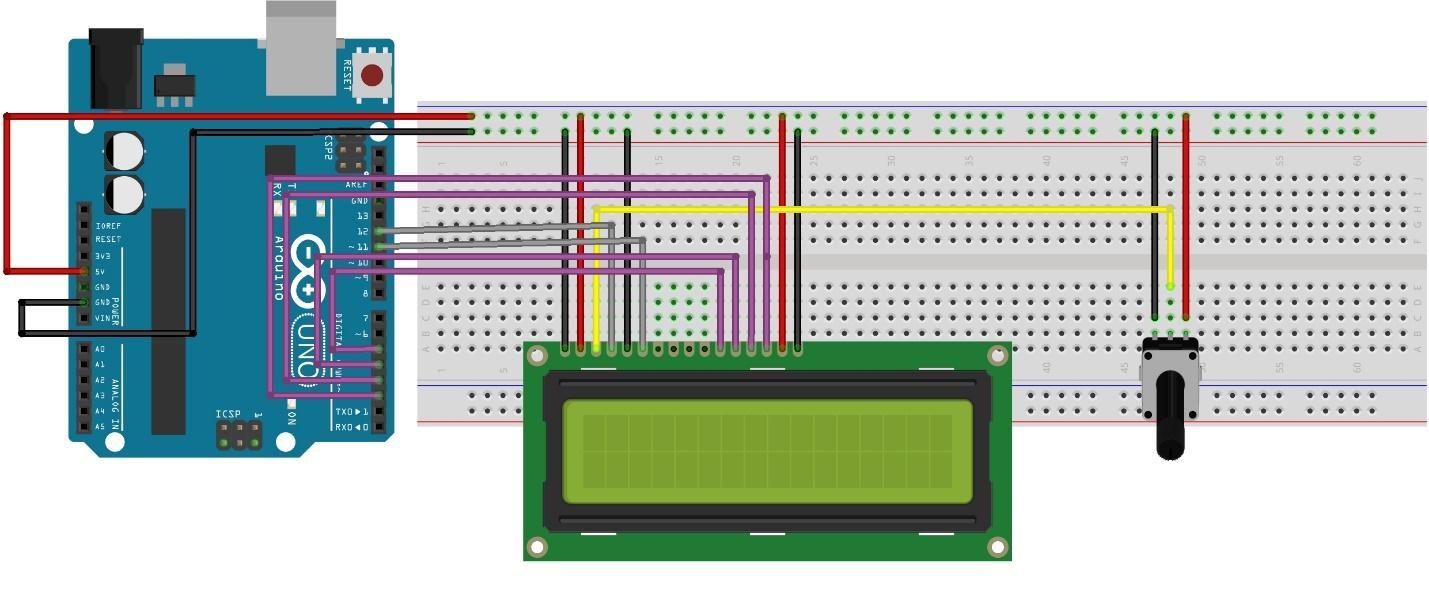
We can create text animation by using different functions like lcd.scrollDisplayLeft() or lcd.scrollDisplayRight(). Similarly, we can create some special characters using the LCD special character generator and move them on the LCD using different loops. To create an LCD animation, we have created a circuit whose schematic is given in the image below:
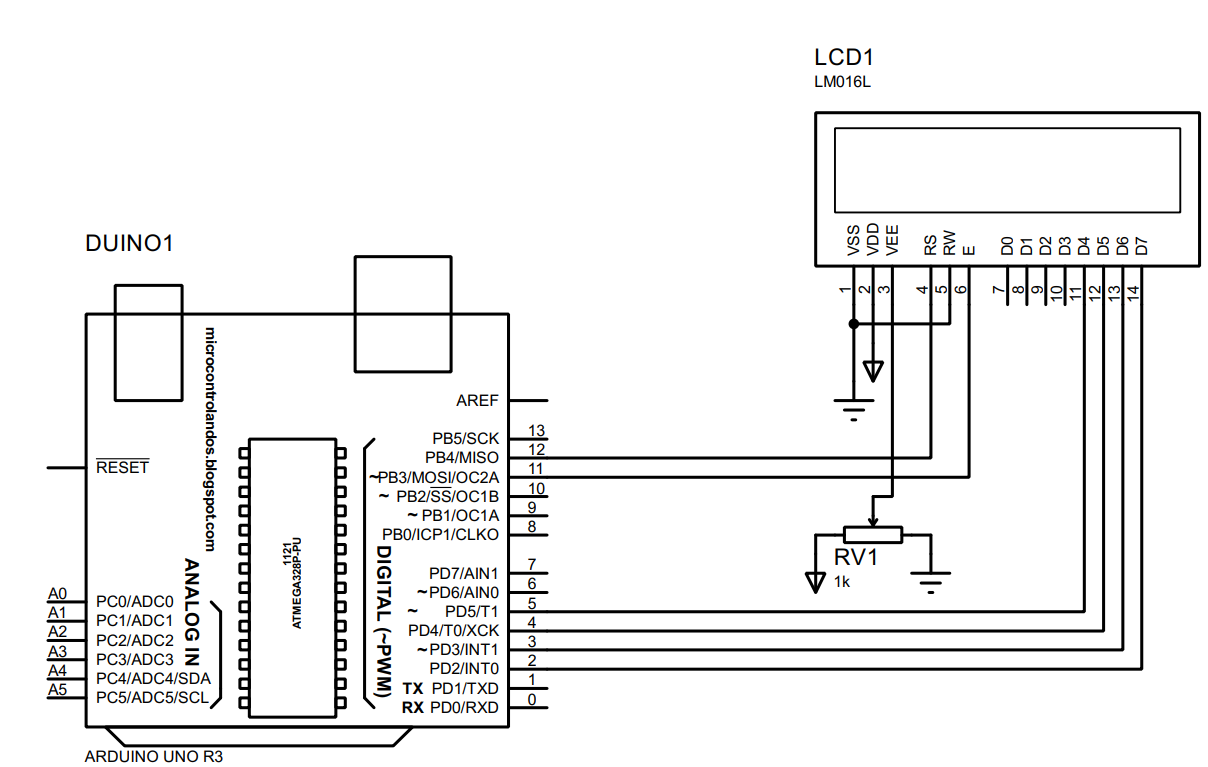
Hardware assembly for creating LCD animation using Arduino Uno
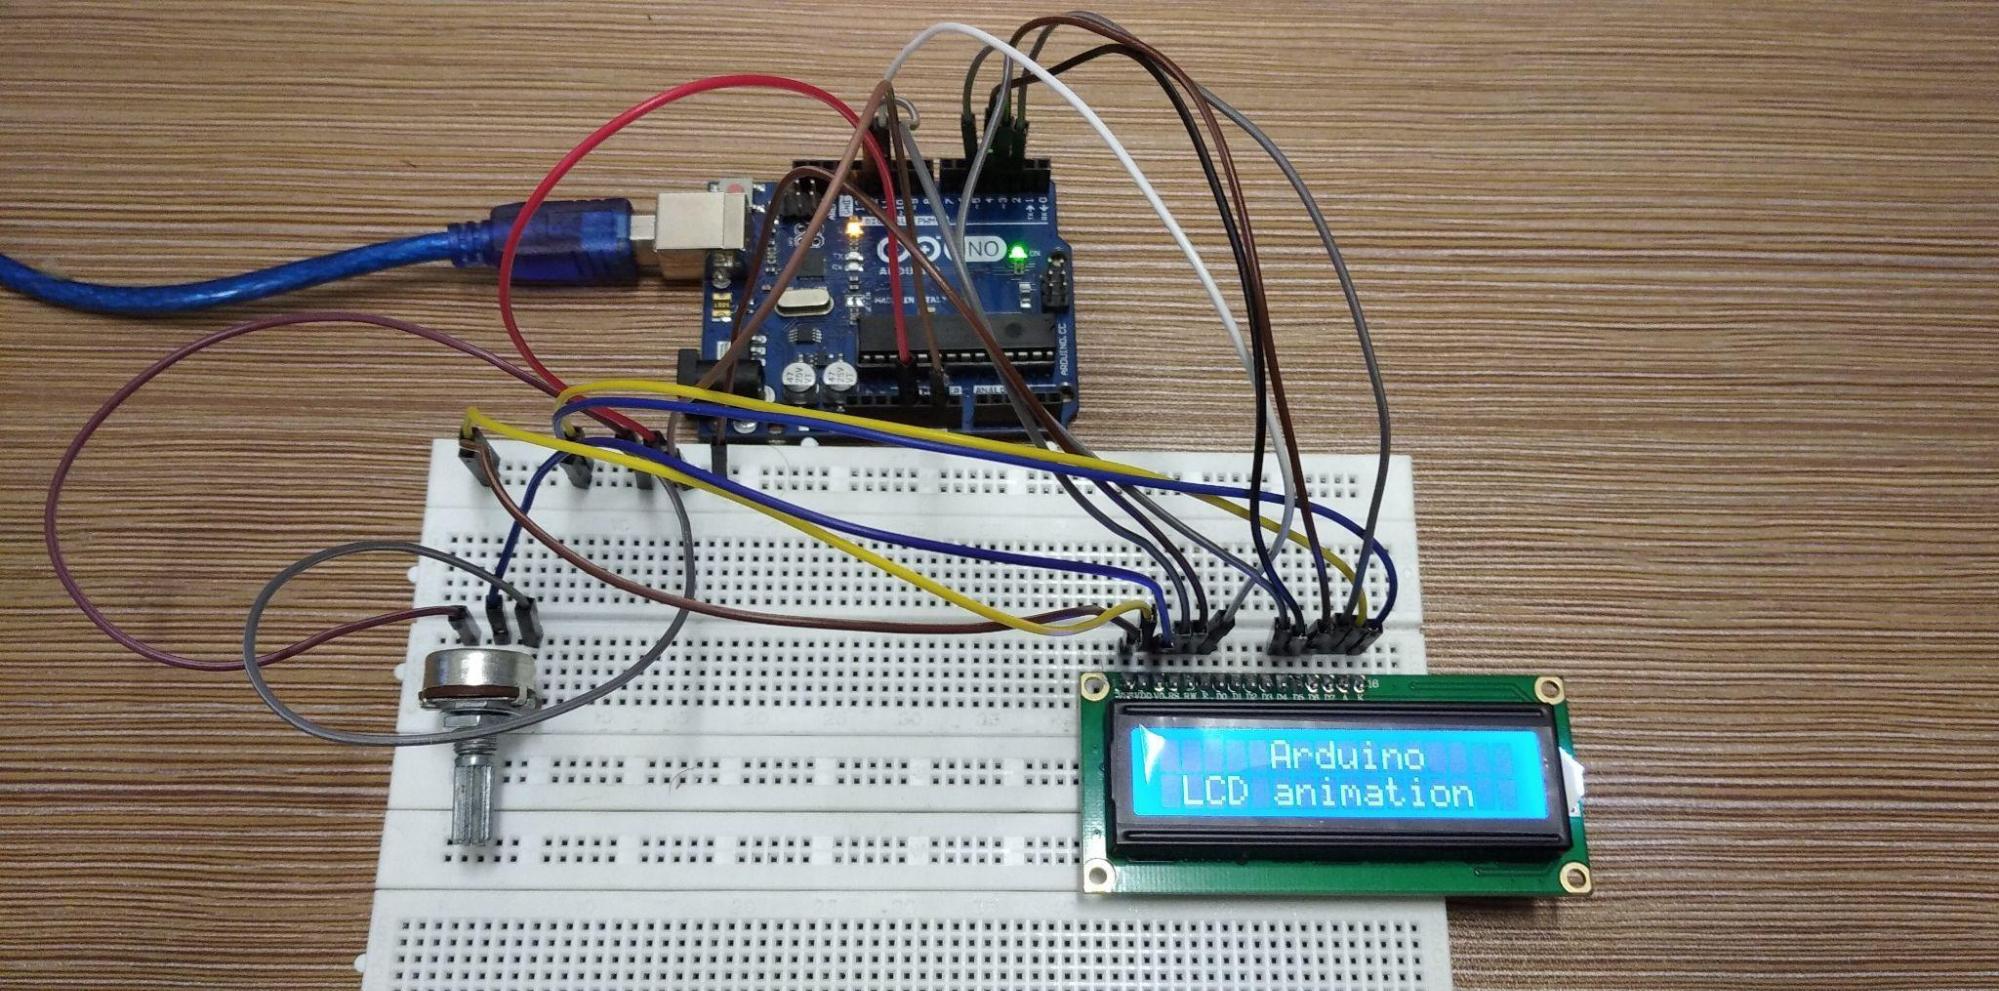
We have demonstrated the animation on LCD by assembling the hardware for the circuit schematic given above. The image below shows the hardware assembly of the circuit created to display animation on LCD.
We have connected the data pins of LCD with Arduino using the purple wires and to adjust the brightness for the LCD we have used yellow wire to connect the V0 pin of the LCD with the output of the Arduino. Moreover, to connect the register select and enable pin of LCD with Arduino we have used the gray wire which uses the pin 12 and 11 respectively.
To connect the LCD with the supply we have used the 5 volts and ground pin of the Arduino.
Arduino code for creating an animation on LCD using Arduino Uno
We have created an animation for the text as well as for the special customized characters and we have provided separate code for each type of animation. Below is the code for creating the animation using the special customized characters:
LiquidCrystal lcd(12, 11, 5, 4, 3, 2);/* assigning the pins of Arduino to the LCD*/
/* declaring the binaries for the special characters */
byte hero2[8]={
B00000,
B01110,
B11011,
B11110,
B11100,
B11110,
B11111,
B01110
};
byte hero3[8]={
B00000,
B01110,
B11011,
B01111,
B00111,
B01111,
B11111,
B01110
};
void setup() {
lcd.begin(16,2);// defining the size of LCD
/* converting all the binaries declared above inti special characters */
lcd.createChar(7, hero2);
lcd.createChar(8, hero3);
lcd.setCursor(1,0); // assigning the location to data
lcd.print(" Arduino "); // data to be printed
lcd.setCursor(0,1); //assigning the location to data
lcd.print(" LCD animation"); // data to be printed
delay(2000);// time for which the data will remain display on LCD
}
void loop() {
for(int j=0;j<=15;j++){
lcd.clear();
lcd.setCursor(j, 0);/* giving a location to display first special character */
lcd.write(byte(7));// displaying the second special character
delay(300);
}
// put your main code here, to run repeatedly:
for(int i=15;i>=0;i--){ /* using for loop to move the special characters on the second line of LCD*/
lcd.clear();
lcd.setCursor(i,1);/* giving a location to display second special character */
lcd.write(byte(8));// displaying the second special character
delay(300);
lcd.clear();
}
}
We have created the animation of the special characters using the for loop. So, to start the animation we have started the for loop from 0 going to 15 and to move the special character from left to right we have used the for loop starting from 15 and going to 0.
The second Arduino code that is for the animation of the text is given below:
LiquidCrystal lcd(12, 11, 5, 4, 3, 2); // assigning Arduino pins of Arduino for LCD
void setup() {
lcd.begin(16, 2); // declaring the size of LCD
lcd.setCursor(17,0); /*assigning the location to data */
lcd.print("Welcome to LinuxHint"); /* text that is to be animated */
lcd.setCursor(17,1);/*assigning the location to data */
lcd.print("Think better,with Linux"); /* text that is to be animated */
}
void loop() {
lcd.scrollDisplayLeft(); /*animating the text */
delay(500); /*speed with which the text will move*/
}
| [ |
To create the animation of the text we have first given the start position for each data line using the lcd.setCursor() function in the step up function. Next to move the text from the right side we have used the lcd.scrollDisplayLeft() function. You can change the starting place for the text and can move the data from left to right as well using the lcd.scroollDisplayRight() function.
Hardware implantation for creating the animation on LCD using Arduino
The hardware assembly described above is implemented on the hardware and it can be seen in the image below.
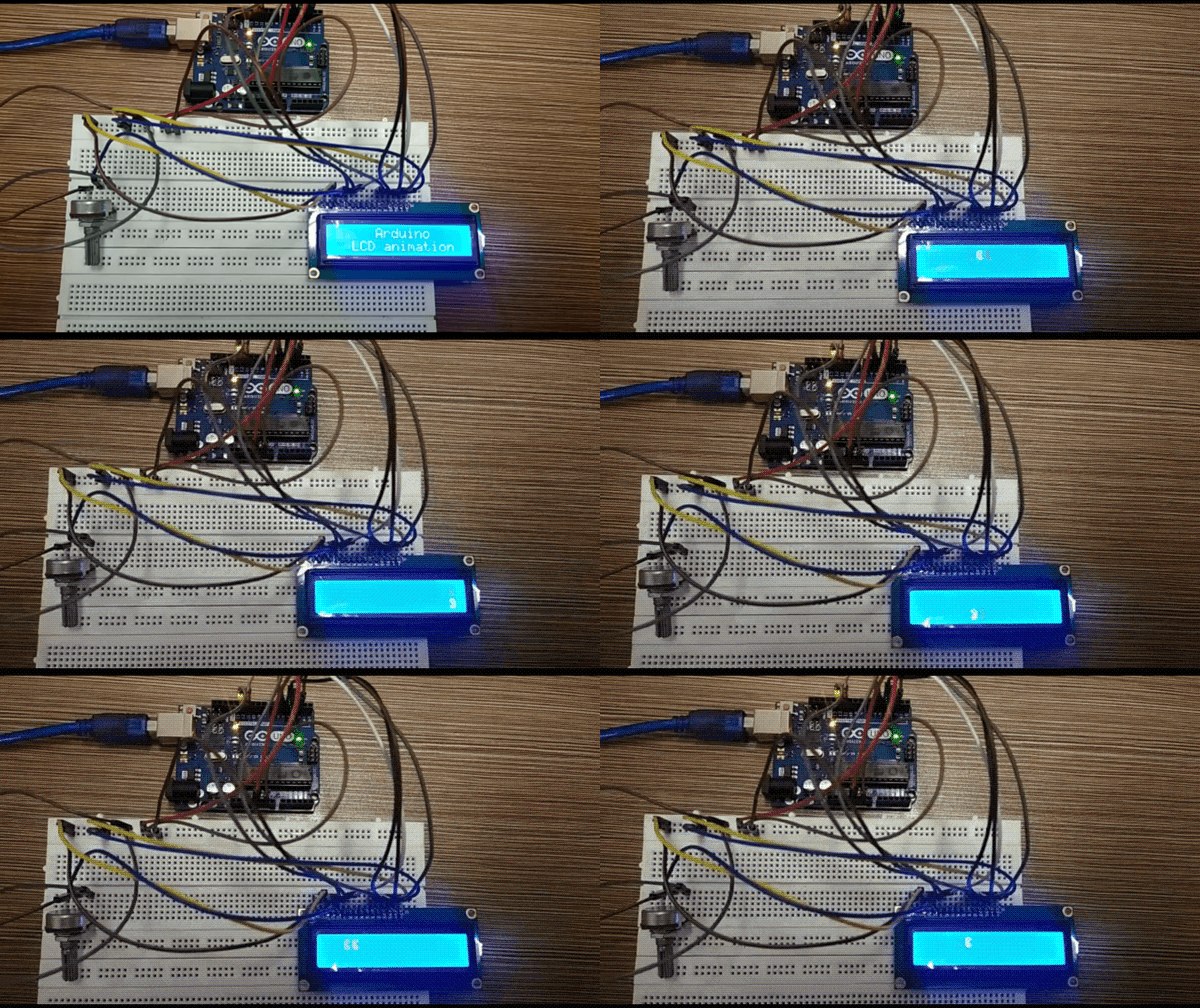
To display the animation created by compiling the code using the special character we have given an animation below:
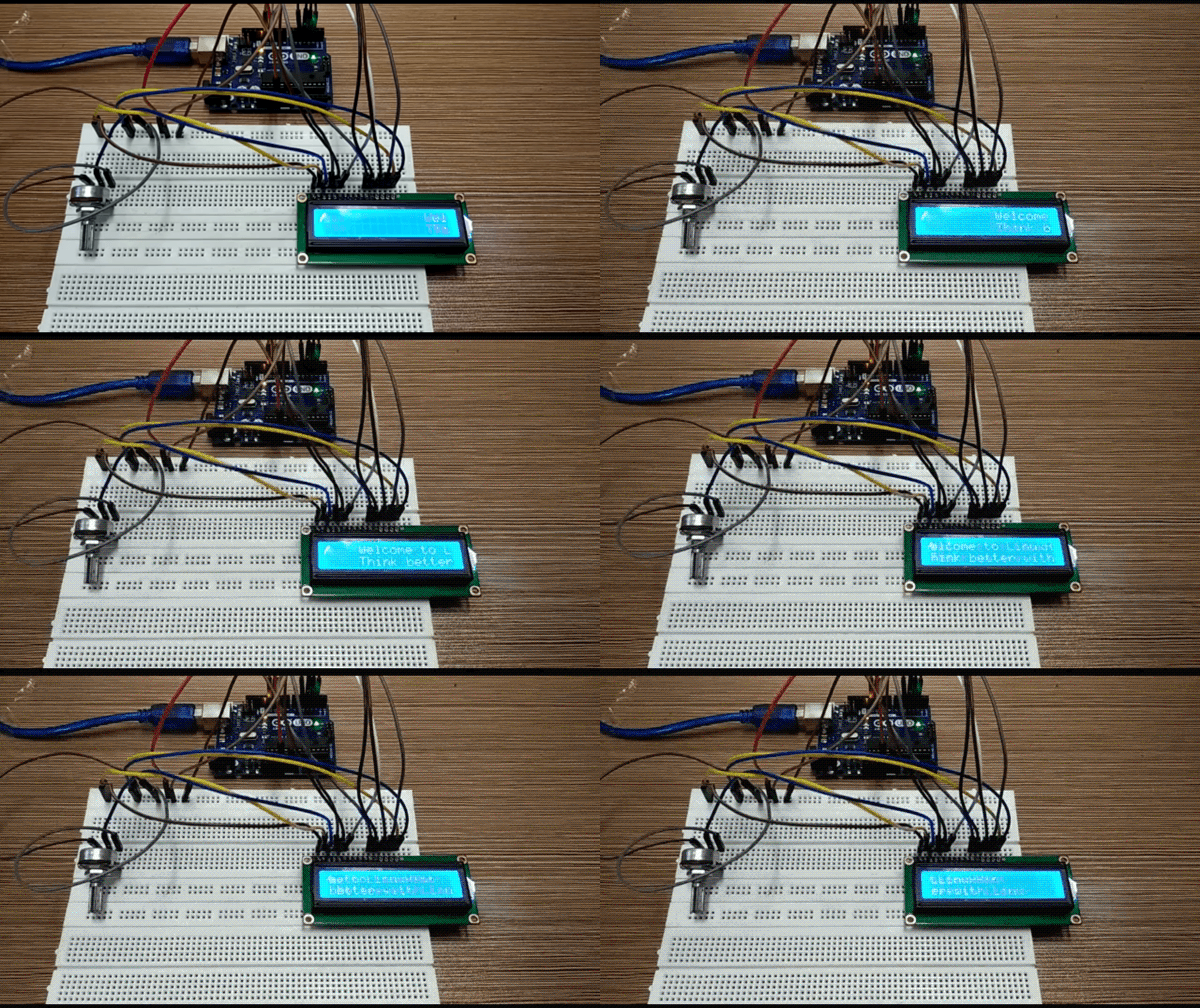
The output of the second Arduino code used to animate the text is illustrated in the animation posted below:
Conclusion
Displaying the parameters of the Arduino code plays a vital role for interpreting the working of the program. If the inputs and outputs are displayed properly then it is much easier to achieve the desired objective of the program. We can make animations of the data that we want to display on the LCD as it makes the project look more cooler and the data is updated automatically. In this write-up we have created the animation on LCD of text as well as special customized characters.

