
How to convert text to shape in Inkscape
This section will demonstrate how to convert text into different shapes in Inkscape. For this purpose, firstly, we will open up “Inkscape” by searching it manually in our system application:
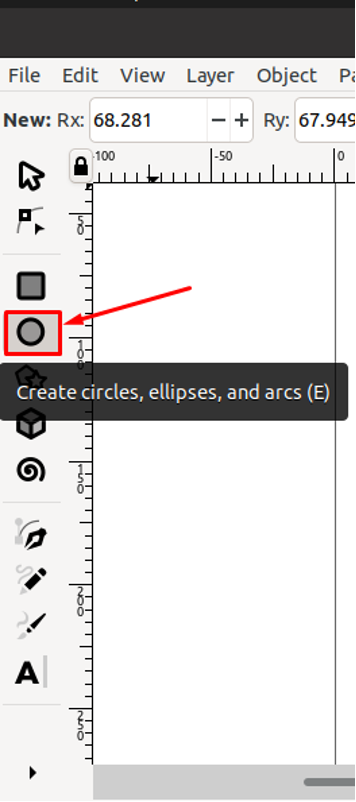
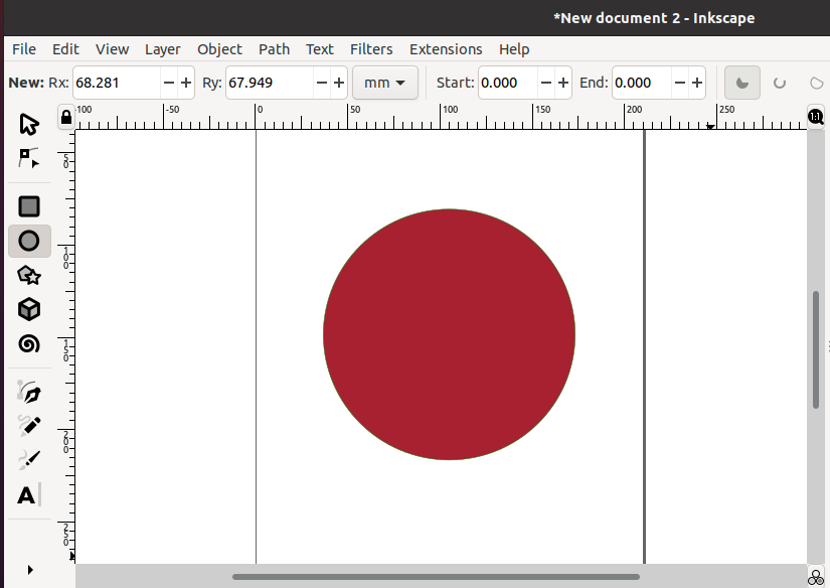
After opening the Inkscape application and creating a new document in it, we will select the “Circle” tool from the Inkscape toolbar to add it to our Inkscape canvas:
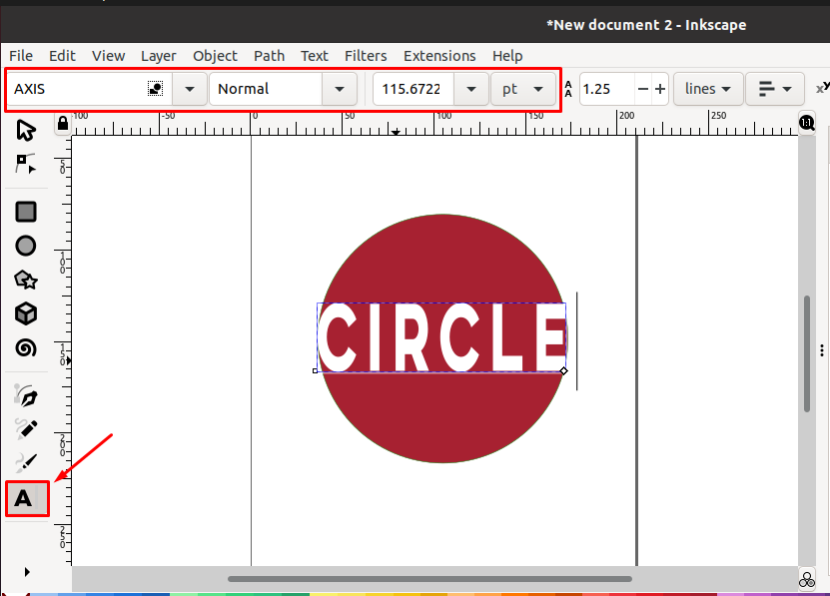
In the next step, click on the “Text” tool and add the text you want to convert. In our case, we will add “Circle” as text. You can also change the font style of the added text by using the provided option below the menu bar:
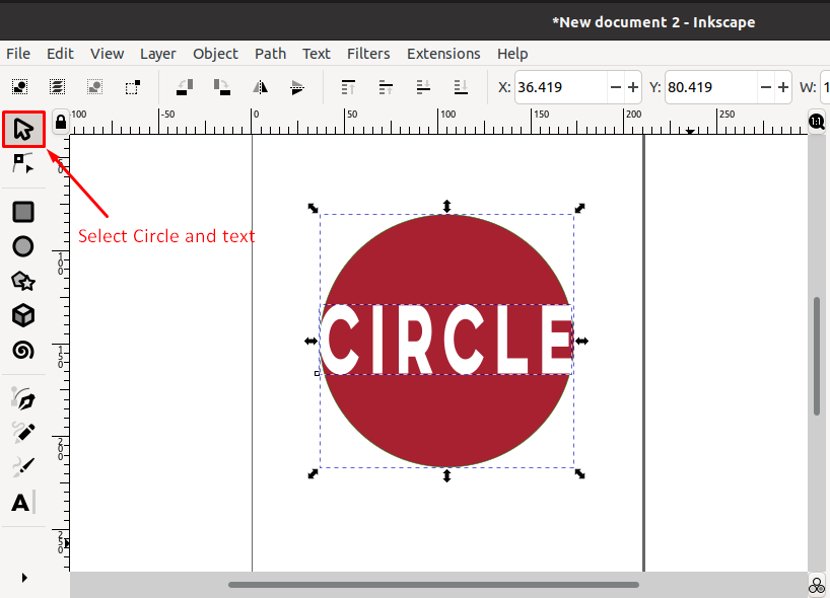
After doing so, choose the “Select and Transform” tool from the left-side toolbar and select both your added shape and text in the following way:
Now, open the “Object” menu and click on the “Object to Path” option. You can also press “Shift+Ctrl+C” for the same purpose:

Then, press “Shift+CTRL+A” to open up the “Align and Distribute” window:
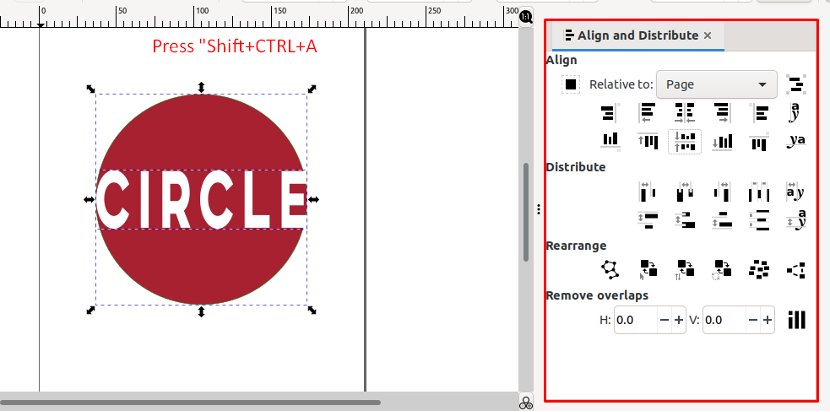
Click on the highlighted button to center-align the selected shape and text on the vertical and horizontal axis:

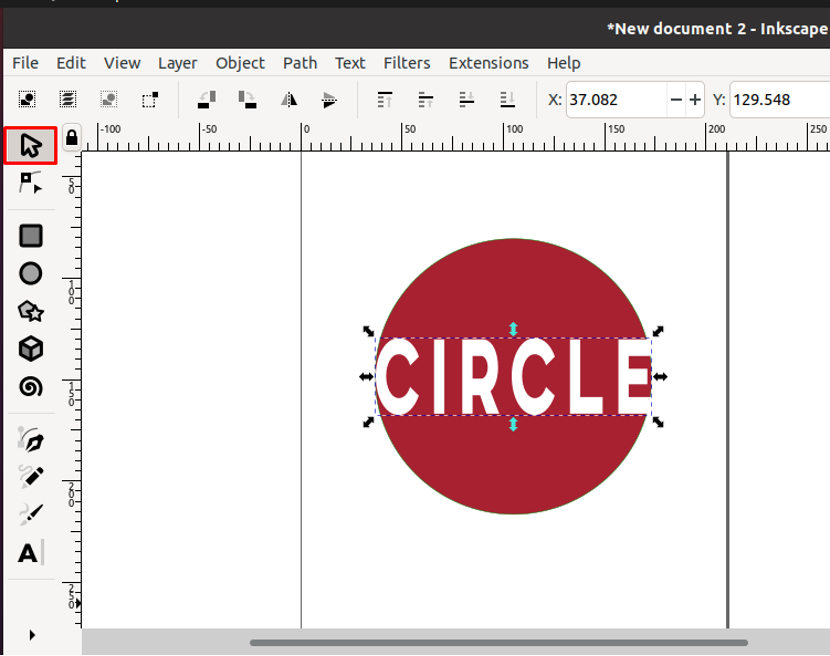
With the help of the “Select and Transform tool” now only select the added text:
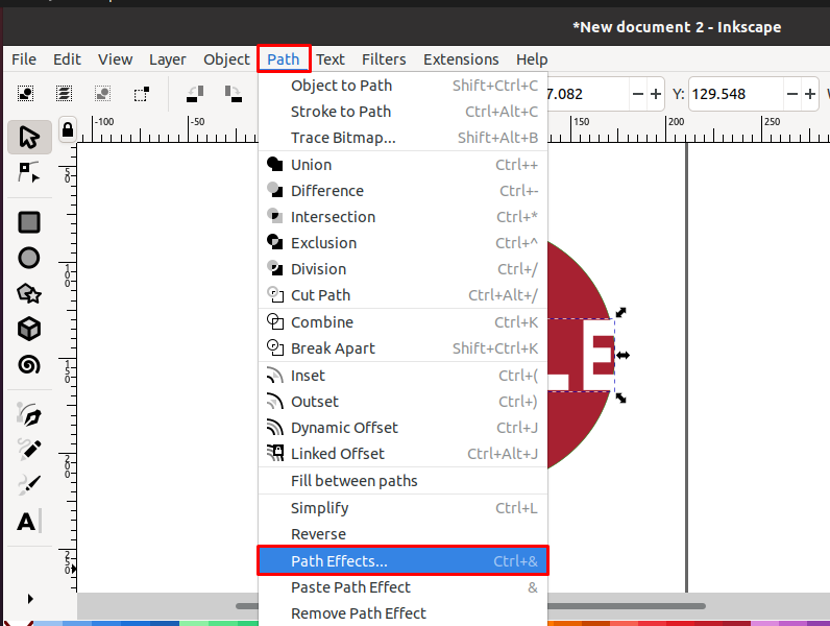
To convert text to shape in Inkscape, we will apply some path effects. To do so, open up the “Path” menu and click on the “Path Effects” option. You can also press “Ctrl+&” to view the Path Effects window:
Click on the “+” button from the bottom left side of the Path effects window, to add a path effect. Here, make sure that you have selected the text before adding a path effect:

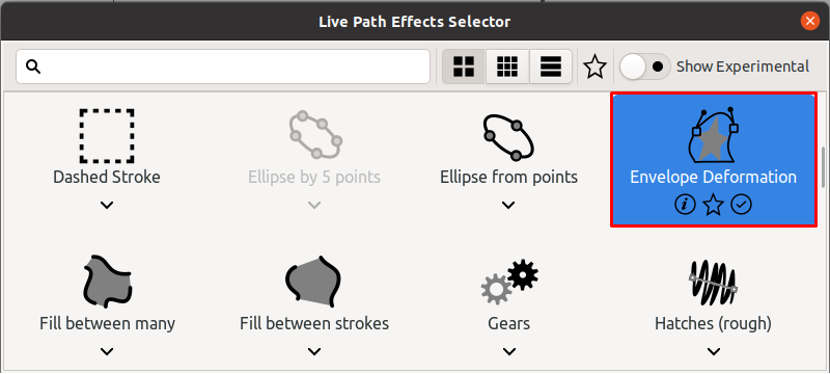
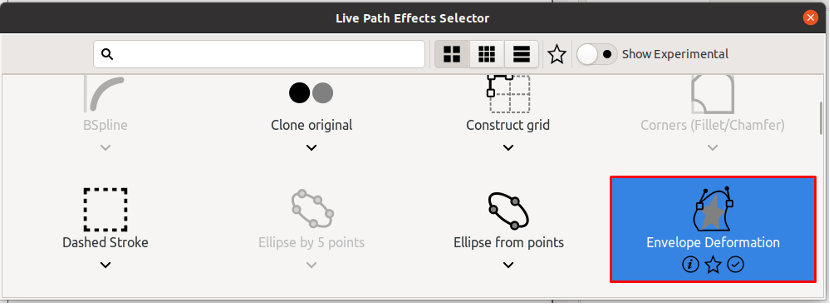
Now, we will choose the “Envelope Deformation” from the path effect selector window. The Envelope deformation effect will help us to bend the text path in the added shape:
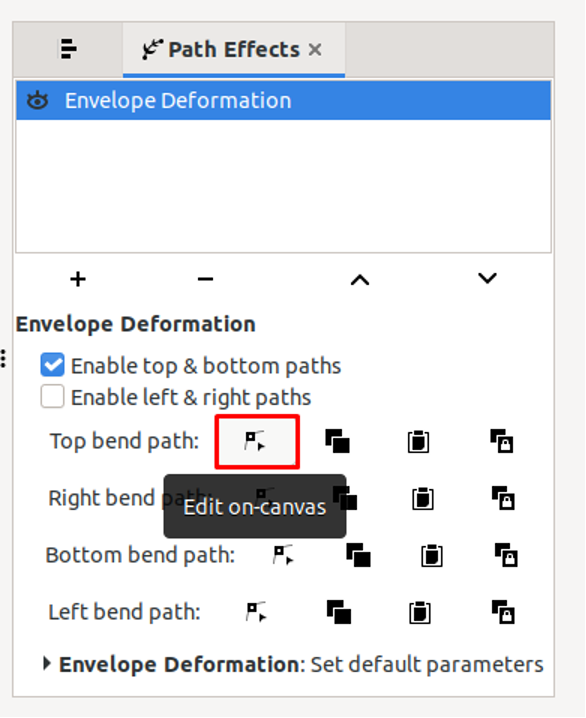
In the next step, unmark the “Enable left & right paths” checkbox as for the text to shape conversion, the deformation of the top and bottom paths will be enough:

After doing so, click on the “Edit on-canvas” button of the “Top bend path”:
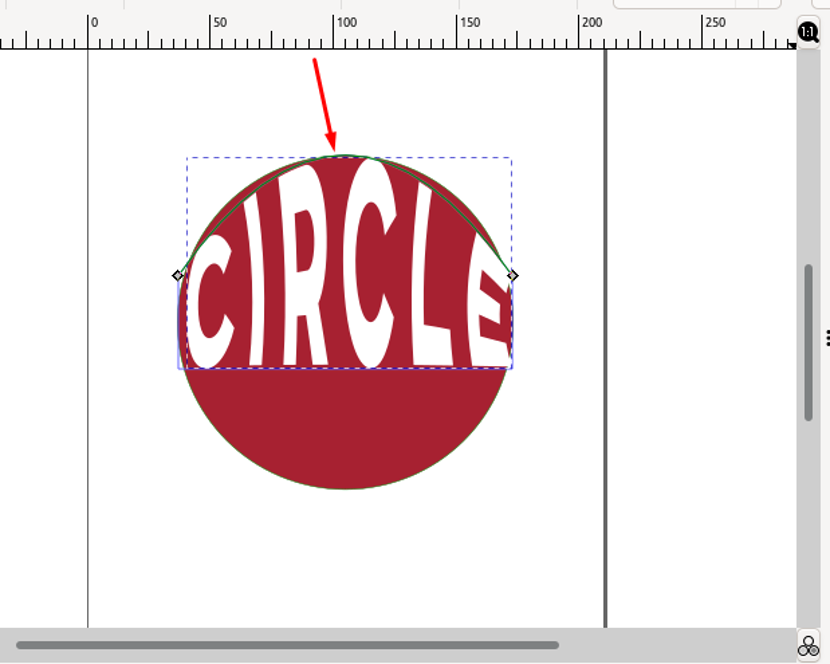
Now, you will see a green line at the top of the text, drag it in the upward direction so that the text fits in the added shape:
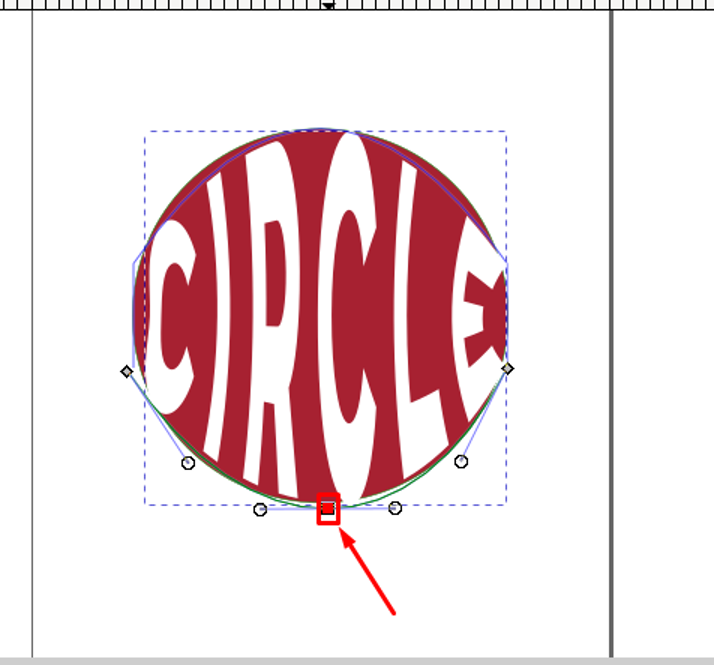
Now, repeat the same procedure to bend the bottom path:
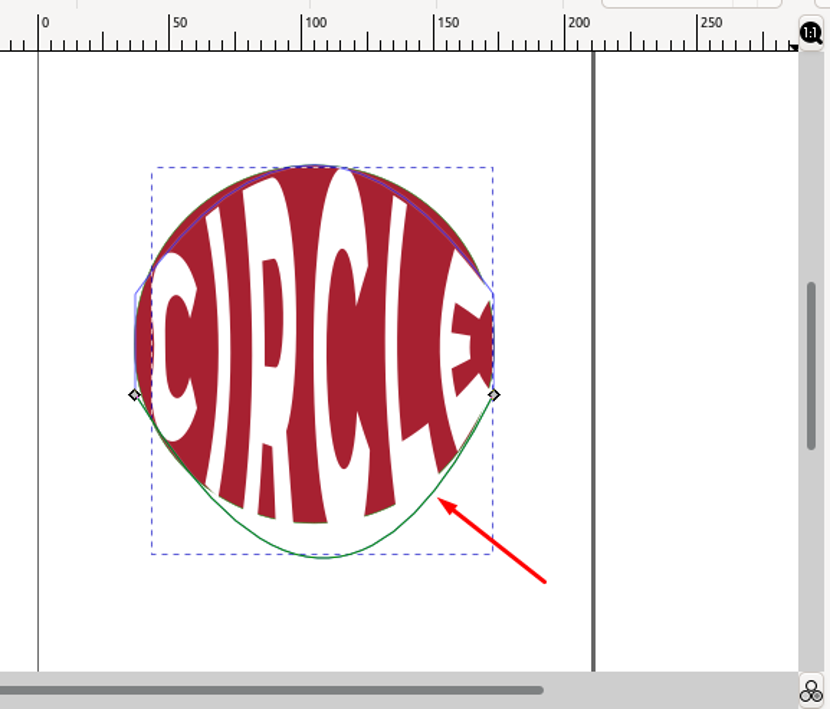
You can also scale up or down the text with the help of corner node handles:

Double click on any path position to add a node with having two scaling handles:
The top and bottom paths, nodes, and handles can easily convert the selected text into the added shape. Here is the final look of our text which is now converted into the Circle shape:

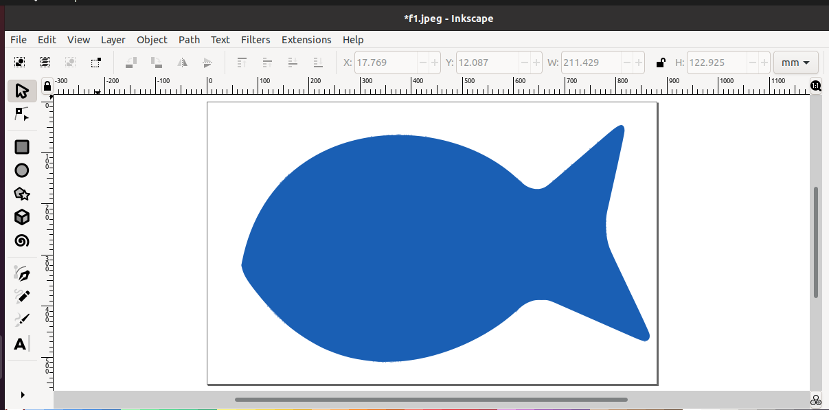
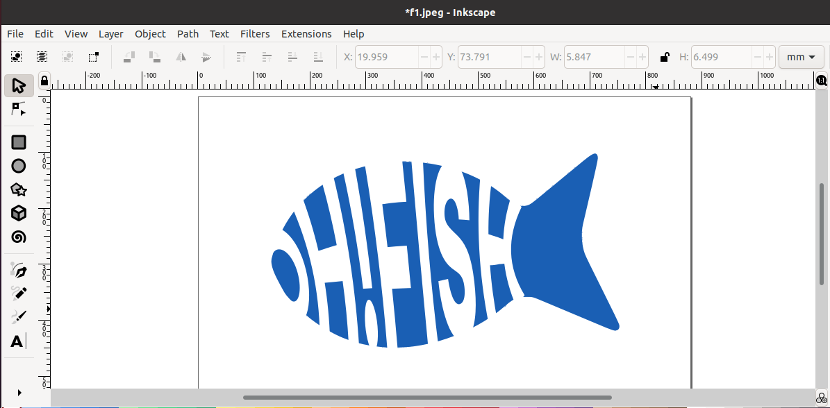
In the previous section, we showed you how to convert text into a circle shape. However, you can use any shape for the text conversion. For instance, we have added a “Fish” shape in our Inkscape canvas, and now we will teach you how to convert text to it:
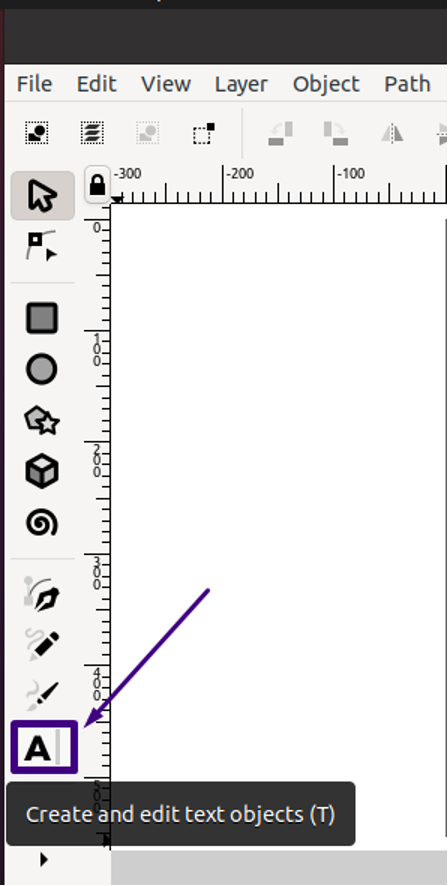
After adding your required shape, select the “Text” tool and then add the text which you want to convert:
You can also set the text properties such as its font style, font size from the highlighted section:

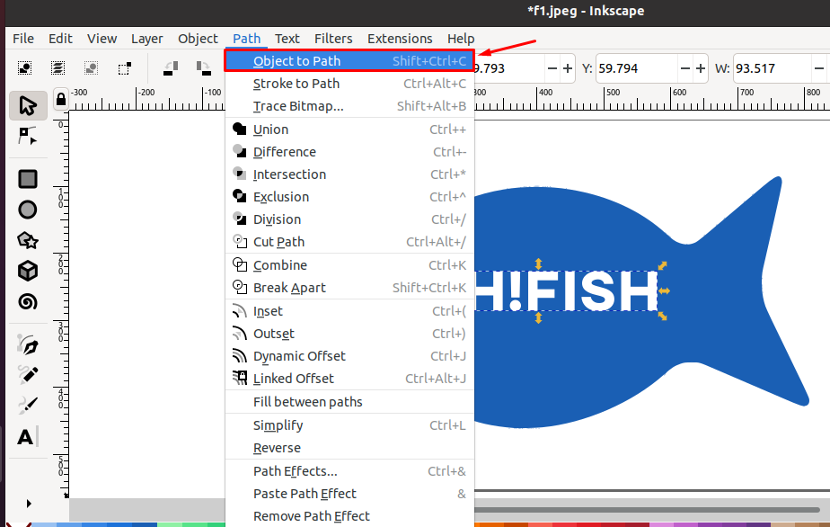
In the next step, we will select our added text “OH!FISH” and convert it to path by pressing “Shift+CTRL+C”. You can also choose the “Object to Path” option from the “Path” menu:
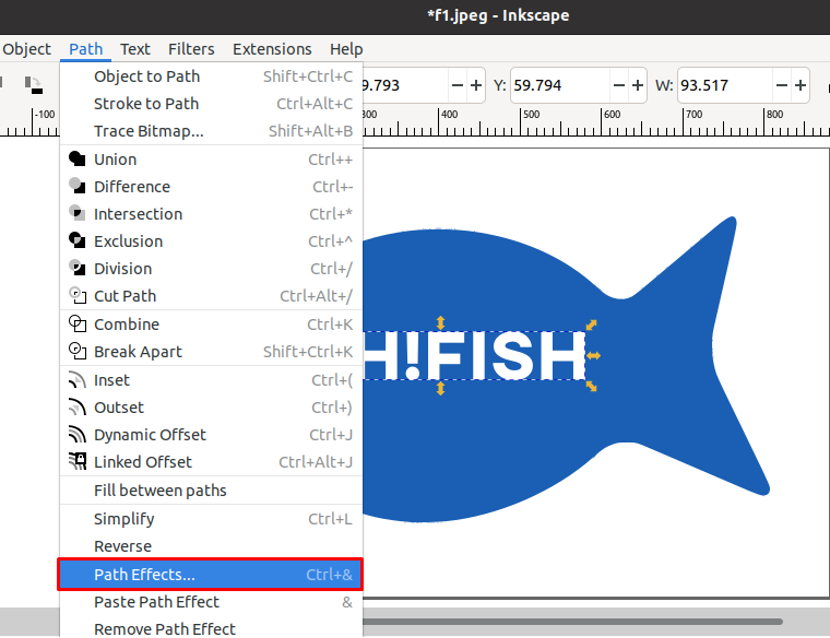
After doing so, we will open up the “Path effects” window:
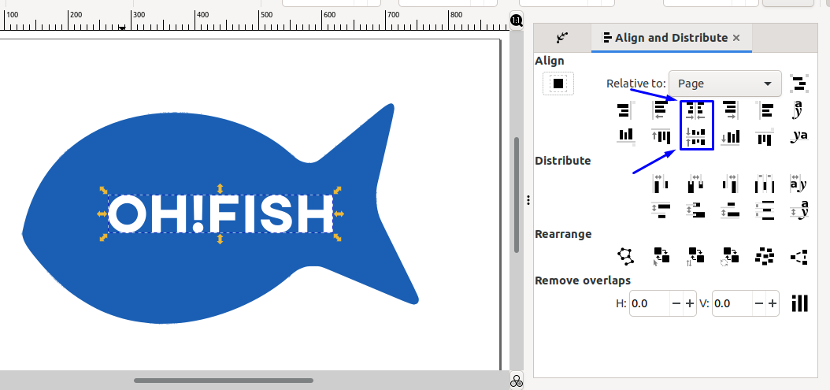
Then, center-align the added text and shape on both vertical and horizontal axis:

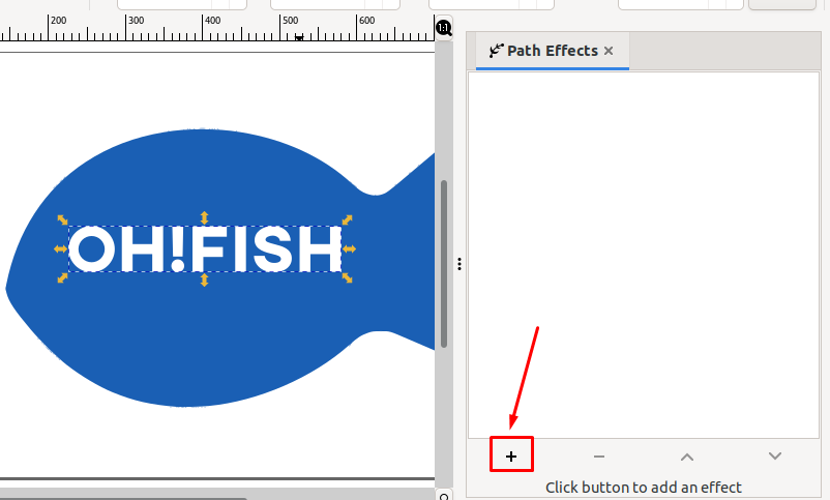
Now, click on the “+” button to add the “Envelope Deformation” path effect:
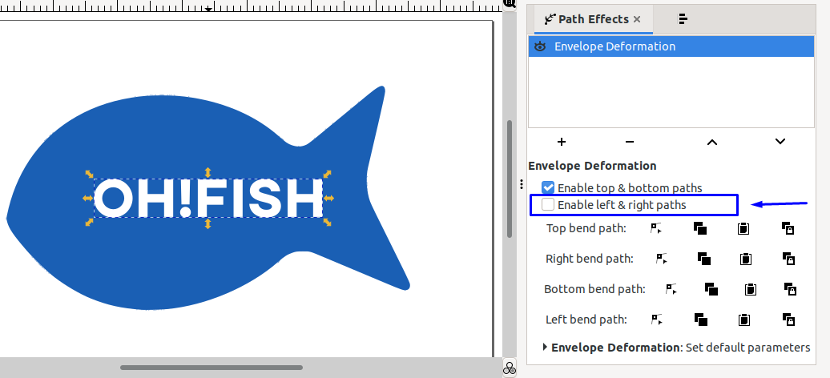
The “Envelope Deformation” path effect with all of its options will appear in the Path Effects window:

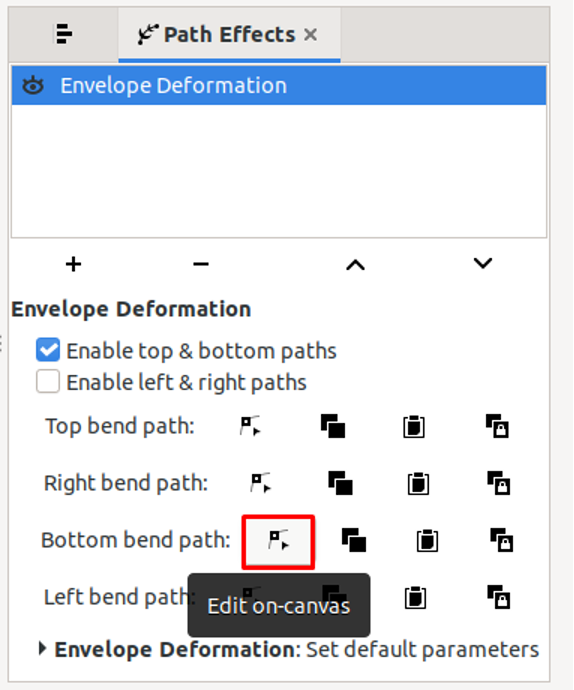
Turn off the “Enable left & right paths” option and move towards the editing of the bottom path:
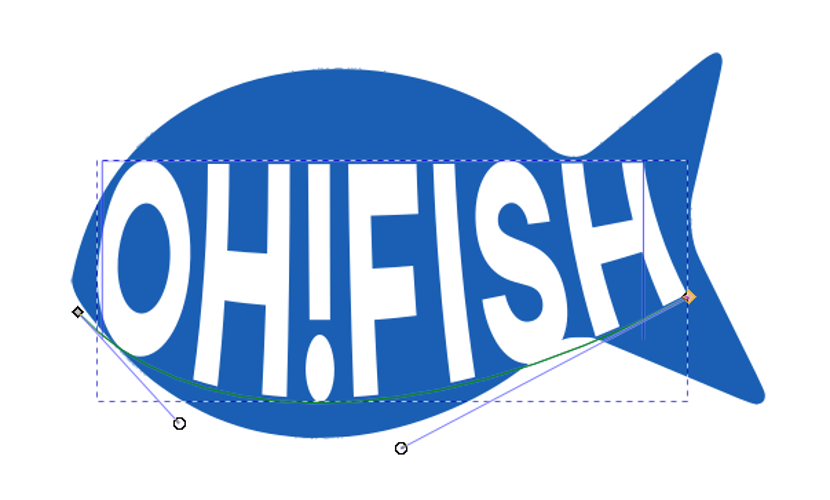
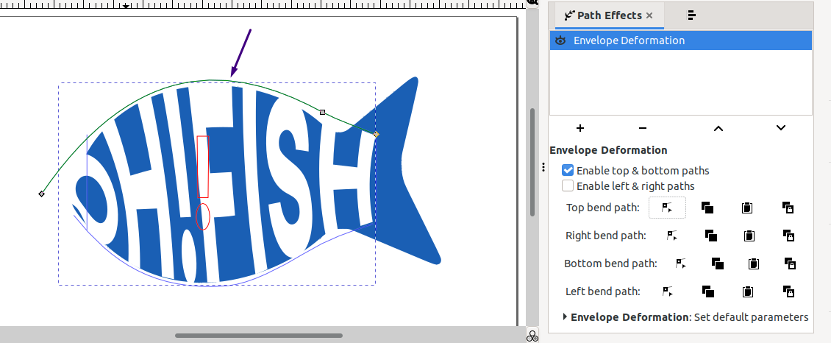
Now, edit the bottom path of the text by dragging the green line:
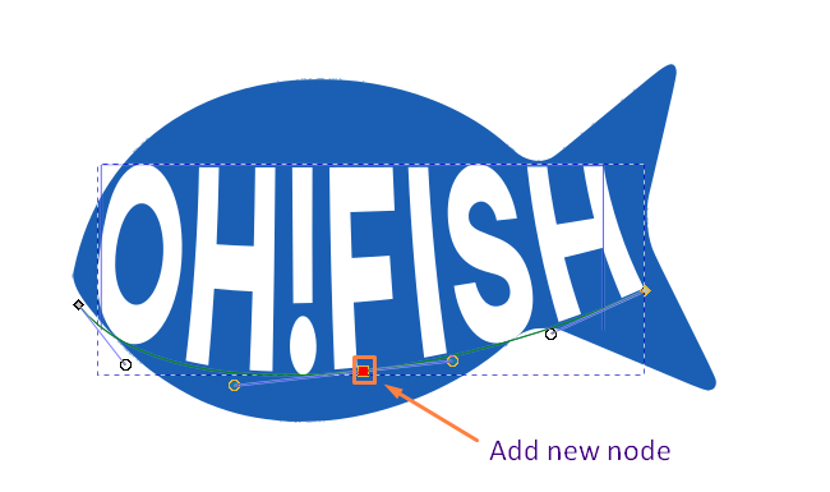
You can also add a node by yourself by double-clicking at any position:
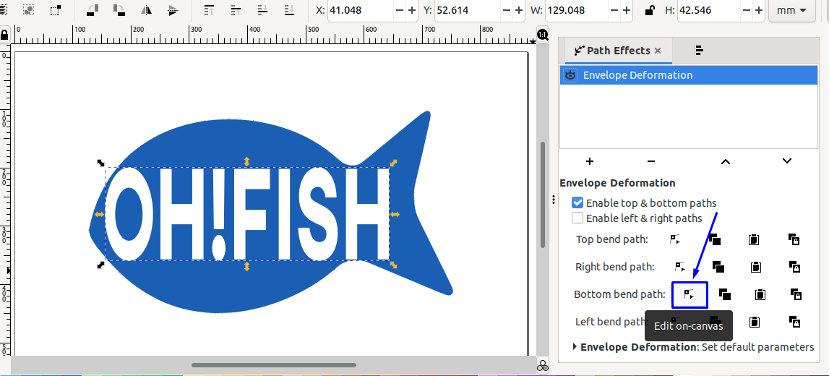
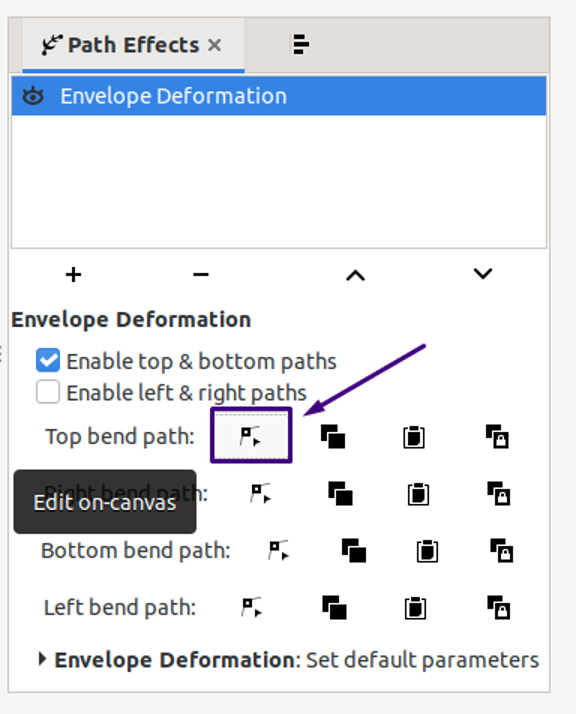
To edit the top path of the text, click on the highlighted Top bend path “Edit on-canvas” button:
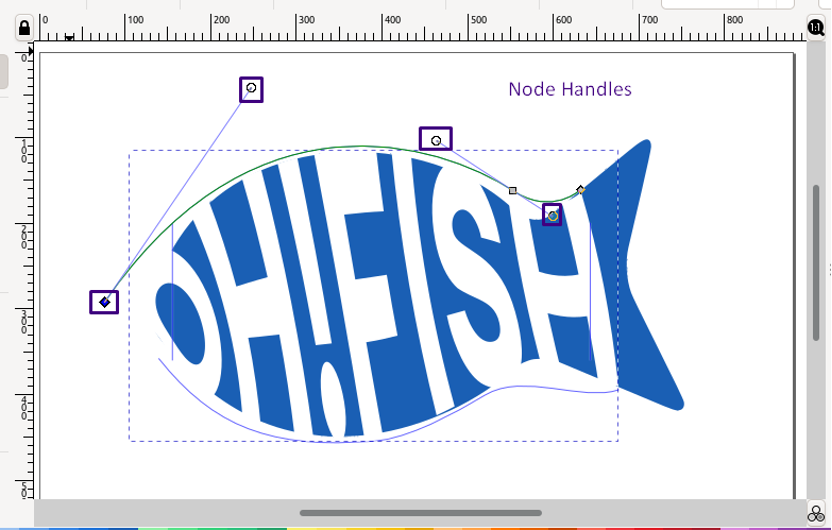
Use the node handles to adjust the text path according to shape outline:
With the specified settings, we have shaped the added text as follows:
Conclusion
You can create logos and do word art in Inkscape by converting the added to any specific shape. This Inkscape functionality also adds an artistic effect to the selected text. Using the “Envelope Deformation” option of the “Path effect”, you can represent a design or shape through the text. This write-up demonstrated how to convert text to shape in Inkscape.