In this write-up, we will explore more about the Raspcontroller application by learning methods of installing it as well as managing the Raspberry device with this application.
What is a RaspController
The RaspController application is released by the “EAGLENET Software Development” and is used to manage the Raspberry device. Following is the list of the functions that can be performed using RaspController:
- To control the GPIO pins
- To shut down and reboot the device
- To find the GPIO pin configuration of the device
- To access the file manager of the device
- To monitor the RAM, CPU, and Networking of the device
- To access the camera of the device
- To execute different commands in the terminal of a device
- To control the different sensors attached to the device
How to connect to the Raspberry device with smartphone
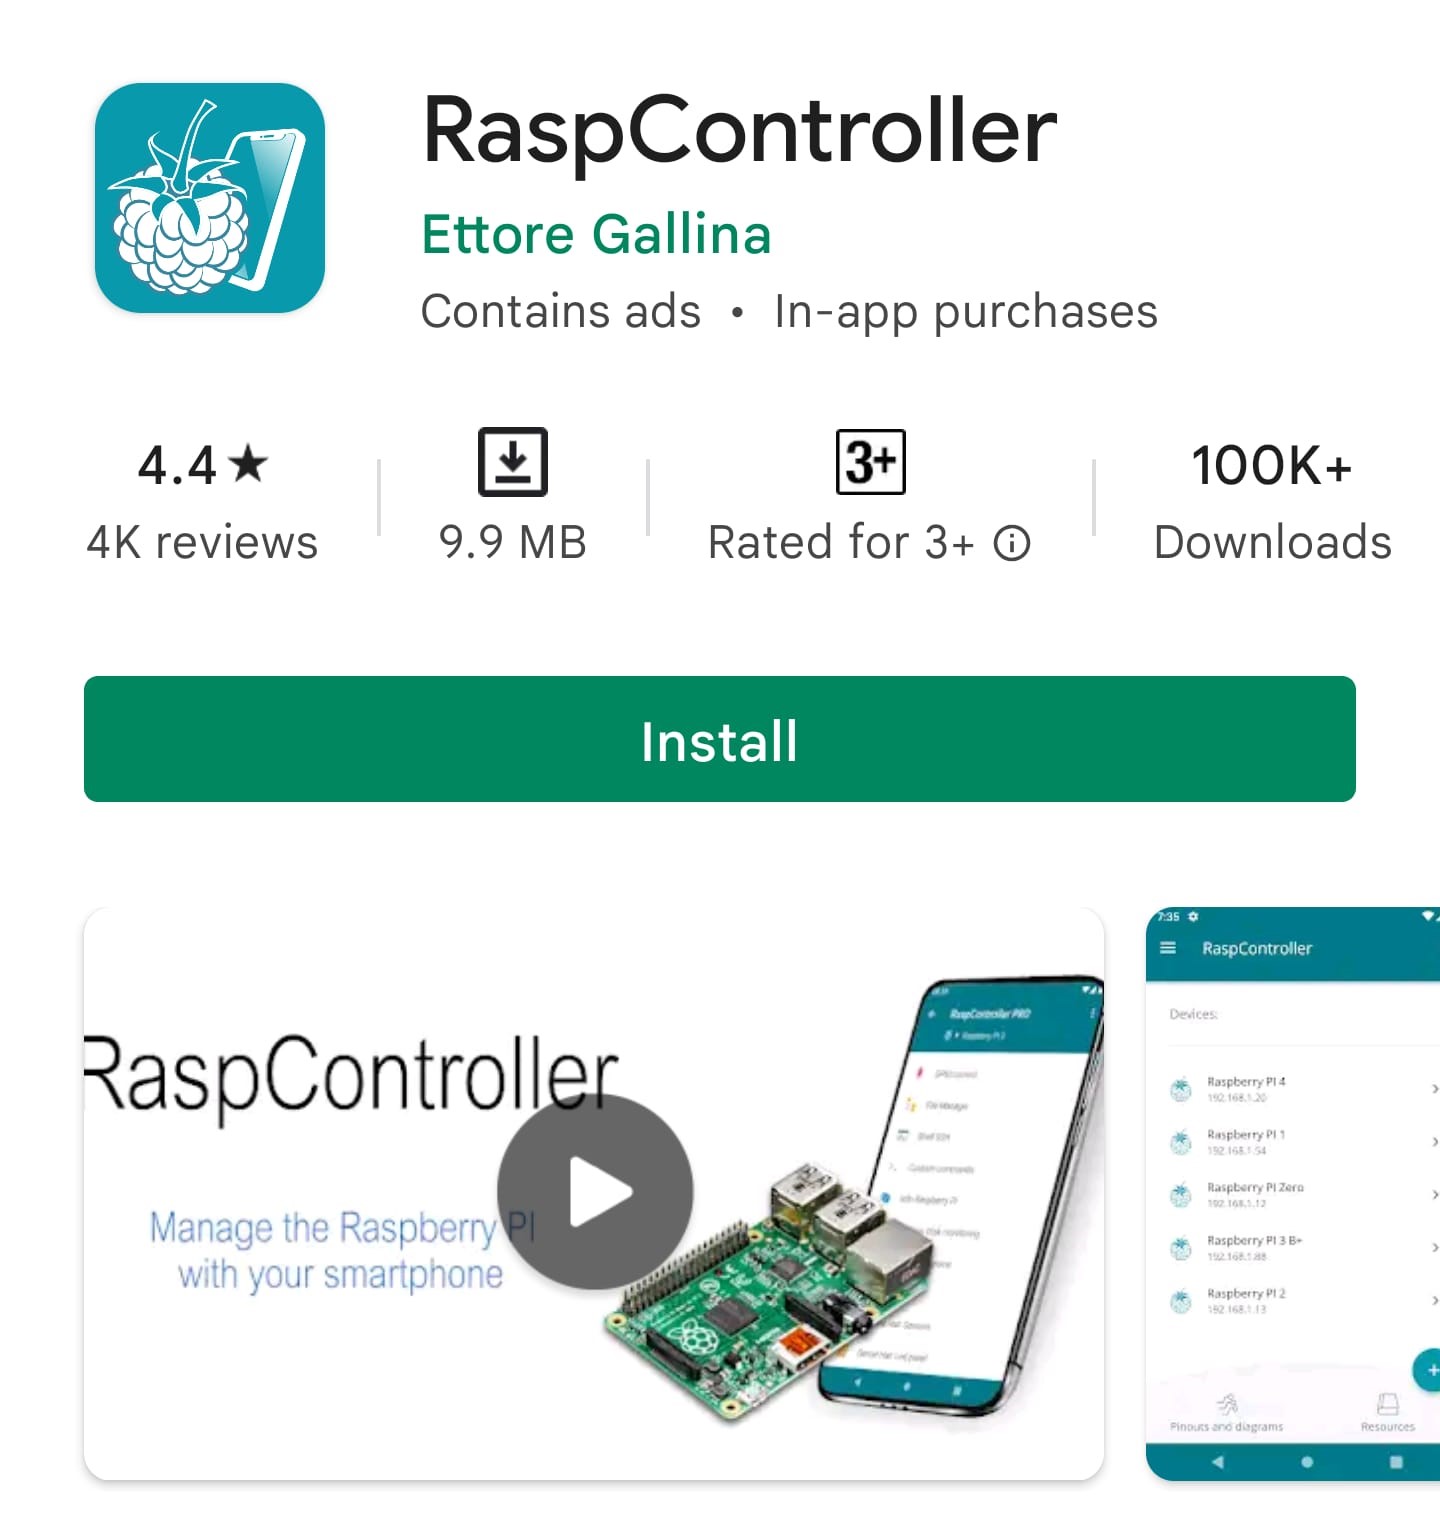
We can simply download the application from the Google Play store on any Android device. Once the application is downloaded, launch the application by clicking it and also turn on the Raspberry Pi device. In our case, we have a Raspberry Pi 4 which is turned on, and the application is downloaded on the Android smartphone:
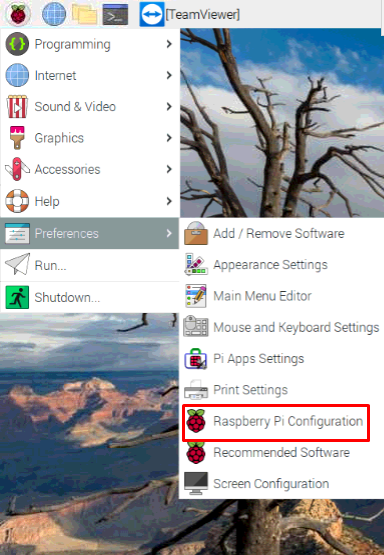
When the application is launched, it asks for some information which can be found in the “Raspberry Pi Configuration” by clicking on the Raspberry icon on the top left corner, then clicking on the “Preferences” and finally on the “Raspberry Pi Configuration”:
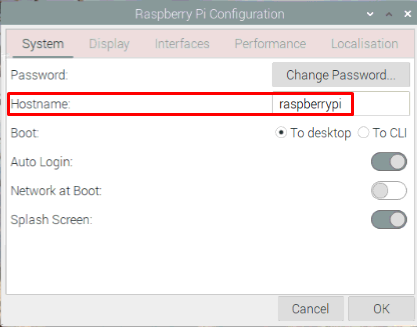
A configuration will be opened:
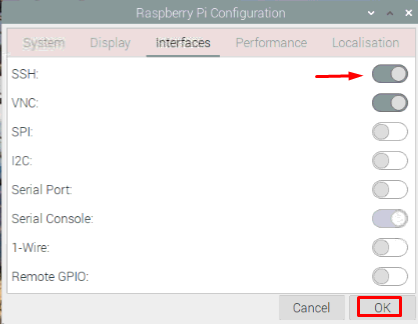
The “Hostname” is the “Device name” that is “raspberrypi” in our case, proceeding next, go to the “Interfaces” and enable the “SSH” by toggling the button to right and pressing the “OK” button:
Open the terminal and execute the following command in order to find the IP Address of the Raspberry Pi device:
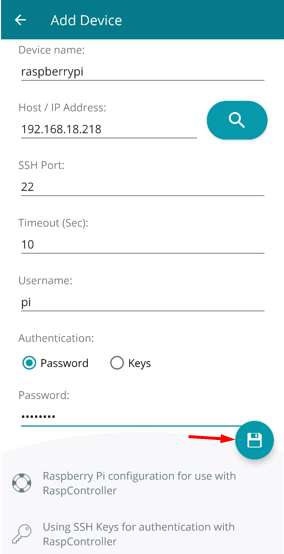
Now after finding all the required information, we will open the RaspController application on the smartphone and enter the information of the device as:
| Device | raspberrypi |
| Host/ IP Address | 192.168.18.218 |
| Username | pi |
| Password | (Enter the set password of the device) |
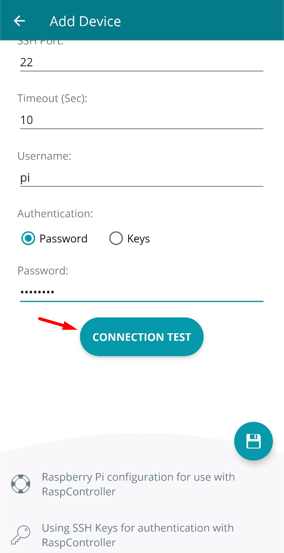
After entering all the information, click on the “Floppy Disk” icon to save the connection or before saving it, once test the connection by clicking on “CONNECTION TEST”.
How to control the GPIO pins of Raspberry Pi using RaspController
To understand the control of the GPIO pins of Raspberry Pi device using the RaspController application in the smartphone, we will configure an electronic circuit using the components:
- Resistor 220 ohms
- Breadboard
- LED
- Jumper wires
- Raspberry Pi 4
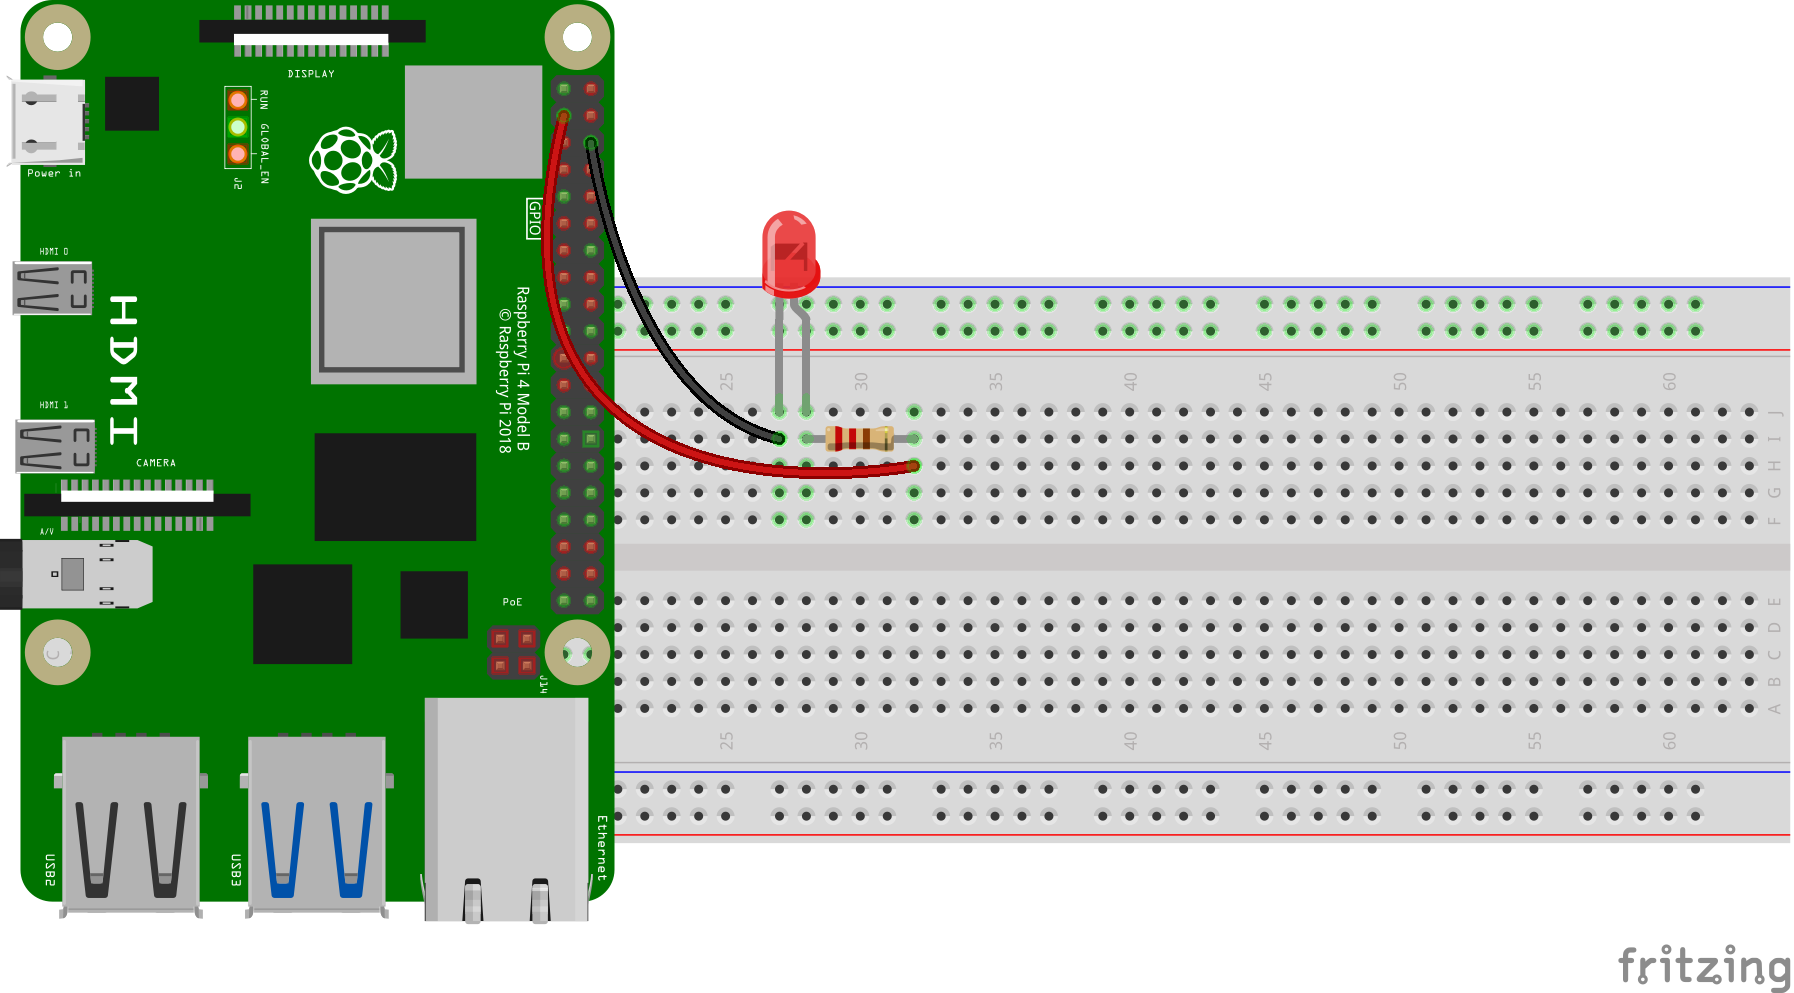
We will connect the cathode of the LED with the ground GPIO pin of Raspberry Pi 4 and connect the anode of LED with the GPIO pin 2 of Raspberry Pi 4 with the help of a 220-ohm resistor. The circuit diagram will be:
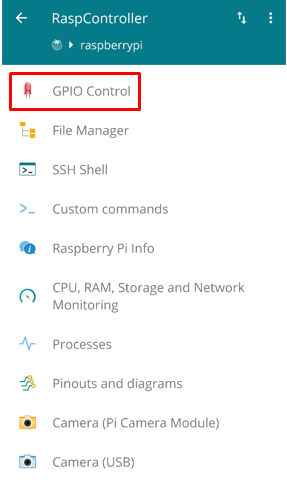
Now open the RaspController application on the Android mobile and click on the GPIO Control:
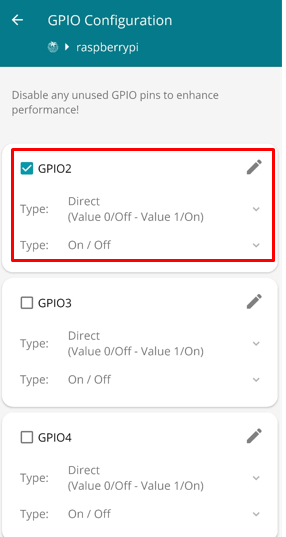
Choose the pin configuration of GPIO pin as IN at 1, OUT at 0 and choose the GPIO pin 2 where the LED is connected:
Now by changing the state of the GPIO pin from IN to OUT and OUT to IN, we can control the switching of the LED connected at GPIO pin 2:
Conclusion
The Raspberry Pi device can be controlled from different mobile applications like in Android the popular application is RaspController. This application is used to manage the Raspberry device remotely from any smart device. In this write-up, we have explained the RaspController which is an Android application to control the Raspberry device, and also used it to control the switching of an LED.

