How to use lcd.cursor() function to control cursor
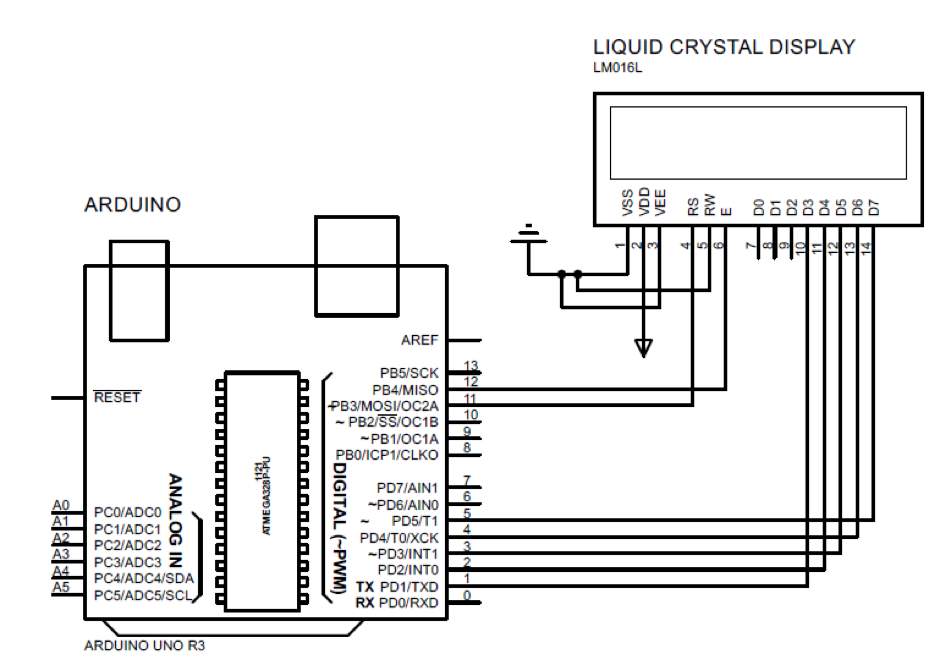
This function just displays the cursor that is of a hyphen in the shape, and it is displayed where the next character will be displayed. To further understand we have made a simulation of displaying the cursor on the LCD interfaced with Arduino. The schematic of the circuit is given followed by the Arduino code that is explained briefly:
First to interface the LCD display module with Arduino the specific library for the display module is defined.
Then the pins of the Arduino board that will be connected to the display module are initialized using the LiquidCrystal lcd() function. The first two pins are for the RS and E pins of the display module and the rest of the pins are connected to the data pins of the display module.
After assigning the pins then in the setup function the dimensions of the LCD are initialized using the lcd.begin() function. So, here we are using the display module of 16×2 so we will write the first argument 16 and the second argument 2 in the function.
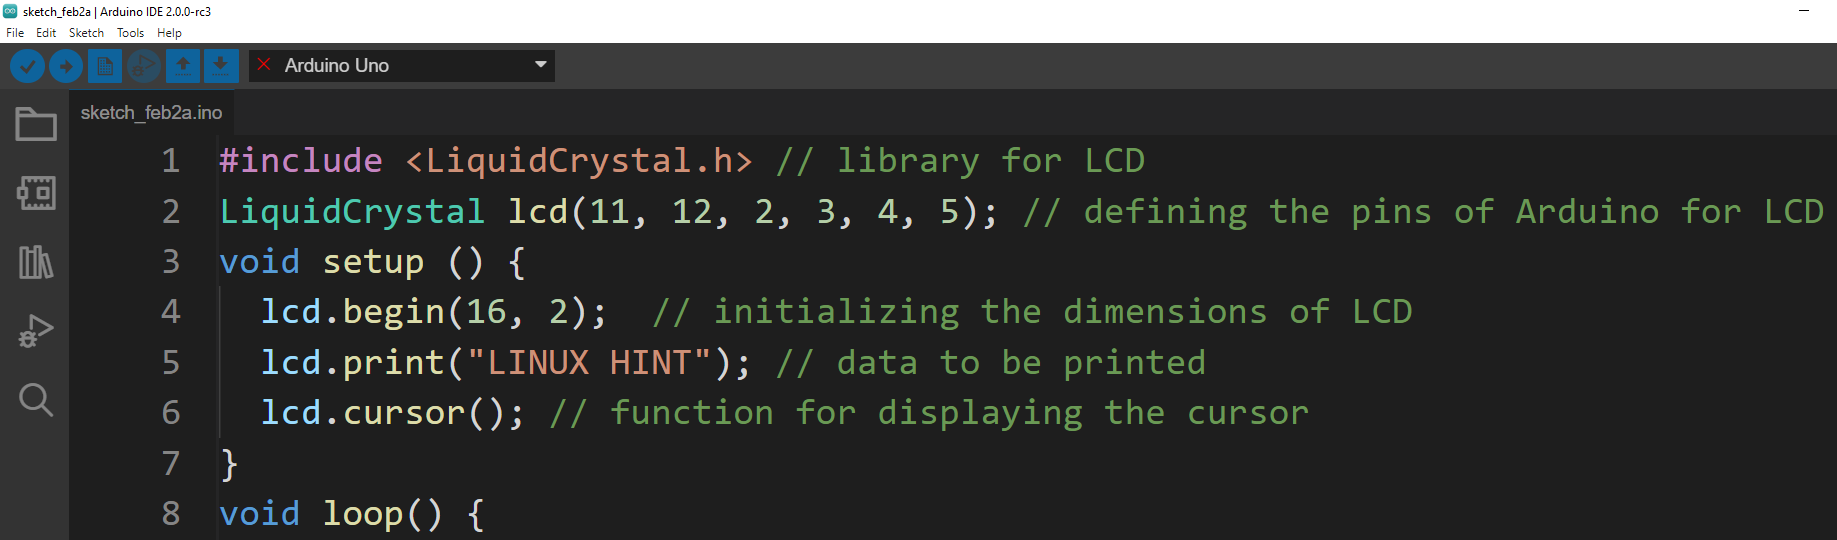
After initializing the dimensions of LCD the data that has to be printed on the LCD is printed on LCD using the lcd.print() function.
Then to display the cursor we have used the lcd.cursor() function and by default the cursor will be displayed on the LCD at the end of the data displayed on LCD. The position of the cursor can be changed using other functions as well.
Here is the complete code that is simulated using the Proteus software.
LiquidCrystal lcd(11, 12, 2, 3, 4, 5); // defining the pins of Arduino for LCD
void setup () {
lcd.begin(16, 2); // initializing the dimensions of LCD
lcd.print("LINUX HINT"); // data to be printed
lcd.cursor(); // function for displaying the cursor
}
void loop() {
}
Output

How to make cursor blink using lcd.cursor and lcd.noCursor function
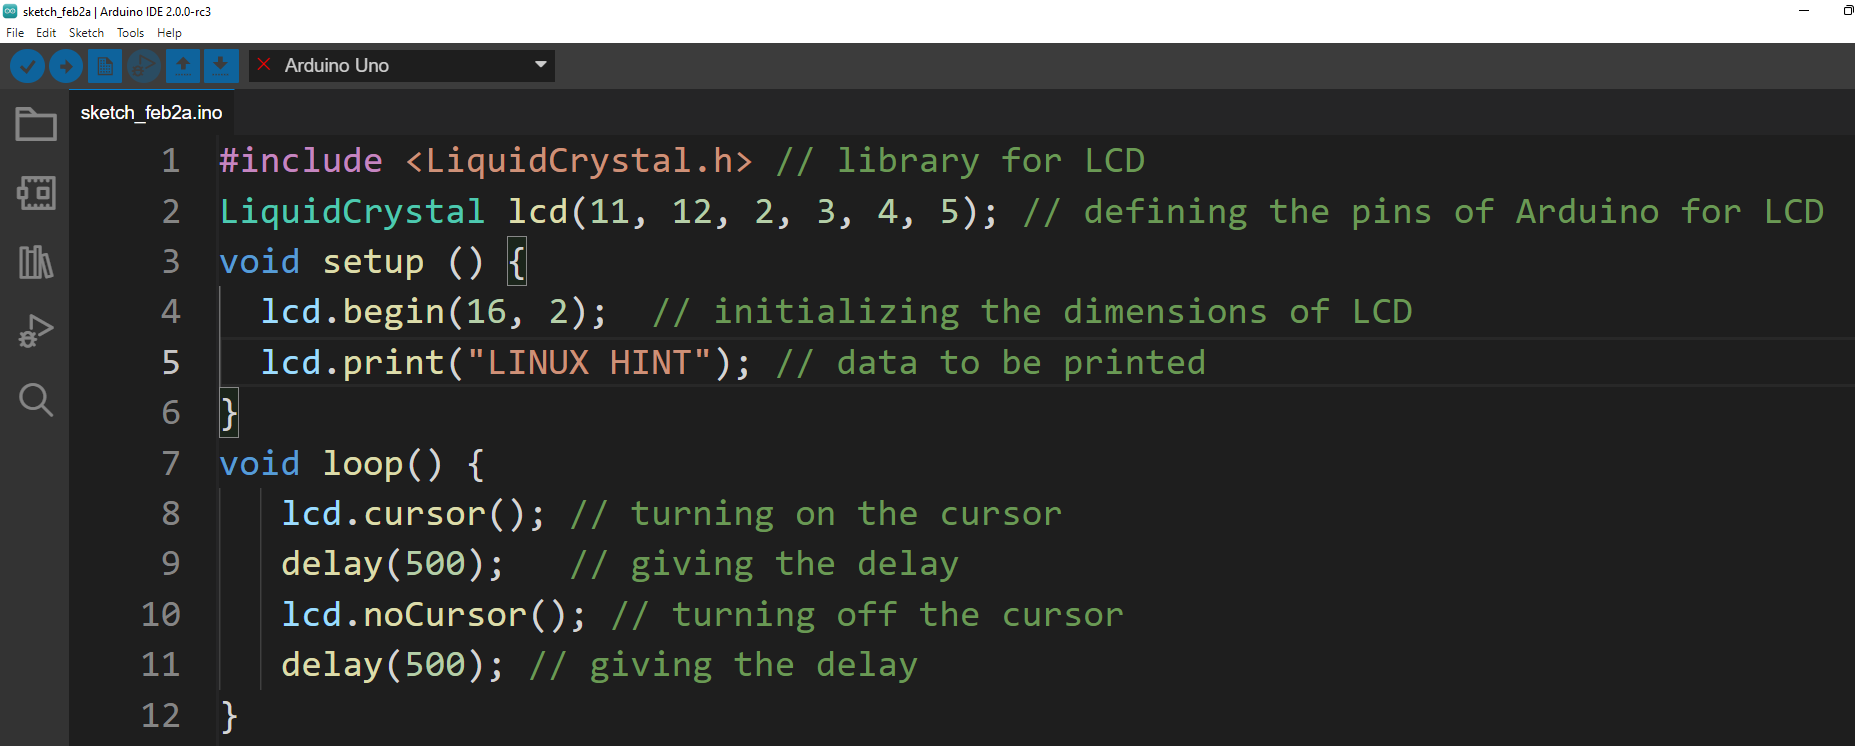
To make the cursor blink we can use the both lcd.cursor and lcd.noCursor functions. These functions are executed with the delay of the time. For demonstration purposes we have made a simulation of interfacing Arduino with LCD and blinking the cursor.
The same Arduino program is used for blinking the cursor; the only difference is that both the functions are used in the loop function of Arduino code. Similarly, these two functions are executed with a delay of 5 milliseconds. This delay means that the cursor will remain visible for 5 milliseconds and will disappear for 5 milliseconds:
lcd.cursor(); // turning on the cursor
delay(500); // giving the delay
lcd.noCursor(); // turning off the cursor
delay(500); // giving the delay
}
Here is the complete Arduino code:
LiquidCrystal lcd(11, 12, 2, 3, 4, 5); // defining the pins of Arduino for LCD
void setup () {
lcd.begin(16, 2); // initializing the dimensions of LCD
lcd.print("LINUX HINT"); // data to be printed
}
void loop() {
lcd.cursor(); // turning on the cursor
delay(500); // giving the delay
lcd.noCursor(); // turning off the cursor
delay(500); // giving the delay
}
Output
Conclusion
Use of cursor while typing is very important as it indicates the typists the place where the data will be displayed. The cursor is also used in the LCD displays and there are specific functions that can be used for displaying the cursors. In this write-up the method of displaying the cursor of the hyphen shape explains the two cursor functions.