Raspberry Pi is a minicomputer. It uses an entire operating system also called Raspberry Pi OS. Raspberry Pi is mostly used for developing software applications using computer programming languages like Python while Arduino is a microcontroller-based board which can control different electric circuit like LEDs, sensors, motors and hardware modules. Arduino acts as a bridge between microcontroller and the programming world. Here we will discuss how to use Arduino with Raspberry Pi.
Can Raspberry Pi Control an Arduino
Yes. Raspberry Pi can control Arduino. Arduino can receive commands from Raspberry Pi using standard USB protocol through serial port. Both Arduino and Raspberry Pi can be used together in complex projects where the Pi board can act as a main brain that sends instructions to the Arduino board. Like every other controller Arduino also needs an IDE to burn code in it. In the next section you will learn how to interface Raspberry Pi and Arduino.
How to Run Arduino Using Raspberry Pi
To run Arduino using Raspberry Pi we need to set up the Arduino development platform in Raspberry Pi. Arduino IDE is a software tool used to program Arduino boards. Follow these easy steps to complete Arduino IDE installation with Raspberry Pi.
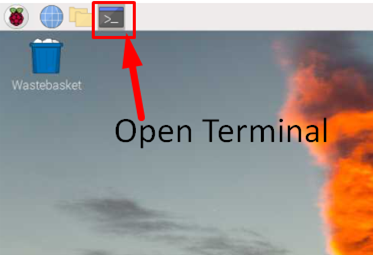
Step 1: Open Terminal Block
To start Arduino installation, open the terminal block in Raspberry Pi.
Step 2: Install Arduino IDE
Once the terminal is open type below mentioned command to start Arduino IDE installation. Raspberry Pi terminal will download all the files required to run Arduino IDE.
Step 3: Check Arduino IDE Version
Now the Arduino is successfully installed in our system. To check which version of Arduino IDE is installed type below given command:
Step 4: Install Java Packages
After IDE installation we need to install Java packages without which Arduino IDE will not open. To check whether Java packages are installed in Raspberry Pi, run following command:
If Java packages are not installed type below mentioned command:
All the required Java packages will be installed in Raspberry Pi.
Step 5: Run Arduino IDE
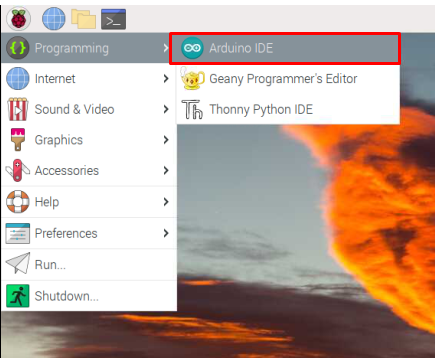
To open the Arduino IDE, we have two options either using command in the terminal block or by using Application menu.
Type below written command in terminal to open IDE.
Or choose the IDE icon from the application menu and click to open Arduino IDE.
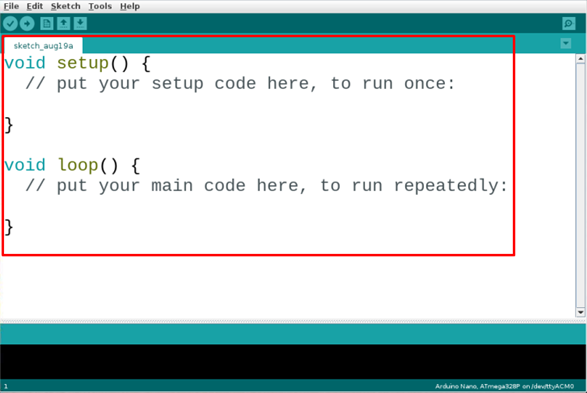
Step 6: Arduino IDE Interface
New window showing the IDE interface which is opened with a blank sketch. Here we can write and upload our code to Arduino boards.
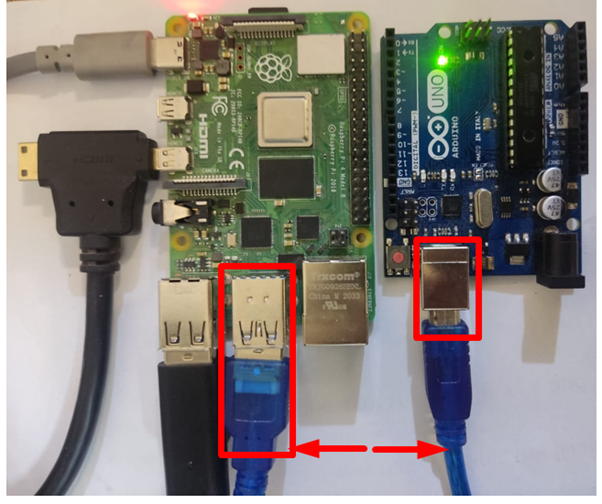
Step 7: Connect Arduino with Raspberry Pi
To start programming Arduino board using Raspberry Pi connect both using USB B cable. Connect the Arduino board with Raspberry Pi as shown in the picture below:
Step 8: Select Arduino Board
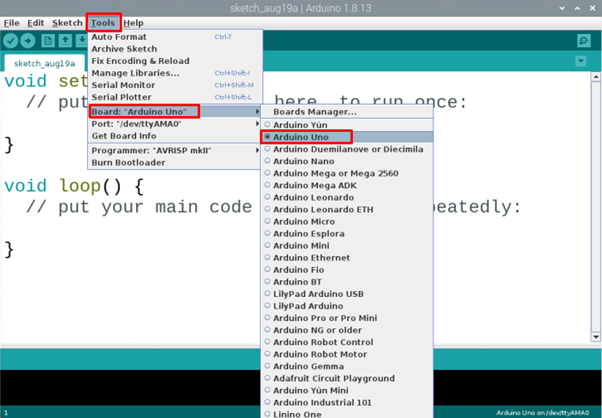
Before we go further, we must select which Arduino boards we are going to use.
Navigate to Tools>Board>Arduino Uno:
Step 9: Select COM Port
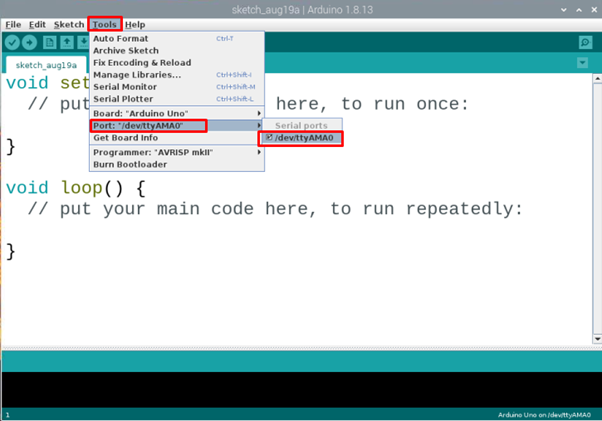
As we have selected the Arduino board now follow below steps to select COM port at which Arduino board is connected.
Go to Tools>Port>Serial Ports:
Step 10: Run an Example Sketch
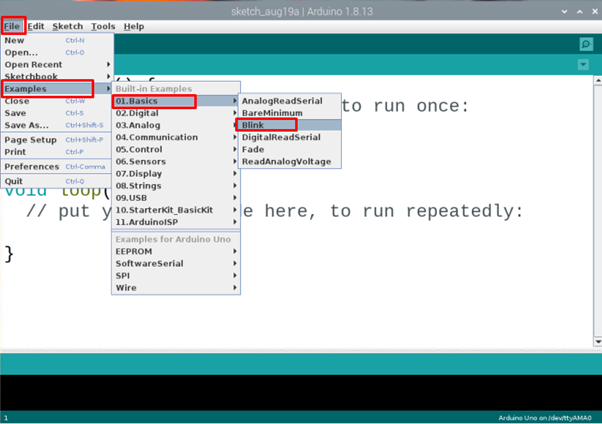
To start with the first Arduino program. Open built-in LED example:
Navigate to: Files>Examples>Basics>Blink:
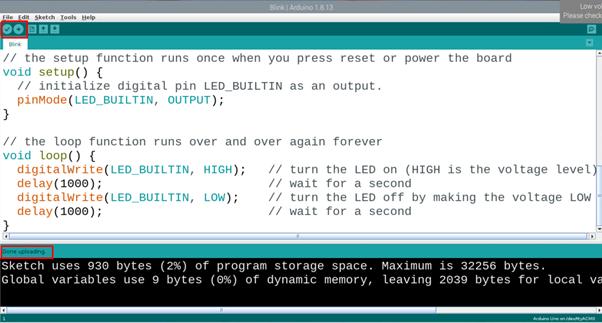
Step 11: Compile and Upload LED Example Sketch
Compile and upload the LED program using the right arrow button at top left corner. A message will appear in the output window saying, “Done Uploading”.
Step 12: Arduino LED Program Output
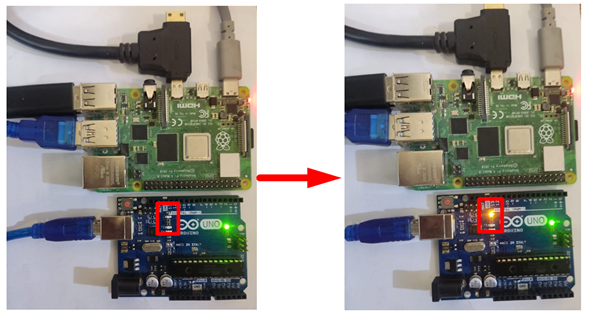
Once the program is successfully uploaded to the Arduino UNO board a built-in LED on Arduino board will start blinking in a pattern of 1 second ON and 1 second OFF.
We have successfully uploaded our first program on an Arduino board using Raspberry Pi which makes it clear that we can control Arduino using Raspberry Pi board.
Conclusion
Arduino and Raspberry Pi both can work synergistically in a project. We have discussed how it is possible to control Arduino by sending commands from Raspberry Pi and receiving back data. To start programming Arduino using Raspberry Pi is just a few steps away. By following the above steps, we can easily upload programs to Arduino.

