For creating projects either on the advanced level or on the beginner level Arduino is the best suitable option for the high school and college students. This platform has made the interfacing of different devices like sensors or modules with microcontrollers easy and due to this we can create a number of projects or can understand the functionality of different devices.
By connecting the Arduino wirelessly we can control its inputs and the outputs so it can be easy to control the devices attached to the microcontroller. So, to demonstrate how we can control our daily use home appliances using wireless technology we have created a project of controlling an AC light bulb wirelessly.
Controlling AC appliances wirelessly using Arduino
Most of our appliances in our homes work on the alternating current (AC) and instead of manually turning on and turning off the appliances we can just control them by the click of a button in our smart phone. The idea not only looks very cool, but it can provide ease to the homeowners to control their home appliances remotely.
To simply control the appliance remotely the wireless technology comes to our mind and then we figure out how we can connect the appliance to the wireless network. This is the stage where Arduino comes as it works as a bridge connectto the AC appliance with the wireless network and then we can send commands to the appliance using the wireless network.
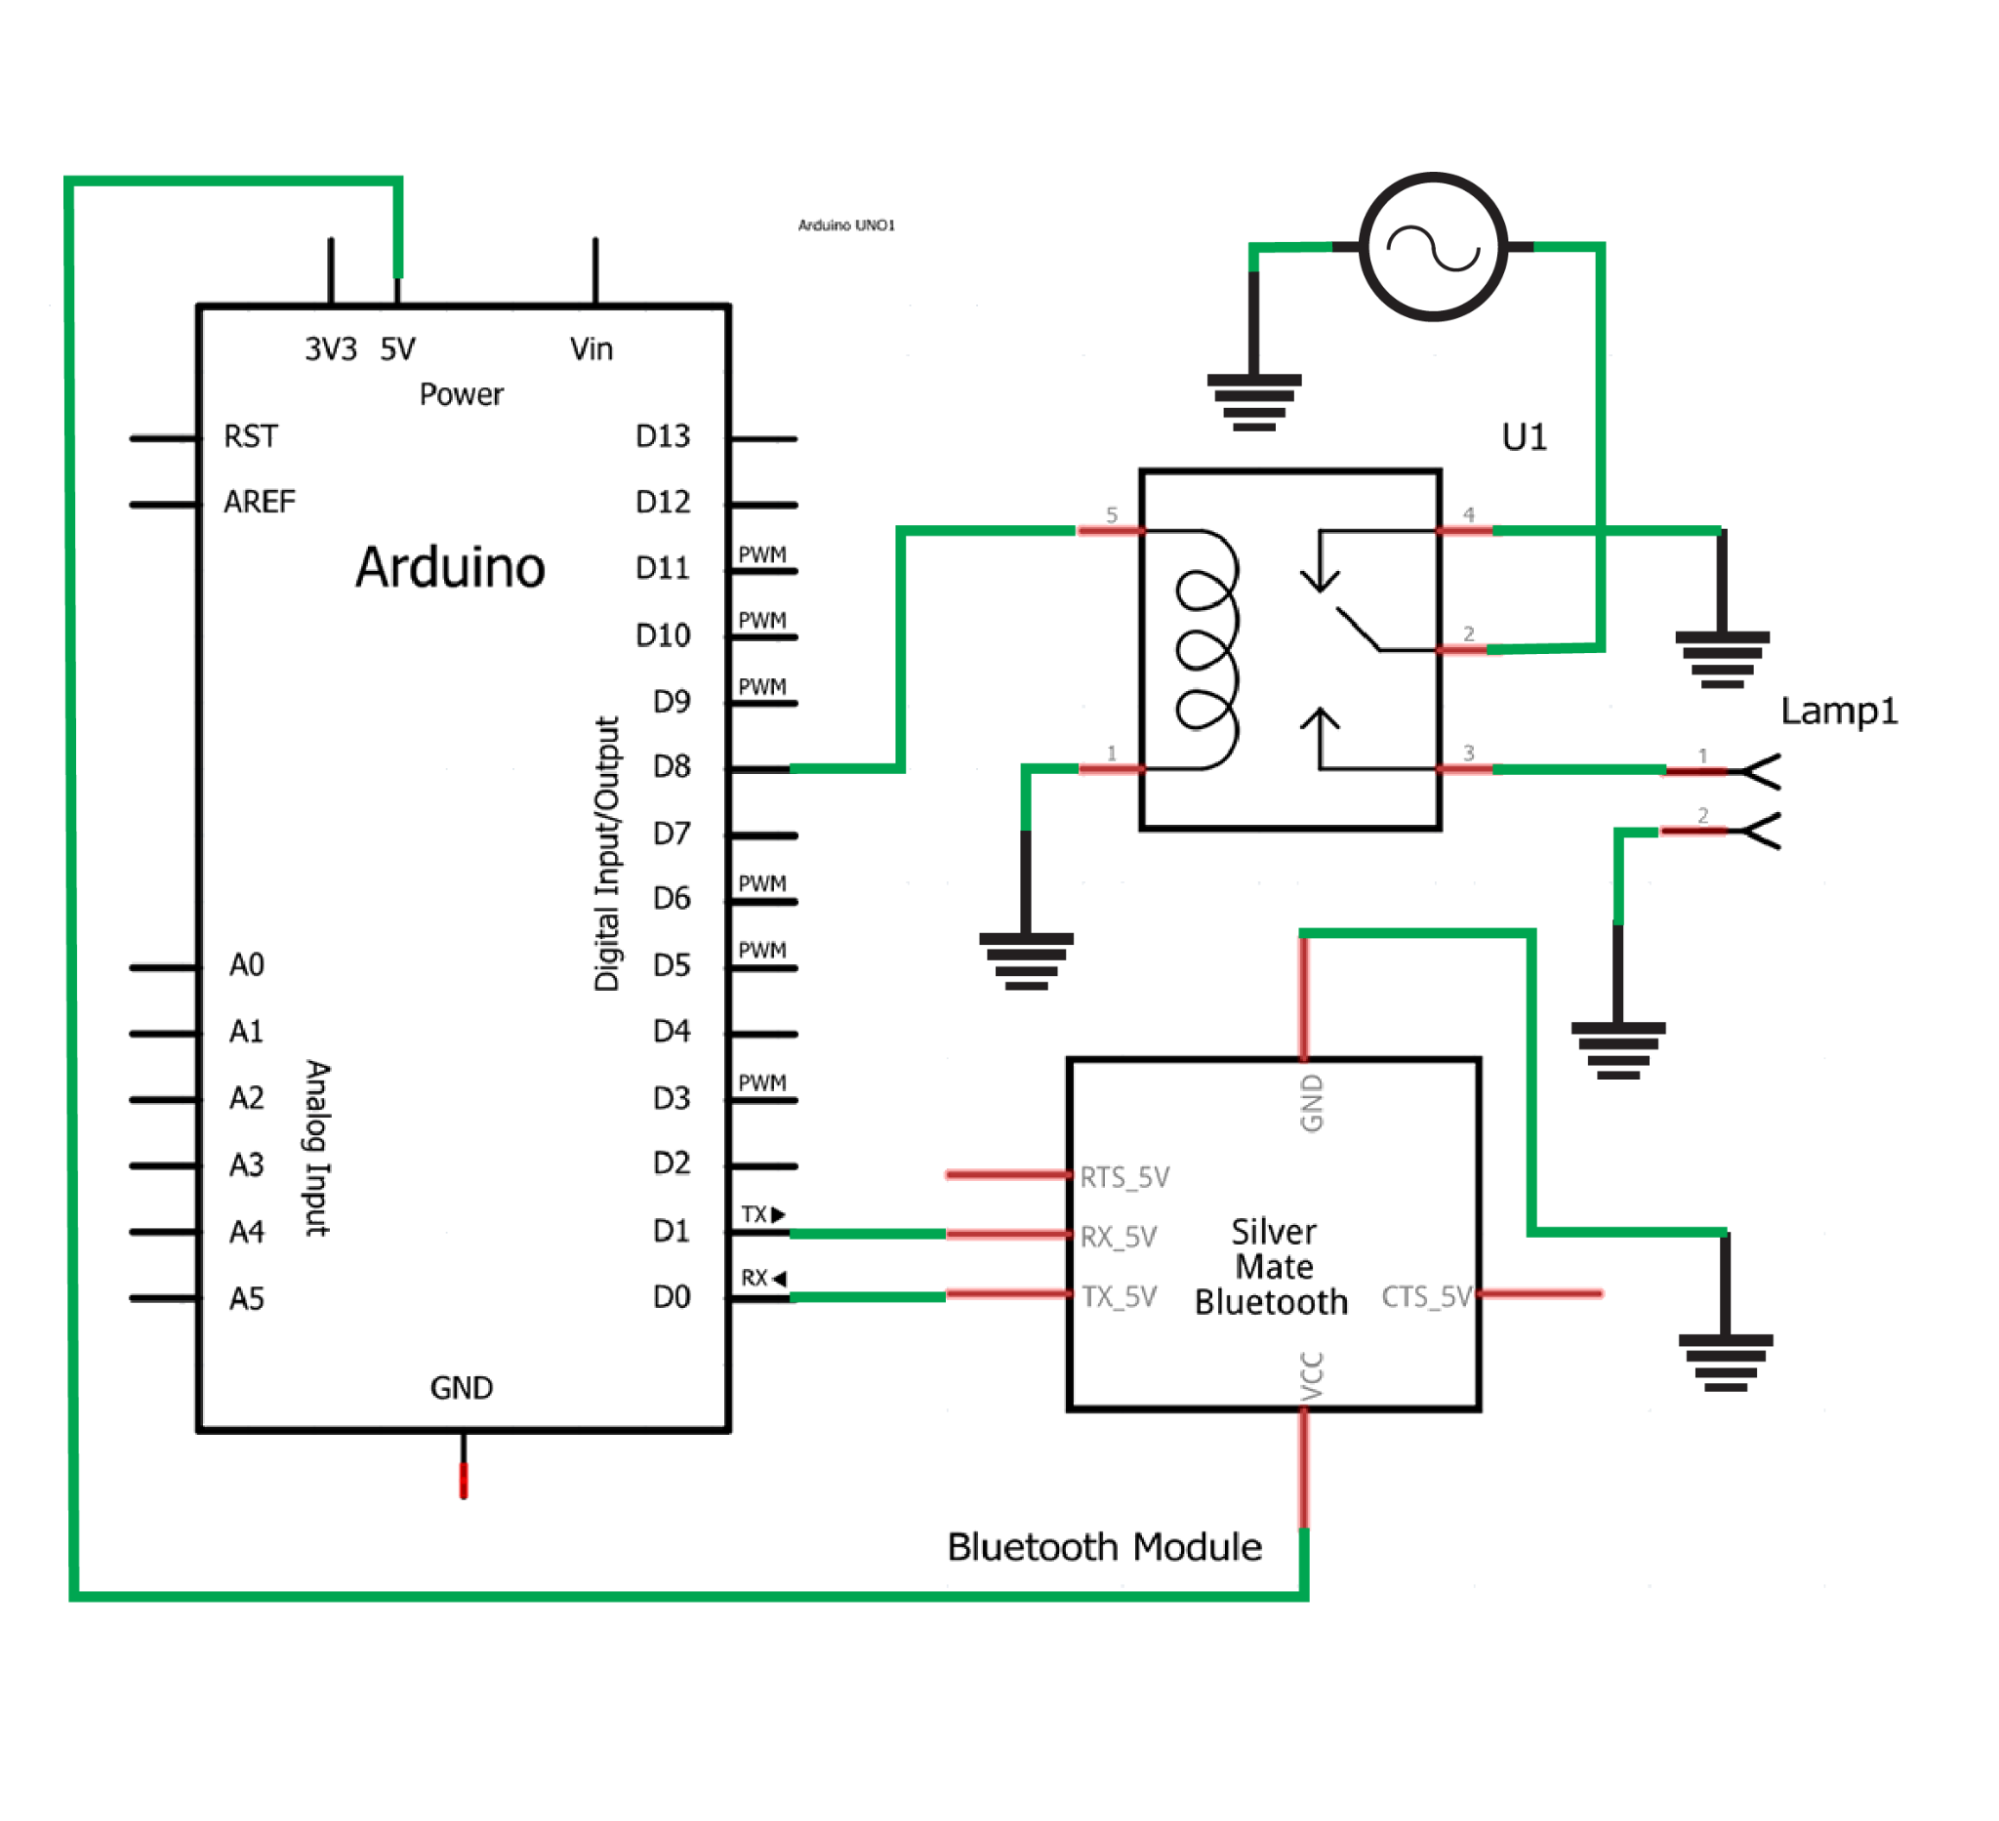
We have provided the schematic of the circuit below that is designed to control the AC appliances in our homes:
Assembling the hardware for controlling the AC appliances wirelessly
To control the AC appliances remotely we have used the following list of components:
- Arduino Uno
- Breadboard
- Connecting wires
- Bluetooth module (HC-05)
- One AC bulb
- Relay module(10A 250V AC)(10A 30V DC)
Below we have provided the figure which demonstrates the connections of the components used for controlling the AC appliance remotely:
Among the components listed above only the Bluetooth module (HC-05) is directly connected to the breadboard and the rest of the components use the breadboard only to connect with the supply voltage. To give a signal to the relay we have connected the relay pin using the brown wire with the pin 8 of the Arduino Uno.
To transmit the data received by the Bluetooth module to the Arduino we have connected the TX pin of the Bluetooth module with the RX pin of Arduino and the TX pin of the Arduino with the RX pin of the Bluetooth module using the gray wires.
To read further in detail how to interface the Bluetooth module with Arduino you can consult the link.
Next we have used the AC supply to energize the relay module by connecting the supply on the common pin of the relay. Since this is a demonstration project, we have only used an AC bulb as an example but you can connect other appliances as well like AC fans, light dishwashers, washing machines using the same relay module. The relay used in this project can handle up to 10 Amps of current so it can run heavy appliances as well.
The AC bulb is connected on the normally open pin of the relay and the other part of the bulb is connected to the ground pin of the AC supply.
Arduino code for controlling the AC appliances remotely using Arduino Uno
We have provided the compiled Arduino code below for controlling the AC appliances using a wireless connection:
int relay =8;// assigning the Arduino pin to give signal to relay
void setup() {
Serial.begin(9600); // initializing the serial communication
pinMode(relay, OUTPUT); /*assigning relay pin the output mode */
}
void loop(){
if(Serial.available() > 0) // checks if any data is received
{
data = Serial.read(); /*Reading any receiving data and storing it into variable named data*/
Serial.print(data); //displaying the data received
Serial.print("\n"); //adding space by giving a New line
if(data == '1') // when the value is equal to 1
digitalWrite(relay, HIGH); // turn the LED
else if(data == '0') // when the value is equal to 0
digitalWrite(relay, LOW);// turn off the LED
}
}
The Arduino code for controlling the AC appliances is quite easy as when the data having one is sent to the Arduino it gives the signal of HIGH to relay. Whereas when the data having 0 is received from Bluetooth is received then it gives the signal of LOW to relay and turns the appliance off.
How to send data to Arduino using Bluetooth
Now there arises a question of how we can give the data to the Bluetooth module so for this we have used an android application that can be downloaded from the google play store. To download the application, you can visit the link.
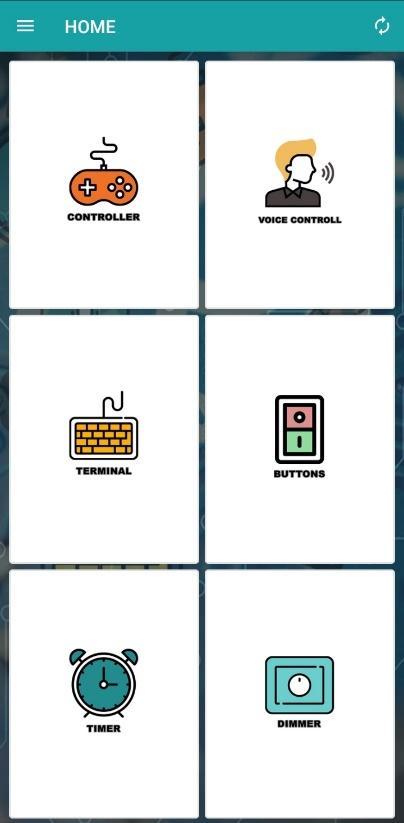
After downloading the application in your smartphone you have to connect it to the Bluetooth module and when you open this application you will come across the similar menu as in the image given below:
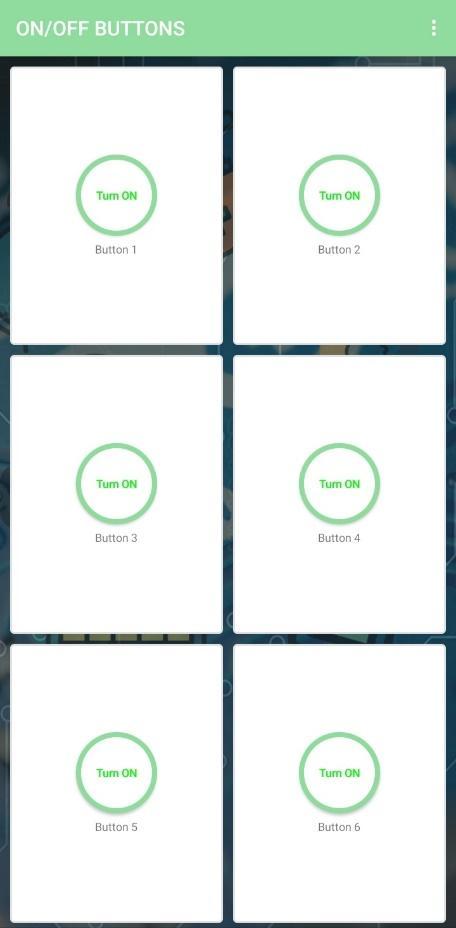
Now you need to click on the second option in the second columns that is the buttons after clicking on the button option you will see a number of buttons in the menu as in the figure provided below:
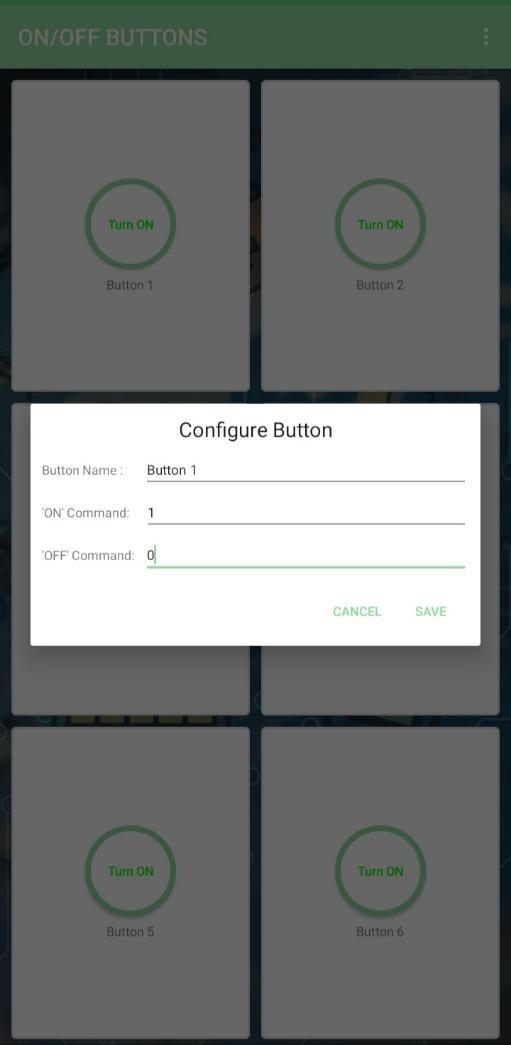
Now we can configure each button by giving it a value for its on and off state and this can be done by long pressing any button in the menu. So, you will come across this pop-up as shown in the image below:
Here in this menu you can assign the values for each state of the button and can also rename the button like by giving the name of the appliance to the button. This is how you can send the data to the Arduino using the Bluetooth module.
Hardware implementation for controlling the AC appliances using Bluetooth module
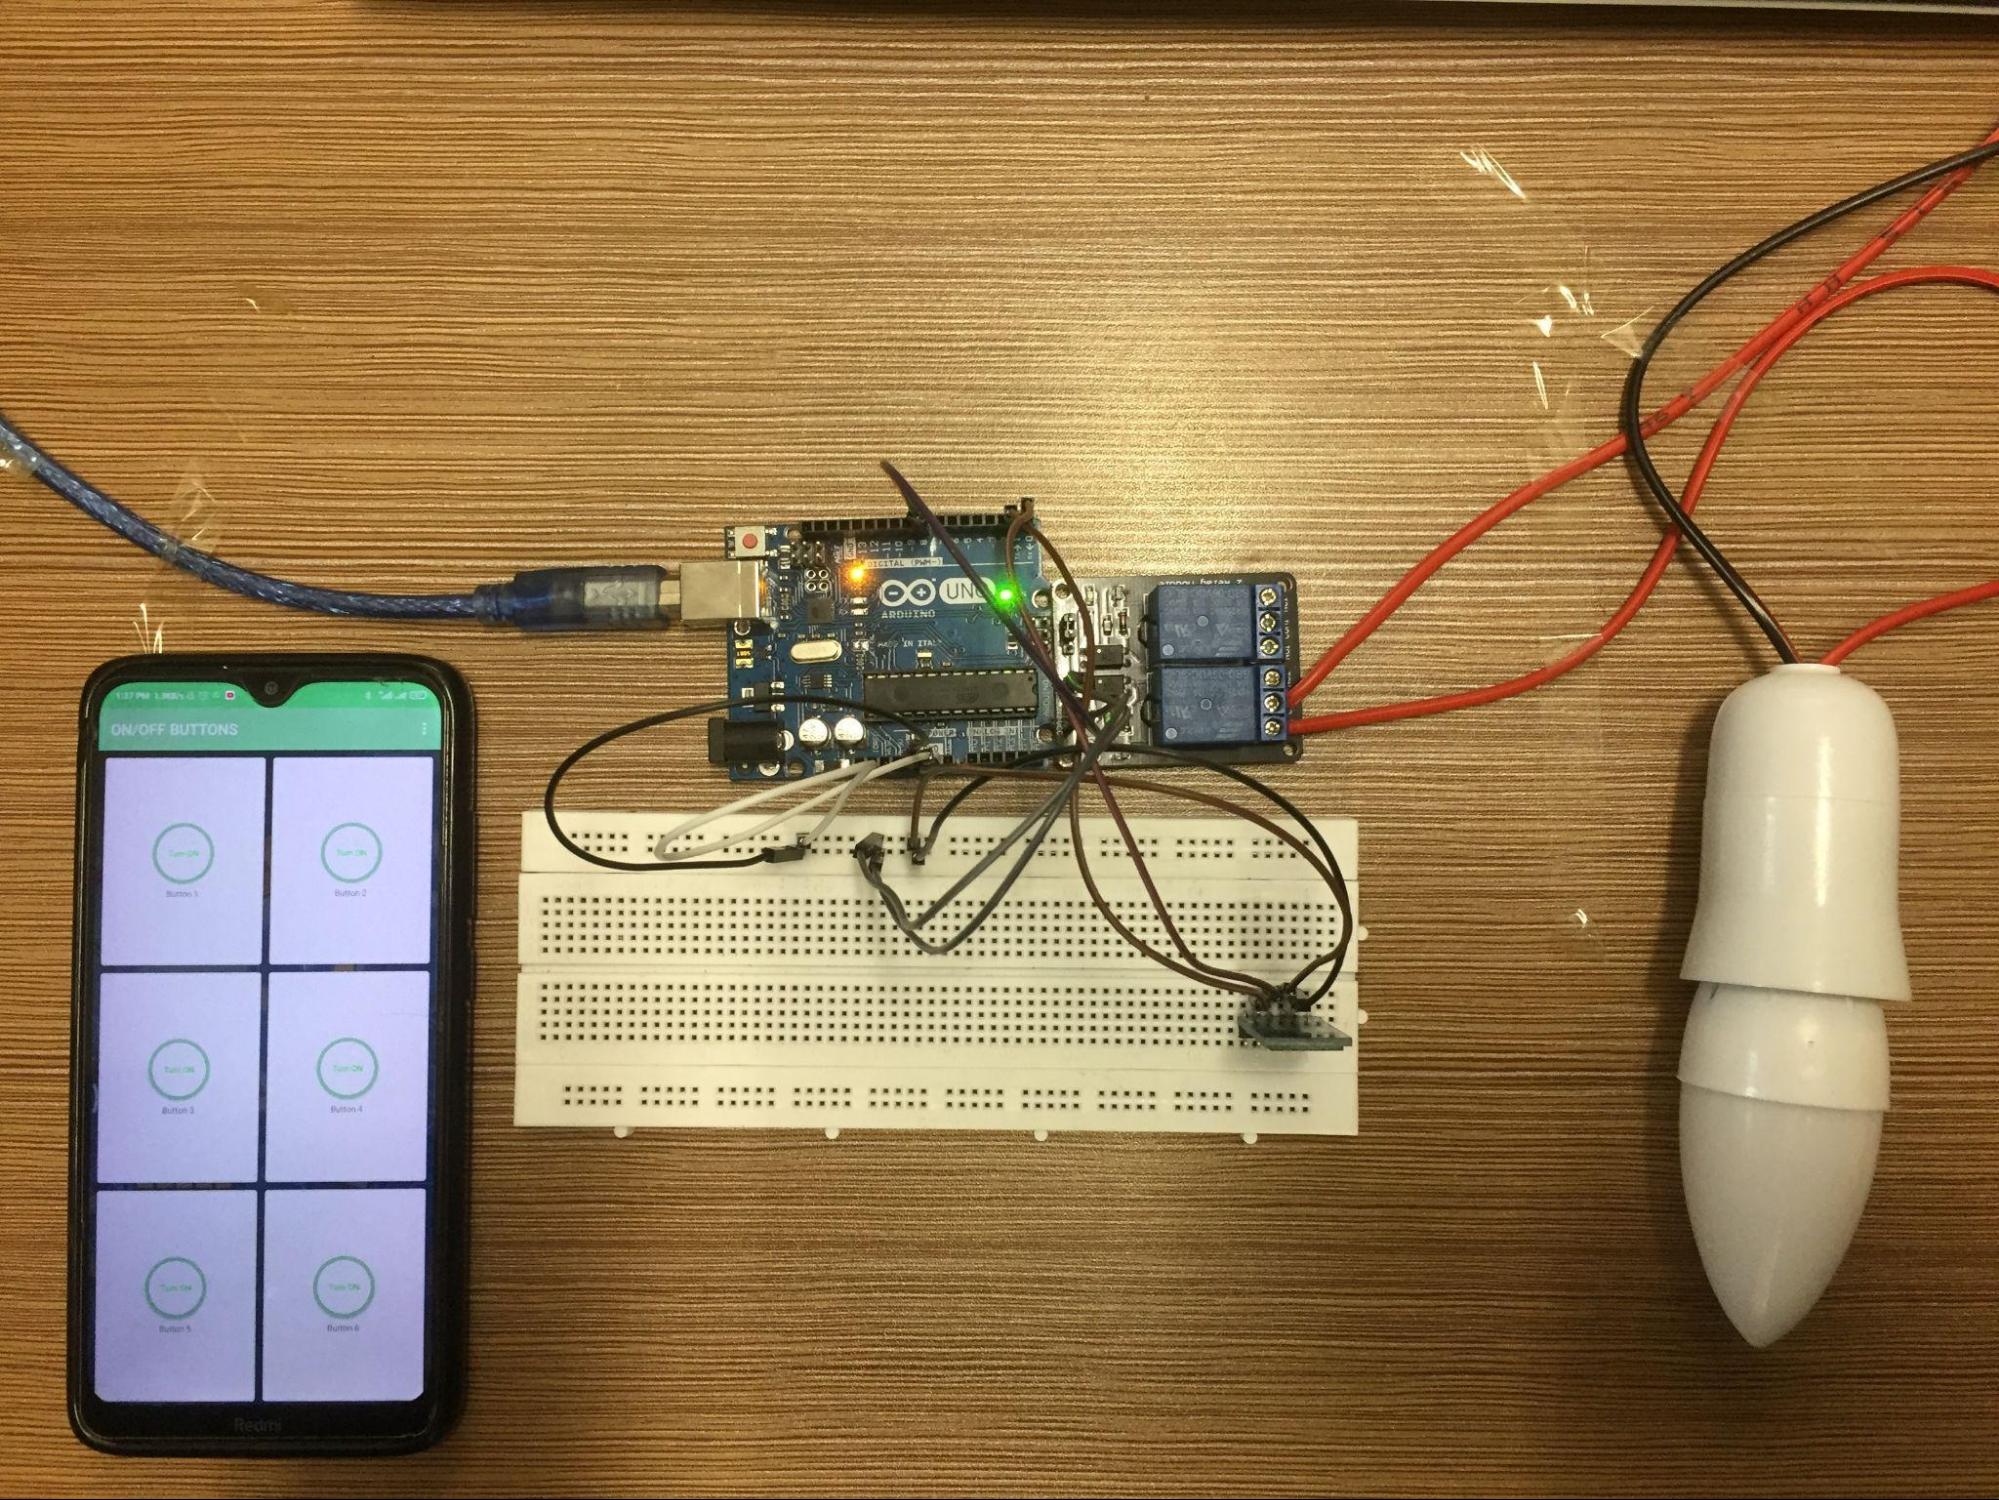
The image given below shows the implementation of the hardware assembly as discussed above:
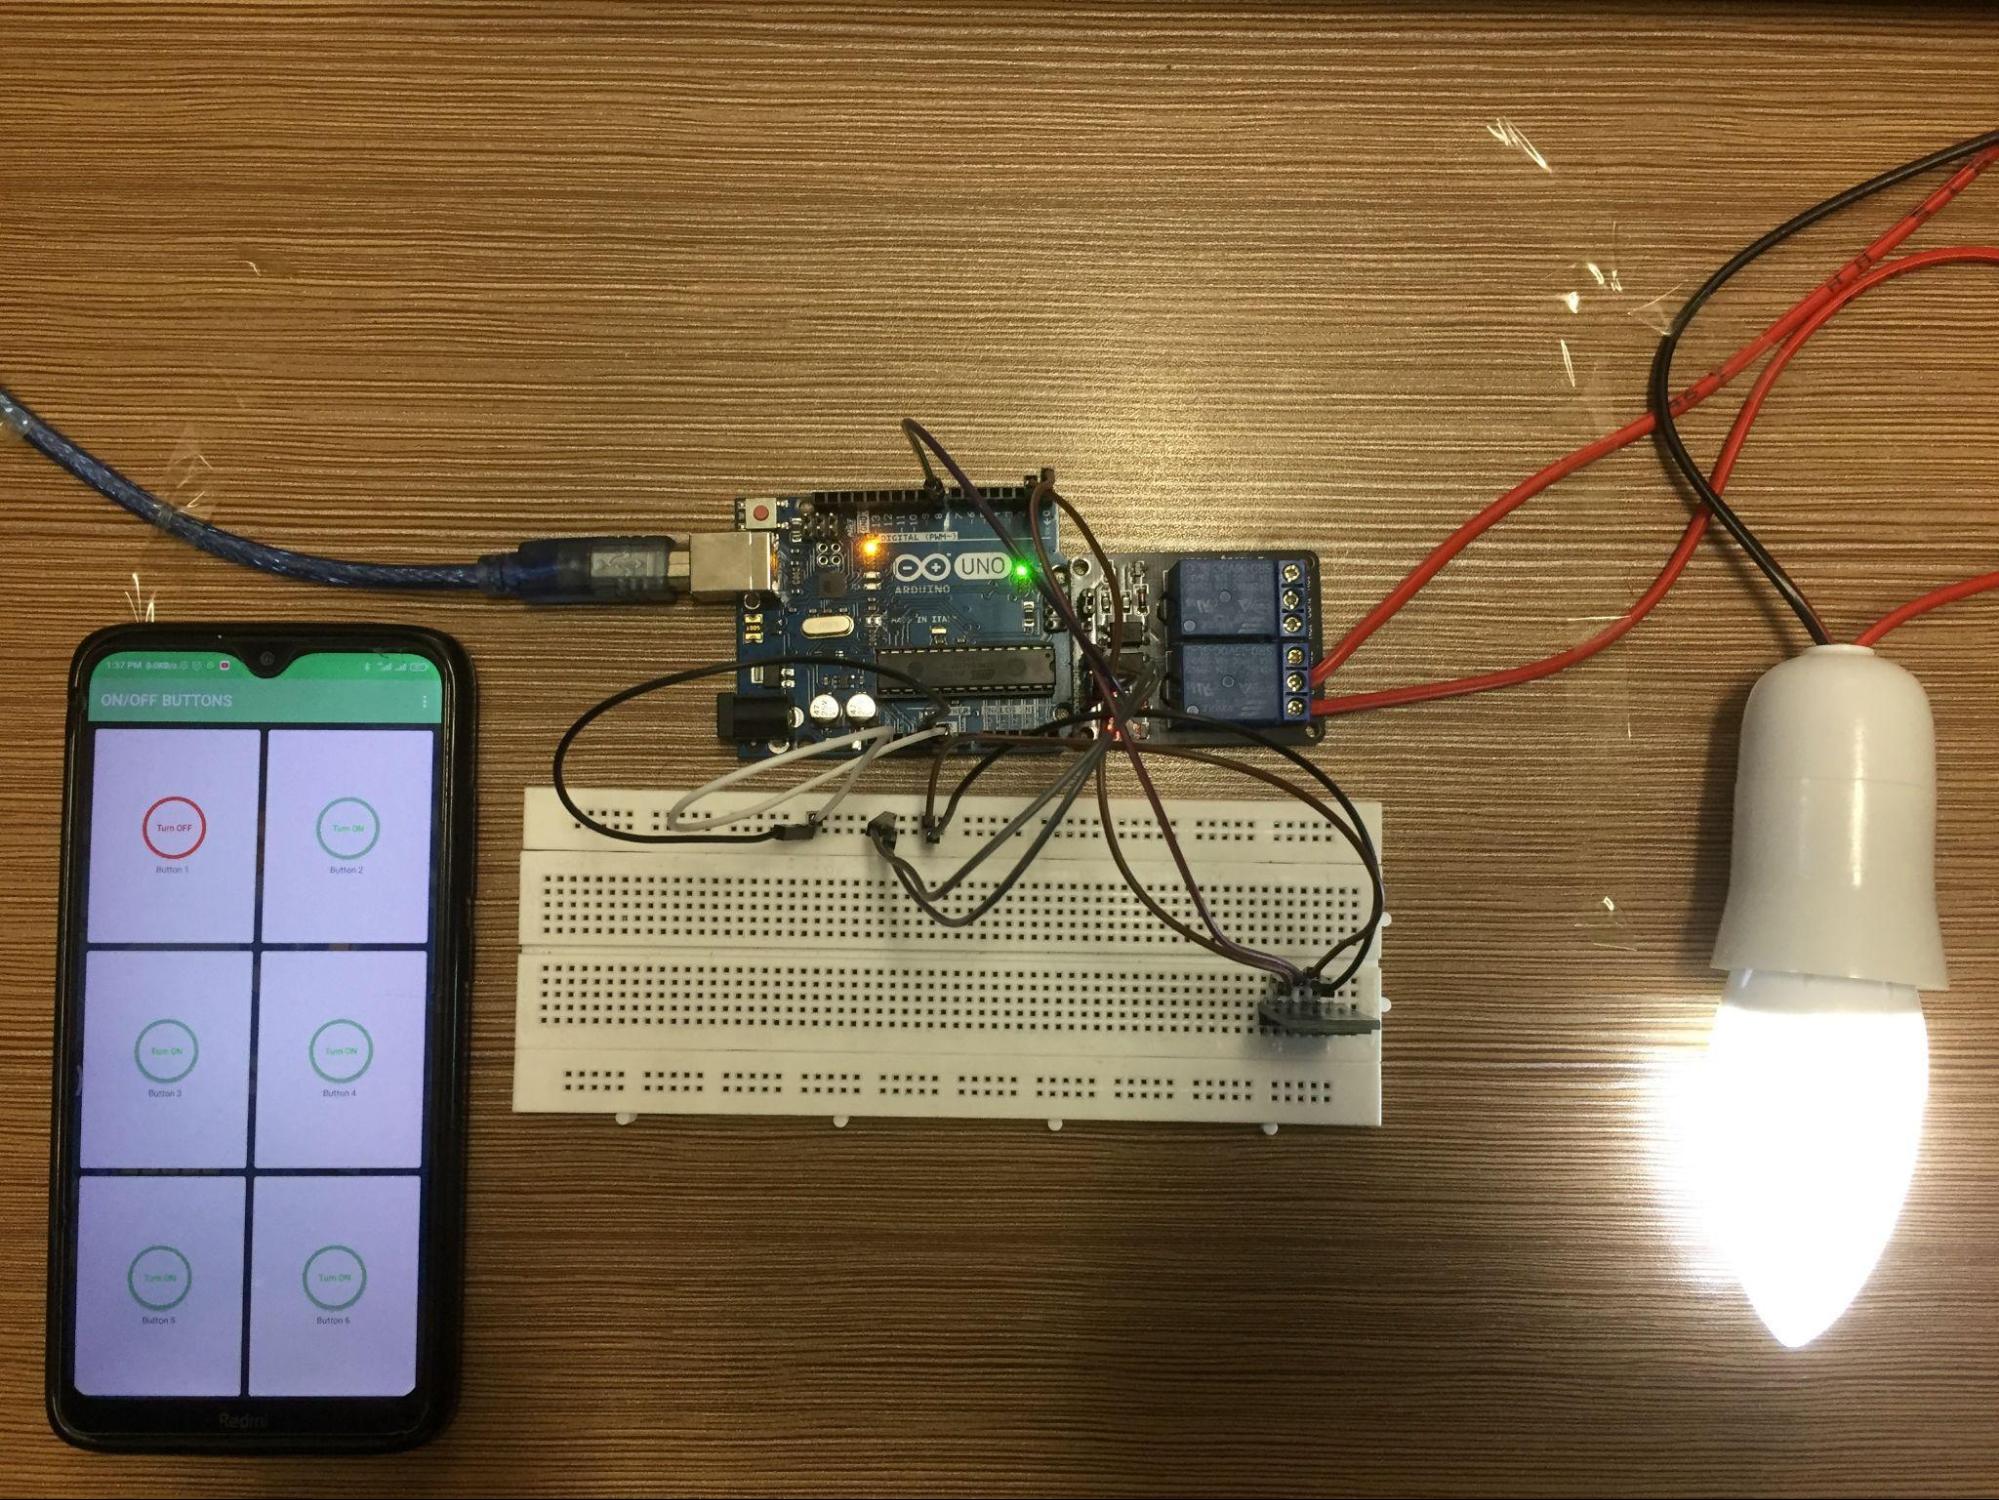
Upon pressing the programmed button the AC light bulb will glow:
The state of the button on the mobile phone is changed from green to red.
Conclusion
The Arduino platform is the most effective platform for the students to learn about circuits as it provides assistance in both hardware and software implementation of the projects. Due to this platform the microcontrollers can be interfaced with a very large number of devices that can be used to create either the beginner level projects or the advanced level projects. We have created a project that demonstrates how we can control the AC appliances from the smartphone wirelessly using the Bluetooth module.

