How to control the 12-volt devices with Arduino Uno
The significance of controlling the devices is that we can switch them on and off automatically and this can ease in controlling the multiple devices. To control a 12-volt device using the Arduino Uno we have used the transistor as a switch by giving it a signal of HIGH to turn on the device and a signal of LOW to turn off the appliance.
What is a transistor
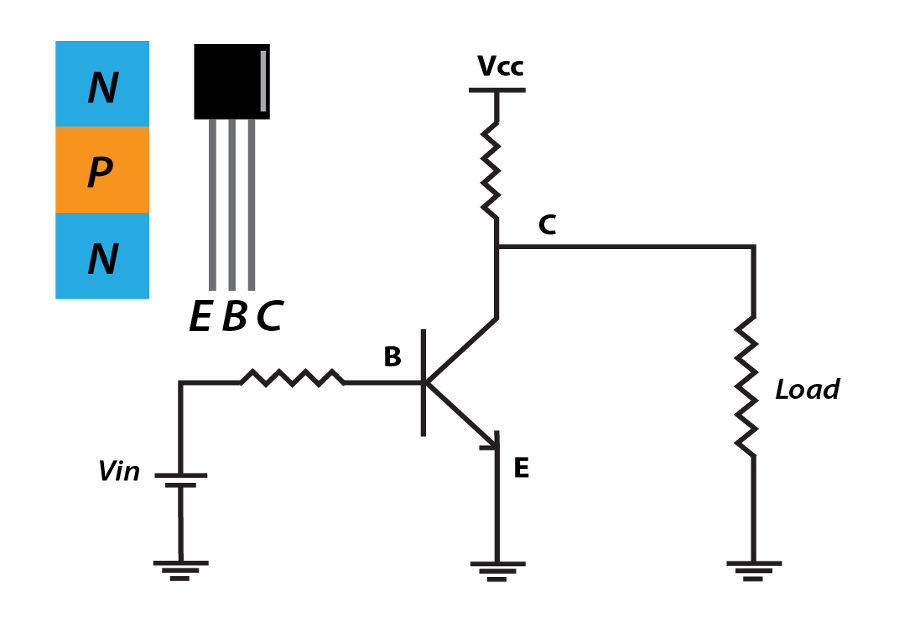
Before proceeding, first we must know what a transistor is. A transistor is a device which is used to either amplify the voltage, current and power or for switching the devices. A transistor is composed of a semiconductor substance that comprises three terminals that are: emitter, base and collector. The transistor comes with two basic configurations one is the PNP and the other is NPN. To use the transistor for switching, we have used the common emitter configuration of the NPN transistor. So when we give the HIGH signal to the base then the transistor comes into its saturation mode and when the signal of LOW is provided on the base it will move into the cutoff region and turn off the device. Below for your understanding we have provide the image that shows the common emitter configuration of NPN transistor:
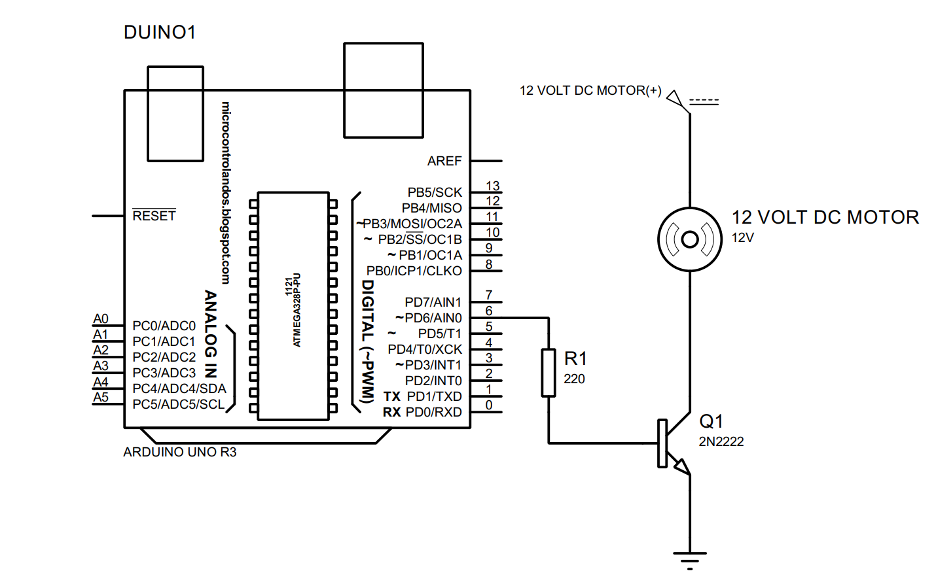
The circuit schematic is given in the image below that is designed to control a 12-volt device:
Hardware assembly for circuit that controls a 12-volt device
To control 12 volts device, we have used the following list of components that are
- Arduino Uno
- Connecting wires
- NPN transistor (BC547)
- 1 220-ohm resistor
- 12-volt DC adaptor
- 12-volt DC Motor
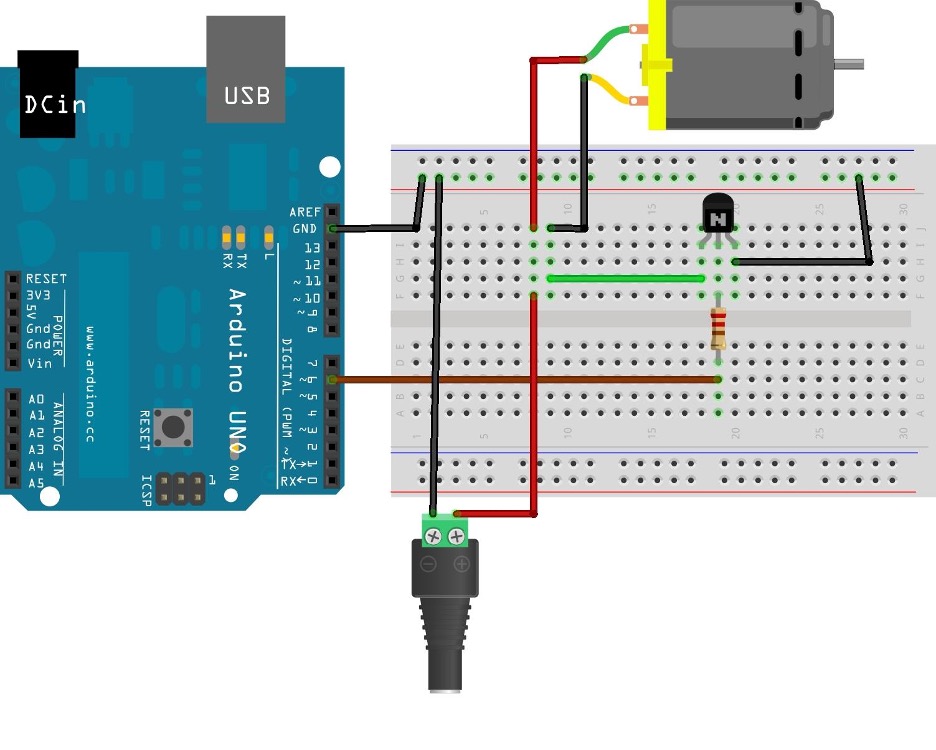
The hardware assembly of the circuit is given below in the image given below:
To control the 12-volt device we have used a 12-volt motor and to supply it with 12-volts we have used an adapter that gives 12 volts on its output and it can be seen in the image above. Similarly, to control the DC motor we have used the NPN transistor by providing it with a HIGH and LOW signal using Arduino pin 6.
Arduino code for controlling the 12 volt device using NPN transistor with Arduino Uno
The compiled Arduino code for controlling the 12-volt DC motor we have given the code below
void setup() {
pinMode(npnpin,OUTPUT);/* assigning the transistor pin as an output of Arduino*/
digitalWrite(npnpin,LOW);/* giving the transistor pin state of LOW initially */
}
void loop() {
digitalWrite(npnpin,HIGH);/* assigning the transistor pin state HIGH to turn the Motor on */
delay(2000);/*time for which the Motor will remain in on state*/
digitalWrite(npnpin,LOW);/* assigning the relay pin the LOW state to turn off the Motor*/
delay(3000);/*time for which the Motor will remain in off state*/
}
To control the 12-volt DC motor using the NPN transistor we have compiled the Arduino code by first assigning the signal pin to the transistor. Next we have given the pin mode to the signal pin for the transistor and then in the loop section we have given the states of HIGH and LOW to the transistor with the delay of 2 seconds. To assign states to transistors we have used the digitalWrite() function.
Simulation for controlling the 12-volt device using transistor with Arduino Uno
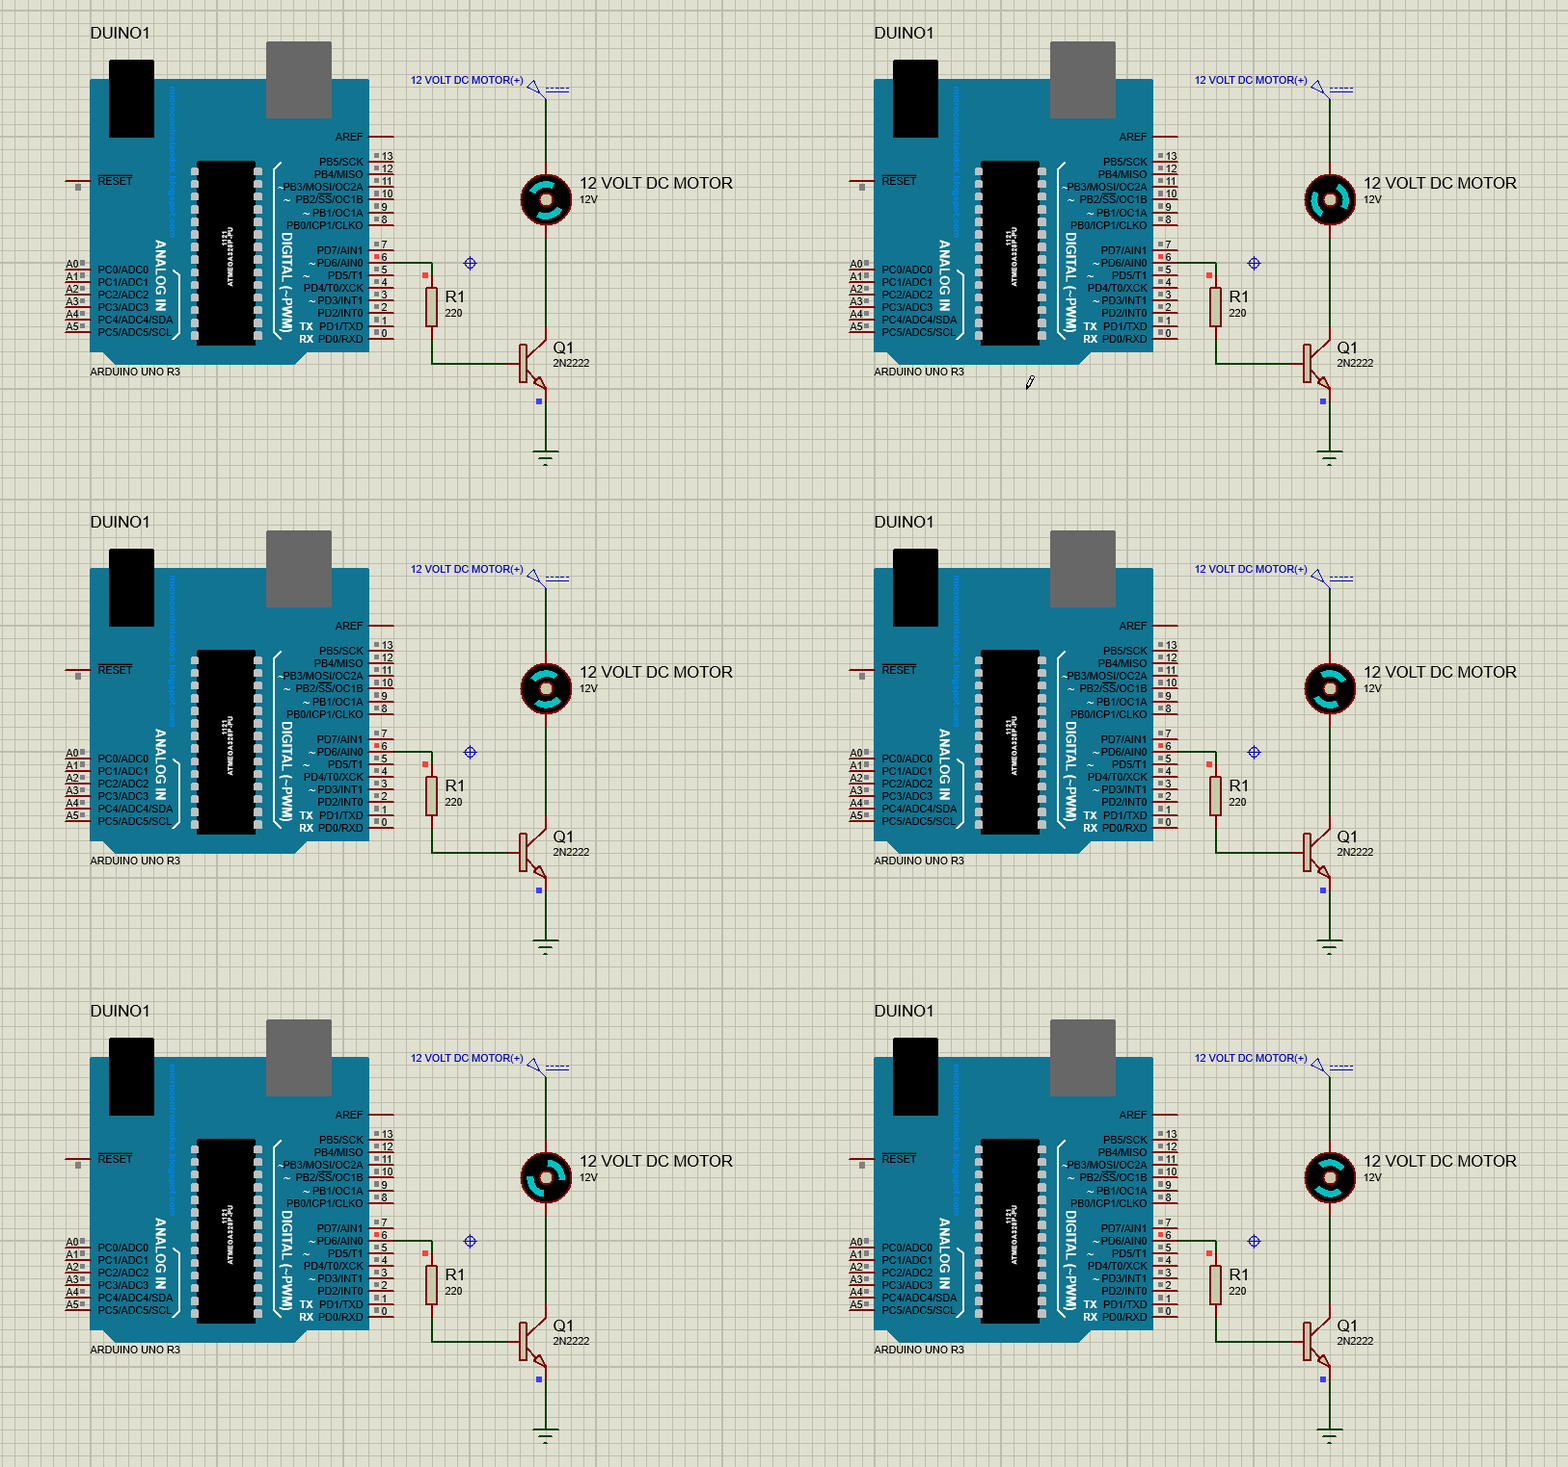
To demonstrate how we can control the 12-volt device with Arduino Uno we have created a simulation whose animation is given below:
Conclusion
The devices that run using direct current are more efficient and consume less power as compared to the devices that use alternating current. Automation is one of the main applications that comes to mind when we think of controlling any device using the Arduino platform. Controlling the devices automatically instead of manually switching them creates a lot of ease for the users especially from the safety point of view that in case of any short circuit nobody gets harmed. To demonstrate how we can control DC devices we have created a project that switches the 12-volt DC motor using a transistor.


