Displaying the data of the inputs and the outputs of an Arduino program is necessary as they give the idea how the program is actually working.. So, for displaying the data there are numerous types of displays available that can be interfaced with Arduino with great ease.So, for this purpose the display we commonly use is the 16×2 LCD as it does not require much of an effort for interfacing it with Arduino and we can also use multiple displays with Arduino. With the help of multiple displays we can either display big data or we can display the same data in different places. To demonstrate how we can use multiple displays with Arduino we have interfaced the two 16×2 LCDs and displayed some data on both the LCDs.
How to interface two LCDs with Arduino Uno
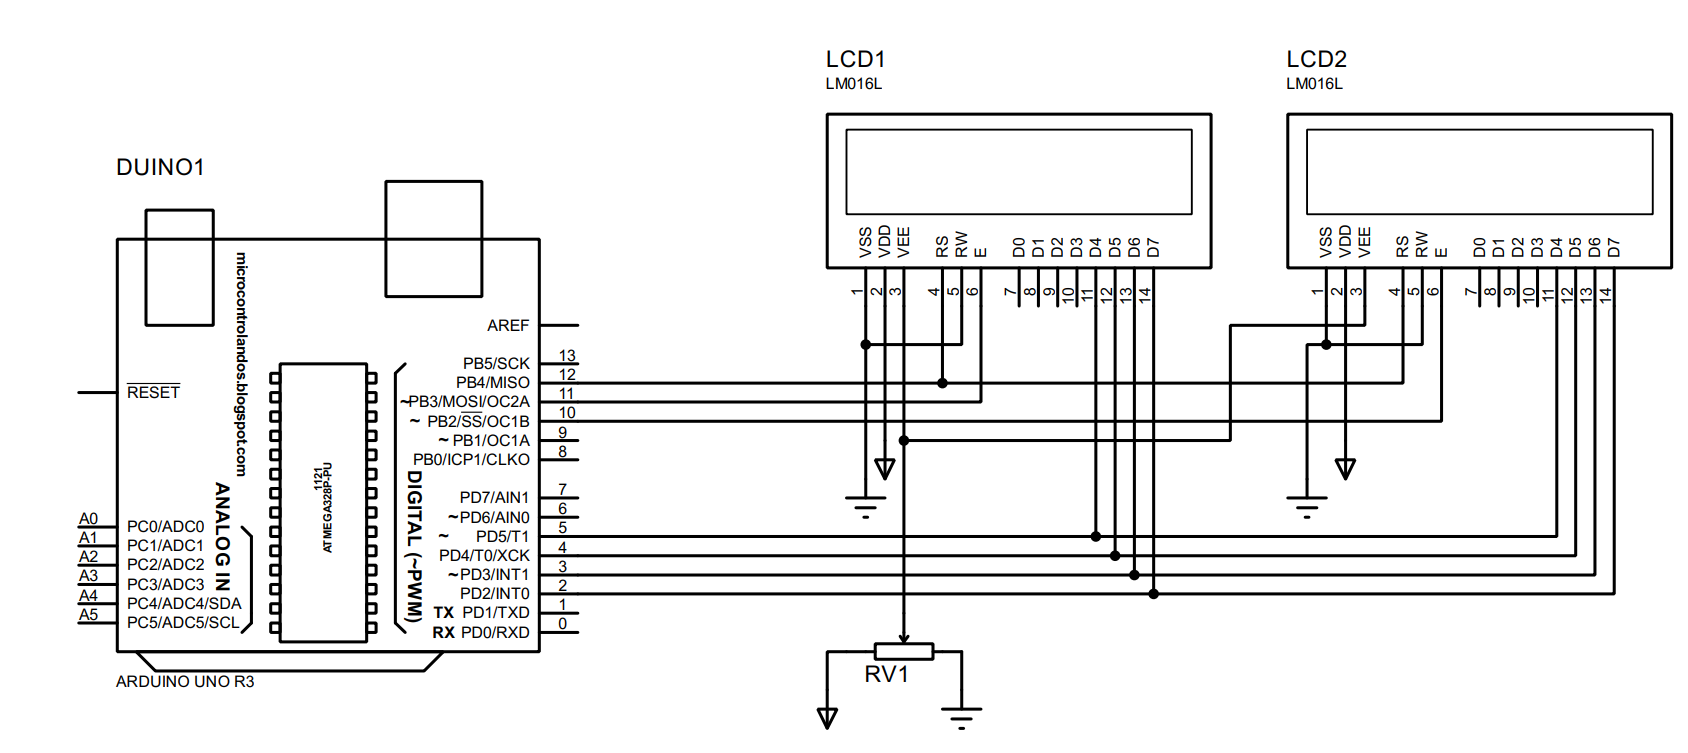
The display modules play a vital role in the functionality of the program as it gives a clear picture of what’s happening to the Arduino code. Apart from that we can use the LCDs for various purposes like we can use LCD as monitors that display the statistics, or we can create a list having multiple options. To give an idea of connections for interfacing the two LCDs with Arduino we have given the circuit schematic below:
Hardware assembly for interfacing the two LCDs with Arduino Uno
For interfacing the two 16×2 LCDs we have used the following components that are
- Arduino Uno
- Breadboard
- Connecting wires
- Potentiometer
- Two 16×2 Liquid Crystal Displays
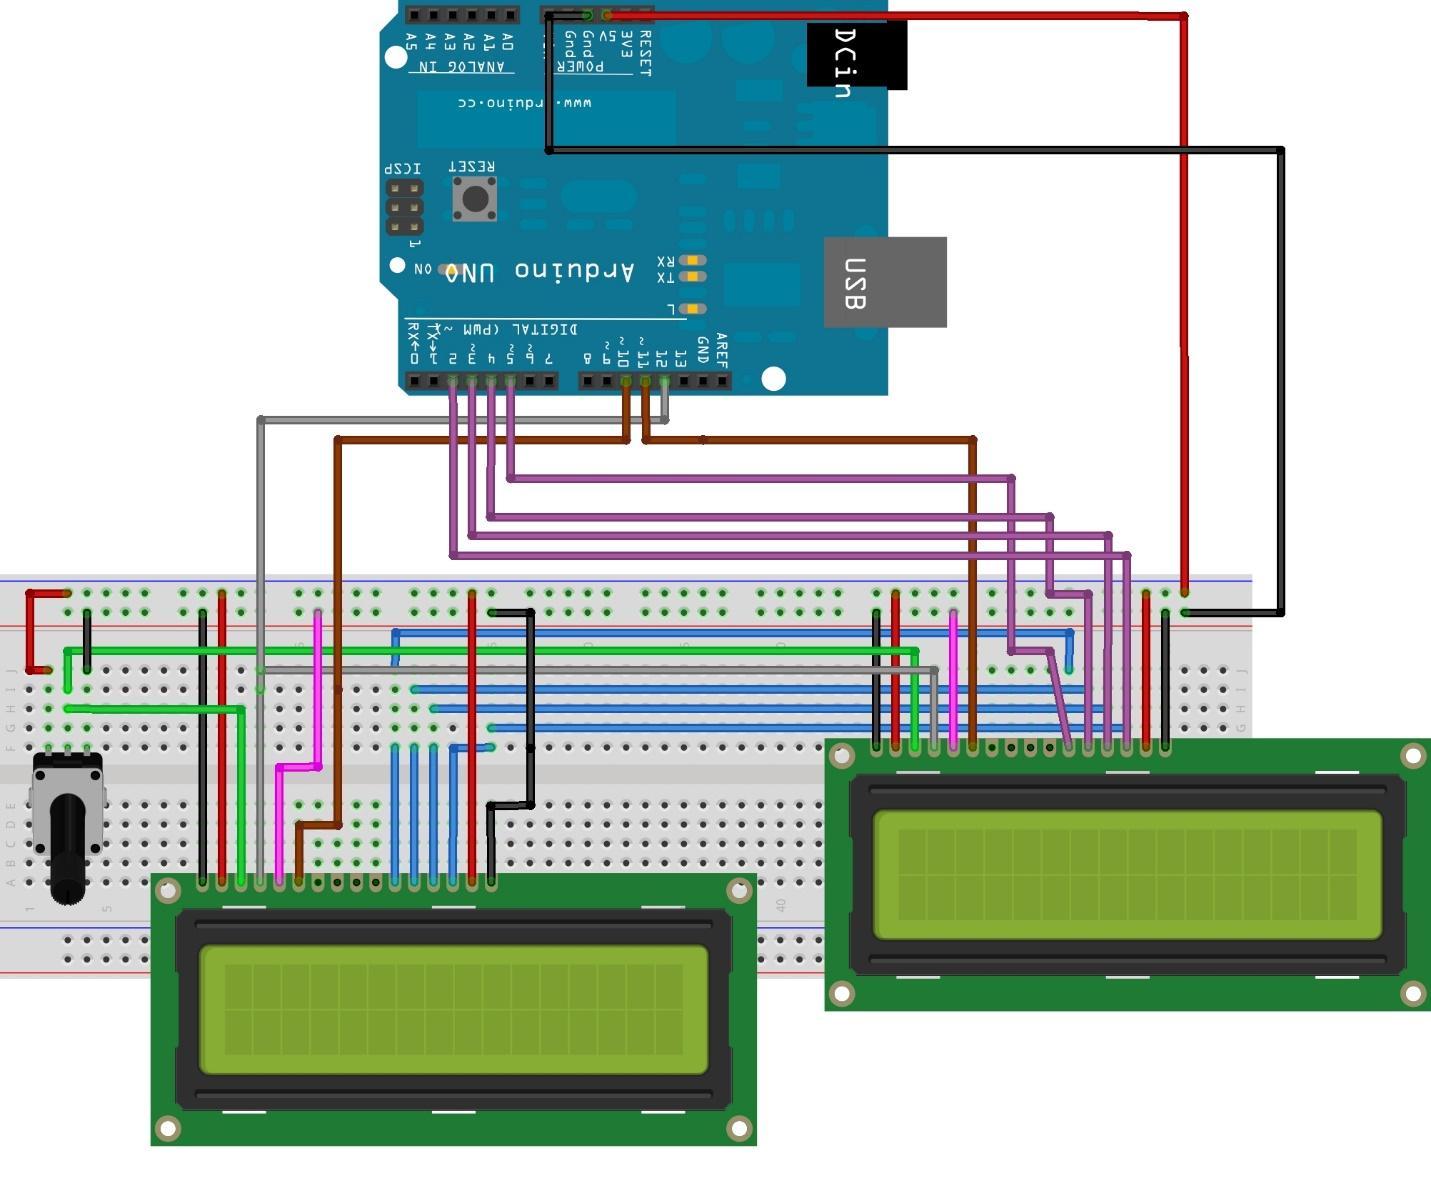
To demonstrate the hardware assembly, we have provided the image below through which you will have a more clear understanding of the connections of the two LCDs:
The interfacing of two LCDs with Arduino has made the circuit quite complicated but for the ease of the reader, we have given similar colors for the same pins of the two LCDs, and I have explained the connection of the pins as well.
The main point to remember when interfacing two or more LCDs is that you have to shorten the data pins of all the LCDs and then connect them to the Arduino as you can see in the figure above we have shorted the data pins using the blue colors wires. You also have to common the register select pin of both LCDs and then connect it to the Arduino pin here in the figure we have used the gray wire for this purpose.
We can use the two separate potentiometers for controlling the brightness of the LCDs but to avoid further mashup of wires we have used one potentiometer for both the LCDs. So, we have connected the V0 pin of LCDs using the green wires with the output of the variable resistor.
To connect the LCDs with supply we have used the 5 volts and ground pin of the Arduino by connecting them with the top two pin slots of the breadboard.
Arduino code for interfacing the two16x2 LCDs with Arduino Uno
The Arduino code for interfacing the LCDs with Arduino uno is given below:
LiquidCrystal lcd1(12, 11, 5, 4, 3, 2);/*assigning the Arduino to the data pins of the first LCD*/
LiquidCrystal lcd2(12, 10, 5, 4, 3, 2);/*assigning the Arduino to the data pins of the second LCD*/
void setup()
{
lcd1.begin(16, 2);/*initializing the dimensions of the first LCD*/
lcd2.begin(16, 2);/*initializing the dimensions of the second LCD*/
lcd1.print(" Welcome to "); /*displaying the data on the first LCD*/
lcd1.setCursor(0, 1);/*setting the position of the second line data on first LCD*/
lcd1.print(" Arduino");/*displaying the data on the first LCD*/
lcd2.setCursor(0, 0);/*setting the position of the first line data on second LCD*/
lcd2.print(" For more visit ");/*displaying the data on the second LCD*/
lcd2.setCursor(0, 1);/*setting the position of the second line data on second LCD*/
lcd2.print(" linuxhint.com");/*displaying the data on the second LCD*/
}
void loop()
{
}
The code for interfacing the two LCDs with Arduino Uno is quite simple as you have to just assign pins of Arduino for each LCD. But the pins of the Arduino Uno are limited so we have to share the data pins of both LCDs.
Next we have to initialize the dimensions of each LCD and then to display the data on LCD we have used the lcd.print() function. Since we named the first LCD by lcd1 and the second LCD with lcd2 so for displaying the data on the first LCD we have used the lcd1.print() function and vice versa.
Hardware implementation of interfacing the two LCDs with Arduino Uno
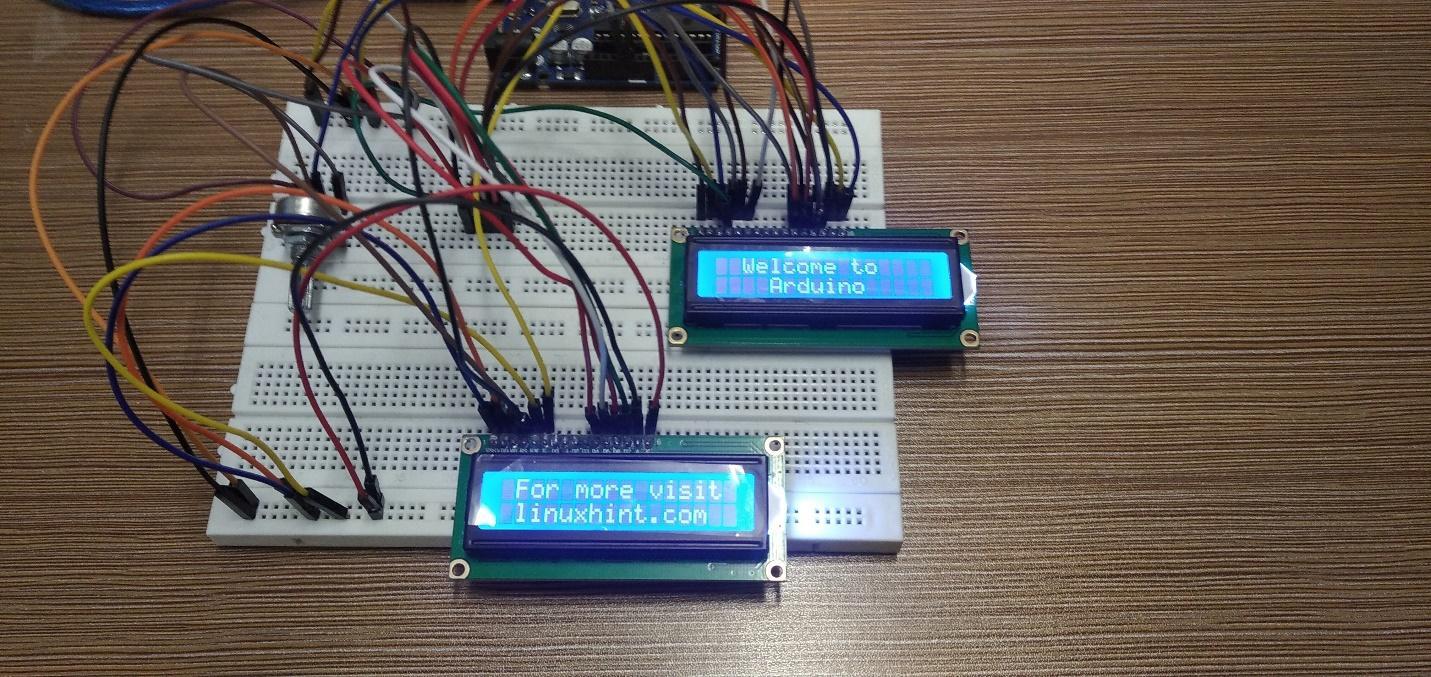
To demonstrate interfacing of the two LCDs we have assembled the hardware according to the hardware assembly described above. Below we have provided the image which shows the hardware implementation that demonstrates how we can interface the two LCDs with Arduino Uno.
Conclusion
Displaying the parameters of any Arduino program is necessary because we can monitor the working of the code. Similarly, we can also use multiple displays with Arduino, and this can increase the amount of data that can be displayed. For displaying the data, there are different types of displays available based on the type of the data that is required to be displayed. So we have interfaced two 16×2 LCDs with Arduino.


