Connecting your system to a Wi-Fi network is important since it allows you to perform different operations like downloading applications from websites, connecting to other people, creating web servers, and much more. The Wi-Fi module is already put into the latest Raspberry Pi model, making it easier for you to use the Wi-Fi on any system. However, to use it on a Raspberry Pi system, you must connect your system to a Wi-Fi network.
This article presents different methods to help you in connecting your Raspberry Pi to the Wi-Fi network.
Let’s start the guide!
How to Connect Raspberry Pi to Wi-Fi?
There are three methods to connect Raspberry Pi to Wi-Fi, which are as follows:
- Connect Raspberry Pi to Wi-Fi Through GUI Method
- Connect Raspberry Pi to Wi-Fi Through Terminal
- Connect Raspberry Pi to Wi-Fi Through wpa-supplicant File
Let’s get into each of them one by one.
Method 1: Connect Raspberry Pi to Wi-Fi Through GUI Method
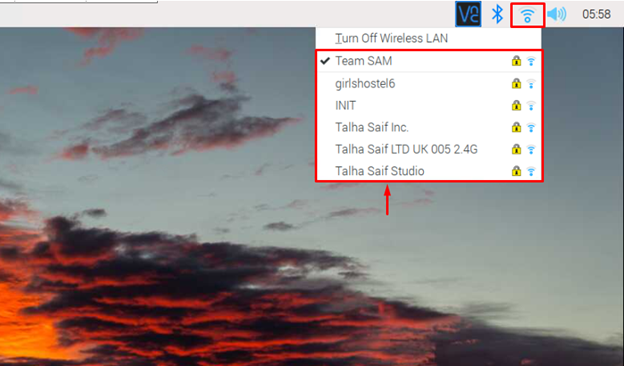
The easiest method to connect Raspberry Pi to Wi-Fi is the GUI method. For this method, the user just has to click on the “Wifi” icon in the taskbar panel. It will display all the networks that are available in the vicinity. The user can click on any network and add the password to connect to the Wi-Fi.
Method 2: Connect Raspberry Pi to Wi-Fi Through Terminal
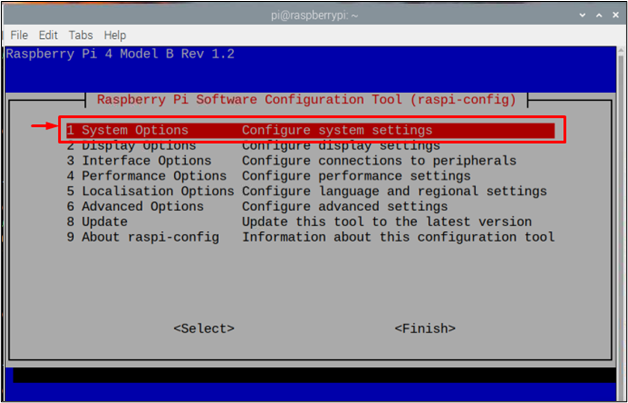
The other method to connect Raspberry Pi to Wi-Fi is through the terminal using the raspi-config tool, which you can open using the below-mentioned command:

Within the configuration, select the “System Options”.
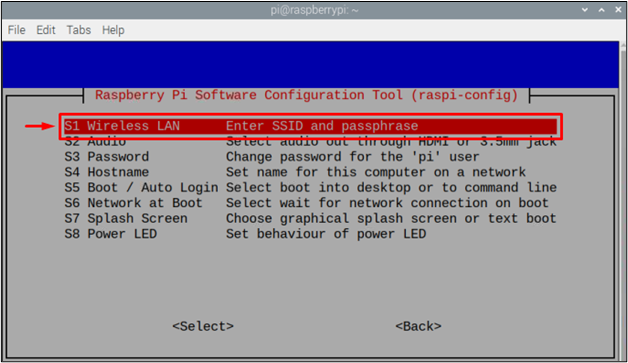
Then select the “Wireless LAN” option.
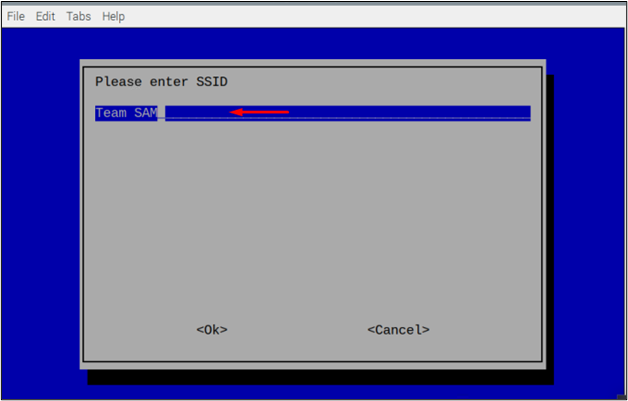
Then it will ask you for an SSID which is basically the name of the Wi-Fi network you want to connect with.

For example, here I have used “Team SAM” as an SSID.
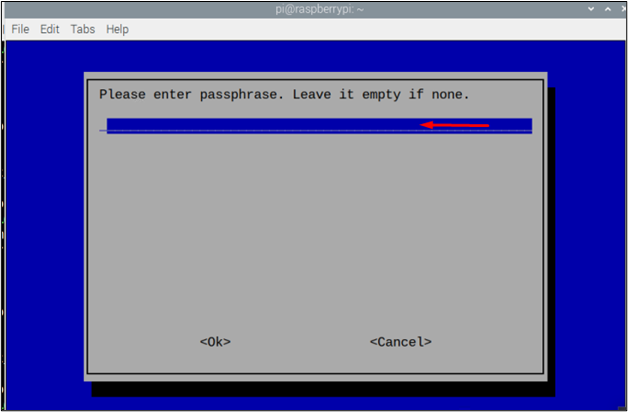
Then it will ask for a passphrase which is basically the password of the Wi-Fi network, if it is an open network without a password, you can simply skip this step by selecting <ok>.
Method 3: Connect Raspberry Pi to Wi-Fi Through wpa_supplicant File
This is the last method in which one can connect to a Wi-Fi network by configuring the “wpa_supplicant” network file. This file allows users to connect to a Wi-Fi network by providing the username, password, and country code. Though, this file is created by default when you connect to your Wi-Fi network using any of the above methods. However, if you haven’t connected your Raspberry Pi to Wi-Fi, you can manually create this file using the following command:

Within this file, add the following lines in case if the file is empty:
update_config=1
country=<country code like “US” for USA>
network={
ssid="SSID"
psk="Wi-Fi password"
key_mgmt=WPA-PSK
}
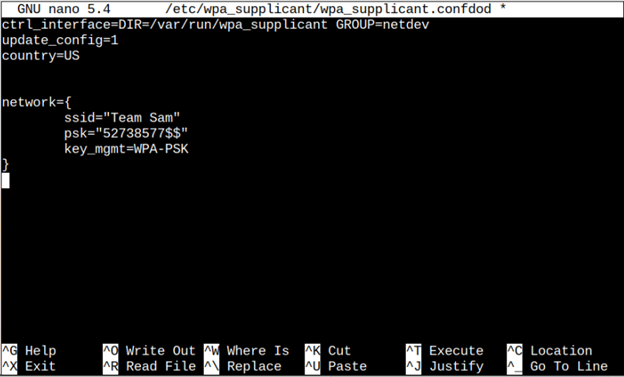
Note: Keep in mind to write “SSID” and “psk” as your Wi-Fi password.
Then press “Ctrl + X” and “Y” to save the configuration file and then finally press “Enter” to get back to the terminal.
You must reboot the system using the below-mentioned command to apply the changes you made to your WiFi network:
![]()
To ensure that the device is connected to Wi-Fi, use the below-written command:

If the above command outputs the IP address for your device, it means that your device is successfully connected to the Wi-Fi network.
That’s it for this guide!
Conclusion
Raspberry Pi can be connected to Wi-Fi using three different methods, which are GUI, terminal, and the “wpa_supplicant” file. Each of these methods is adaptable and users can choose any of them according to their feasibility. The SSID and passphrase (password) of a network will be required for each method to successfully connect the system to Wi-Fi.