This article will help you in connecting NFS share on Raspberry Pi so that you will be able to transfer files from your device to another system or vice versa.
How can I connect with NFS Share on Raspberry Pi
To access the Raspberry Pi folder through NFS Share, use the following steps:
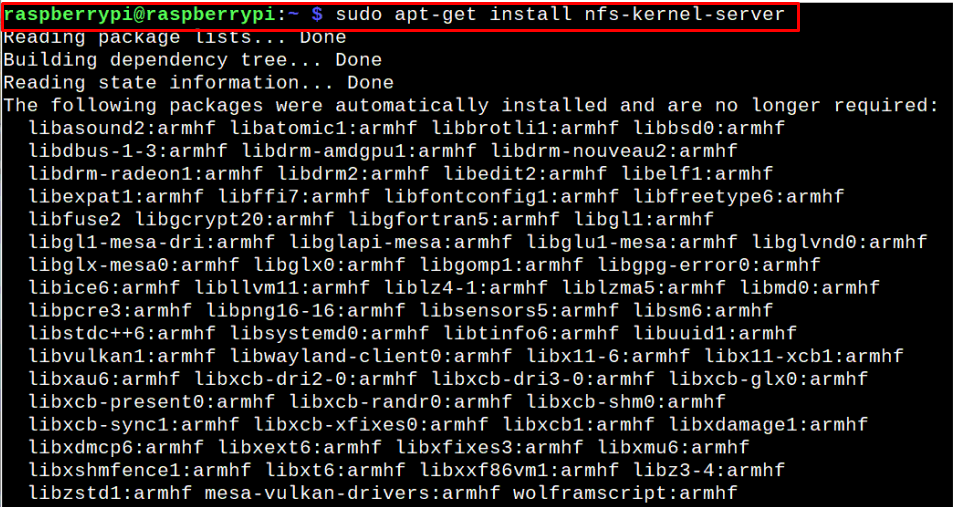
Step 1: Install NFS Server
First, you will need to install NFS server on your Raspberry Pi device using the “nfs-kernet-server” package through the following command:
Step 2: Make a Directory
Next, you will require to create a directory of your choice through the following command as this directory will be accessed later on:

You can change the “shared_drive” directory name with the name of your choice.
Step 3: Grant Permission to the directory
After creating the directory, you will also need to assign the correct rights to it which you are going to share on the network through NFS share. You can do so by first using the following command to grant permission to the default Raspberry Pi user.

The username “raspberrypi” in the above command may be different in your case and you have to ensure it first before executing the command.
Now, you will also allow permission to the directories inside the “shared_drive” through the following command:

The number “755” shows assigning the permission to Read, Write and Execute for the owner.
Further, assign the correct rights to the files inside the “shared_drive” directory through the following command:

The number “644” shows assigning the permission to Read and Write for the owner.
Step 4: Retrieving Group ID
In this step, you will need to retrieve the group ID (guid) and user id (uid) for the user that is going to access your device directory. For this reason, you will need to execute the following command:

Step 5: Configure Directory Access for the user
With the IDs successfully retrieved, it’s now time to allow the trusted users to access the Raspberry directory using the NFS share. You can do this by opening the configuration file through the following command:
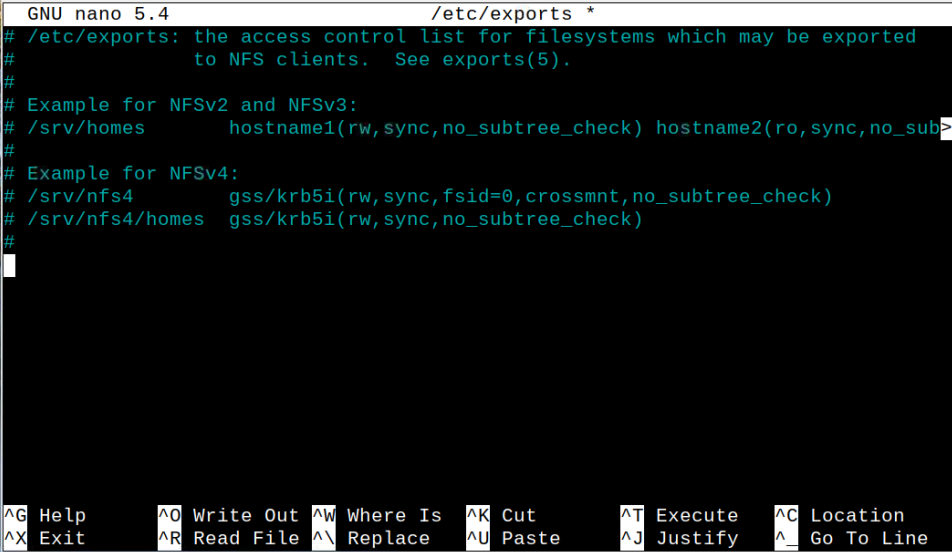
With the file open, add the following line inside the file:
You will need to replace asterisk * sign with the IP address range that matches your network address to allow the users to access your device directory. In our case, the network address is “192.168.100.1” so we can use the address “192.168.100.0/24” in place of asterisk * to allow all IPs that match the address.
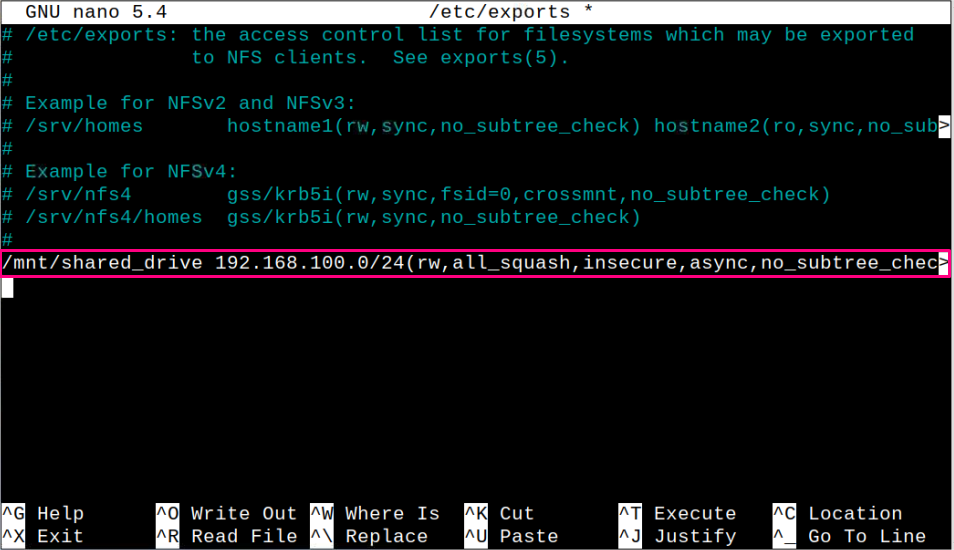
Save the file using “CTRL+X” keys, add Y and then press enter to exit the file.
Step 6: Run Exportfs file
Once the required changes are made, you can run the “exportfs” file to successfully add the shared directory so that it can easily be accessible through NFS share.

Step 7: Finding the Hostname
You will also need to find out the hostname of your device so that you can access the device directory through NFS share on another system. You can find the hostname using the following command:

Step 8: Connecting to NFS Share on Raspberry Pi from Another device
Connecting to NFS share on Raspberry Pi is different on Windows and macOS so here you will learn both ways:
Connecting to NFS Share on Raspberry Pi on Windows OS
On Windows OS, you can connect access the Raspberry Pi directory through NFS Share using the following steps:
Step 1: Go to the Windows search and find the “Turn Windows features on or off” option:

Step 2: Find the option “Services for NFS” and check both options as highlighted in image below:


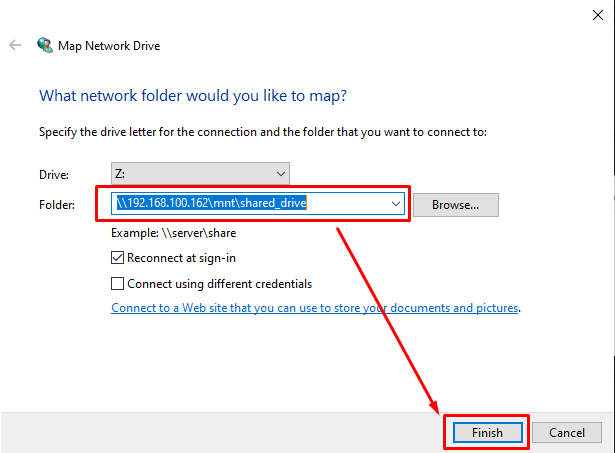
Step 3: Now, go to the “Computer” option and click on the “Map network drive” icon.
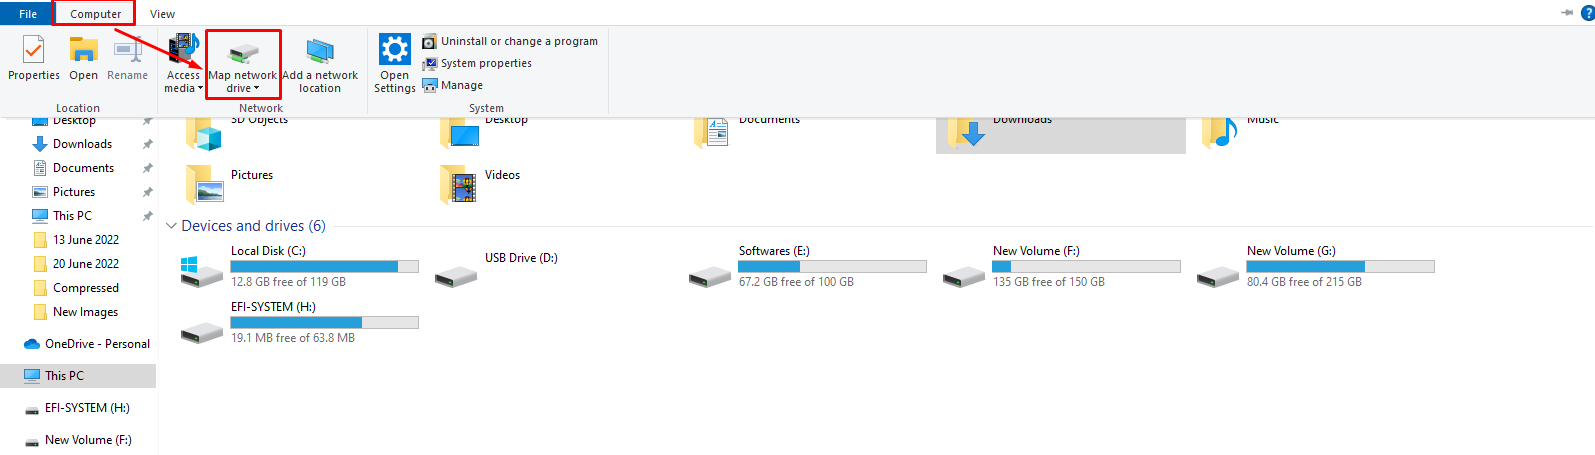
This opens the following screen on your desktop:

Now, add the address “\\192.168.100.162\mnt\shared_drive” and click on the “Finish” button.
This will open up the shared folder on your system:

You can go back to “This PC” option and see your shared drive there.

Connecting to NFS Share on Raspberry Pi on macOS
To access Raspberry Pi directory on macOS through NFS share, use the following steps:
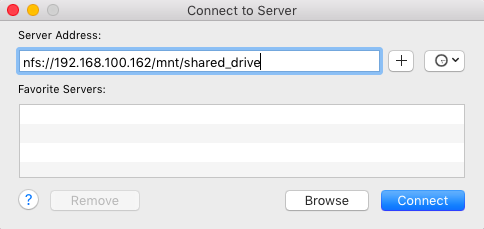
Step 1: On desktop, navigate to the “Go” section and click on the “Connect to Server” option:

Step 2: Use the address “nfs://192.168.199.162/mnt/shared_drive” and click on the “Connect” option:
This opens the Raspberry Pi’s “shared_drive” directory on your macOS as shown below:

After successfully accessing the Raspberry Pi directory through NFS share, you are now good at copying files from the device to your system. However, you have to put the files into your created directory on your device. The same operation applies to the folder on your system as well.
Conclusion
NFS share is a handy file sharing system that enables the users to share files between multiple devices, making it easy for you to transfer files to another system. The steps mentioned above provide enough guidance to successfully set up NFS sharing using your device’s Raspberry Pi IP address, allowing you the opportunity to transfer the files from your device to your Windows or macOS laptop and vice versa.