This tutorial will show how to connect Arduino Nano to Raspberry Pi.
How to Connect Raspberry Pi and Arduino Nano?
The step-by-step method to connect Arduino Nano to Raspberry Pi is discussed below:
Step 1: Install Arduino IDE
To connect Arduino Nano to Raspberry Pi, it is necessary to have Arduino IDE installed in Raspberry Pi.
Since Arduino IDE is a java-based software, thus, the user must install the java package on Raspberry Pi through the following command:
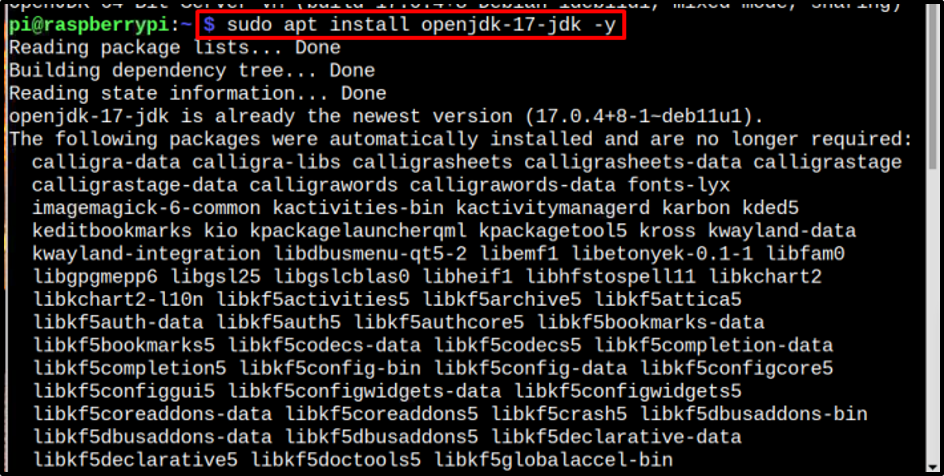
Then finally install Arduino IDE by running the below-mentioned command:

Step 2: Accessing Arduino IDE
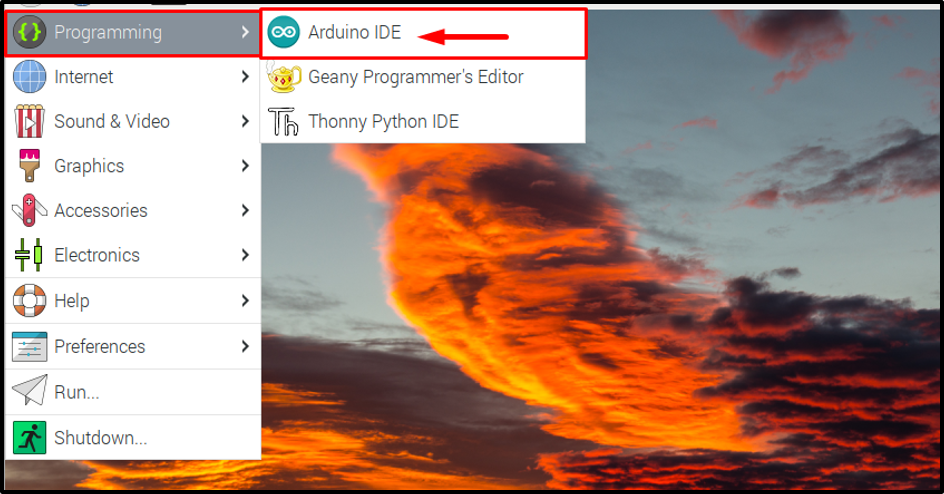
Once the Arduino IDE is installed, there are two ways to open it. Either access it through the desktop from the Programming menu:
Or else access it through the terminal by simply typing in the arduino command:

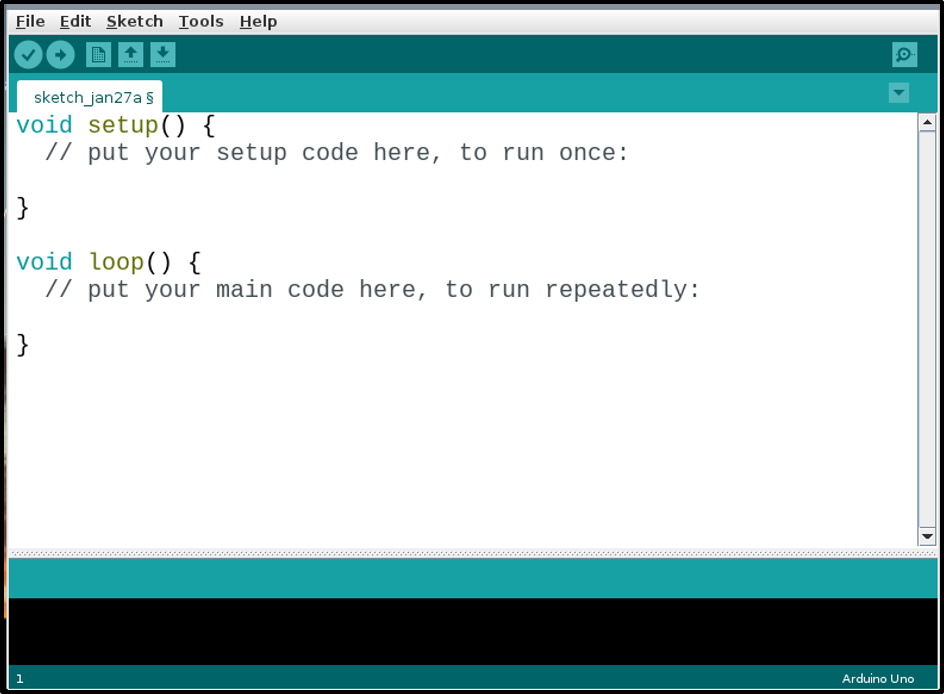
Both the above actions will open the Arduino IDE interface on Raspberry Pi:
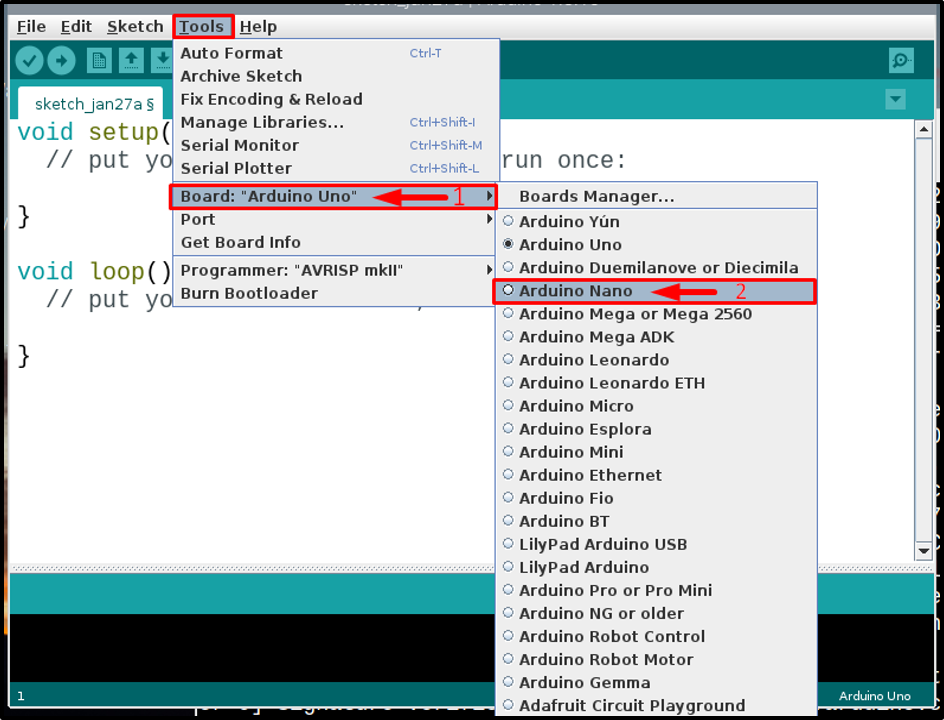
Step 3: Specifying Arduino Board
Once the Arduino IDE is installed and opened. Now it’s time to make the necessary setup for the nano board, by specifying the board in IDE. For that, click on Tools >> Board >> Arduino Nano.
Step 4: Creating a Code File
Now simply write your Arduino code, whatever you want to program your Arduino Nano for. Here, I have just run an example code to blink the built-in LED on Arduino Nano board with 1-second delay between each on (HIGH) and off (LOW) states:
pinMode(LED_BUILTIN, OUTPUT);
}
void loop() {
digitalWrite(LED_BUILTIN, HIGH);
delay(1000);
digitalWrite(LED_BUILTIN, LOW);
delay(1000);

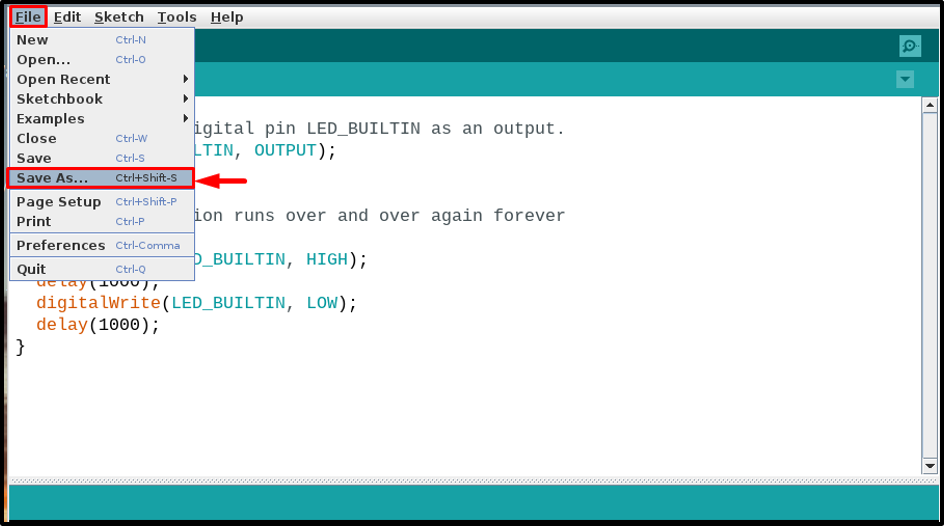
Once you are done with the coding then save the file, by clicking on File tab then choosing the Save As option from the drop-down list:
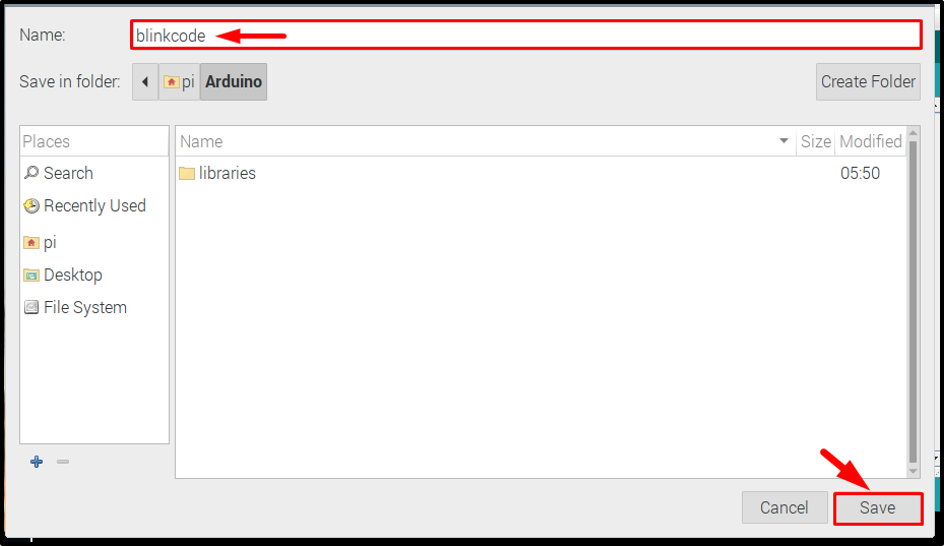
After that write a suitable name for your file, since mine was a LED blinking code so I named it as blinkcode. You can choose according to your code. After that click the Save button:
Step 5: Compiling the Code
Once the file is saved, compile the code to verify that the code is correct.

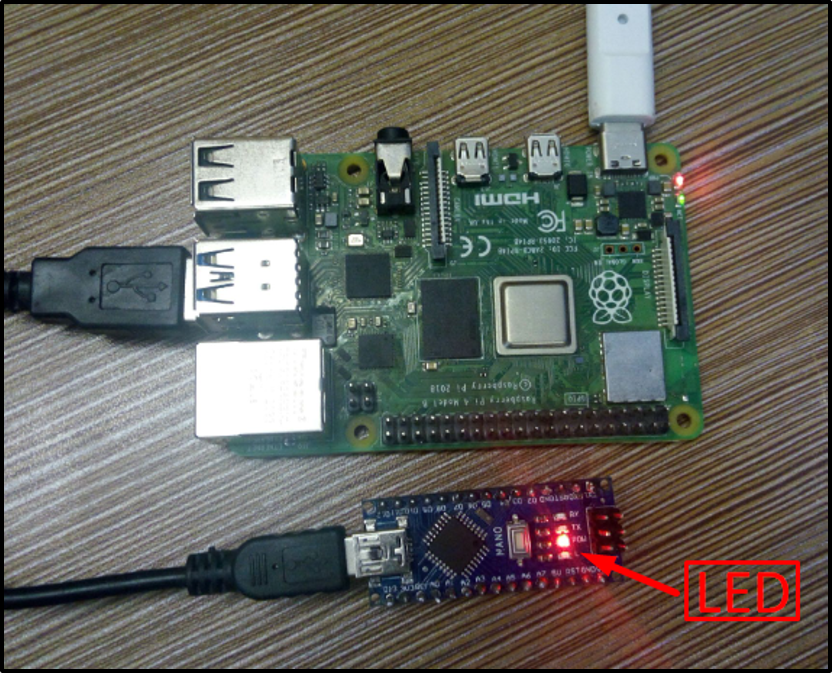
Step 6: Connecting Hardware
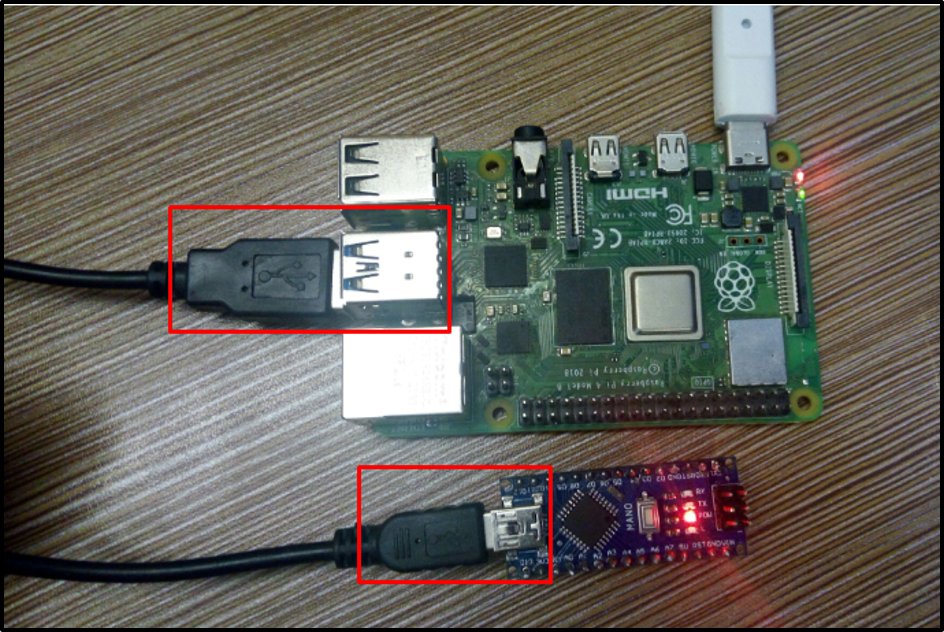
Once the code is ready to upload, connect your hardware. Remember that, for Arduino Nano, mini-USB cable connector is used. Connect the Arduino Nano to Raspberry Pi as shown in the image below:
Step 7: Selecting Port and Processor
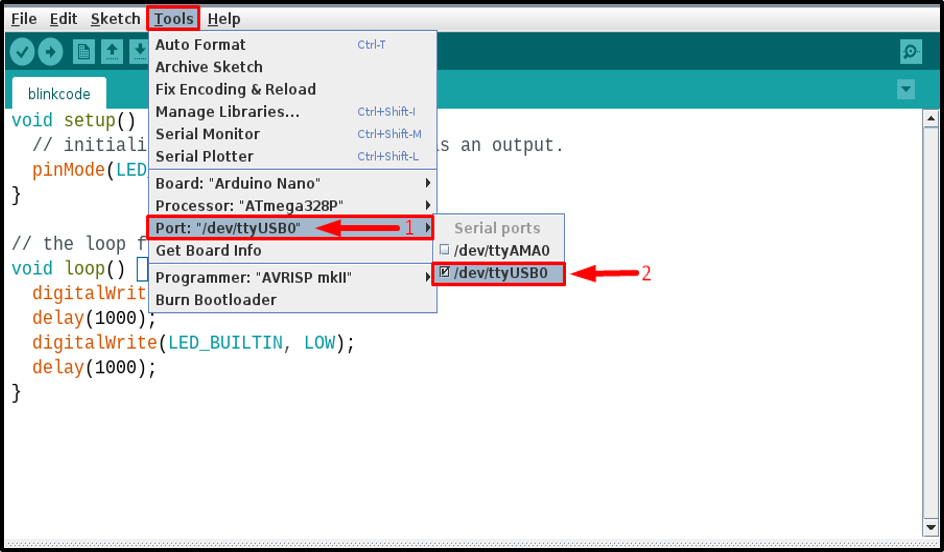
Once the hardware is connected successfully, go to the Tools tab, and click on the Port option and you will see a port named as /dev/ttyUSB0 or some other number after USB like /dev/tty/USB1 or /dev/tty/USB2 etc. Click to choose this port:
Then again from the Tools tab, select the Processor, as the processor of Arduino Nano is Old Bootloader, so click on it:

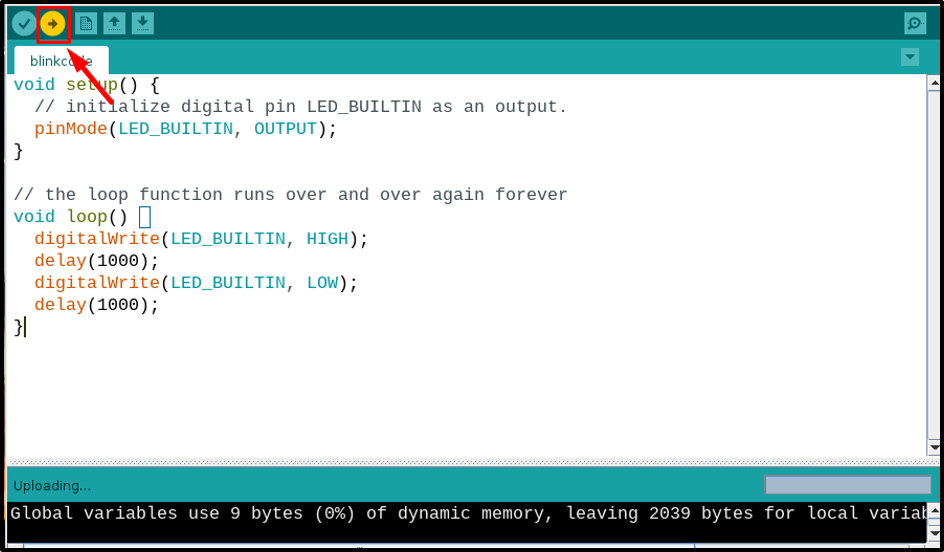
Step 8: Uploading Code
Then upload the code by clicking on the upload button:
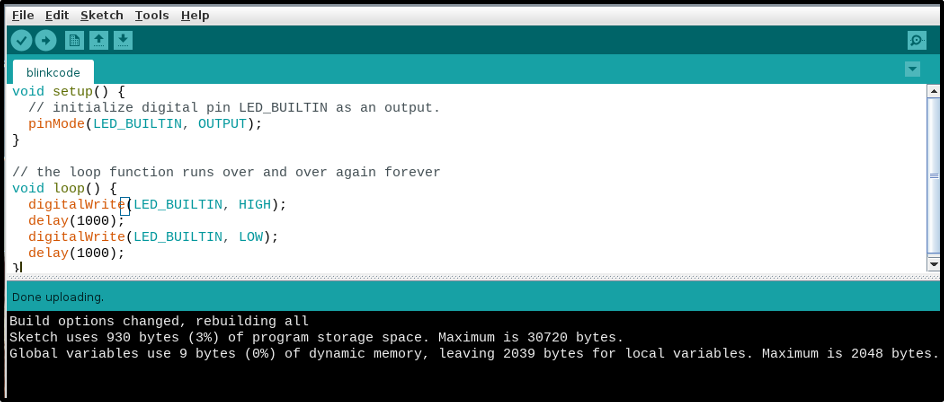
Ensure that the code is uploaded successfully and there are no errors:
Step 9: Verifying Through the Circuit
Once the code is uploaded, observe your nano board and it should work the way it is programmed. For instance, I have programmed mine to blink the built-in LED, and it is blinking the LED correctly:
Conclusion
Arduino Nano can be easily connected to Raspberry Pi using a mini-USB cable. You have to install Arduino IDE on Raspberry Pi from the repository to compile and upload a code into the board. Further, you must also install Java from the “apt install” command. After everything is done, go to the tools option in Arduino IDE, and select the specified nano board, processor, and port to upload the code. Once all the selections are made correctly, you can upload any code using the above-mentioned guidelines.