- Saved Storage costs as not all the computers/servers on your firm/lab will need to have a disk for installing an operating system.
- Efficient Storage utilization as the disks of the central server (in this case, your Synology NAS) can be shared among a lot of computers/servers.
- Easy to manage as the data of all the computers/servers will be stored in a central server (In this case, your Synology NAS).
- Easy to take backups of the data of your computers/servers as it will be stored in a central server (In this case, your Synology NAS).
- Easy to take Snapshots of the remote disk. So, you can easily recover a computer/server from any disaster in case there’s any.
In this article, I am going to show you how to configure your Synology NAS for diskless booting Fedora Workstation 36 on your computers from iSCSI SANvia iPXE.
Table of Contents
- Technical Terms
- Network Topology
- Setting Up a Static IP Address on your Synology NAS
- Preparing Synology NAS for PXE Booting with iPXE
- Creating the Necessary iPXE Configuration Files for Diskless Booting
- Creating an iSCSI LUN for Installing Fedora Workstation 36
- Installing Fedora Workstation 36 on iSCSI LUN
- Configuring iPXE to Boot from iSCSI Target
- Booting Fedora Workstation 36 from iSCSI Disks via iPXE
- Diskless Booting Other Linux Distributions
- Conclusion
- References
Technical Terms
SAN: The full form of SAN is Storage Area Network. It is the iSCSI server. In this case, it is your Synology NAS.
iSCSI disk/LUN: The logical disk that is shared on the network via iSCSI is called an iSCSI LUN (Logical Unit Number). In this article, I will also call it an iSCSI disk.
iSCSI Target: One or more iSCSI disks/LUNs will be mapped to an iSCSI target. You will be asked to login into an iSCSI target to access the iSCSI disks/LUNs mapped to it.
IQN: The full form of IQN is iSCSI Qualified Name. It is a unique identifier for the iSCSI target and iSCSI client.
For more in-depth information on iSCSI and how it works, read the article Configure iSCSI Storage Server on CentOS 8.
Network Topology
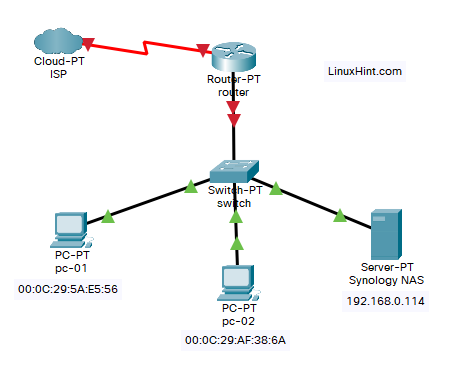
The network topology used in this article is shown below. Here, I have a Synology NAS and two diskless computers pc-01 and pc-02 connected to my home network. pc-01 has the MAC address 00:0c:29:5a:e5:56 and pc-02 has the MAC address 00:0c:29:af:38:6a. I will show you how to configure your Synology NAS and the iPXE boot server in a way that the computers pc-01 and pc-02 will automatically boot from different iSCSI disks/LUNs depending on their MAC addresses.
Note that your network topology will be different. So, don’t forget to make the necessary adjustments in the succeeding sections of this article.
Setting Up a Static IP Address on your Synology NAS
You will have problems with PXE booting with iPXE and diskless booting Fedora Workstation 36 on your computers if the IP address of your Synology NAS changes frequently.
Set up a static IP address on your Synology NAS before you set up diskless booting from iSCSI SAN with iPXE. If you need any assistance with setting a static IP address on your Synology NAS, read the article How to Assign a Static IP Address to a Synology NAS?.
Preparing Synology NAS for PXE Booting with iPXE
Prepare your Synology NAS for PXE booting with iPXE.
To prepare your Synology NAS for PXE booting with iPXE, read the article How to Configure Synology NAS as PXE Boot Server for Netbooting Linux Installation Images with iPXE (BIOS and UEFI version).
You should see the following files and folder in the pxeboot shared folder of your Synology NAS once your Synology NAS is configured for PXE booting with iPXE.

In the config/ folder, you will see an iPXE boot configuration file boot.ipxe as well.
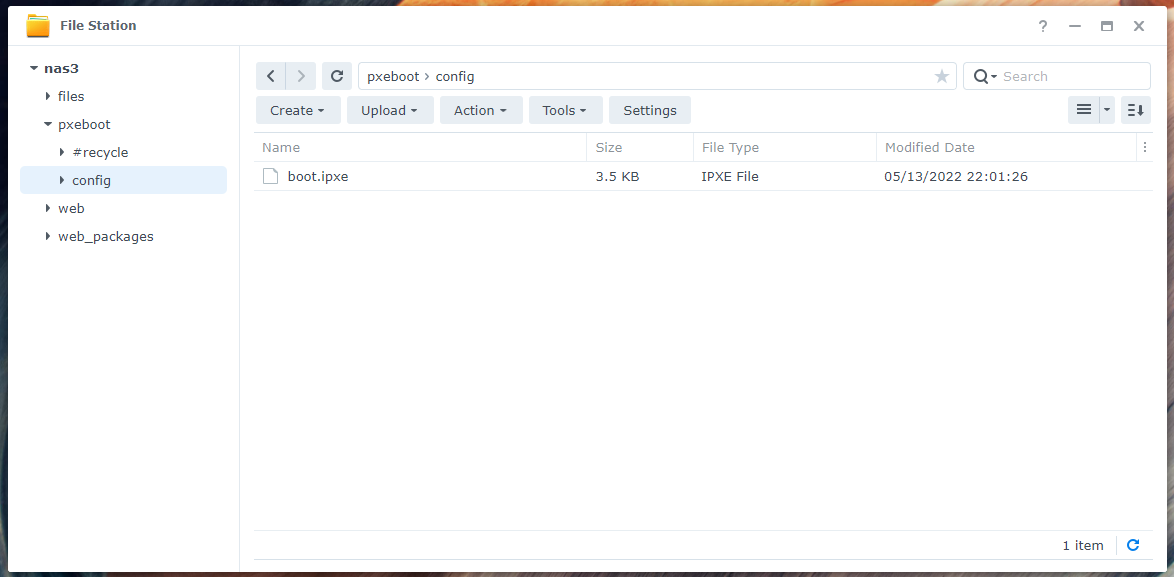
Make sure that you have all the necessary files and folders in the pxeboot shared folder before going any further. Don’t forget to read and follow the article How to Configure Synology NAS as PXE Boot Server for Netbooting Linux Installation Images with iPXE (BIOS and UEFI version) if you’re having any difficulties setting up iPXE on your Synology NAS.
Creating the Necessary iPXE Configuration Files for Diskless Booting
I will configure iPXE in a way that a different boot configuration file is used for each computer on the network depending on the MAC address of the computers. This way, you can configure PXE booting for each of the computers on the network separately. You can also configure multiple boot options for each of the computers separately. This gives you a lot of flexibility.
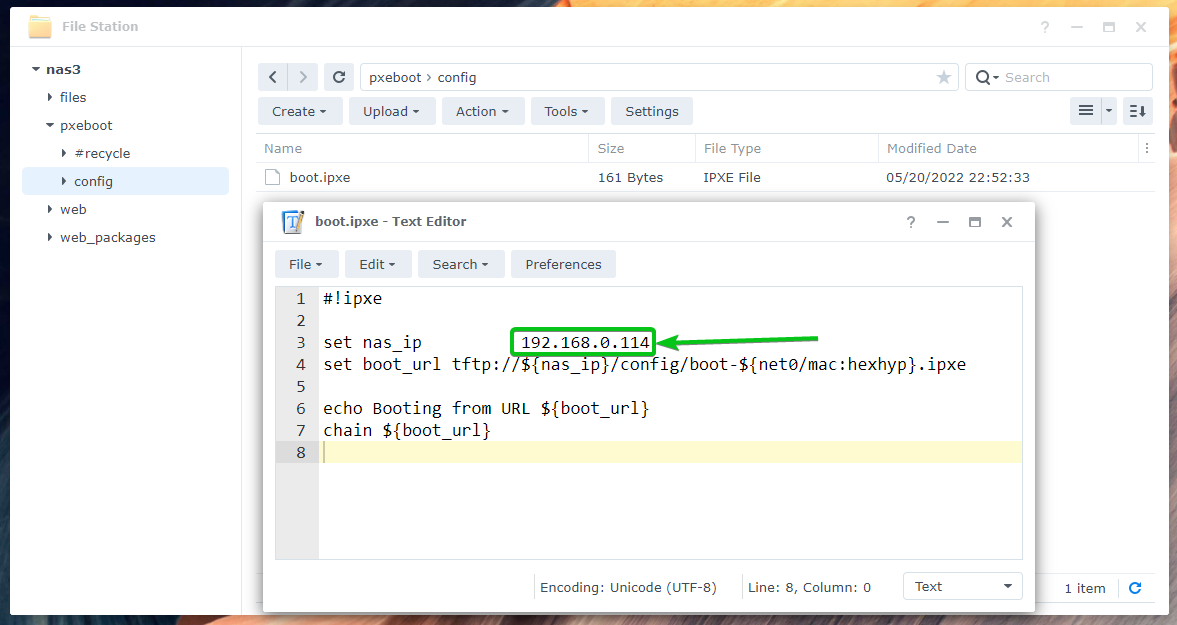
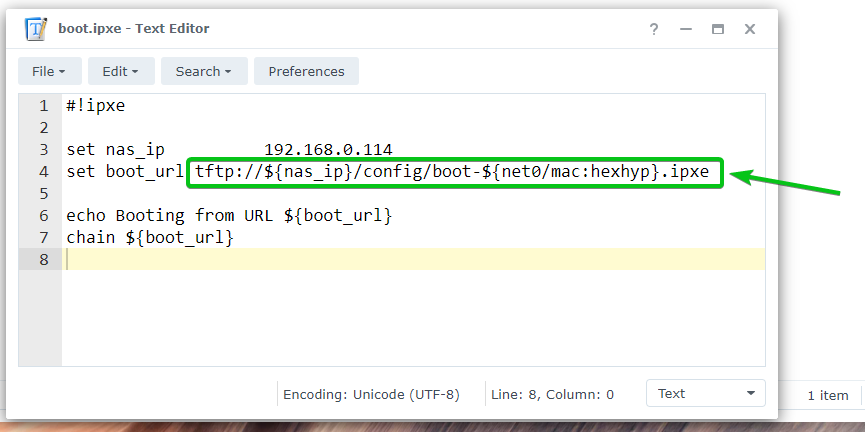
Open the [pxeboot]/config/boot.ipxe boot configuration file with a text editor and type in the following lines of codes:
set nas_ip 192.168.0.114
set boot_url tftp://${nas_ip}/config/boot-${net0/mac:hexhyp}.ipxe
echo Booting from URL ${boot_url}
chain ${boot_url}
Here, 192.168.0.114 is the IP address of my Synology NAS. Make sure to replace it with yours from now on. If you need any assistance in finding the IP address of your Synology NAS, read the article How Do I Find the IP Address of My Synology NAS?.
Once you’re done, save the boot.ipxe configuration file.
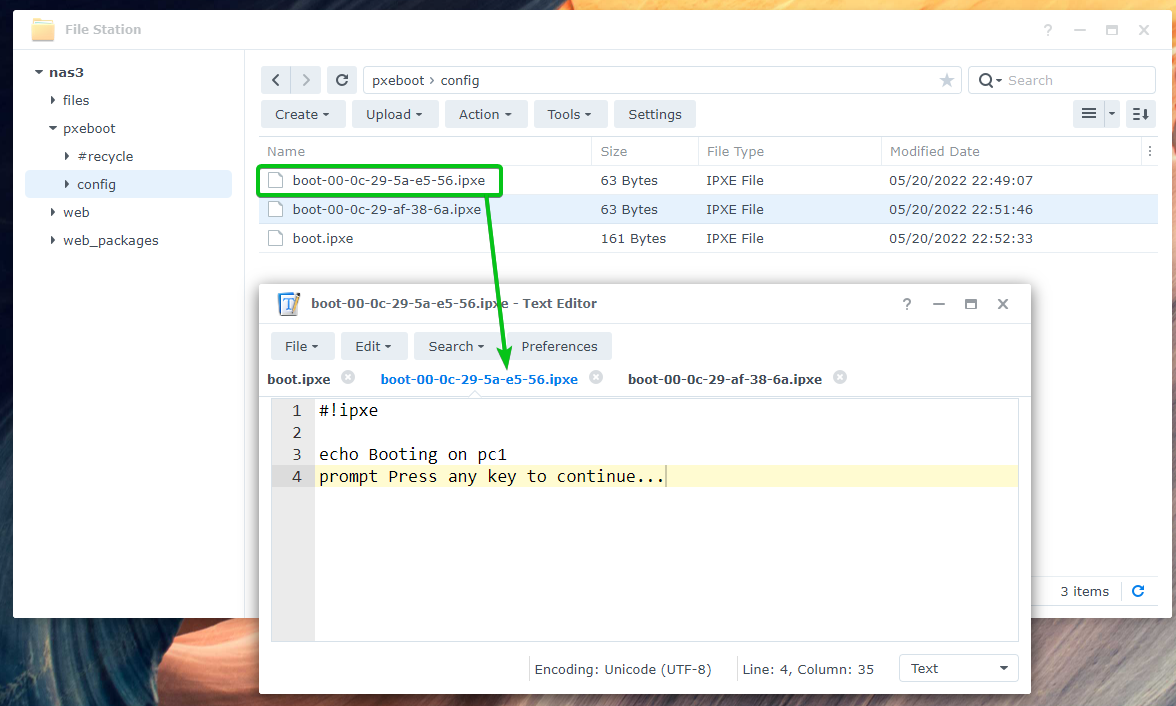
Here, iPXE will look for boot configuration files boot-<hyphened-mac-addr>.ipxe in the config/ folder of the pxeboot shared folder. <hyphened-mac-addr> is the MAC address of the computer being booted via iPXE. iPXE will run the boot configuration file boot-00-0c-29-5a-e5-56.ipxe if the computer pc-01 with the MAC address 00:0c:29:5a:e5:56 boots via iPXE. Notice how the colons (:) of the MAC address are replaced with hyphens (–).
Now, create a new boot configuration file boot-00-0c-29-5a-e5-56.ipxe for the computer pc-01 with the MAC address 00:0c:29:5a:e5:56 and type in the following lines in that file.
Once you’re done, save the boot-00-0c-29-5a-e5-56.ipxe file.
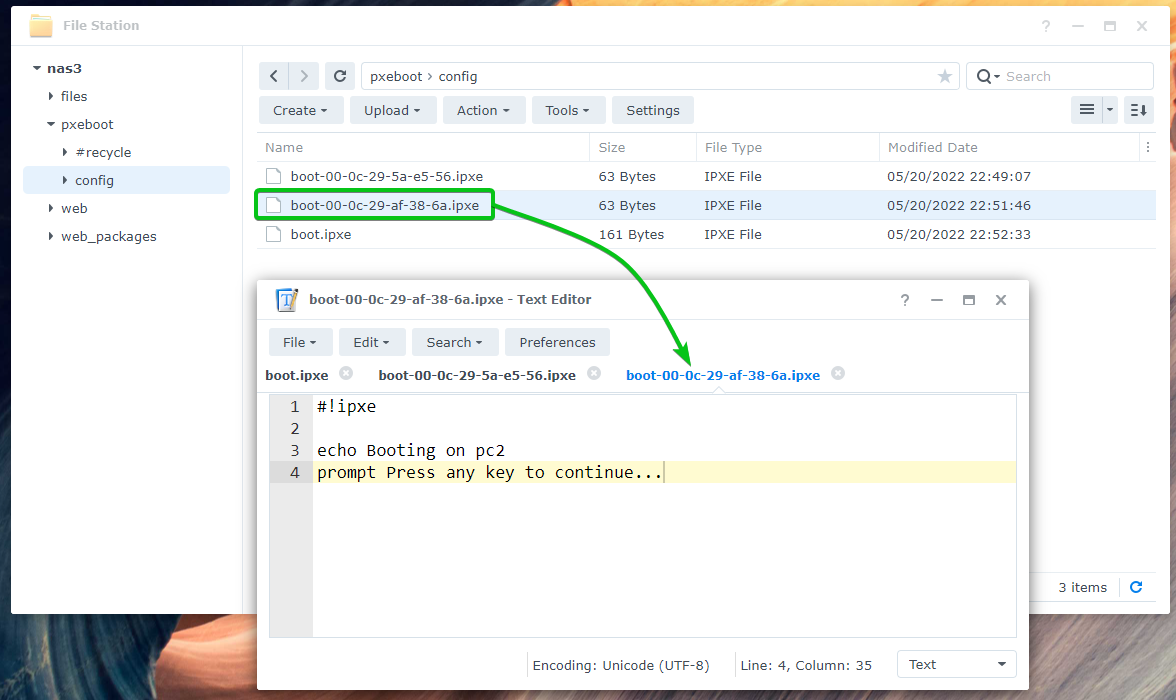
Create another boot configuration file boot-00-0c-29-af-38-6a.ipxe for the computer pc-02 with the MAC address 00:0c:29:af:38:6a and type in the following lines in that file.
Once you’re done, save the boot-00-0c-29-af-38-6a.ipxe file.
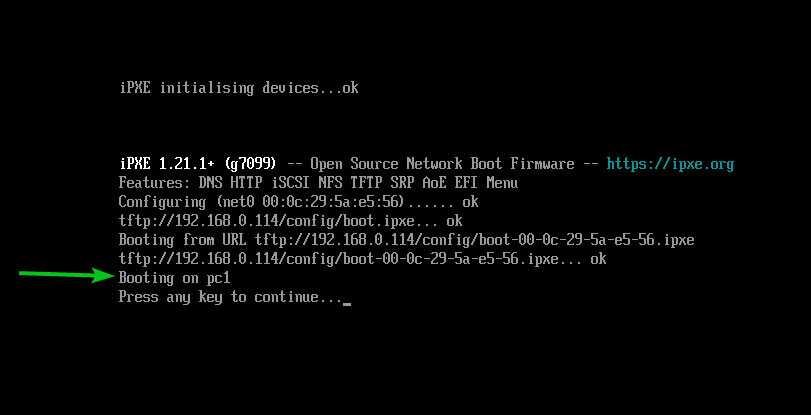
Once you’ve created the required boot configuration files, you can PXE boot the computers on your network.
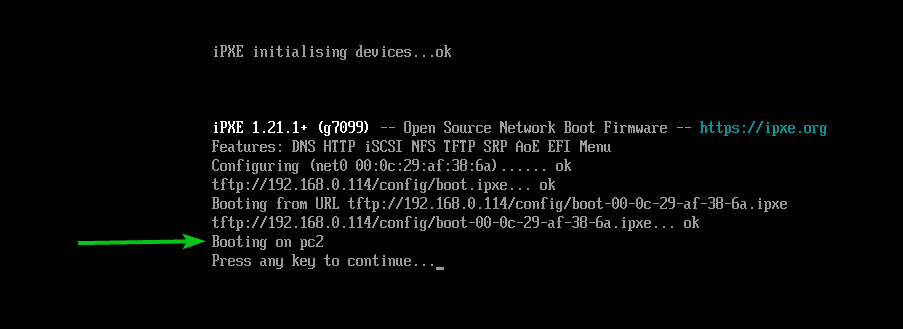
In this case, it will show the message Booting on pc1 as marked in the screenshot below if I PXE boot the computer pc-01. It means that PXE boot on pc-01 works. iPXE reads the configuration file boot-00-0c-29-5a-e5-56.ipxe when PXE booted on pc-01.
In the same way, if I PXE boot the computer pc-02, it will show the message Booting on pc2 as marked in the screenshot below. It means that PXE boot on pc-02 works and iPXE reads the configuration file boot-00-0c-29-af-38-6a.ipxe when PXE booted on pc-02.
Creating an iSCSI LUN for Installing Fedora Workstation 36
In this section, I am going to show you how to create an iSCSI target and LUN on your Synology NAS. Also on how to map the iSCSI LUN to the iSCSI target so that you can install Fedora Workstation 36 on it and boot Fedora Workstation 36 diskless on your computer/server with iPXE. If you want to learn more about creating an iSCSI target on your Synology NAS, read the article How Do You Make an iSCSI Target in Synology?.
First, open the SAN Manager app from the Application Menu of the DSM web interface of your Synology NAS.
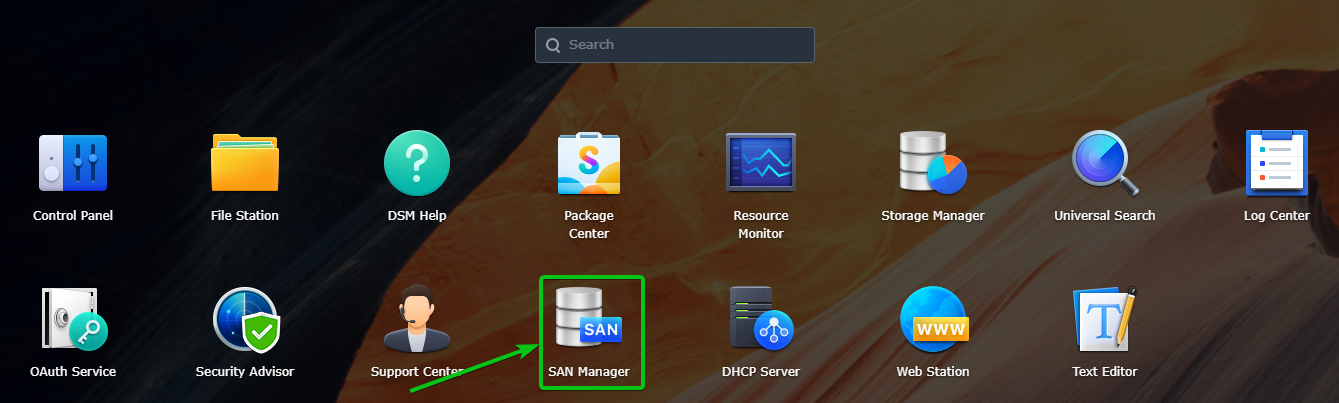
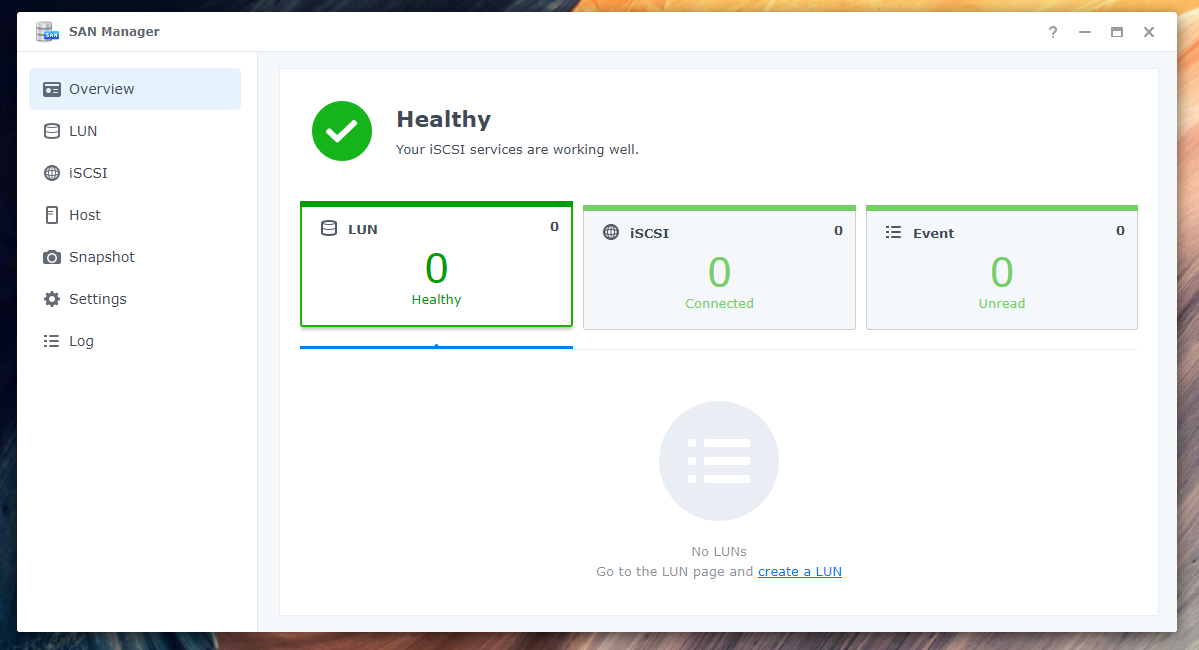
The SAN Manager app should be opened.
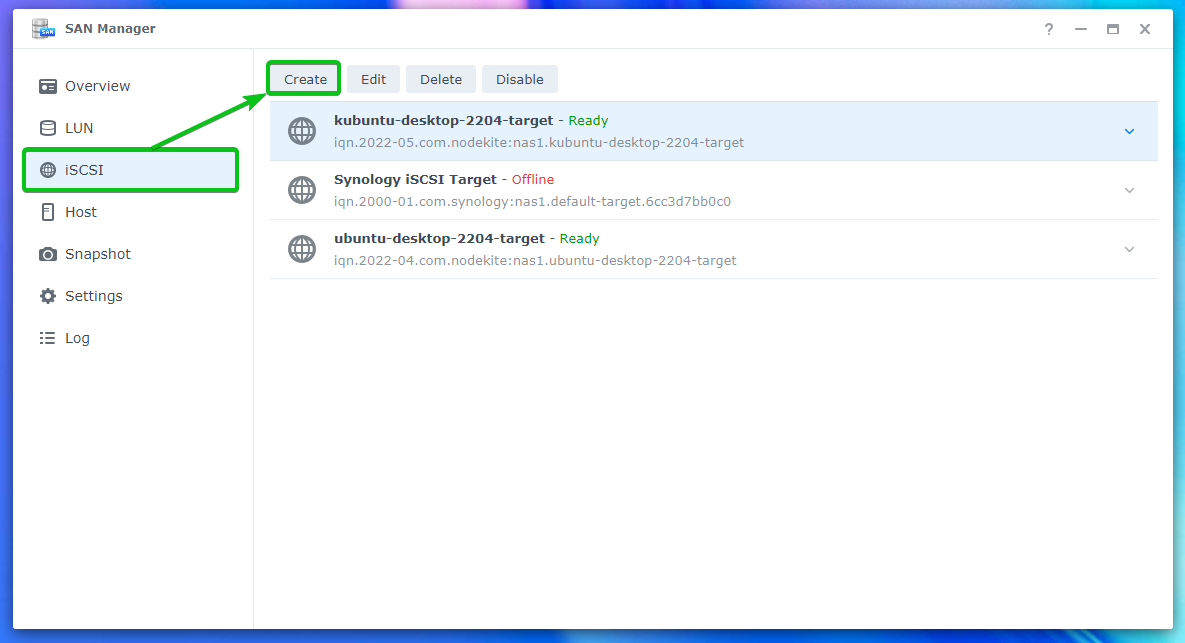
Navigate to the iSCSI section and click on the Add button to create a new iSCSI target.
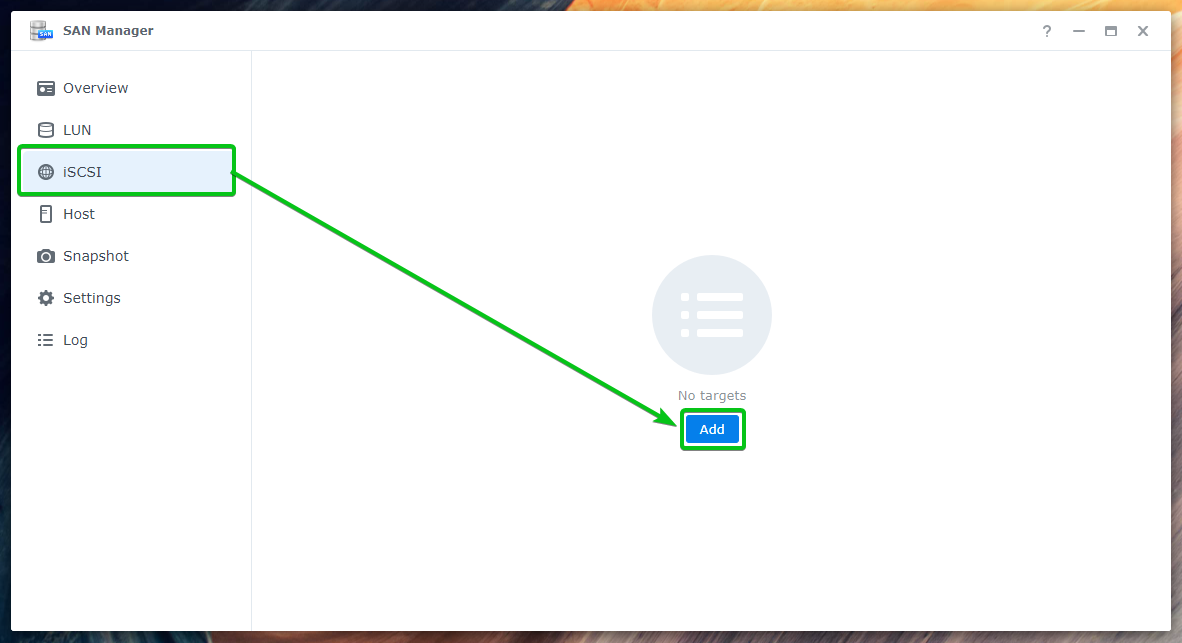
You will have to click on the Create button instead to create a new iSCSI target as marked in the screenshot below if you have created some iSCSI targets already.
iSCSI target creation wizard should be displayed. You can create a new iSCSI target from here. For more information on the available options of the iSCSI target creation wizard, read the article How Do You Make an iSCSI Target in Synology?.
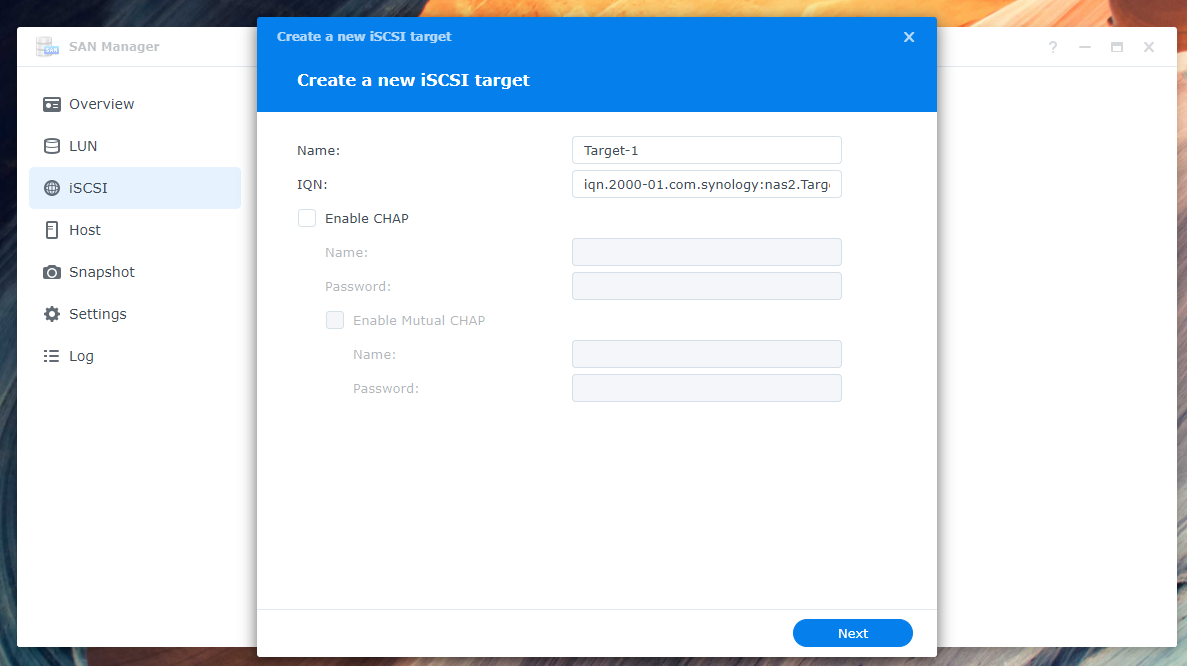
I am going to show you how to create an iSCSI target for diskless booting the computer pc-01 only. You can create an iSCSI target for the computer pc-02 in the same way.
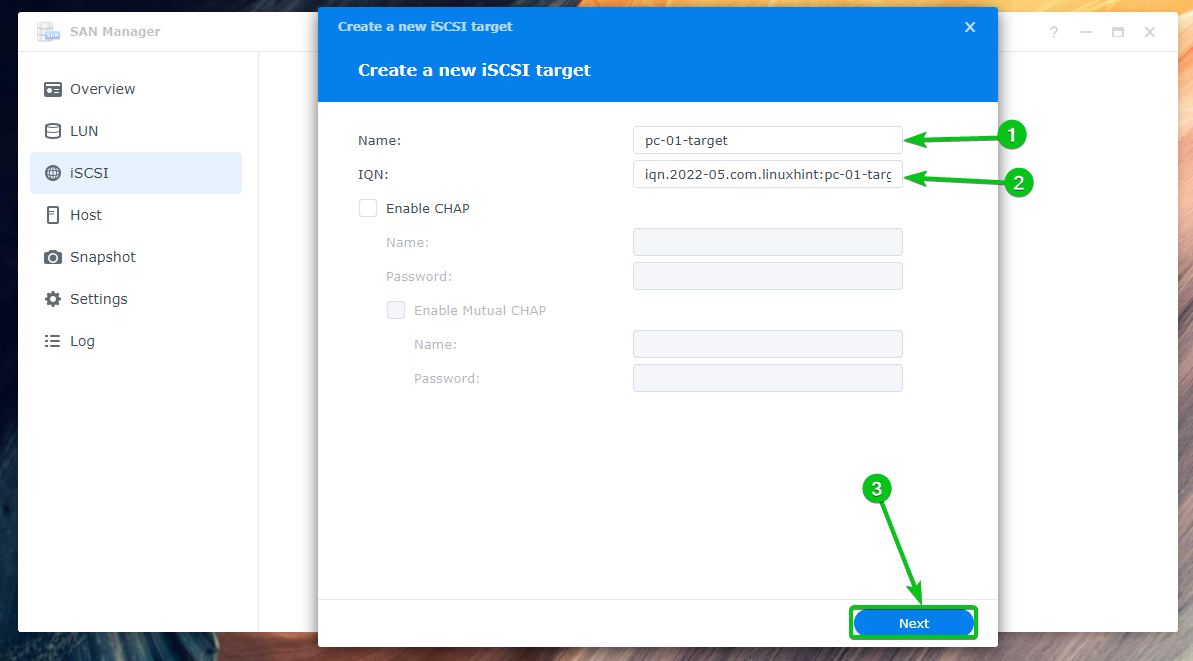
Type in pc-01-target as the iSCSI target name1, iqn.2022-05.com.linuxhint:pc-01-target as the IQN2, and click on Next3.
NOTE that IQN is a unique identifier for the iSCSI targets of your Synology NAS. The IQN follows a specific format. To learn more about IQN and it’s format, read the Creating an iSCSI Target section of the article How Do You Make an iSCSI Target in Synology?.
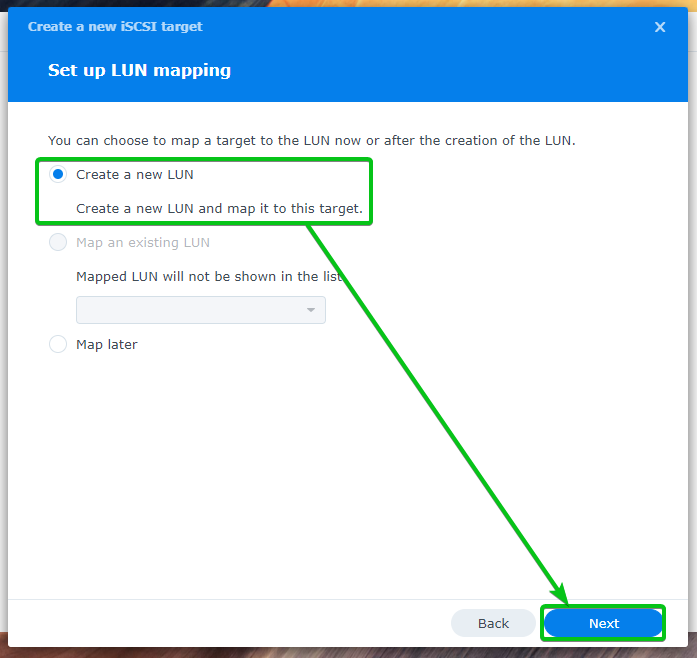
Select Create a new LUN and click on Next.
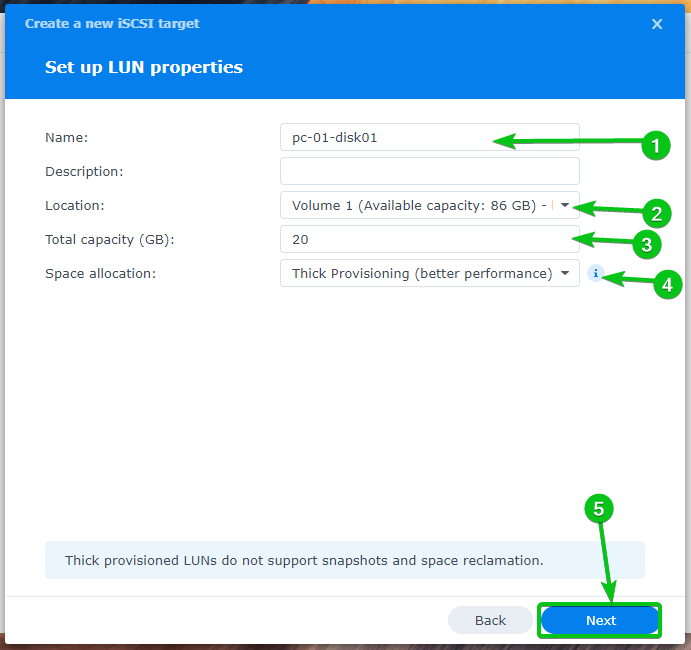
Type in pc-01-disk01 as the name for the iSCSI LUN1. Select a volume where you want to store the iSCSI LUN data from the Location dropdown menu2. Type in the amount of disk space (in GB/gigabyte unit) you want to allocate for the LUN3. Then, select a space allocation method from the Space allocation dropdown menu4, and click on Next5.
For more information on Thin Provisioning and Thick Provisioning, read the Creating a LUN section of the article How Do You Make an iSCSI Target in Synology?.
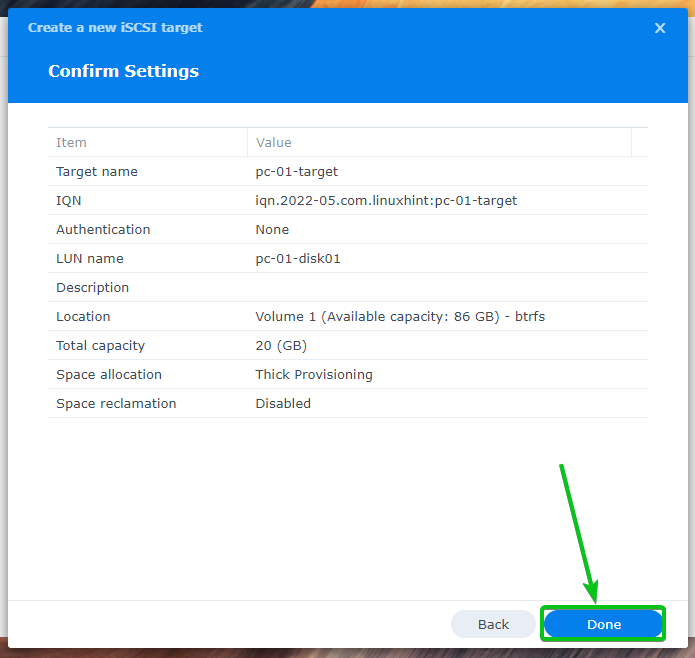
A summary of the settings used to create a new LUN and iSCSI target will be displayed.
Click on Done to create a new LUN and iSCSI target with these settings.
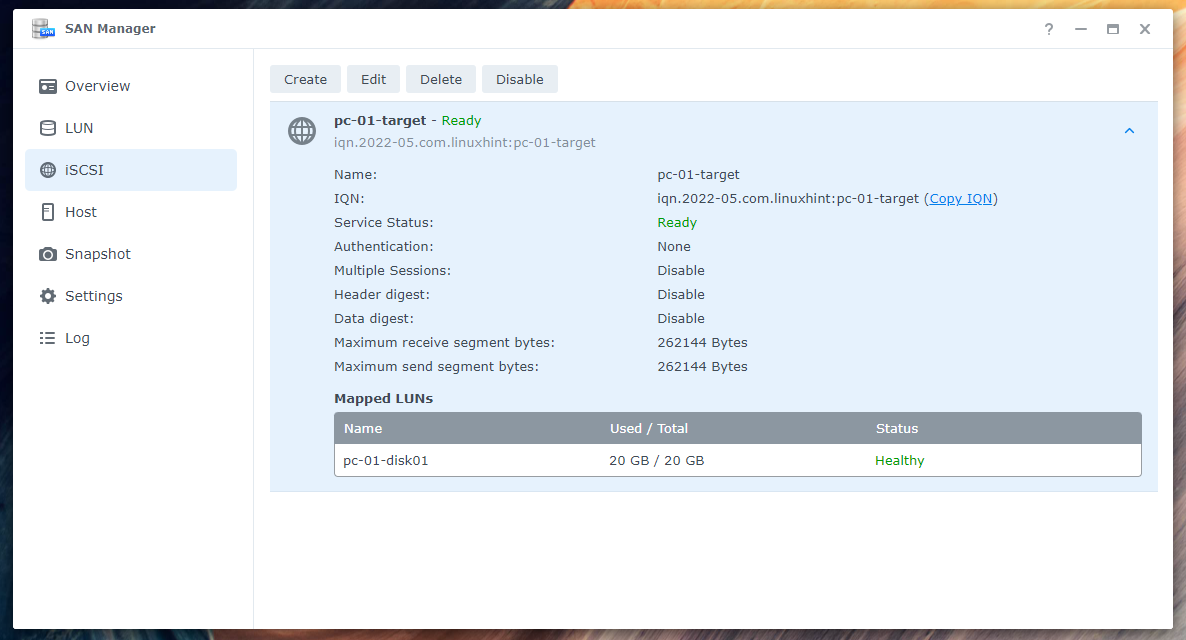
A new iSCSI target pc-01-target should be created. A new LUN pc-01-disk01 should be created and mapped to the iSCSI target pc-01-target as well.
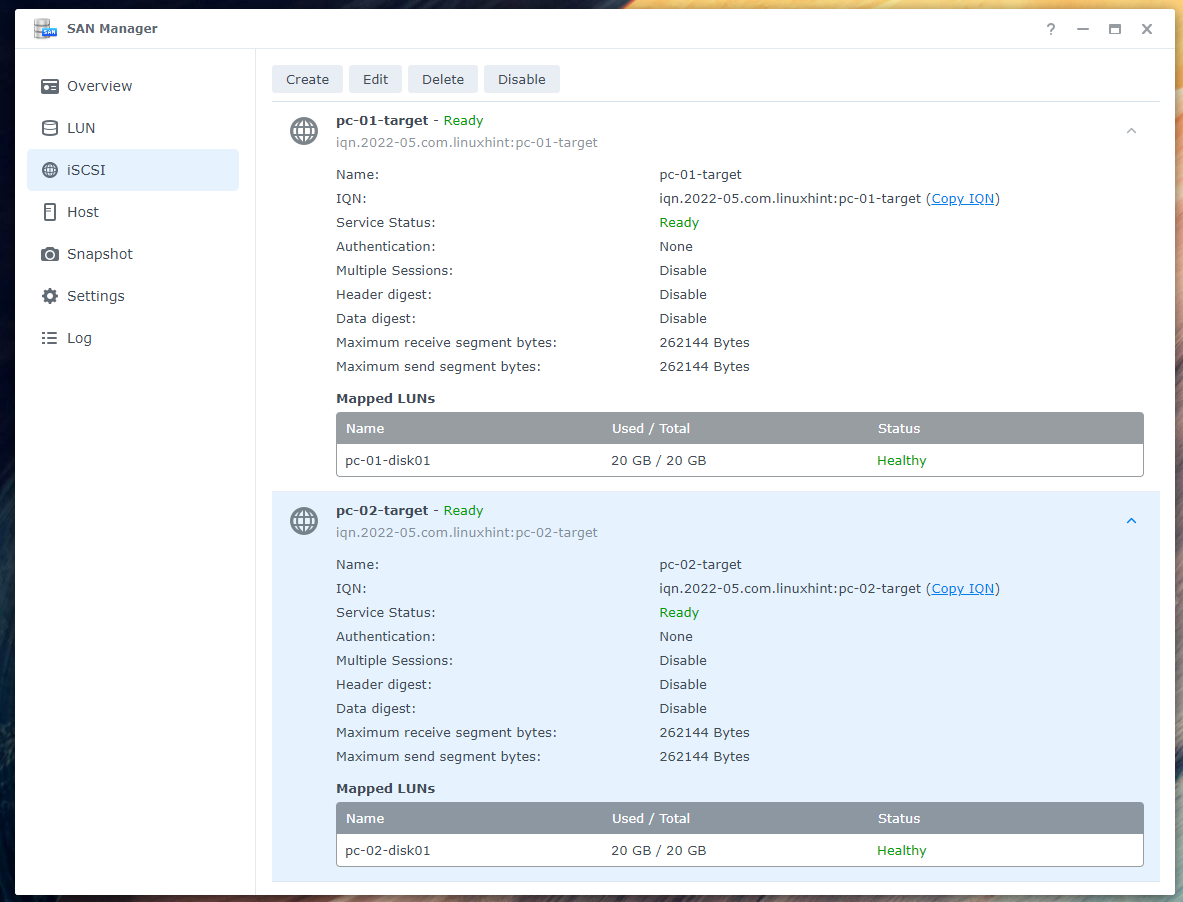
In the same way, create a new iSCSI target pc-02-target for the computer pc-02. Create a new LUN pc-02-disk01 and map it to the iSCSI target pc-02-target.
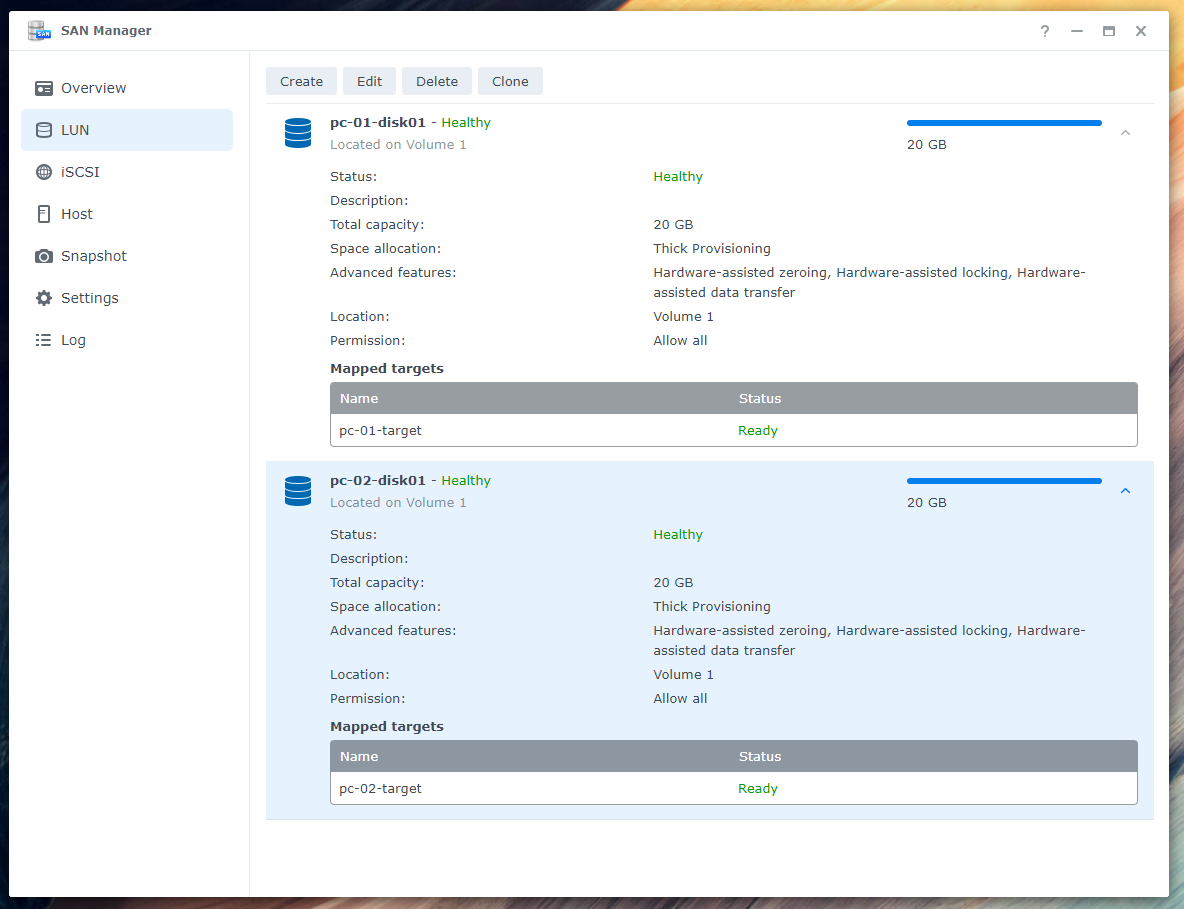
You will find a lot of information about all the LUNs that you’ve created in the LUN section of the SAN Manager app as you can see in the screenshot below.
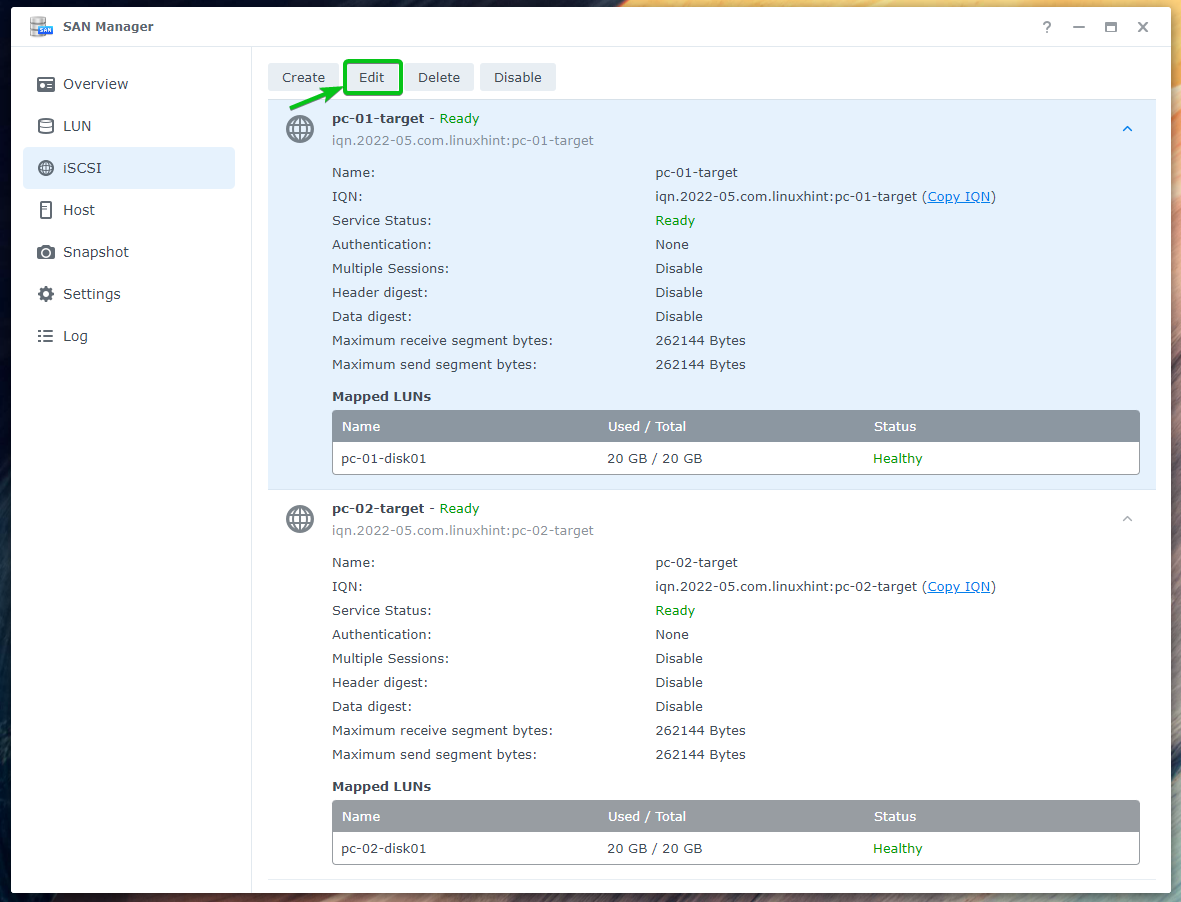
You will have to enable multiple sessions to the iSCSI targets that you’ve created for the computers pc-01 and pc-02 for iSCSI diskless booting of Fedora Workstation 36 to work perfectly.
Select it and click on Edit to enable multiple sessions for the iSCSI target pc-01-target.
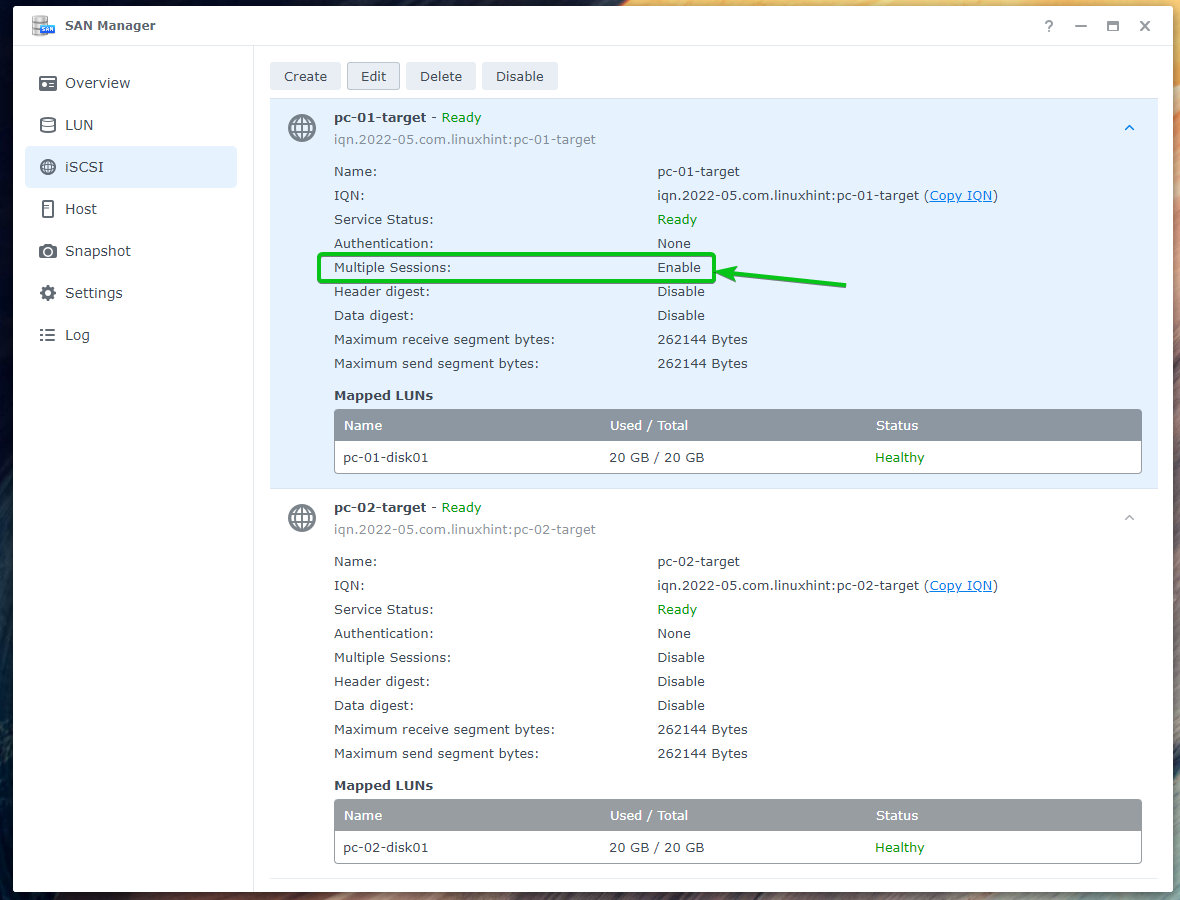
Check the Allow multiple sessions from one or more iSCSI initiators checkbox from the Advanced tab and click on Save.

Multiple sessions should be enabled for the iSCSI target pc-01-target as you can see in the screenshot below.
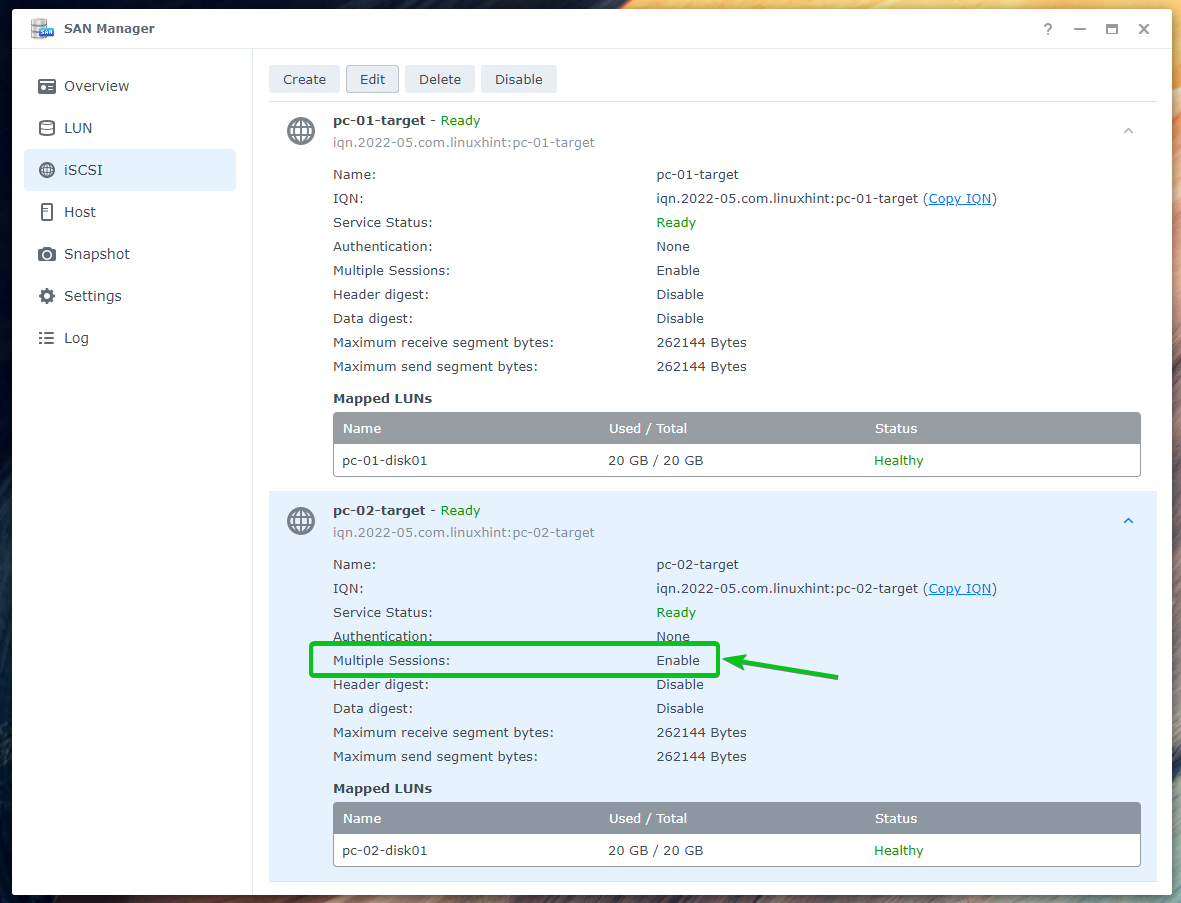
In the same way, enable Multiple sessions for the iSCSI target pc-02-target.
Installing Fedora Workstation 36 on iSCSI LUN
You will have to create a bootable USB thumb drive of Fedora Workstation 36 using the official ISO image. Boot Fedora Workstation 36 on your computer from the USB bootable thumb drive in Live mode to install Fedora Workstation 36 on the iSCSI LUNs that you’ve created in the previous section of this article.
If you need any assistance in creating a bootable USB thumb drive of Fedora Workstation 36 from the official Fedora Workstation 36 ISO image, read the article How to Install Fedora Workstation 35 from USB.
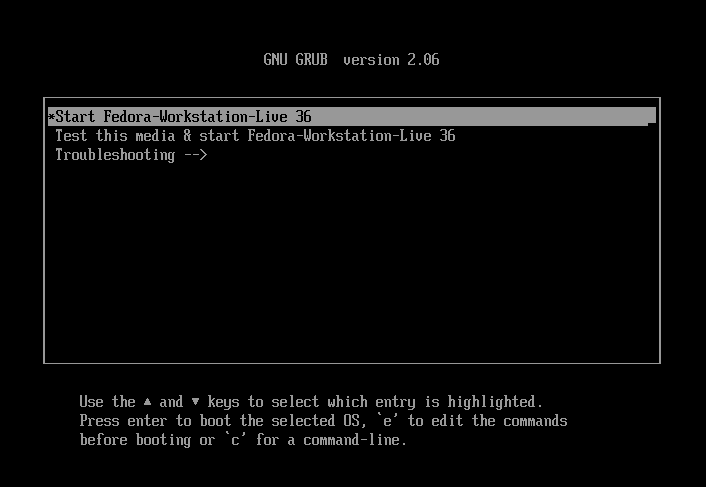
You will see the following window once you boot from the bootable USB thumb drive of Fedora Workstation 36. Select Start Fedora-Workstation-Live 36 and press E.
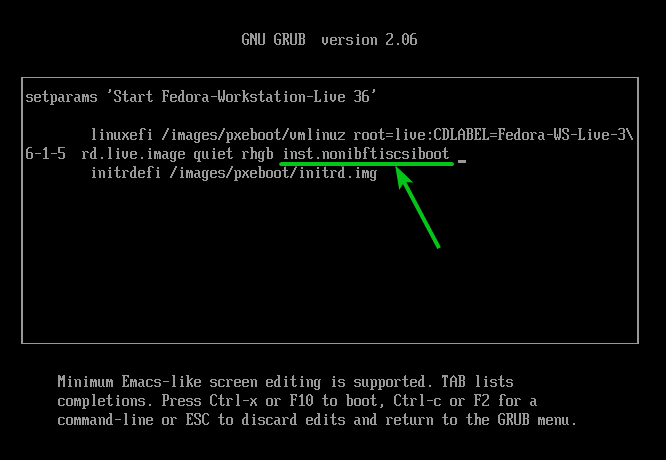
Type in inst.nonibftiscsiboot at the end of the linuxefi line as marked in the screenshot below and press F10 to boot.
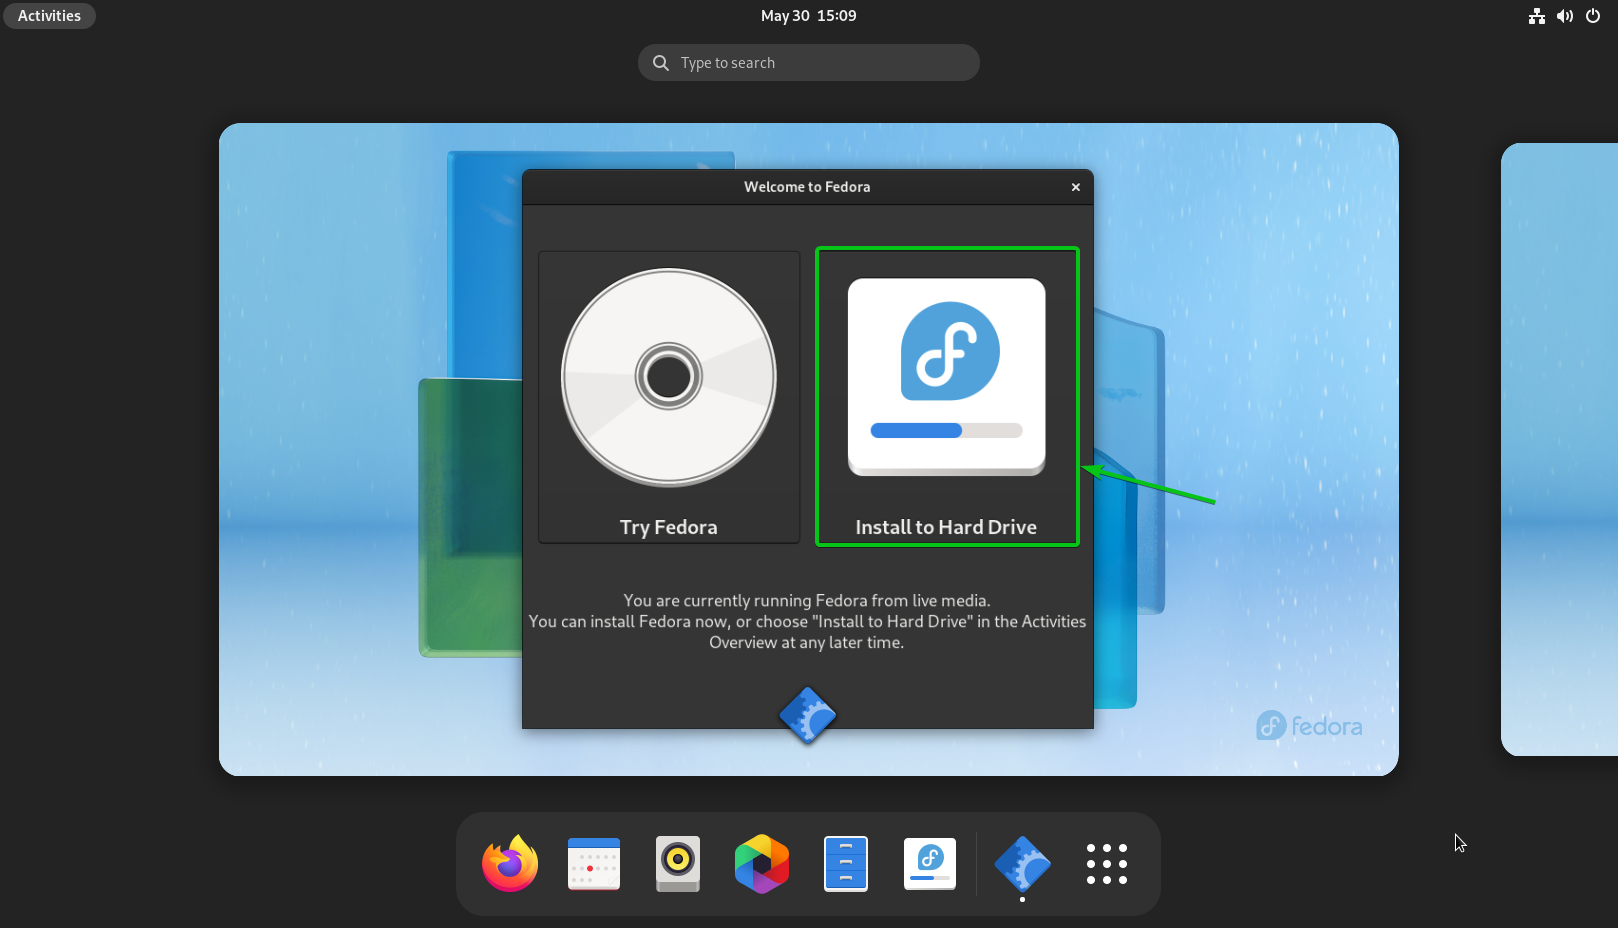
Fedora Workstation 36 should boot in Live mode. Click on Install to Hard Drive to install Fedora Workstation 36 to an iSCSI disk.
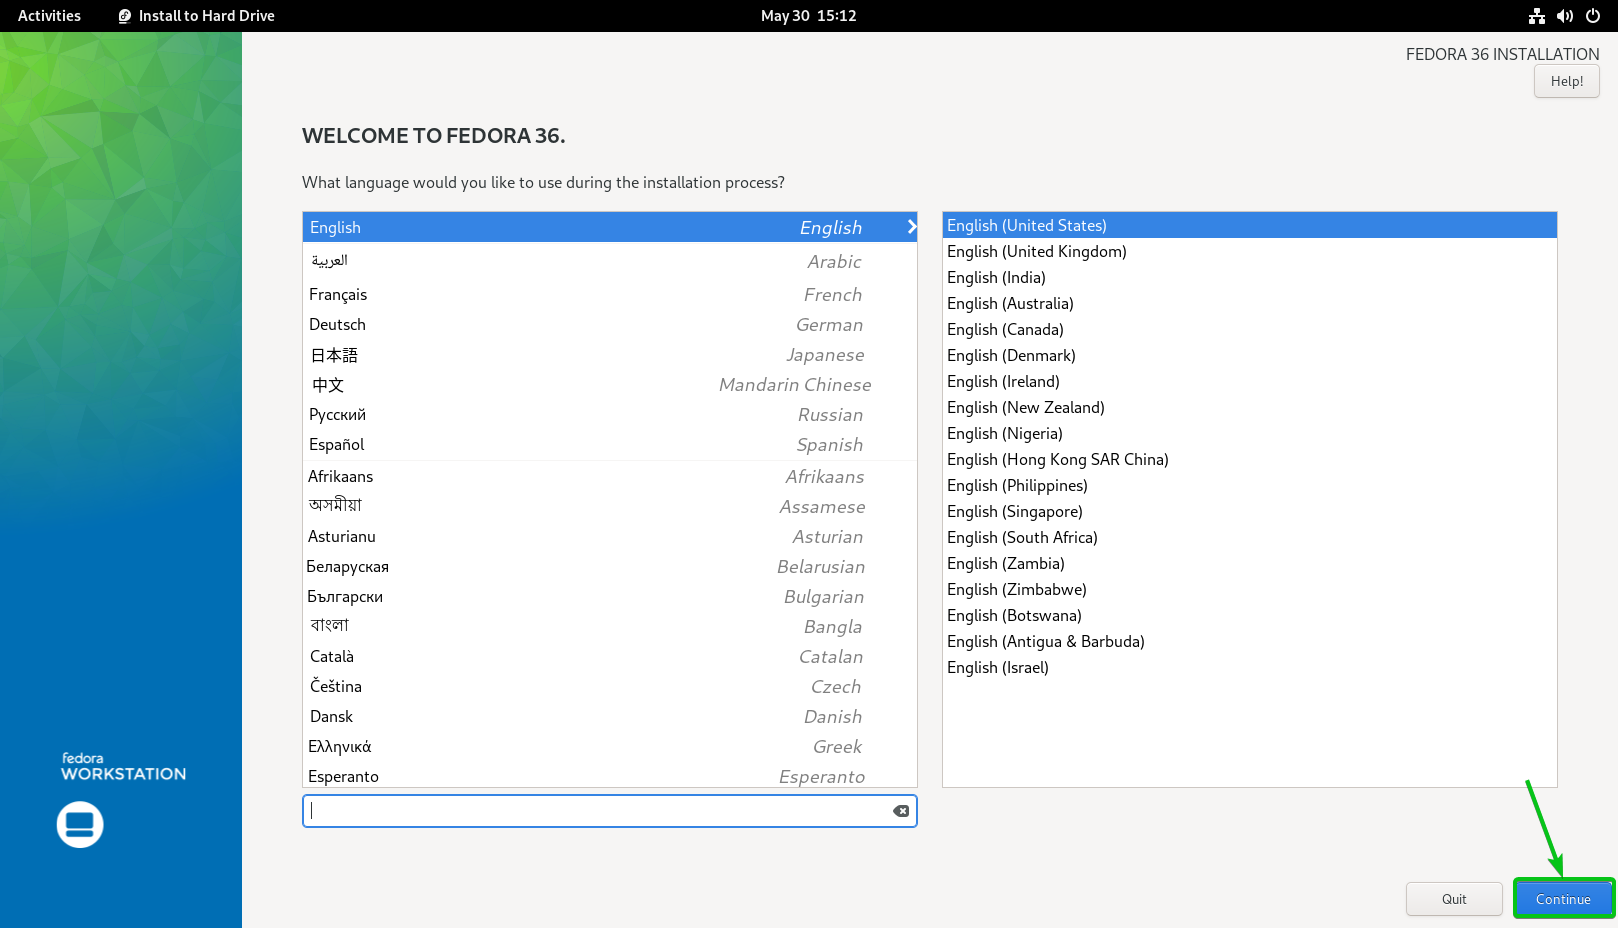
Fedora Workstation 36 installer should be displayed.

Select your language and click on Continue.
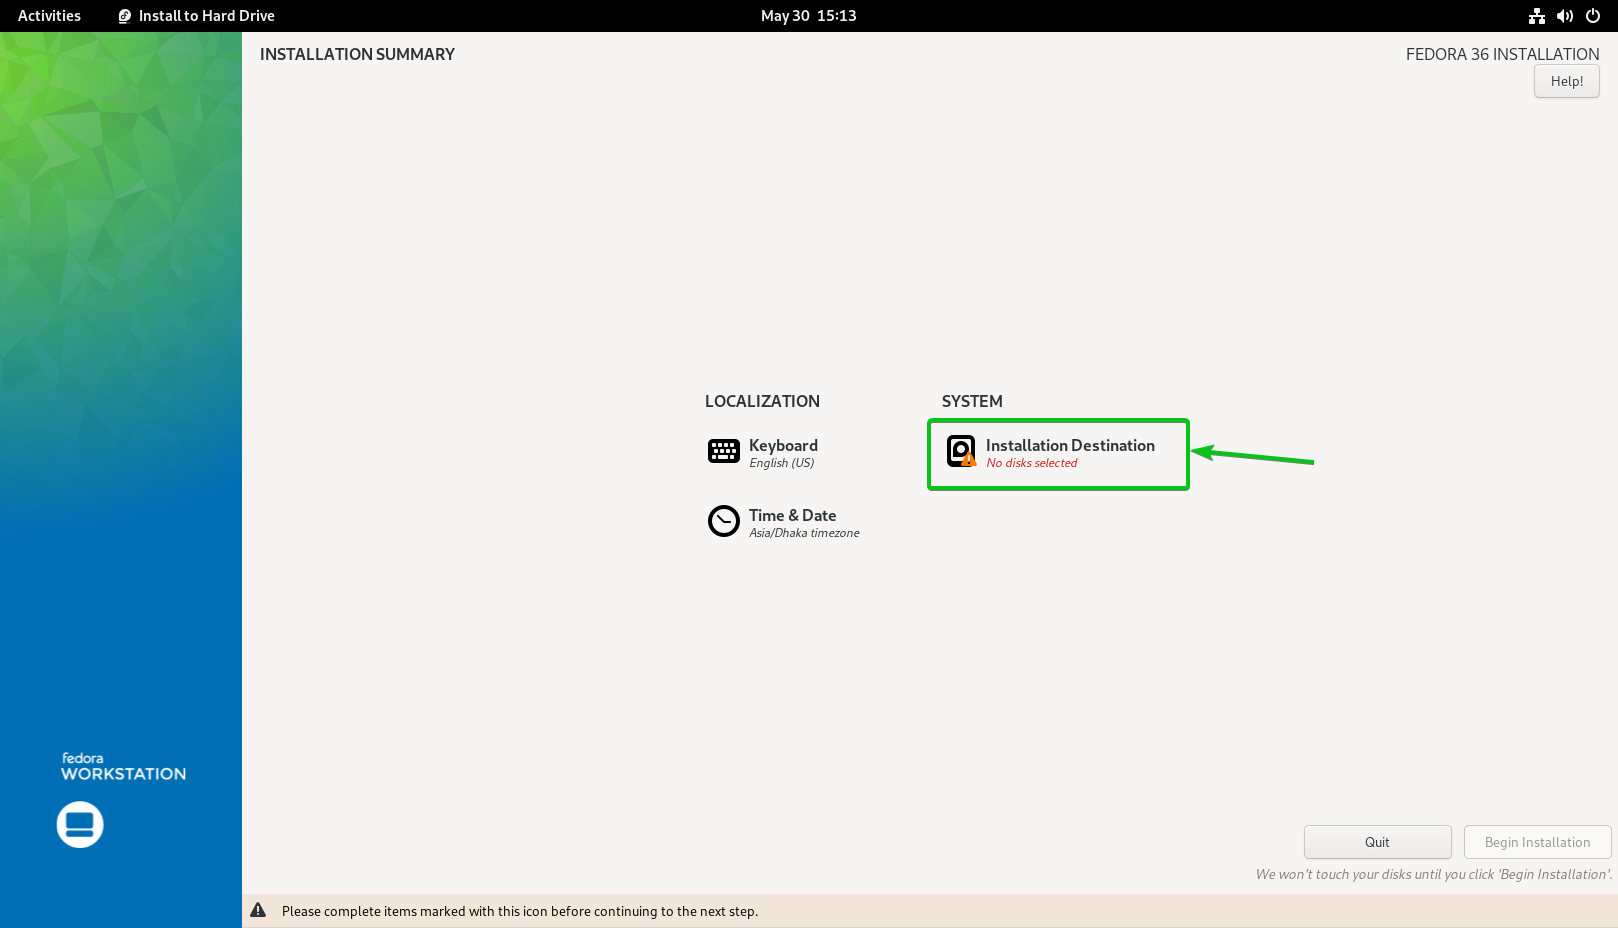
Click on Installation Destination.
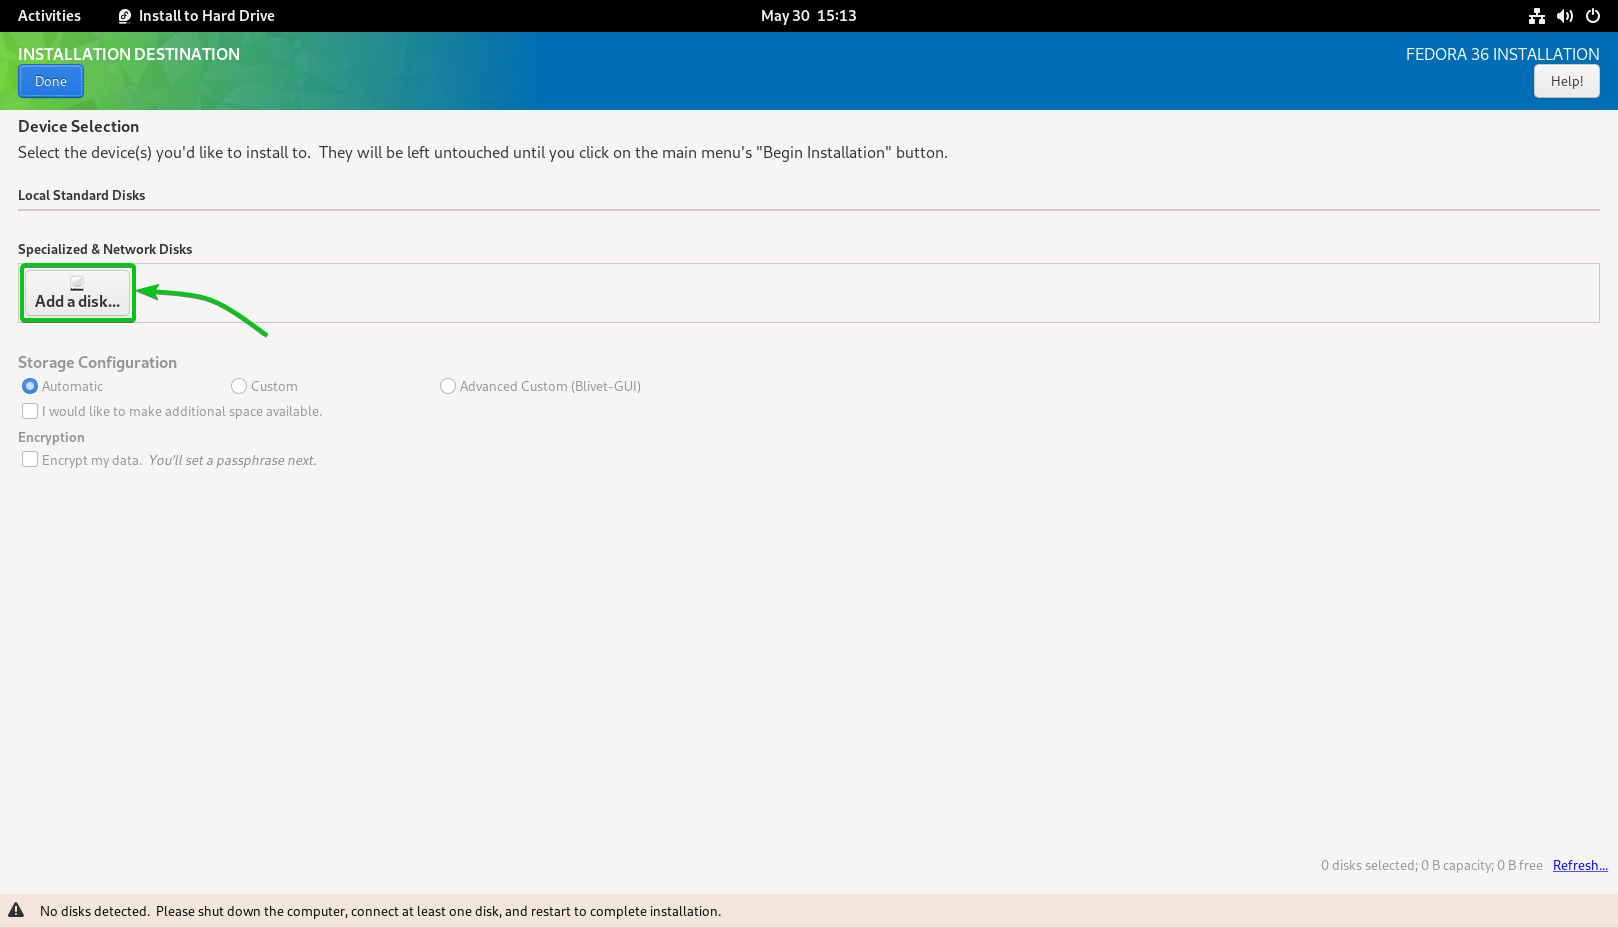
Click on Add a disk… to add an iSCSI disk.
Click on Add iSCSI Target…

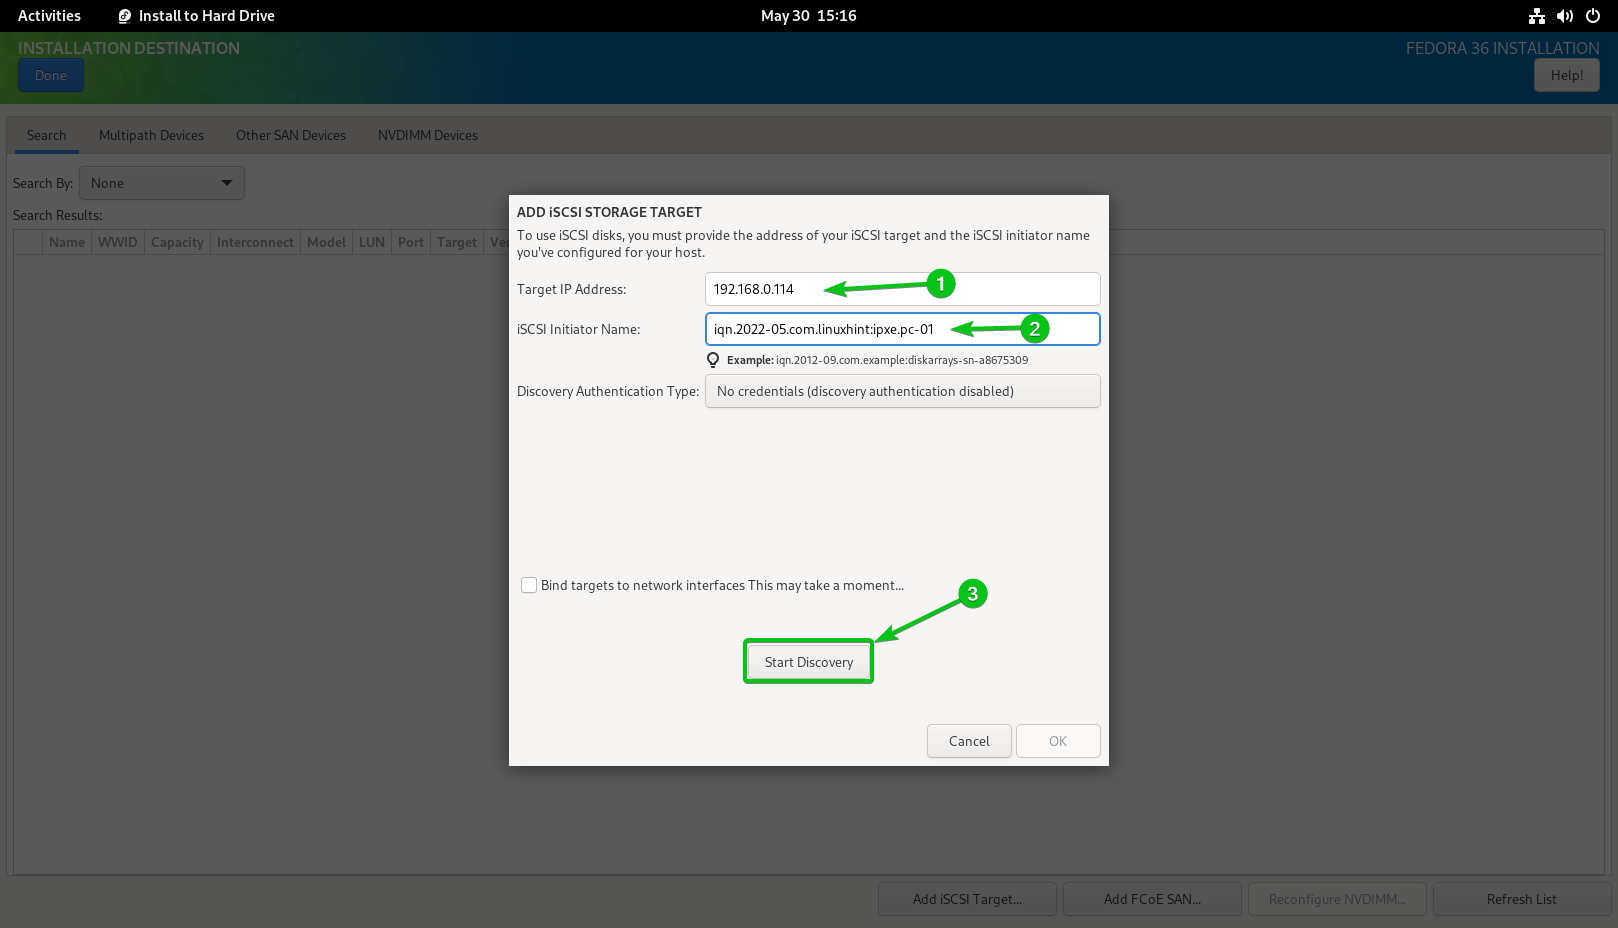
Type in the IP address of your Synology NAS in the Target IP Address section1.
Type in a unique IQN for the iSCSI client/initiator in the iSCSI Initiator Name section2. In this article, I will use the IQN iqn.2022-05.com.linuxhint:ipxe-pc-01 as the client/initiator IQN. If you need an in-depth explanation of the IQN format, read the iSCSI Target and Initiator Naming Conventions section of the article Configure iSCSI Storage Server on CentOS 8.
Once you’re done, click on Start Discovery3.
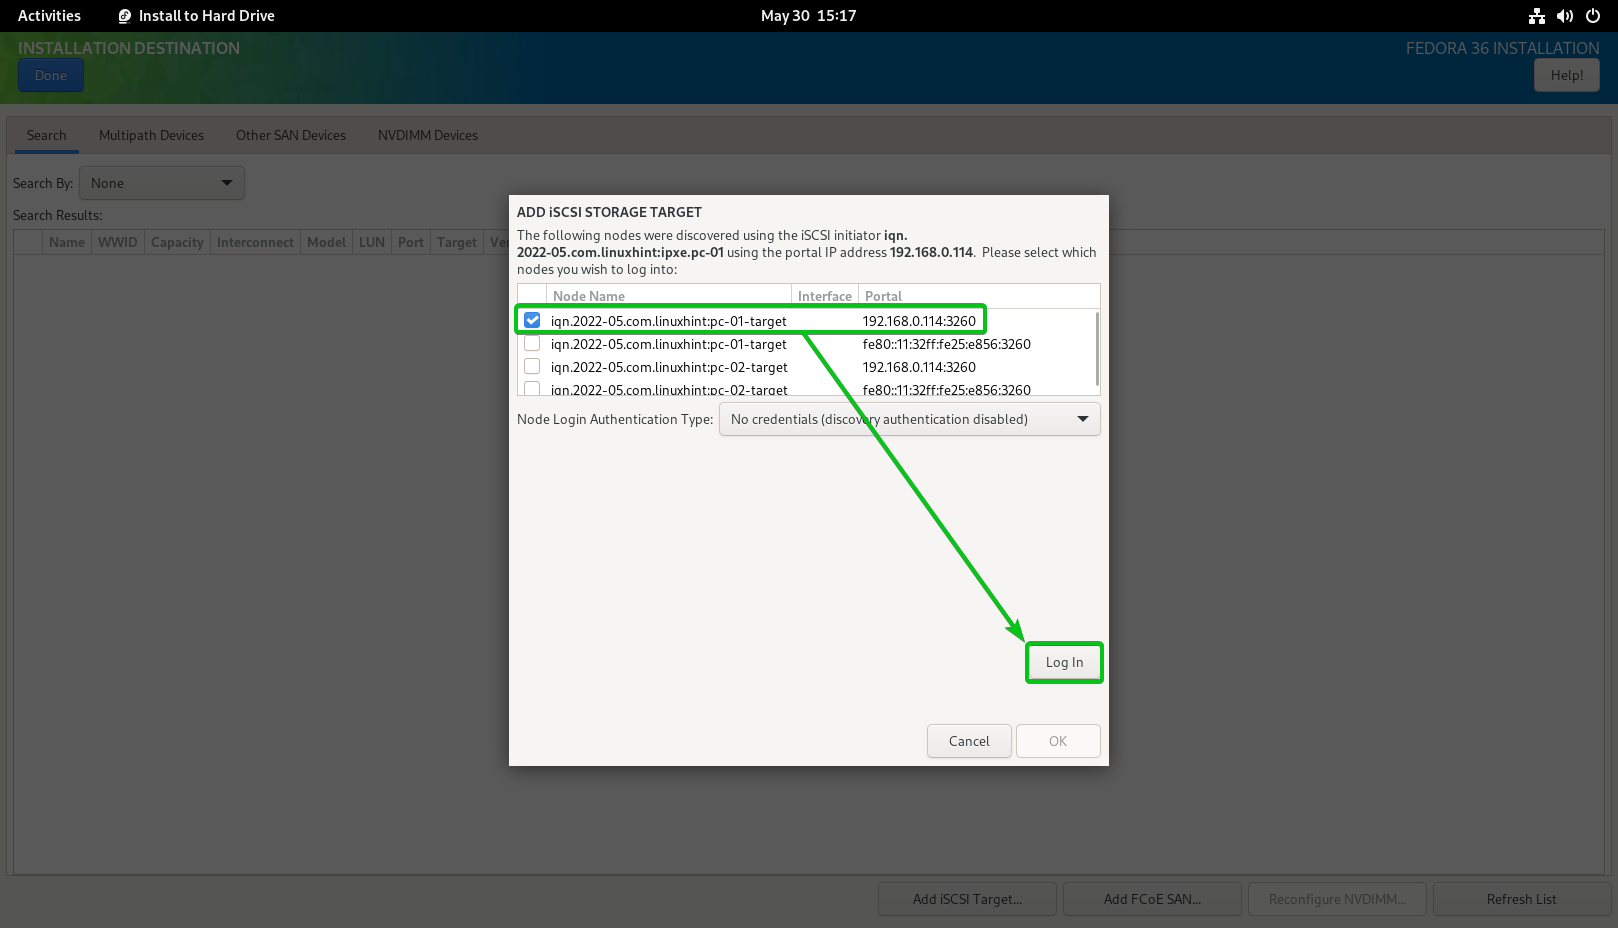
All the iSCSI targets that you’ve created on your Synology NAS should be listed.

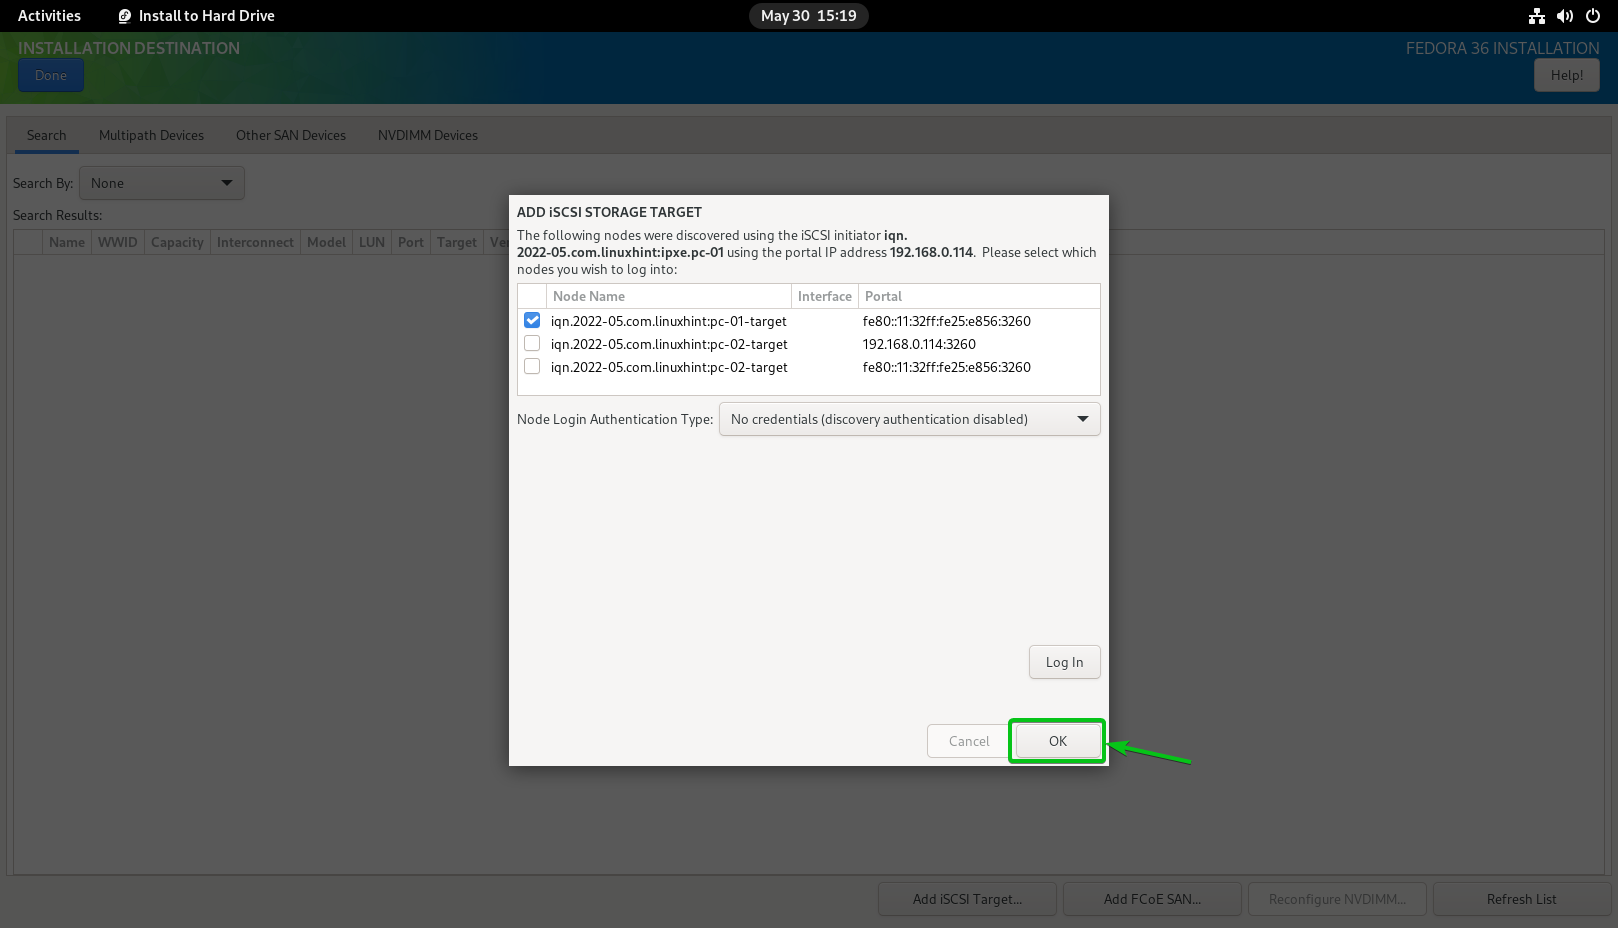
Select iqn.2022-05.com.linuxhint:pc-01-target and click on Log In.
Click on OK.
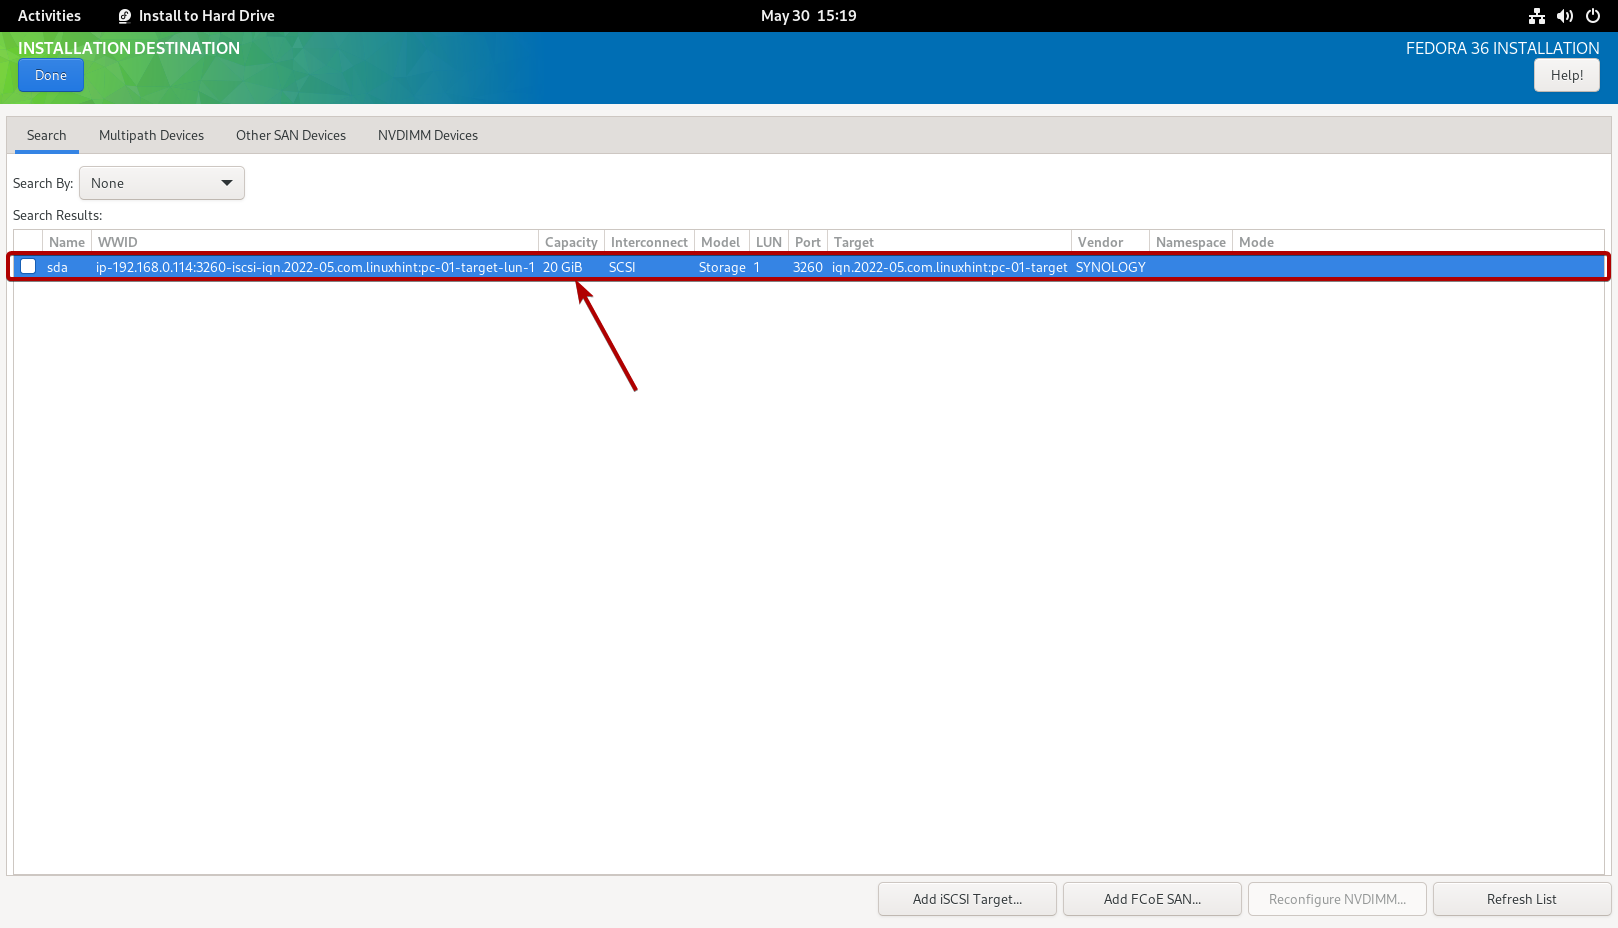
You should see a new iSCSI disk.
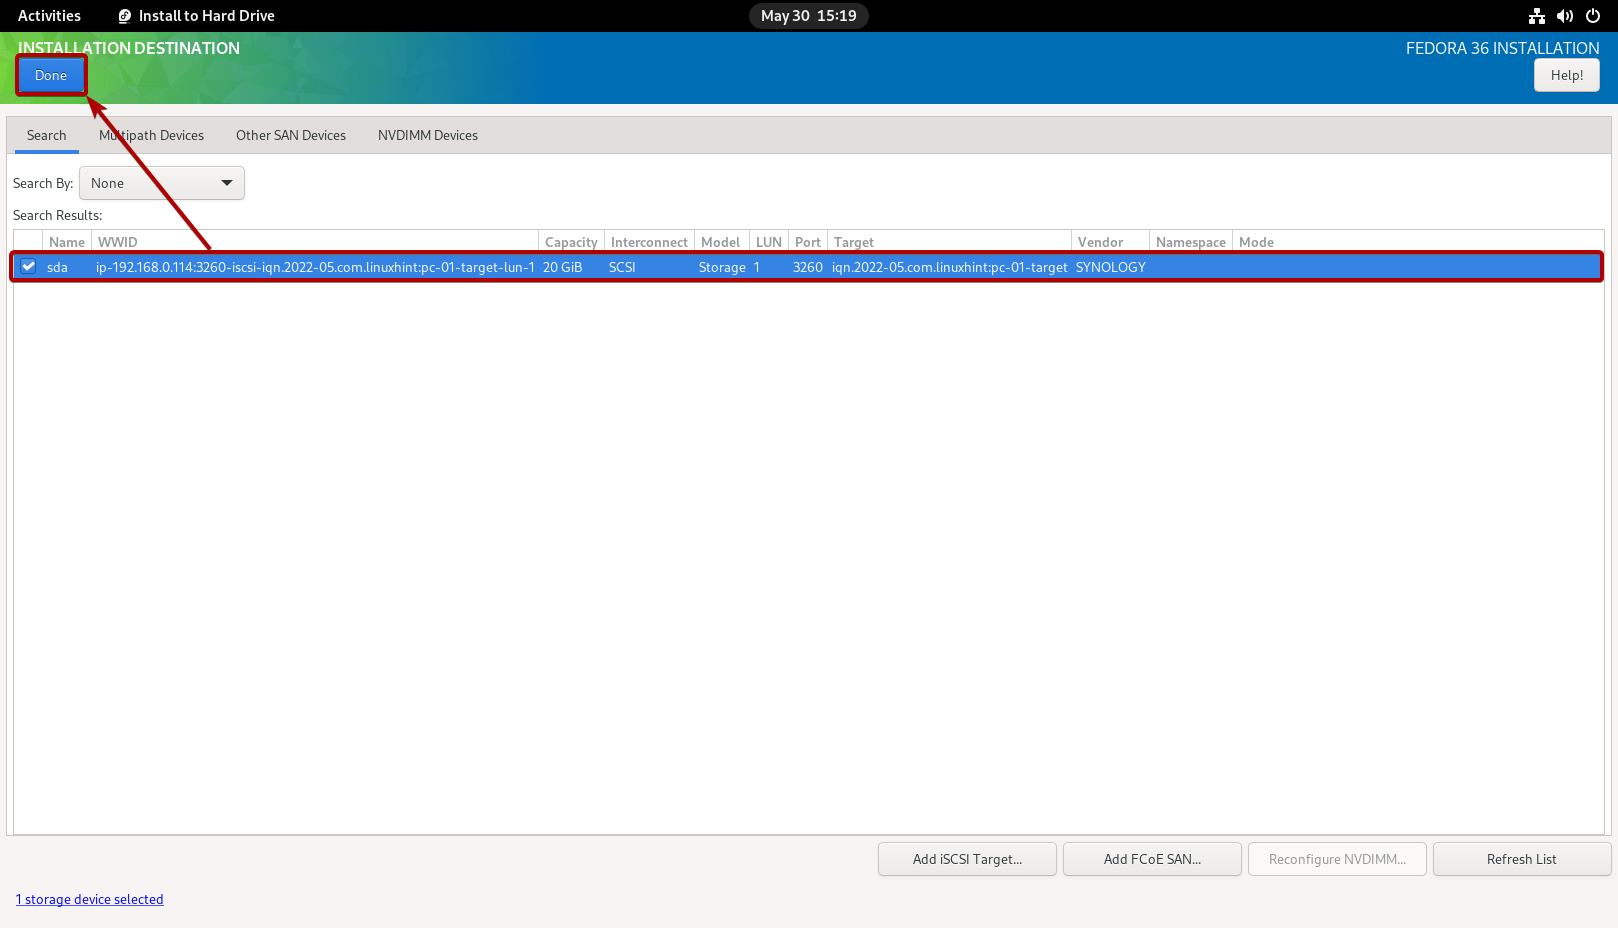
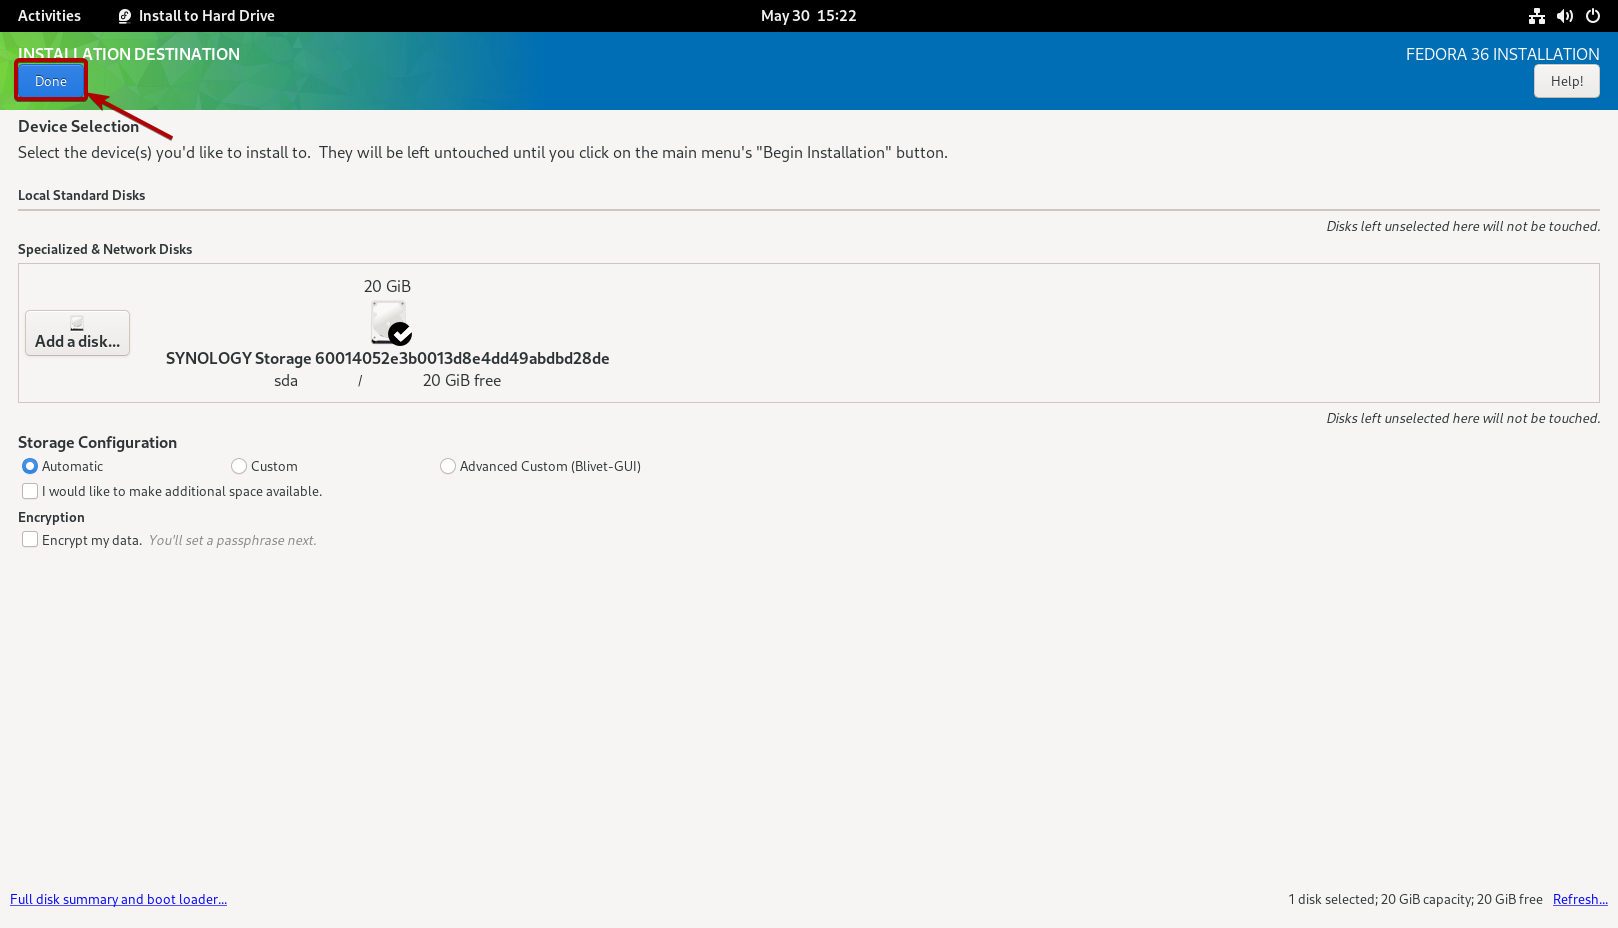
Select it and click on Done.
The iSCSI disk should be selected as the installation destination.
NOTE that in this article, I will do automatic partitioning just to keep things simple. If you want to do manual partitioning, be sure to check the article How to Install Fedora Workstation 35 from USB.
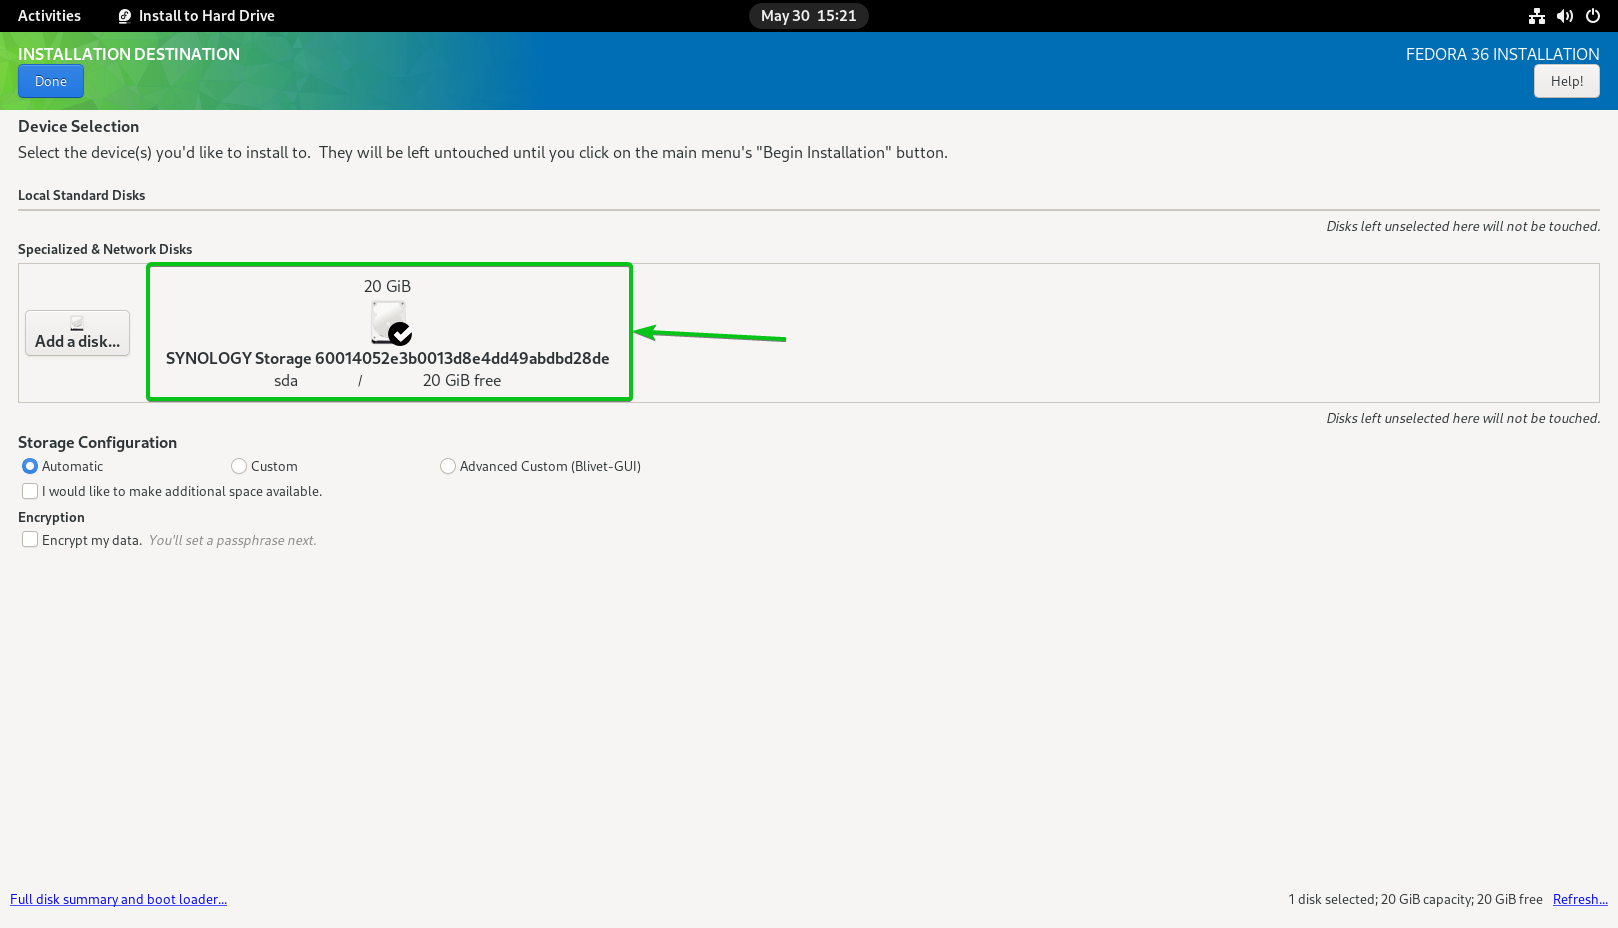
Click on Done.
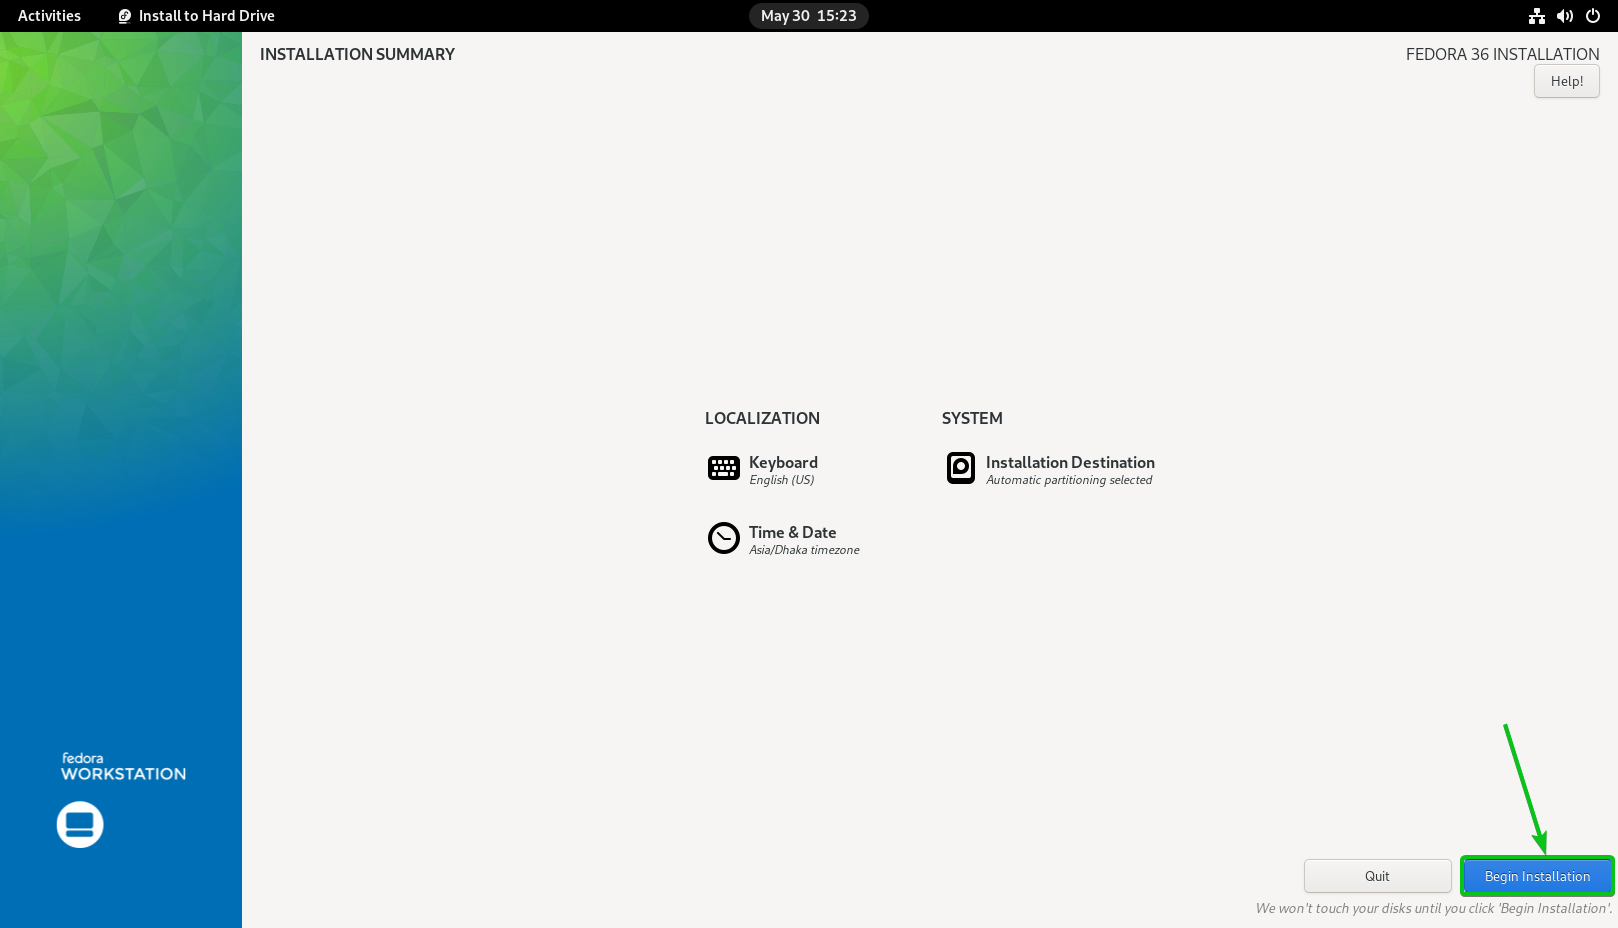
Click on Begin Installation.
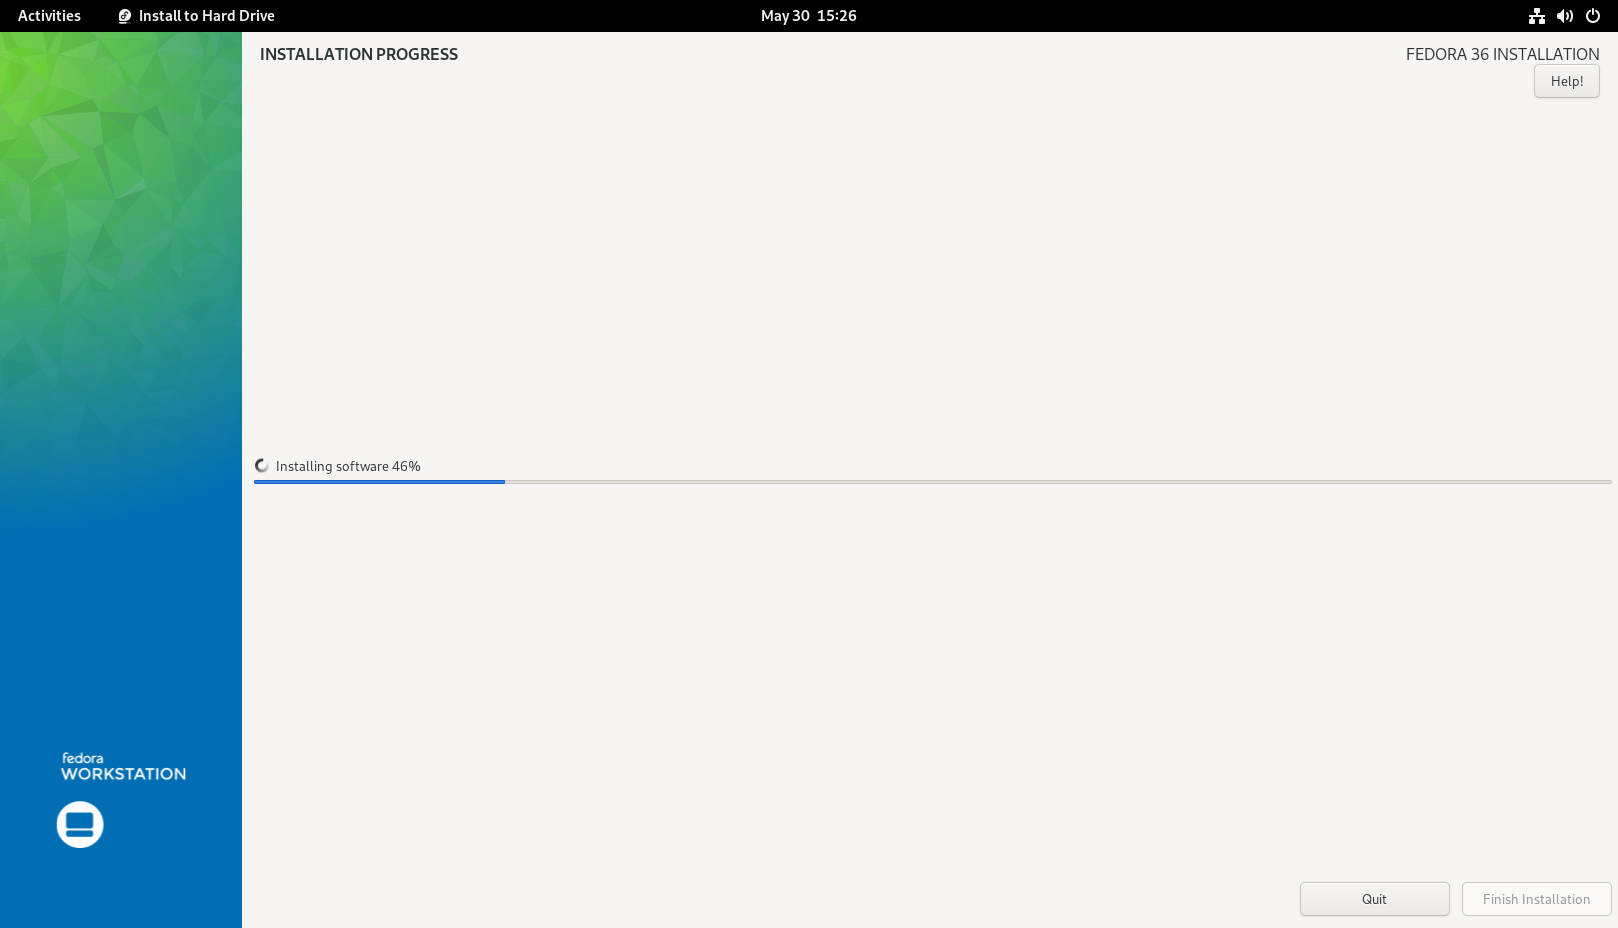
Fedora Workstation 36 is being installed on the iSCSI disk.

Fedora Workstation 36 is being installed on the iSCSI disk.
At this point, Fedora Workstation 36 should be installed on the iSCSI disk.
Click on Finish Installation.
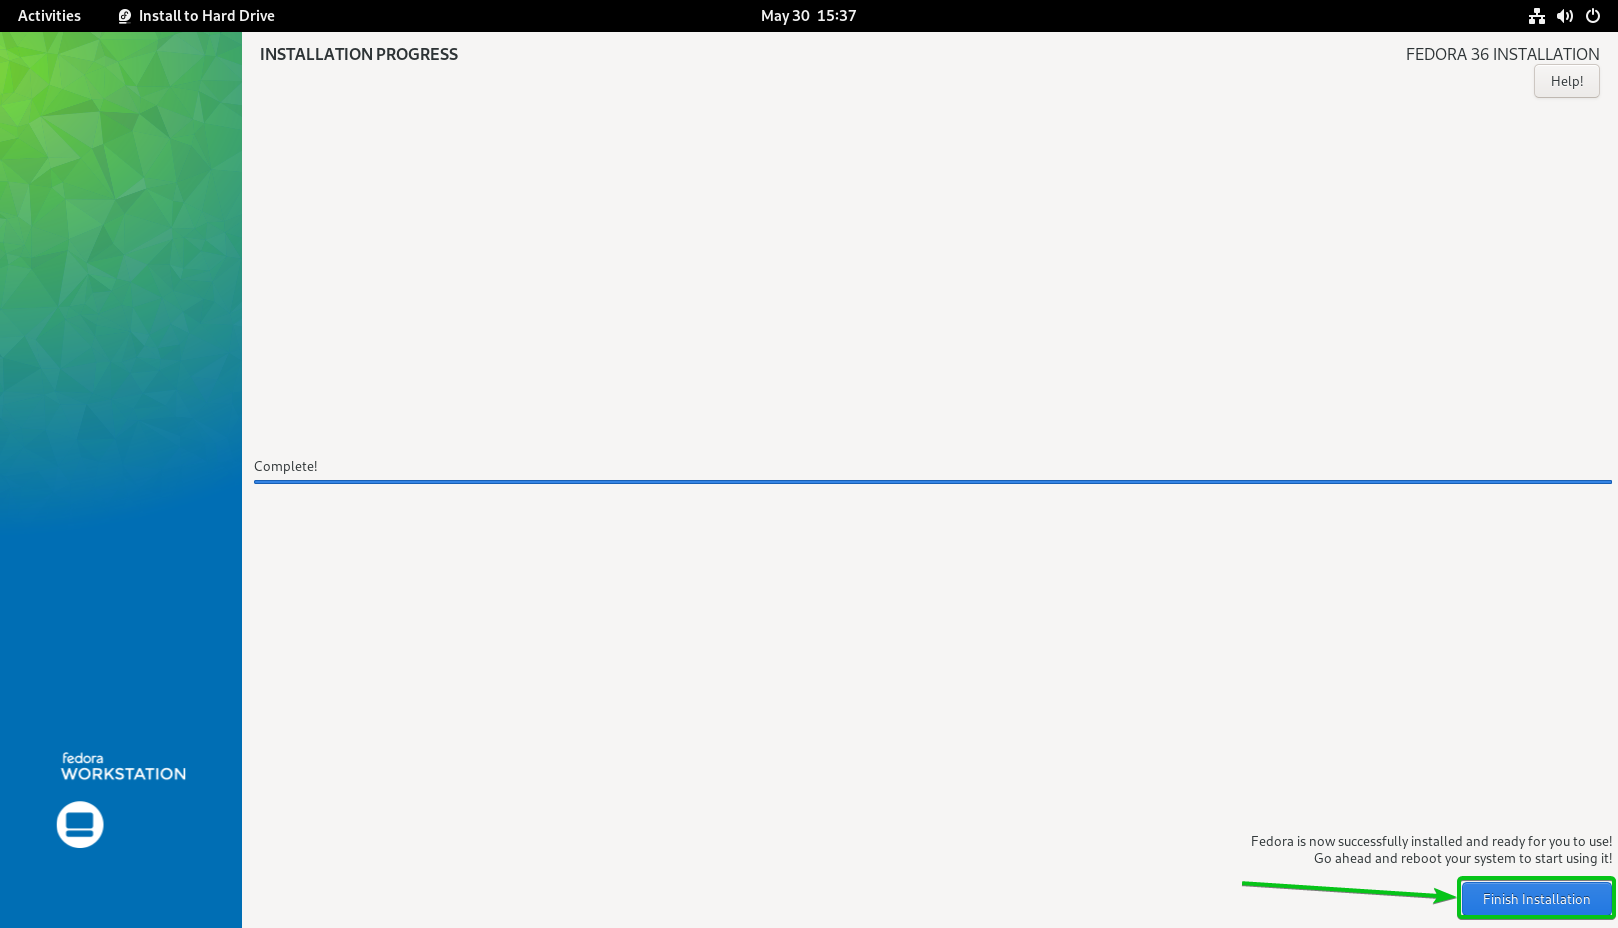
Now, you can shut down your computer.
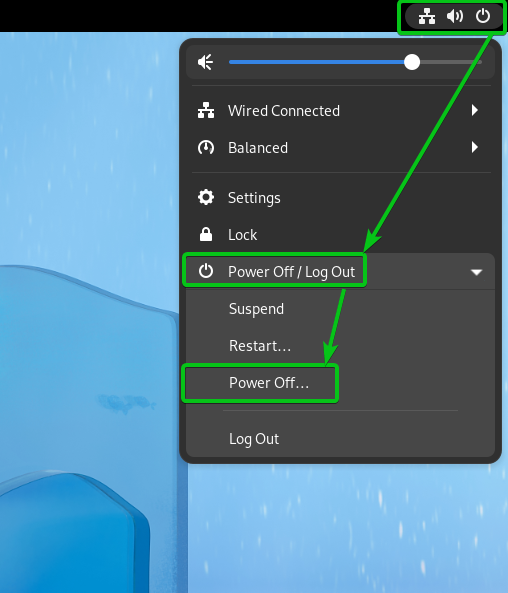
Click on System Tray > Power Off/Log Out > Power Off… as marked in the screenshot below to shut down your computer.
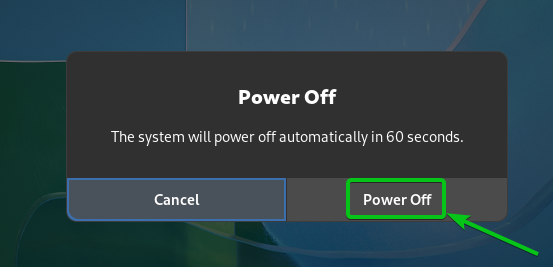
Click on Power Off. Your computer will shut down. Afterward, you can remove the USB thumb drive from your computer.
In the same way, you can install Fedora Workstation 36 on the other iSCSI LUN/disk that you’ve created.
Configuring iPXE to Boot from iSCSI Target
Now, configure iPXE computer-specific boot configuration files so that you can boot Fedora Workstation 36 on your computers from the iSCSI disks via iPXE.
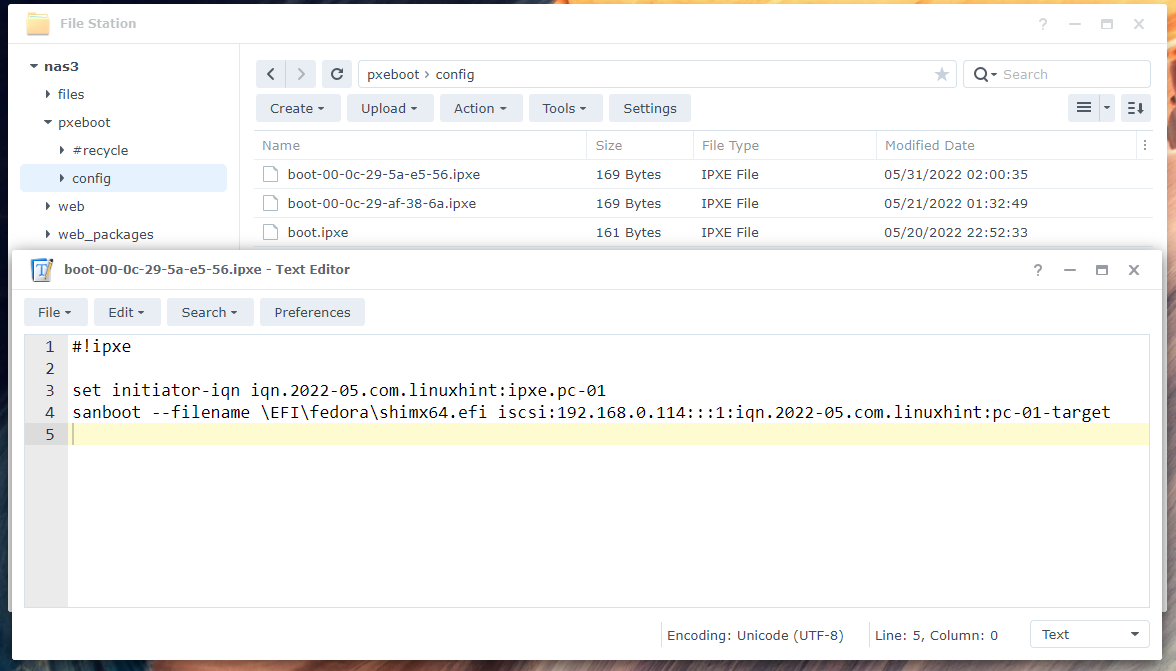
Configure pc-01 (which has the MAC address 00:0c:29:5a:e5:56) to boot Fedora Workstation 36 from the iSCSI disk pc-01-disk01 (which is mapped to the iSCSI target pc-01-target with the IQN iqn.2022-05.com.linuxhint:pc-01-target). Open the iPXE boot configuration file boot-00-0c-29-5a-e5-56.ipxe with a text editor and type in the following lines:
set initiator-iqn iqn.2022-05.com.linuxhint:ipxe.pc-01
sanboot --filename \EFI\fedora\shimx64.efi iscsi:192.168.0.114:::1:iqn.2022-05.com.linuxhint:pc-01-target
Once you’re done, the iPXE boot configuration file boot-00-0c-29-5a-e5-56.ipxe should look as follows:
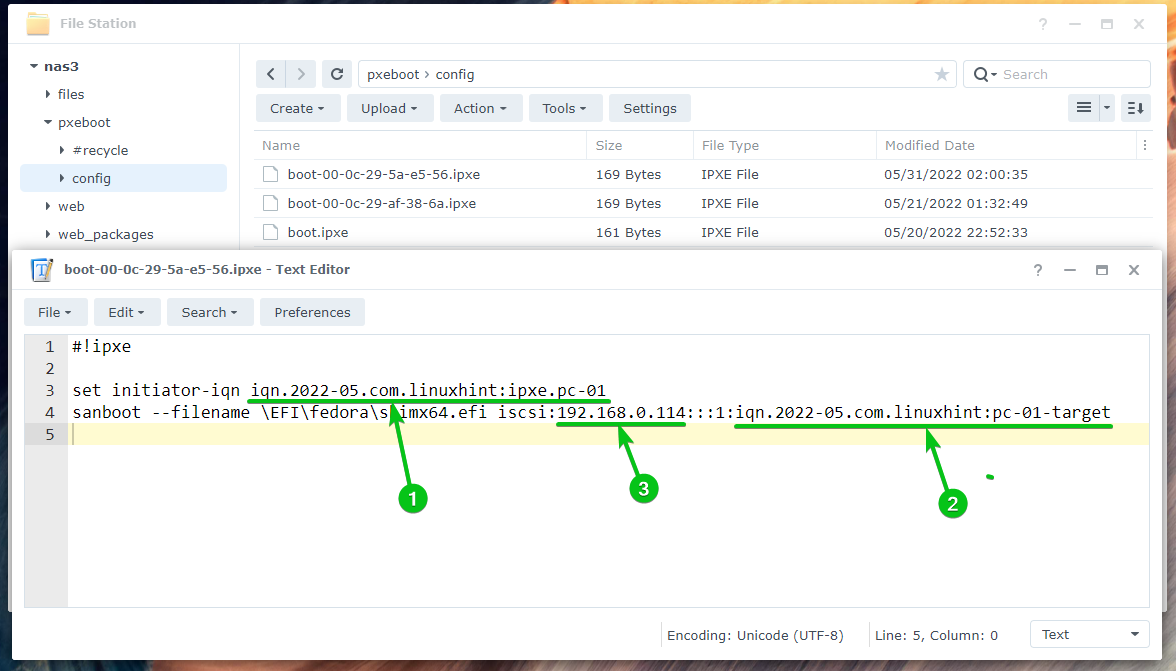
Here, iqn.2022-05.com.linuxhint:ipxe.pc-01 is the IQN of the iSCSI initiator name1. It should be the same value as you’ve set in the Installing Fedora Workstation 36 on iSCSI LUN section of this article.
iqn.2022-05.com.linuxhint:pc-01-target is the IQN of the iSCSI target of your Synology NAS that you want to log in and boot Fedora Workstation 36 from the mapped iSCSI disk pc-01-disk012.
192.168.0.114 is the IP address of your Synology NAS3.
In the same way, you can configure pc-02 (which has the MAC address 00:0c:29:af:38:6a) to boot Fedora Workstation 36 from the iSCSI disk pc-02-disk01 (which is mapped to the iSCSI target pc-02-target with the IQN iqn.2022-05.com.linuxhint:pc-02-target). Just open the iPXE boot configuration file boot-00-0c-29-af-38-6a.ipxe with a text editor, type in the same lines as in the boot configuration file boot-00-0c-29-5a-e5-56.ipxe, and make the necessary adjustments.

Booting Fedora Workstation 36 from iSCSI Disks via iPXE
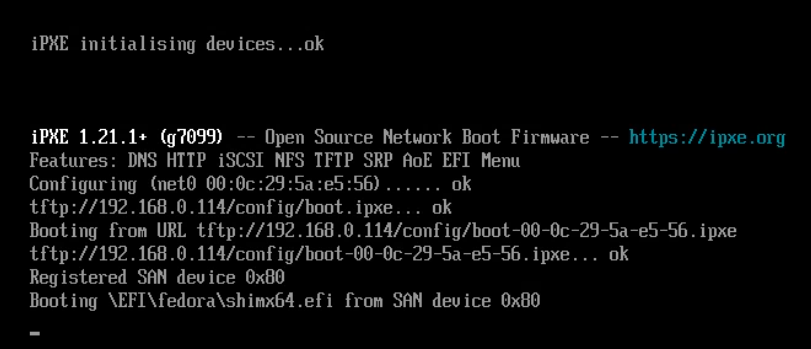
Now that everything is ready, you can boot the computer pc-01 via iPXE. Your computer should start booting Fedora Workstation 36 from the iSCSI disk pc-01-disk01 as you can see in the screenshot below.
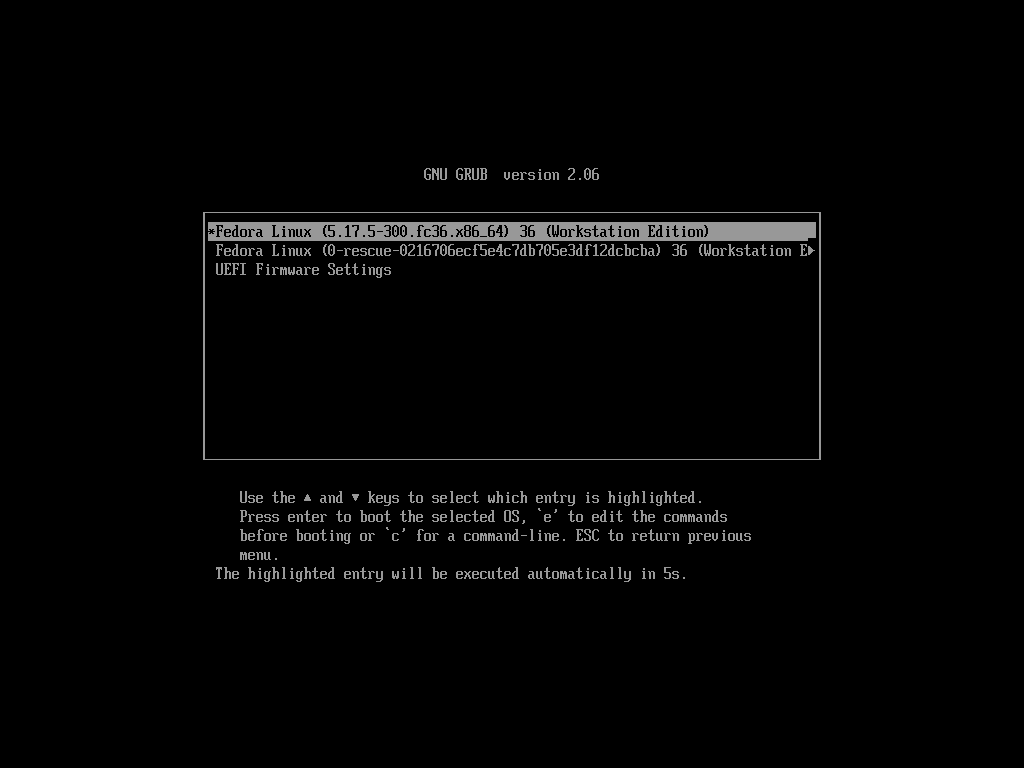
Shortly, you will see the GRUB menu of Fedora Workstation 36.
Select Fedora Linux (*) 36 (Workstation Edition) and press <Enter>.
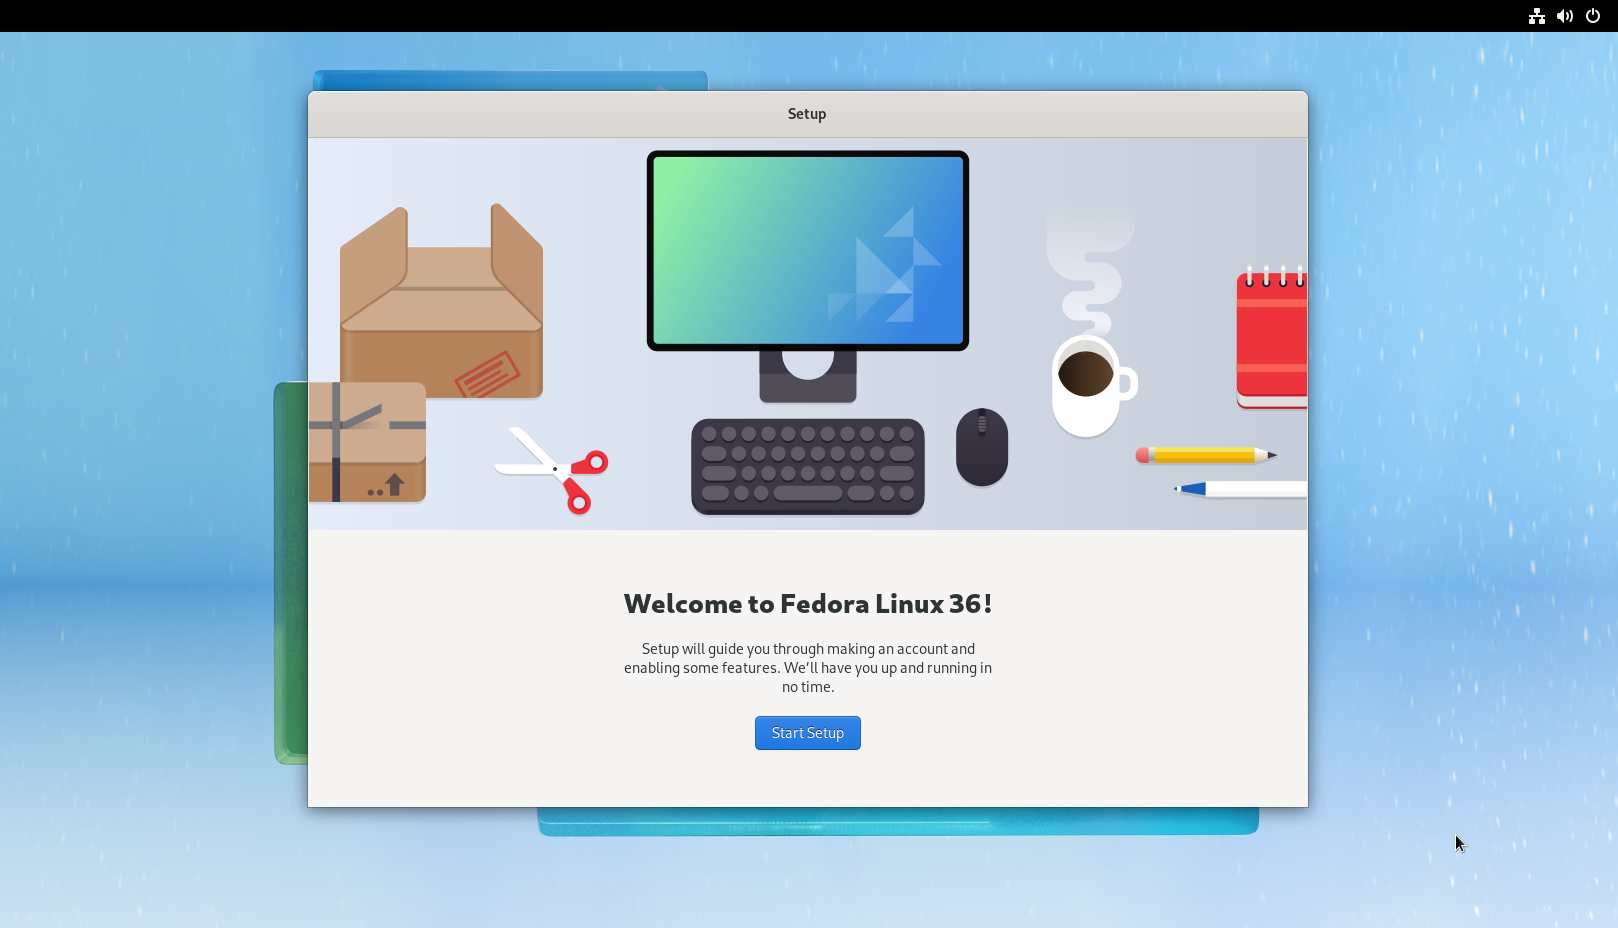
Fedora Workstation 36 should boot from the iSCSI disk. You will see the initial setup window of Fedora Workstation 36. You can set up a user account for Fedora Workstation 36 from here.
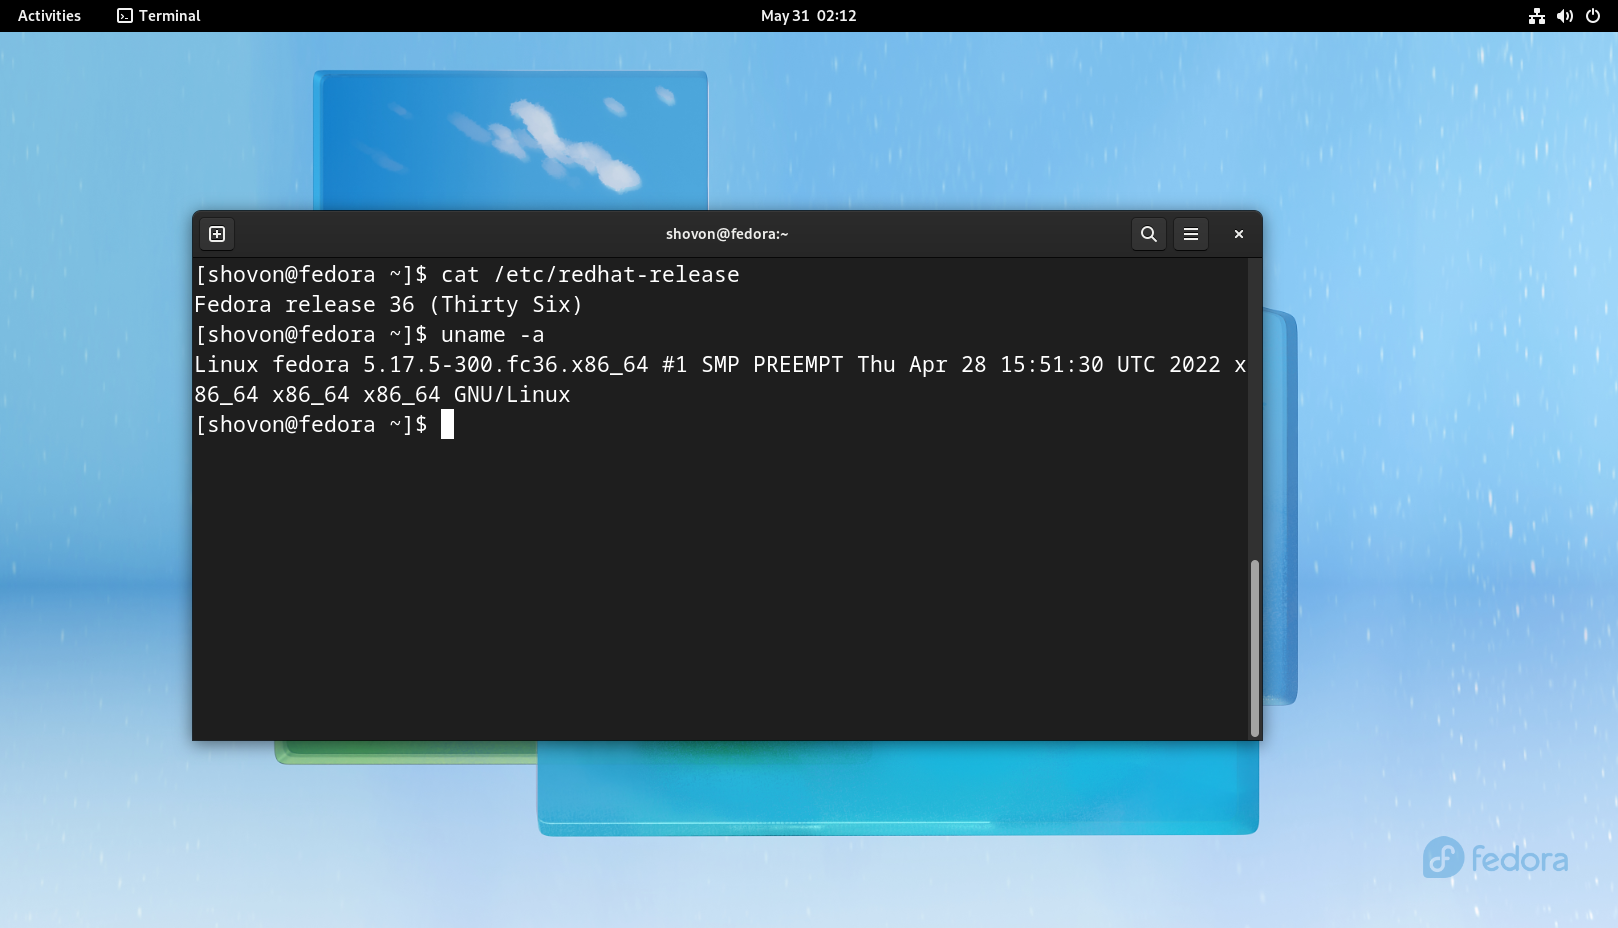
Once you’ve done the initial setup, you can use Fedora Workstation 36 on your computer/server as usual. You won’t be needing any physical disk installed on your computer.

In the same way, you can boot Fedora Workstation 36 on the computer pc-02 from the iSCSI disk pc-02-disk01 via iPXE.
Diskless Booting Other Linux Distributions
If you need any assistance in configuring Synology NAS for diskless booting other Linux distributions from iSCSI disks via iPXE, read the following articles:
- How to Configure Synology NAS for Diskless Booting Ubuntu 22.04 LTS via iSCSI and iPXE
- How to Configure Synology NAS for Diskless Booting RHEL 9 via iSCSI and iPXE
Conclusion
In this article, I have shown you how to configure a Synology NAS for diskless booting (from iSCSI disks) Fedora Workstation 36 on the computers/servers on your network via iPXE. I have shown you how to configure iPXE to use different iPXE boot configurations for different computers/servers on your network depending on their MAC address. This way, you will be able to configure/control booting for each of the computers/servers on the network separately and also configure multiple booting. This will also make diskless booting seamless like booting from local disks.