Basics of iSCSI:
iSCSI storage server is used to share block devices such as HDD/SSD partitions, or LVM partitions, or block files on the network. iSCSI clients can use these shares over the network just as any ordinary HDD or SSD mounted to it. The iSCSI client can format these disks, mount them and store files and directories as usual.
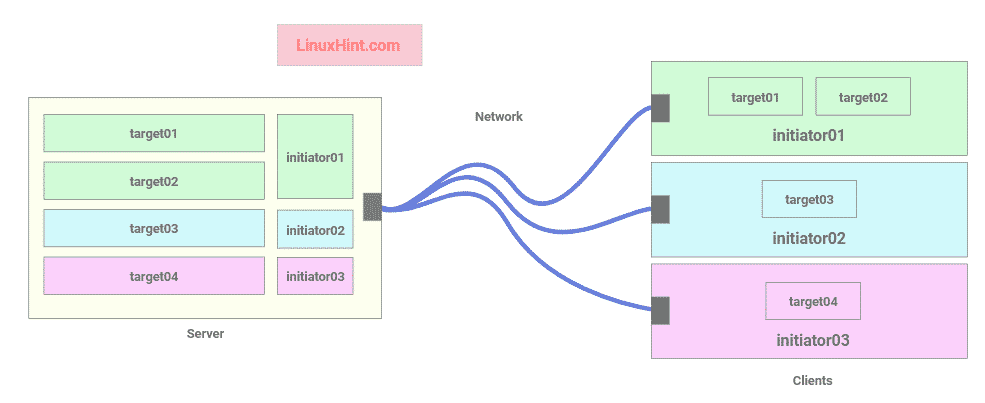
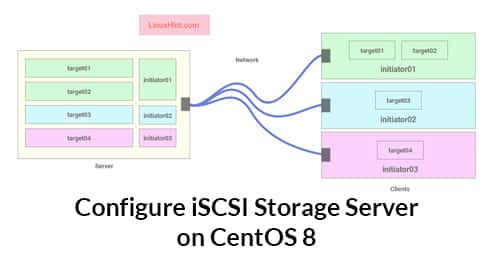
Fig 1: iSCSI server-client architecture
Each iSCSI client has an initiator ID which is used to connect to the targets on the server.
The targets are shares on the iSCSI server. Each target consists of a unique name (IQN), the path of the block device (i.e. disk partition or block file), the initiator ID that can connect to this target, and an optional username-password based authentication system.
In fig 1, the iSCSI storage server allows 3 initiators (3 iSCSI clients) to connect to 4 targets. initiator01 can connect to target01 and target02, initiator02 can connect to target03, and initiator03 can connect to target04.
iSCSI Target and Initiator Naming Conventions:
The iSCSI target name and initiator name must be unique.
The target naming format is:
Example:
iqn.2020-03.com.linuxhint:user-bob etc.
The initiator naming format is:
Example:
iqn.2020-03.com.linuxhint:initiator03 etc.
Network Topology:

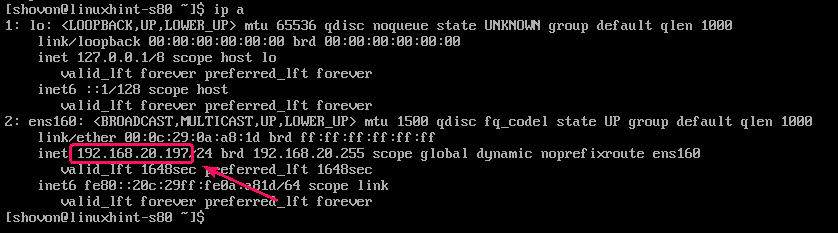
Fig 2: Network topology used in this iSCSI server article
The network topology used in this article is given in fig 2. Here, I will configure a CentOS 8 machine as an iSCSI server. The iSCSI server has a static IP address 192.168.20.197. The iSCSI client is also on the network 192.168.20.0/24. So, it can access the iSCSI server.
Setting Up Static IP Address:
You must set up a static IP address on your CentOS 8 machine which you will configure as an iSCSI server. To set up a static IP address on CentOS 8, check my article Configuring Static IP on CentOS 8.
The CentOS 8 machine I will configure as an iSCSI server in this article has the static IP address 192.168.20.197. It will be different for you. So, make sure to replace it with yours from now on.
Installing iSCSI Server Tools:
First, update the DNF package repository cache as follows:

You must have targetcli tool installed on the CentOS 8 machine which you want to configure as an iSCSI server.
To install targetcli, run the following command:
![]()
To confirm the installation, press Y and then press <Enter>.

targetcli should be installed.

Now, to test whether the targetcli tool is working, start targetcli as follows:
![]()
targetcli should start.

targetcli is working perfectly.

Now, exit out of the targetcli tool.

Now, start target service as follows:
![]()
Now, add target service to the system startup as follows:

Sharing File Blocks:
You can share file blocks as storage devices via iSCSI.
First, create a new directory where you want to keep all the file blocks as follows:

Now, start targetcli as follows:

Now, create a new 1 GB fileio backstore web1 in the path /iscsi/blocks/web1.img as follows:

The web1 1GB file block should be created in the path /iscsi/blocks/web1.img

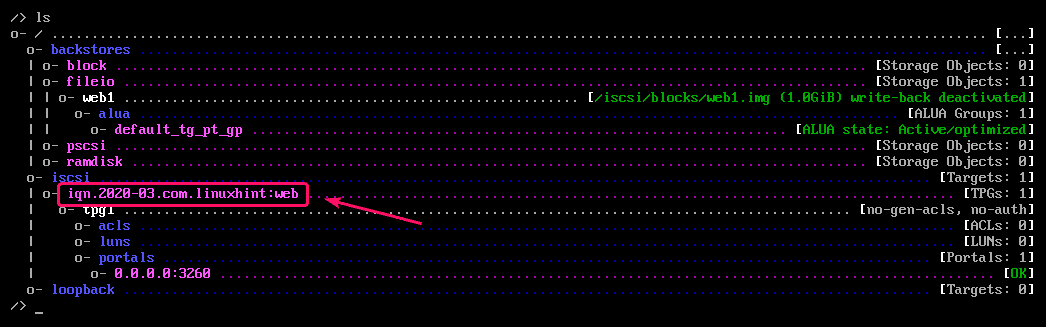
Now, create a new iSCSI target iqn.2020-03.com.linuxhint:web as follows:

The iSCSI target iqn.2020-03.com.linuxhint:web should be created.
Now, navigate to the target’s TPG (Target Portal Group) as follows:

This is how the TPG of the target should look like.

Now, create a LUN from the web1 fileio backstore you’ve created earlier.

LUN 0 should be created.

Now, create an ACL for the initiator iqn.2020-03.com.linuxhint:init1 so that the iSCSI client can access the LUNS in this target.

An ACL should be created and LUN 0 should be mapped to it.

Now, save the configuration.

Now, exit out of the targetcli interface.

Sharing HDD/SSD or HDD/SSD Partitions:
You can also share the whole HDD/SSD or one or more HDD/SSD partition via iSCSI. If you share the whole HDD/SSD, the partitions of that HDD/SSD will also be accessible from the initiator or the iSCSI client.
First, find the HDD/SSD name or HDD/SSD partition name that you want to share with the following command:
Here, nvme0n2 is the SSD name and nvme0n2p1, nvme0n2p2 and nvme0n2p3 are the partitions of that SSD.

Now, start targetcli as follows:

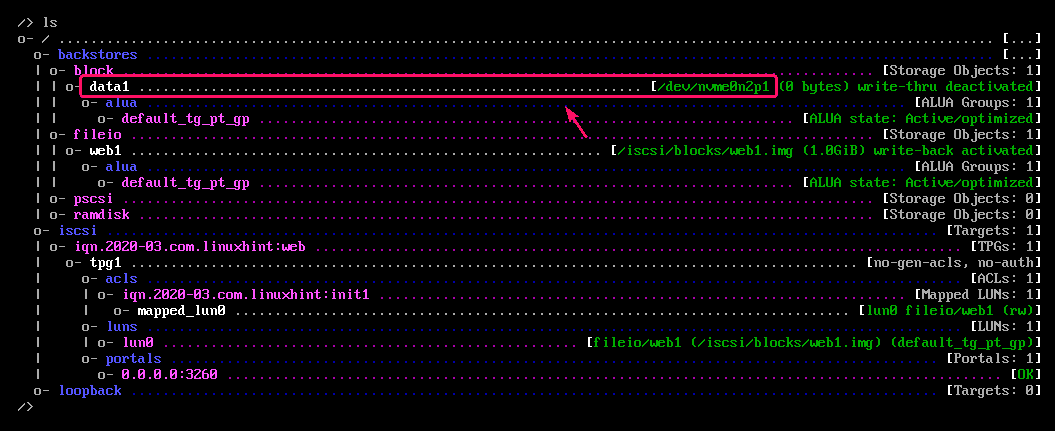
Now, create a block backstore data1 using the HDD/SSD or HDD/SSD partition as follows.
NOTE: Here, I used the SSD partition /dev/nvme0n2p1.

The data1 block backstore should be created.
Now, create a new iSCSI target iqn.2020-03.com.linuxhint:data as follows:
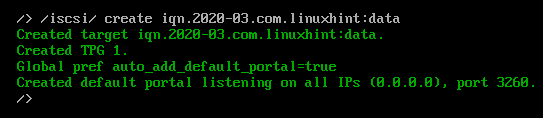
A new iSCSI target should be created.

Now, navigate to the TPG of the target as follows:

The TPG of the target should look as follows.

Now, create a new LUN from the data1 block backstore you’ve created earlier.

A new LUN should be created.

Now, create an ACL for the initiator iqn.2020-03.com.linuxhint:init1 so that the iSCSI client can access the LUNS in this target.

An ACL should be created and LUN 0 should be mapped to it.

Now, save the configuration.

Now, exit out of the targetcli interface.

Configuring Firewall:
Now, allow access to the iSCSI port 3260 through the firewall as follows:

For the changes to take effect, run the following command:

Installing iSCSI Client Tools:
On the iSCSI client, you must have iscsi-initiator-utils package installed in order to access the shared iSCSI storage devices.
First, update the DNF package repository cache as follows:

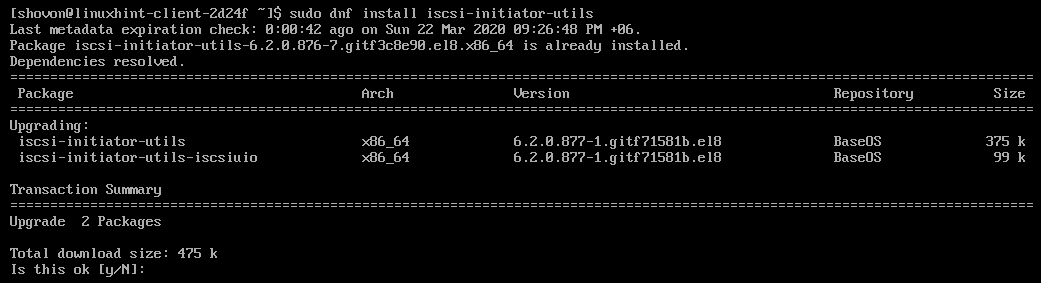
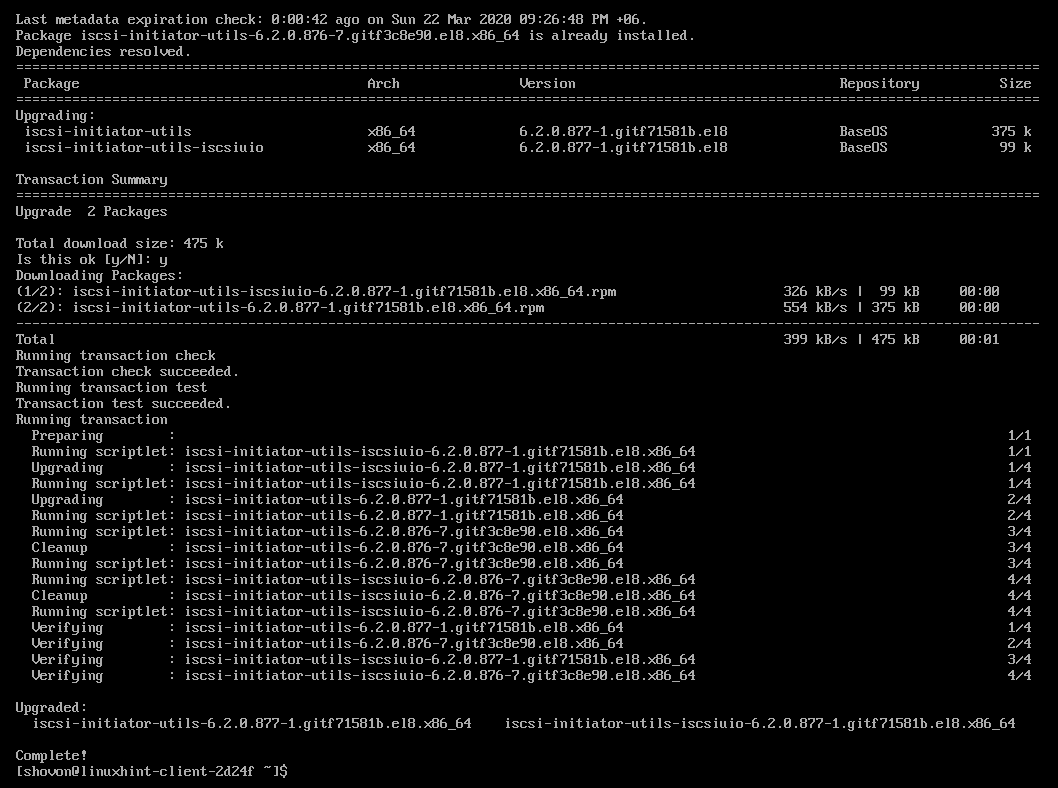
Now, install iscsi-initiator-utils package on the client machine as follows:
![]()
To confirm the installation, press Y and then press <Enter>.
iSCSI client utilities should be installed.
Now, open the /etc/iscsi/initiatorname.iscsi configuration file as follows:
![]()
Now, set your initiator name to InitiatorName and save the file.

Now, scan for the targets as follows:

Now, you can login to the targets as follows:

The iSCSI storage devices should be attached to your client as you can see in the screenshot below.

Now, start the iscsi and iscsid services as follows:
$ sudo systemctl start iscsid
![]()
The iscsi and iscsid services should be running.

Now, add the iscsi and iscsid service to the system startup as follows:
$ sudo systemctl enable iscsid
![]()

Mounting iSCSI Disk:
You can mount the iSCSI disks permanently on the iSCSI client using the /etc/fstab file.
First, format the iSCSI disk if it’s not already formatted.

Now, create a directory (mount point) for the iSCSI disk as follows:
![]()
Now, find the UUID of the iSCSI disk that you want to mount as follows:
The UUID in my case is c1cbfa44-a8a9-4343-a88e-769b63a6e006. It will be different for you. So, make sure to replace it with yours in the /etc/fstab file.

Now, open the /etc/fstab file as follows:
![]()
Now, add the following line to the /etc/fstab file.
/data ext4 defaults,_netdev 0 0
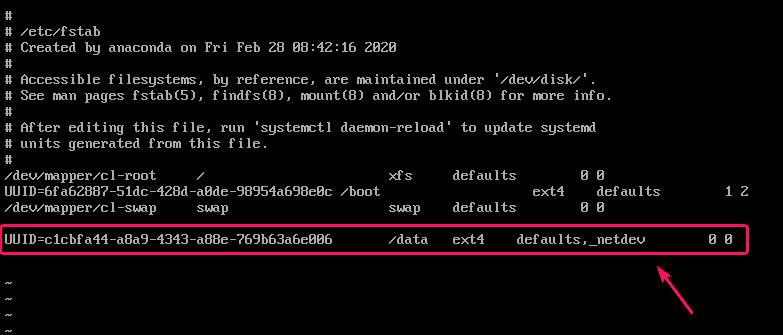
Make sure to add the _netdev option in the /etc/fstab file while mounting iSCSI disks. Otherwise, your CentOS 8 iSCSI client may not boot.
Now, you can mount the iSCSI disk for the first time as follows:
![]()
As you can see, the iSCSI disk is mounted correctly.

So, that’s how you configure iSCSI storage server and client on CentOS 8. Thanks for reading this article.