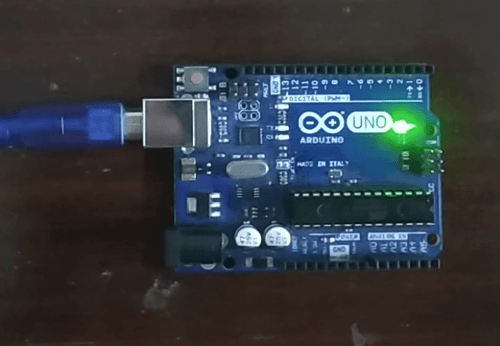
We have explained how you can use the ArduinoBlocks to code your Arduino without the hassle of remembering the syntax of the programming language.
Creating account on ArduinoBlocks
To use ArduinoBlocks there are following steps given below that you must follow:
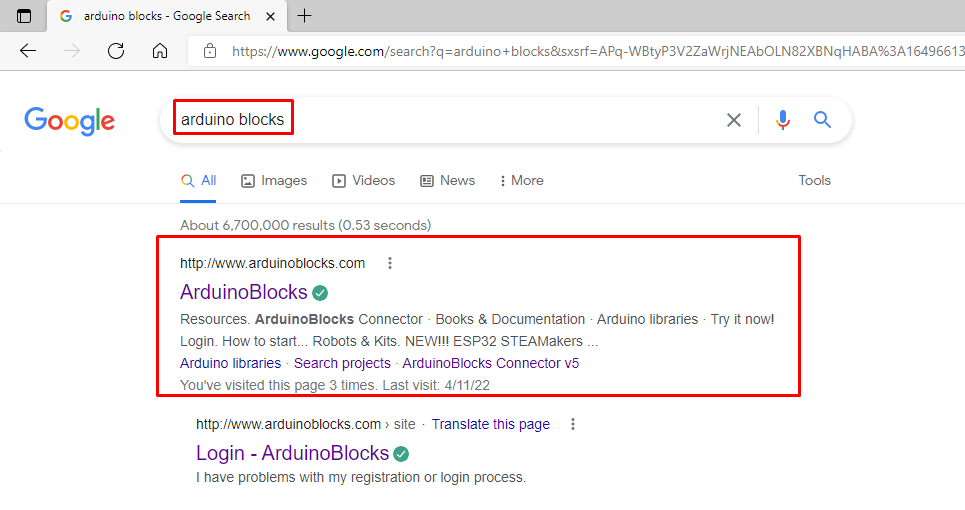
Step1 : To use the Arduino blocks you have to write Arduino blocks in the Google search and click on the first link appeared in the Google search as shown in the image below:
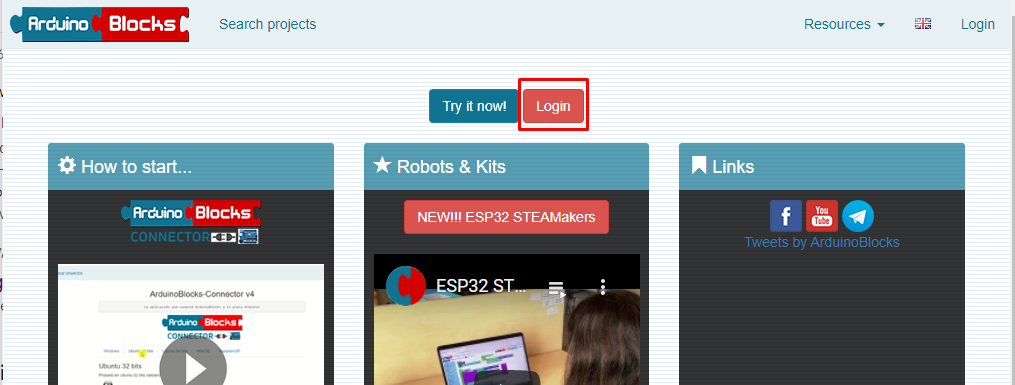
Step 2 : Once you have clicked on the first link the ArduinoBlocks website will open and first you have to create an account by clicking on the Login option.
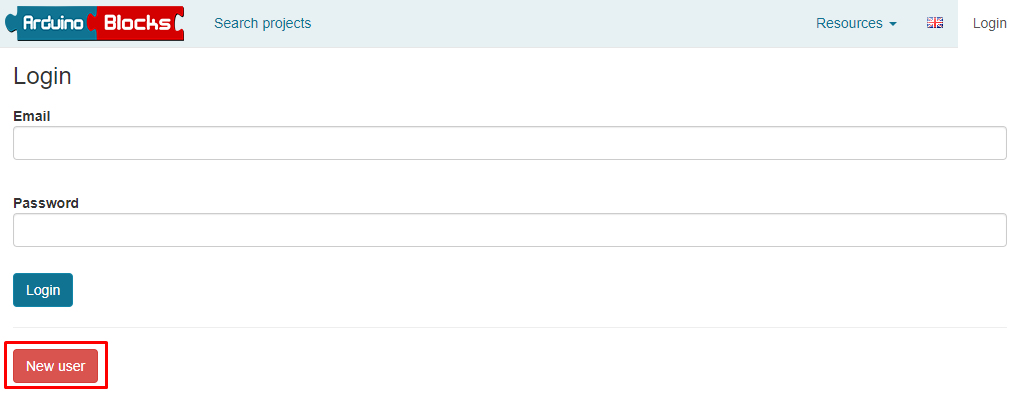
Next click on the New user option to create your account and then add the details.
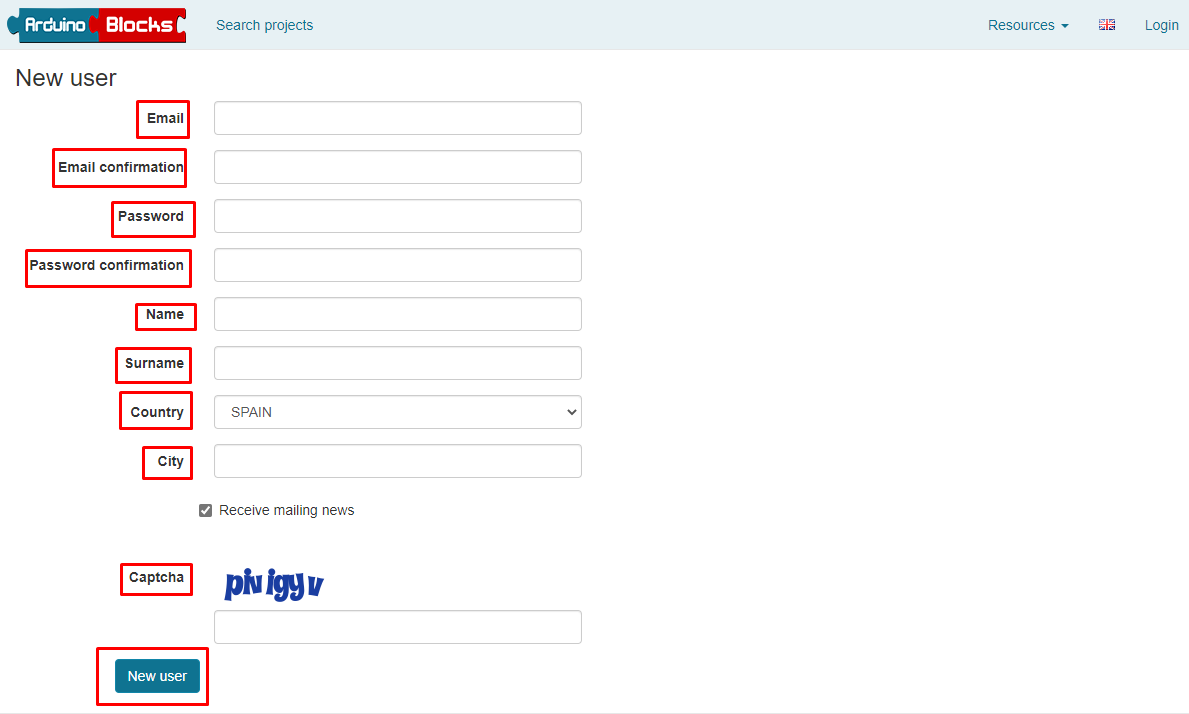
Step 3 : Enter the details and click on the New user.
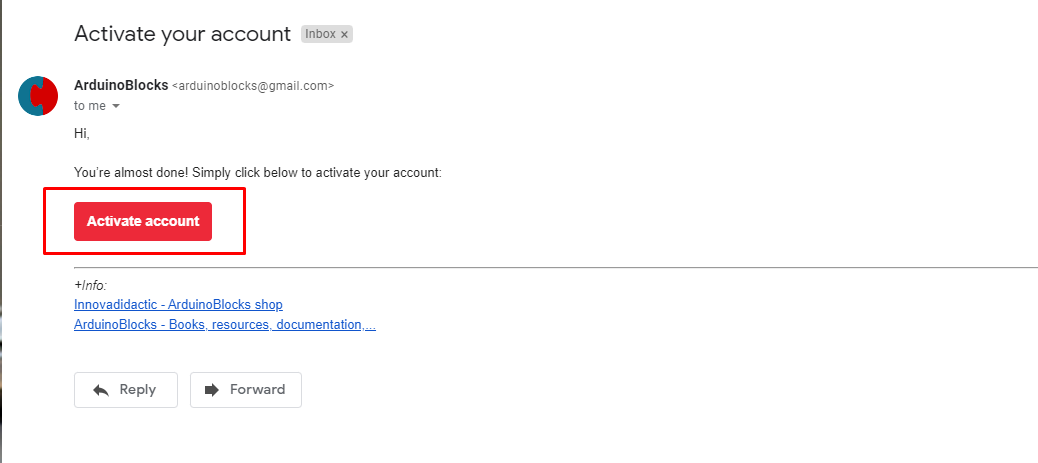
You will receive a link in your email to verify your account just click on that link and your account will be verified.
Next login into your account and you are all set.
Getting started with ArduinoBlocks
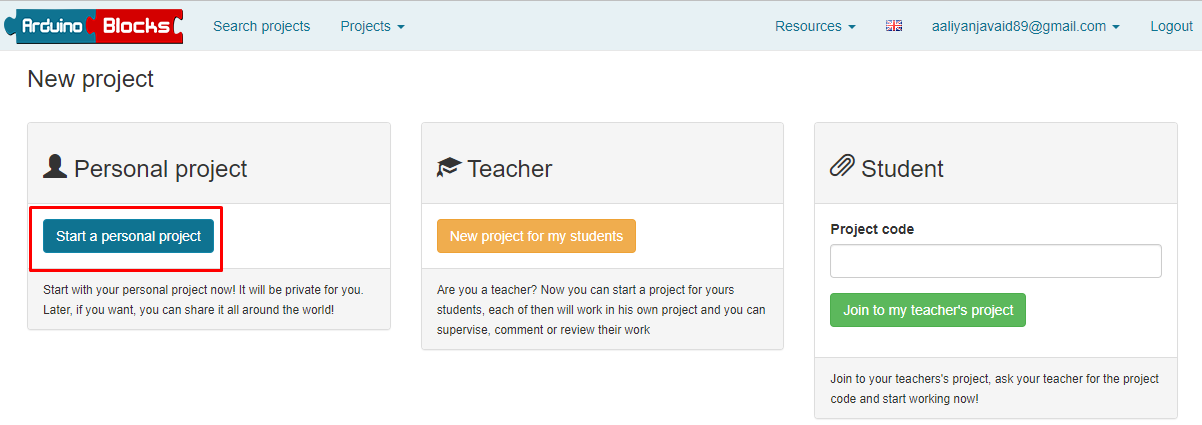
To code the Arduino first you have to click on the Start new project button.
Since we will be making a personal project we will select the personal project option in the project creation menu.
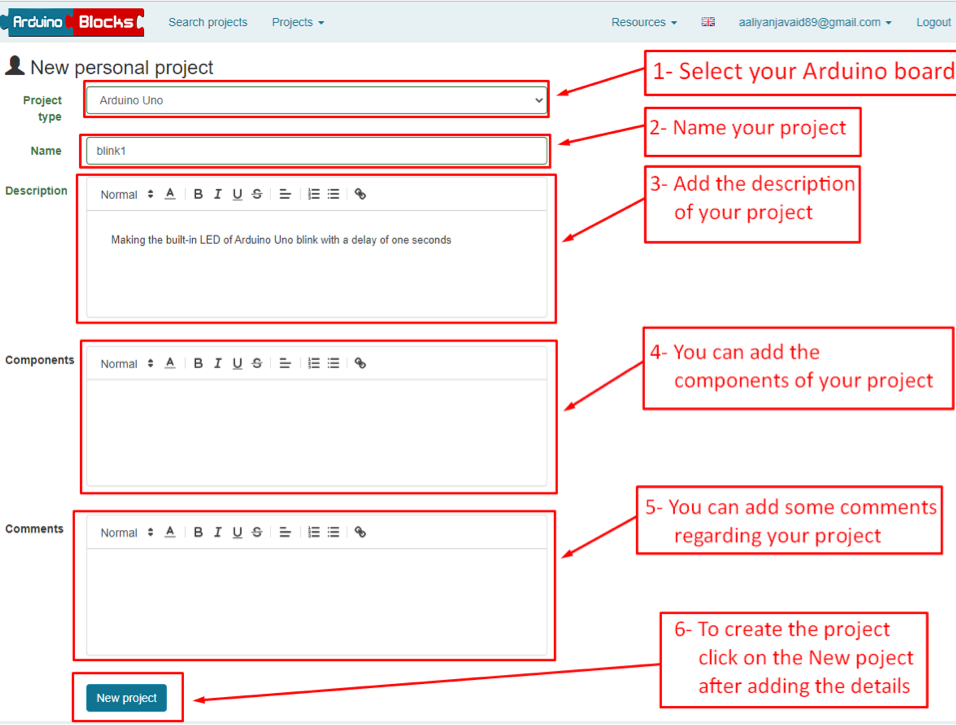
Now add the details of your project and here for demonstration we will program the Arduino to blink its built-in LED. Next after filling up the details, you have to click on the New project to create the project.
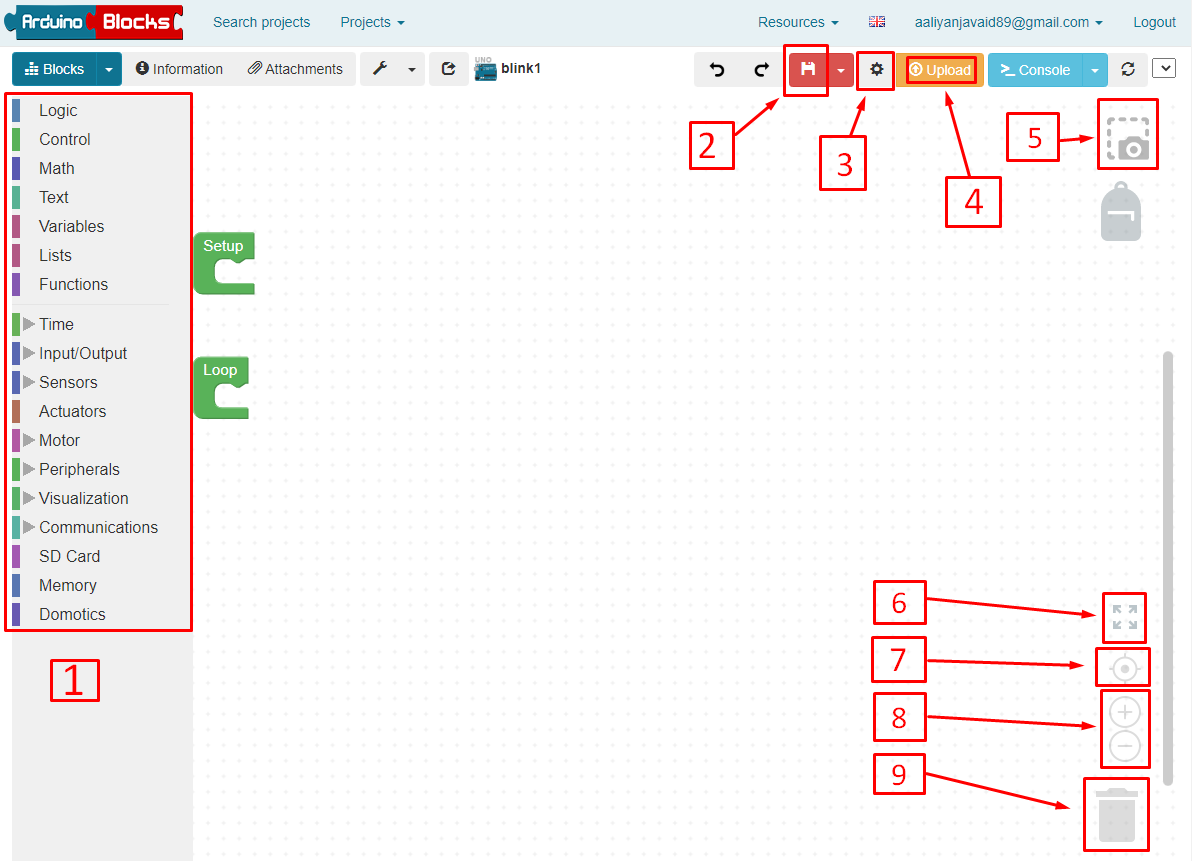
Now the project is created, and the interface of the ArduinoBlocks will open. You will find multiple options that you can use and for your ease we have explained each option in detail and also highlighted in the image below:
Option 1 : This is the block’s menu from which you can add variables, functions, sensors, logical operators, mathematical operators, loops and all kinds of stuff that you need in coding.
Option 2 : To save the progress of your code block you have to click on this RED icon labeled as 2 in the image above.
Option 3 : To connect your board with this software you have to set the configuration.
Option 4 : To upload the code to the Arduino board you have to click on the icon in the orange labeled as 4.
Option 5 : To take a screenshot of your Arduino code you can click on the icon labeled number 5.
Option 6 : To move the blocks to the center and to zoom in you can click here.
Option 7 : This icon is used to bring the blocks in the middle of the code panel.
Option 8 : If you want to zoom in and out upon your desire, you can use these icons labeled number 8.
Option 9 : Bin icon is used to remove any block, simply drag the block into it.
Another thing that is required to be done before moving on to the project is to download an ArduinoBlock connector to connect the Arduino board with the ArduinoBlocks.
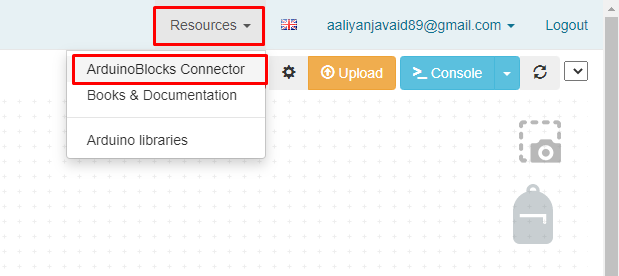
For that you need to click on the resources option on the top menu bar and select the ArduinoBlocks connector as in the image below:
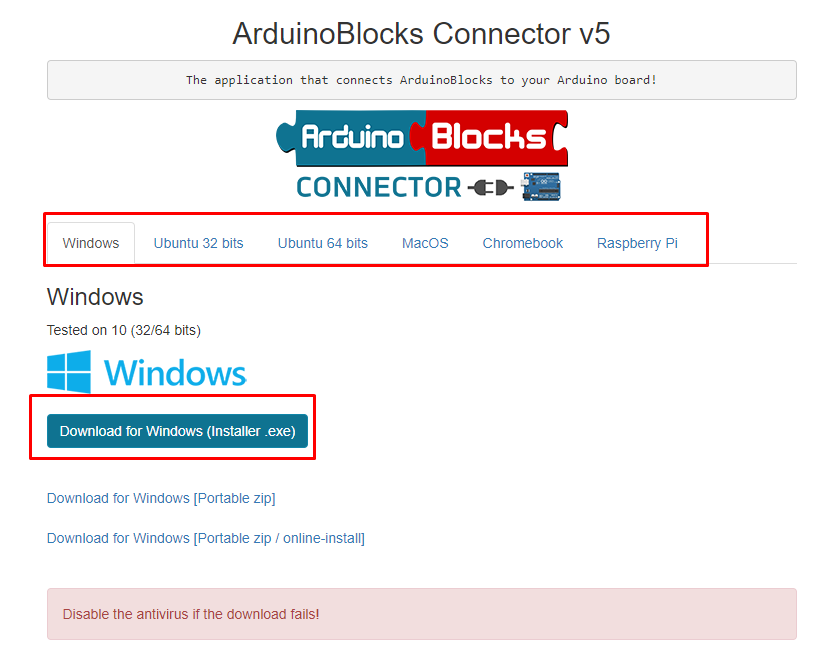
Next you will download the connector application for any of the operating systems and install it by running the downloaded file. Here we are using the windows platform so we will download ArduinoBlocks connector for windows.
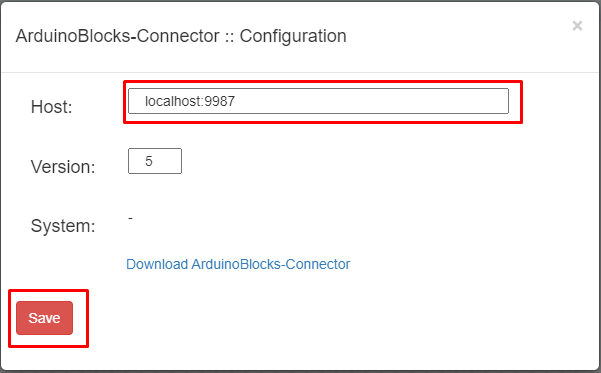
To connect the ArduinoBoard you have to first run the ArduinoBlocks connector application and then upload the code to your Arduino. Also, in the setting options you have to configure the connector and click Save.
As for now we have discussed almost all the major options that are provided by the ArduinoBlocks so now let’s move to building an Arduino code to blink the built-in LED.
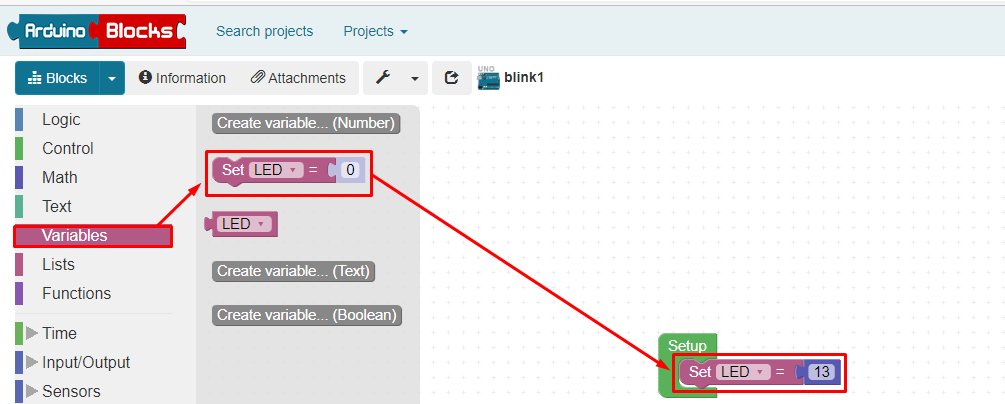
There are already setup and loop blocks present as they were present in the Arduino IDE so, first to declare the LED pin we will go to the variable option and give it the name LED and then give it the value 13 which is the pin for built-in LED:
Next the block for the variable LED will be created and you have to drag it to the setup block:
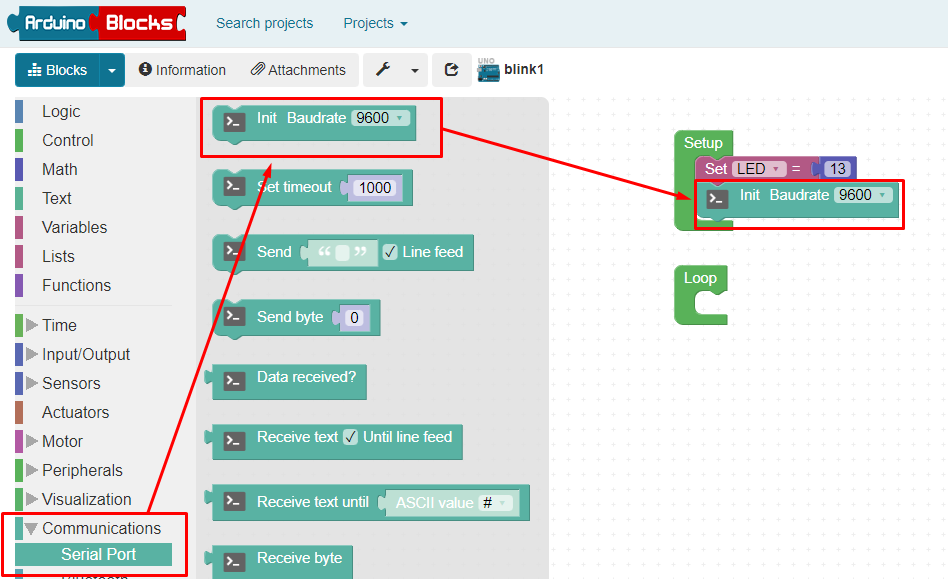
Now to set the baud rate for communication we will go to the communication option in the menu on the left and will drag the baud rate block to the setup block:
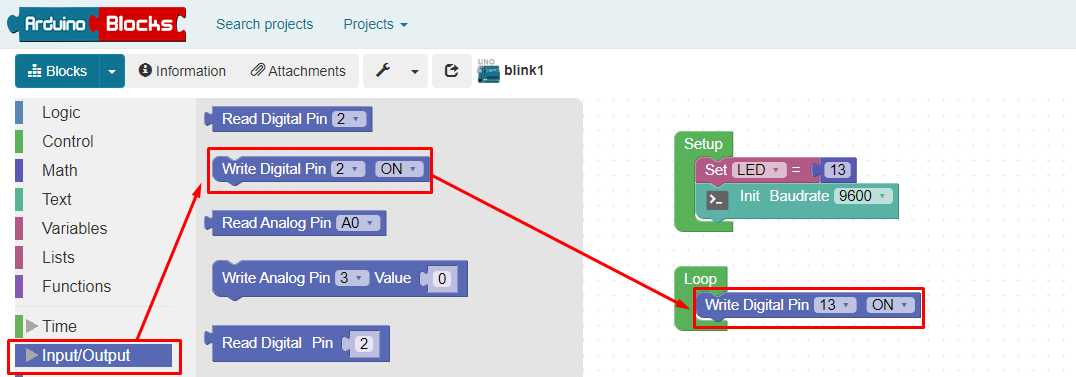
Now let’s just move to the loop section and give the value of HIGH to LED using the digitalWrite() function:
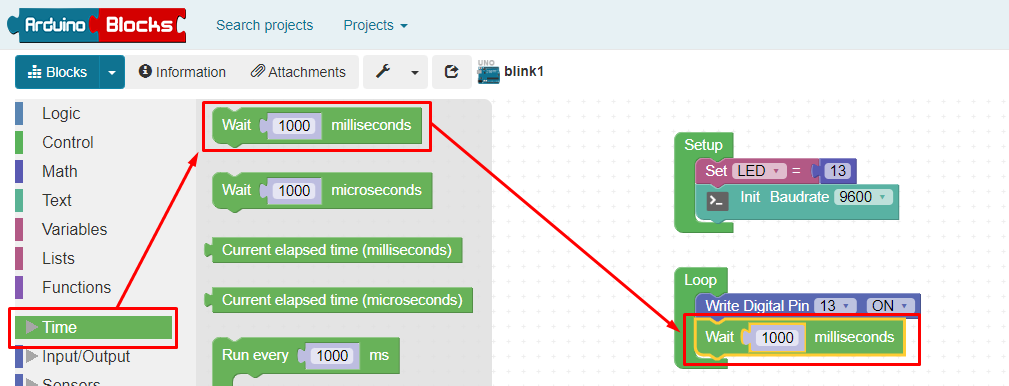
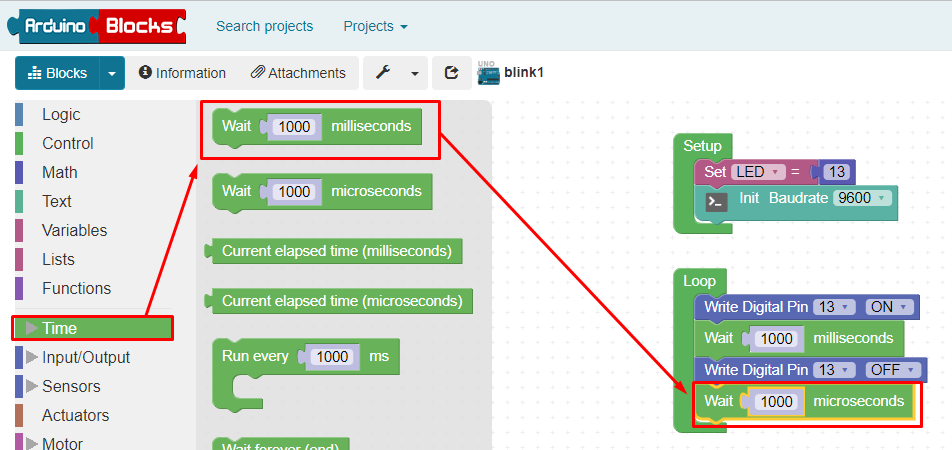
To blink the LED we have given the time of one second for which the LED will remain in the HIGH state:
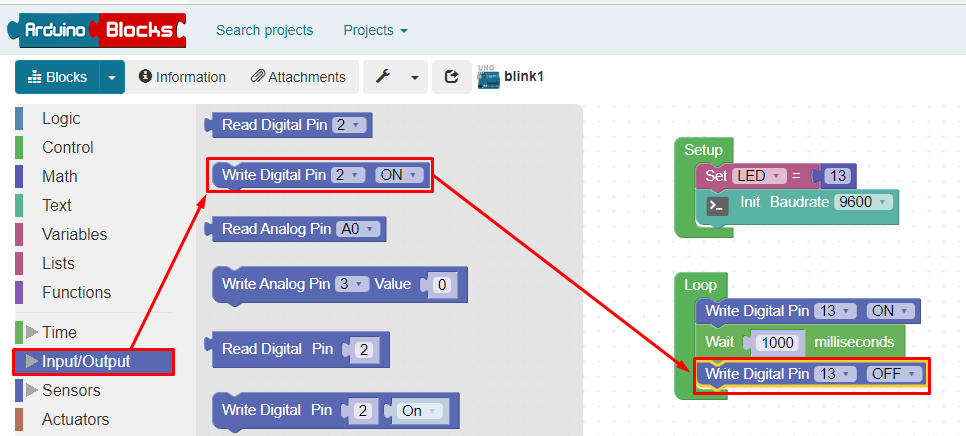
Now to turn the LED off we have again used the digitalWrite() function.
Now for one second, we have to keep the LED off so again giving a delay of one second as in the image below:
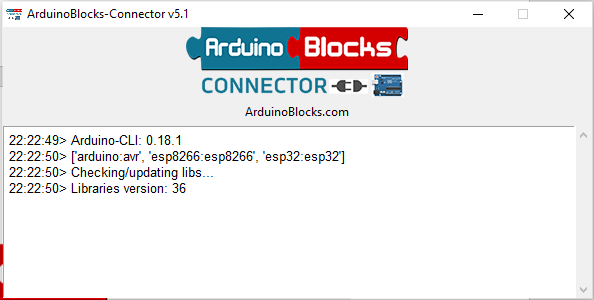
Now it’s time to upload the code to the Arduino so first we will run the application of ArduinoBlocks connector:
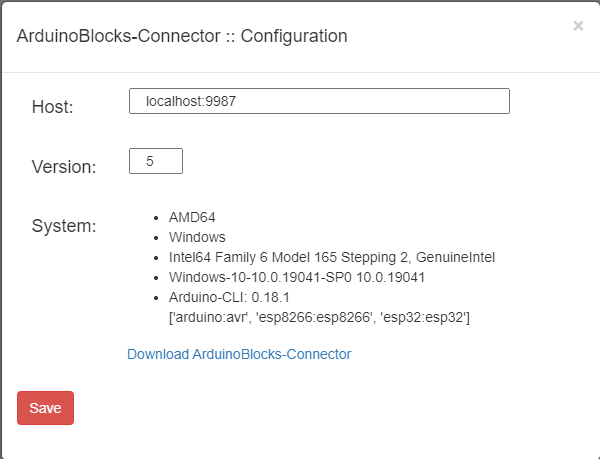
Now save the configuration of local host and version in the setting menu:
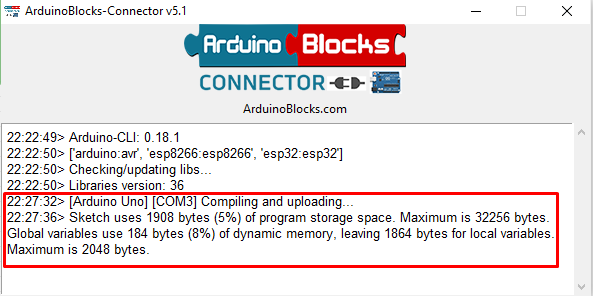
Next, we will upload the code to the Arduino and its status can be seen on the ArduinoBlocks connector application.
Below we have provided the demonstration of how you can make the block code to blink the built-in LED of the Arduino Uno board.
Conclusion
Programming the microcontroller has now become easy because of visual programming with the ArduinoBlocks as now you don’t have to worry about the syntax and errors that can come while writing, compiling, and uploading the code. So, we have explained how you can use the ArduinoBlocks to code the Arduino board and also provided a step-by-step example that can make your concepts more clear.

