How to Tell If Arduino Is Broken
While working with Arduino we deal with circuits with different voltage and current requirements, there might be a bad day in your Arduino journey that a single current spike or voltage surges lead Arduino board to permanently turn off. So, it’s better to know about what kind of damage the Arduino can handle or what are the components that can be damaged easily. Here I have compiled a list of all those components that need to be checked before you conclude that the Arduino board is fried. Check the list below.
- Check Power Led
- Check Microcontroller
- Check FTDI Chip
- Check Pin 13 Led Blinking
- Check Voltage Regulator
- Check 5V Output Pin Voltages
1. Check Power LED: Majority of Arduino boards have power led on board that helps to identify whether Arduino is turned on or not. So, the first thing to do with the Arduino is to check the led, connect Arduino with PC or power it is using any external supply. If the LED turns on, then it means the Arduino is working or at least it is getting the 5V to run that led. If the LED doesn’t turn on then the voltage regulator probably needs to be replaced.
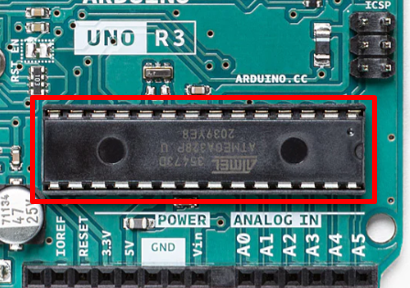
2. Check Microcontroller: Microcontroller is the brain behind Arduino, if it goes out of working then Arduino is of no use. Usually, Arduino boards such as Uno come in two variants SMD (Surface Mounted Device) or in DIP (Dual In-line Packaged). If the Arduino microcontroller burn out than it can easily be replaced in case of DIP Arduino while SMD based Arduino board is needs to be completely replaces with a new one as it’s hard to solder the SMD microcontroller on Arduino. To test if a microcontroller is out of order use logic analyzer, multiple USB based analog logic analyzer are available that connect with digital pins to test microcontroller working.
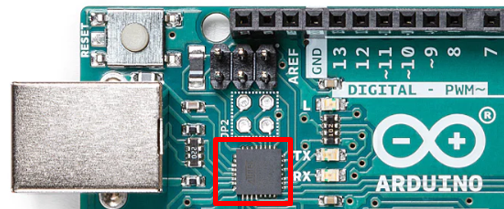
3. Check ATmega16u2: Arduino latest models have ATmega16u2 microcontroller that helps Arduino to get recognized by PC and build serial communication between Arduino and PC. It might be possible that an electric or voltage surge can burn out this chip, so the Arduino board will not be recognized by your PC. If the chip is in working condition but not recognized by PC then try to update the bootloader program along with correct fuses. If the issue persists then replace the serial chip or buy a new Arduino board.
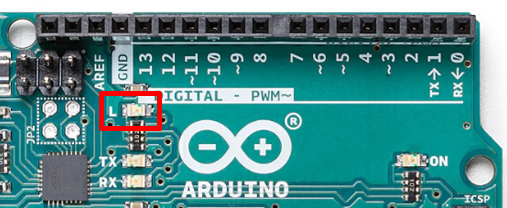
4. Check Pin 13 LED Blinking: Arduino IDE has a test program known as Led Blink sketch which comes by default in the new Arduino board. Arduino is equipped with a built-in LED on pin 13. Upload the blink sketch by connecting the Arduino board with the PC. If the Led starts blinking with a delay of 1 sec, then it shows the Arduino is fine and working accordingly.
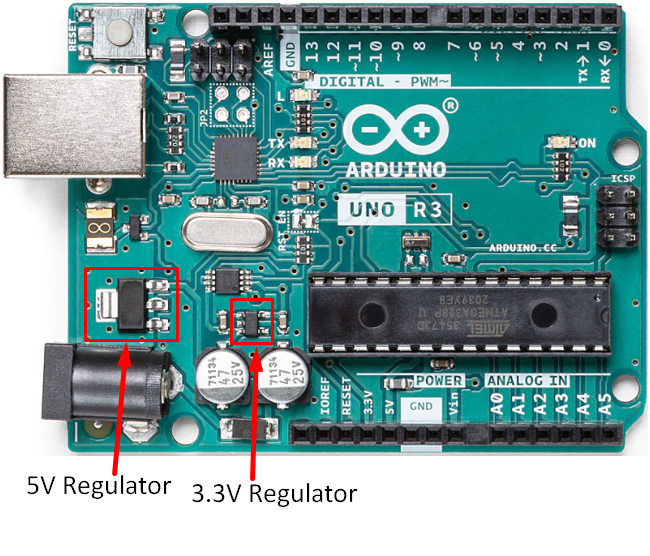
5. Check Voltage Regulator: Arduino has on-board two voltage regulators once the Arduino is powered up voltage goes through these two regulators and then given to Arduino and microcontroller. One voltage regulator is of 5V and other one is of 3.3V. Voltage given through Vin and DC barrel jack is passed through these regulators. Once the regulators start heating due to excess voltage it can damage the Arduino board and may shut it down permanently.
Both these regulators are available easily and can be replaced if not working.
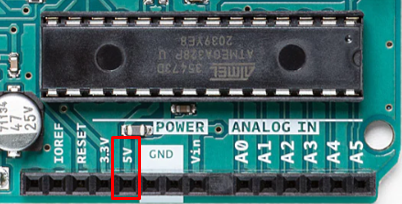
6. Check 5V Output Pin Voltages: Once the voltage is regulated, we can get the regulated 5V output from Arduino using a 5V output pin. If the 5V pin is giving output less or more than 5V then there is a high probability that the Arduino board might be damaged somewhere or going to shut down soon. Atmel microcontrollers are designed to work on maximum voltage of 5.5V anything above that can fry your Arduino board permanently.
Conclusion
Working with Arduino sometimes does not go as well as we think of, you might face issues when Arduino suddenly shuts down until you find out that the Arduino board is fried. So here we discuss all the basic elements of Arduino that need to be checked before we drive our conclusion. Multiple Arduino peripherals are replaceable and readily available to get Arduino running again. Follow the above checklist to troubleshoot the Arduino board.


