If you are not sure how to change the Mac address on Raspberry Pi, follow this article as a guide.
How to Change Mac Address on Raspberry Pi?
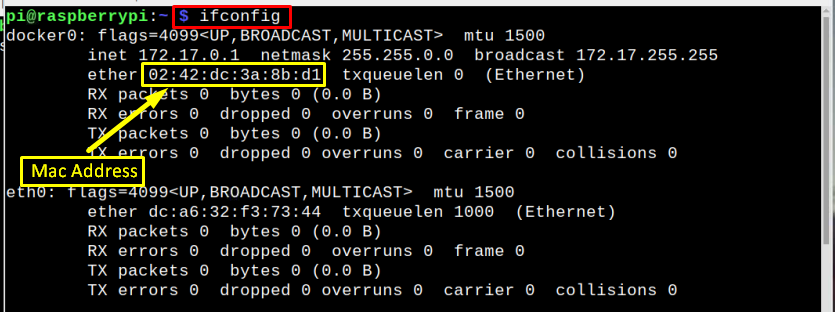
To change the Mac address for your Raspberry Pi, we will use a mac changer tool that can be easily installed from the official Raspberry Pi repository. However, before that first, let’s display the permanent mac address of the Raspberry Pi device using the ifconfig command:
In the output the characters written in front of ether are the mac address of Raspberry Pi:
Or alternatively you can use the below-mentioned command to display the Mac address directly, but remember depending upon the type of network connection, the command is altered like for wired network eth0 is used in the command and for wireless connection the wlan0 is used:
For Wired Network / Ethernet

For Wireless Network

Now, to change the Mac address, follow the below-given steps:
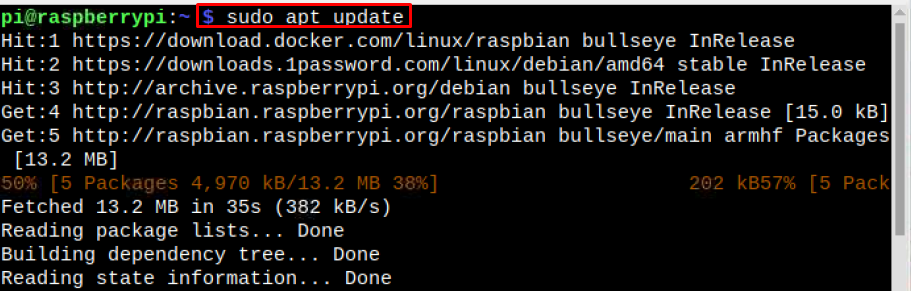
Step 1: First check for an updated package in the Raspberry Pi repository using the below-written command:
Step 2: Then upgrade the packages using the upgrade command as shown below:

Step 3: Now install the mac-changer tool on Raspberry using the below-mentioned command:

A prompt will appear on the screen to ask you about changing the mac address every time after the device is connected to the network, choose <Yes> here:
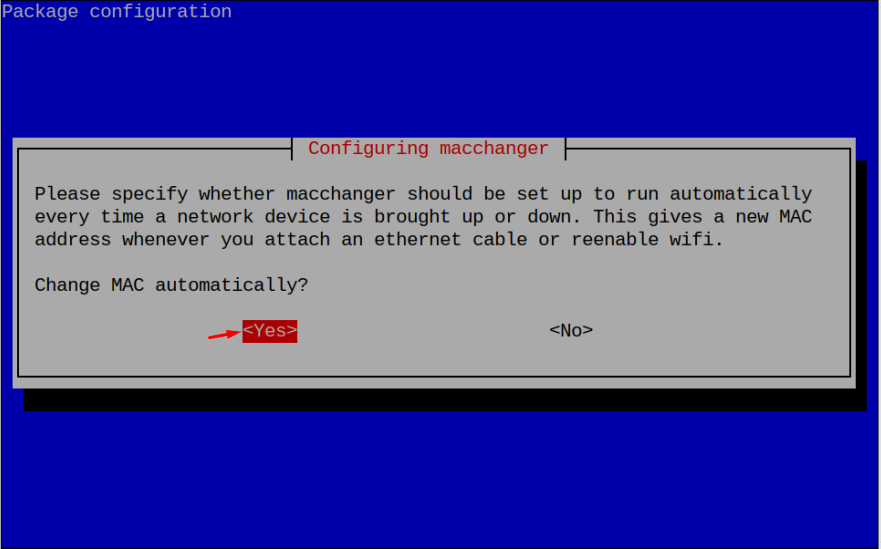
Note: It is recommended to change the Mac address with a randomly generated Mac as it will generate a new Mac address after every time you connect to the network, decreasing the chances of the Mac address getting tracked.
Step 4: Since I am performing the Mac address changing process on wlan0, it’s necessary to turn down the “wlan0” interface on Raspberry Pi.
Note: If you are accessing the Raspberry Pi terminal remotely, connect an Ethernet cable since the above steps will disable the WiFi.

Note: If you are using ethernet then replace the wlan0 with eth0.
Step 5: Now run the below-mentioned command to randomly generate Mac address on Raspberry Pi:
The newly generated Mac address will display as an output:

Step 6: After turning wlan down use the below-mentioned command along with the desired Mac address:
Note: The xx:xx:xx:xx:xx:xx needs to be replaced with twelve characters which could be numbers or alphabets:

Step 7: After changing the Mac address, turn up the wlan0 to allow Raspberry Pi to have network access with a new Mac address:

Change Mac Address Back to Permanent
After changing Mac address, if you now feel like changing it back to the previous (permanent) Mac address then turn down the wlan by using the below-written command:

Then run the below-mentioned command to change the Mac Address back to the permanent one:

Then finally turn up the wlan to connect to the network with a permanent Mac address:

Note: In all the commands which are discussed in the article, you can use wlan0 or eth0 depending upon the type of network connection you are using.
Conclusion
You can change the Mac address of Raspberry Pi by installing the macchanger package from the official Raspberry Pi repository. After installing the macchanger, turn down the network and run the macchanger command to change the mac address. Mac address could be generated randomly or according to user desire but it is recommended to change it randomly to make it less trackable. After changing the Mac address, turn up the network to connect Raspberry Pi to the network with a new Mac address.