In this tutorial, we will show you the method to change the default SSH port in Raspberry Pi.
How to Change the Default SSH Port in Raspberry Pi?
To change the default SSH port in Raspberry Pi, open the sshd_config file using the nano editor by typing the below-mentioned command into the terminal:

Then into the configuration file, scroll to the point where #Port 22 is written:

Uncomment this port number by removing the # from the left and change the Port number to your desired number. You can choose any number between 1024 – 65535. Here, I have used 2500 for the SSH port.

Then press Ctrl+X then Y to exit and save the modified file.
Now to allow the traffic on our newly set port, follow the below-mentioned command:

Note: You can install Firewall (ufw) on Raspberry Pi from here.
Now restart the sshd service so that it can restart with the changes we have made for sshd:

The default SSH port has changed successfully, and now user can access the Raspberry Pi through SSH using port number 2500.
Accessing SSH Through Windows with a New Port Number
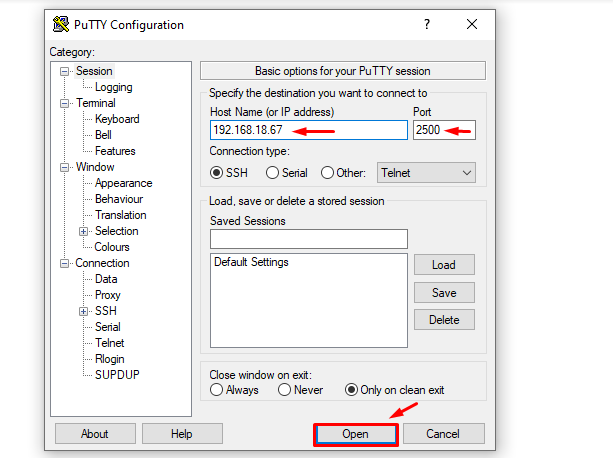
PuTTY is required to access the Raspberry Pi through windows. The user just needs to install PuTTY on a laptop or PC. Once done, open the PuTTy application and enter the IP address of the Raspberry Pi server with the newly set port number as 2500.
If you do not know the IP address run the below-mentioned command into the Raspberry Pi terminal to find out the IP address of the server:
The IP address will be displayed as an output of the above command:

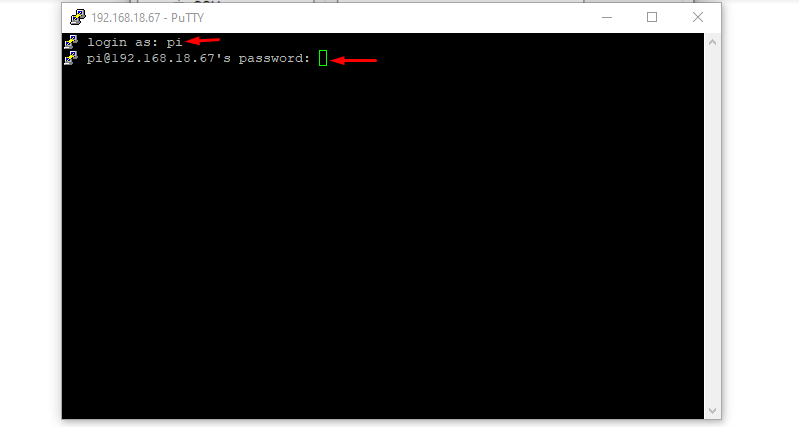
Once you have entered the IP address and port into the PuTTY it will take you to the login screen where you have to enter your Raspberry Pi username and password to get the SSH access into the Raspberry pi:
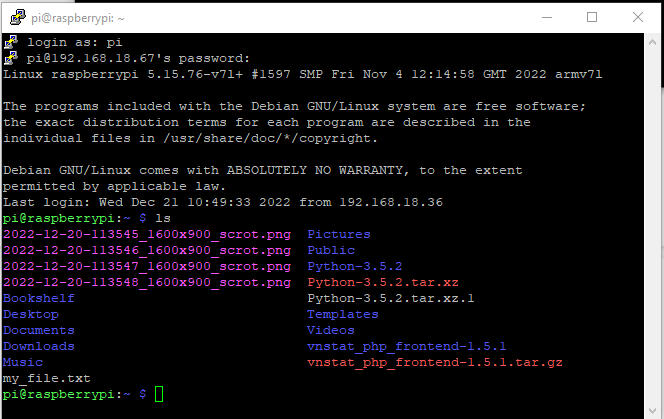
Below I have just run a simple ls command to show that I have accessed the Raspberry Pi through SSH on windows:
Accessing SSH Through Mac with a New Port Number
If you are accessing an SSH port through Mac then you must mention the port name in the command. Just open the z-shell and type the below-written command along with the IP address and port number:
Syntax:
Example:
In the example below I have used my server’s IP and the SSH port number which I have set for my SSH port:
Just by using the above command along with the Raspberry Pi password user can access the newly set port.

Conclusion
The default SSH port in Raspberry Pi is 22, which the users can change by opening the sshd_config file using the nano editor. The port number can be assigned according to their choice and once it’s done, restart the service of sshd so it can start with a newly assigned port number. After that, the Raspberry Pi system can be accessed through SSH using the new port number.