NGINX is a lightweight, open-source and robust web server that acts as an email proxy, reverse proxy and HTTP cache. It can balance the high load and has a fast response time allowing users to load the web page at a quick pace. The server is used by many high-profile platforms such as Google, IBM, Twitter, and Facebook. Although the NGINX server lags behind Apache in terms of performance, it’s easy to set up and utilizes fewer memory resources than Apache.
This article will guide you on installing and configuring NGINX Server on Raspberry Pi and building your own NGINX Web Server.
Build Your Own Raspberry Pi NGINX Web Server
Building an NGINX web server is not a complex process; you can do so easily by carefully following the below-mentioned steps.
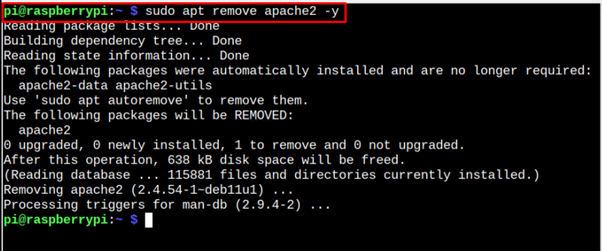
Step 1: Remove Apache From Raspberry Pi
Before moving towards the main process of setting up the NGINX web server, you should need to remove the Apache web server from your Raspberry Pi in case it’s installed in your system. To remove Apache, the following command will be used:
Step 2: Install NGINX on Raspberry Pi
After successfully removing Apache from Raspberry Pi, you can install NGINX on Raspberry Pi using the following command:
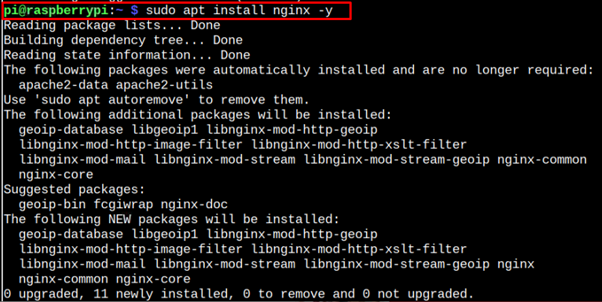
Wait for a few seconds till NGINX installation completes and afterward you can move towards the next step.
Step 3: Start NGINX Service on Raspberry Pi
After the installation, you can start NGINX service through the following command:
![]()
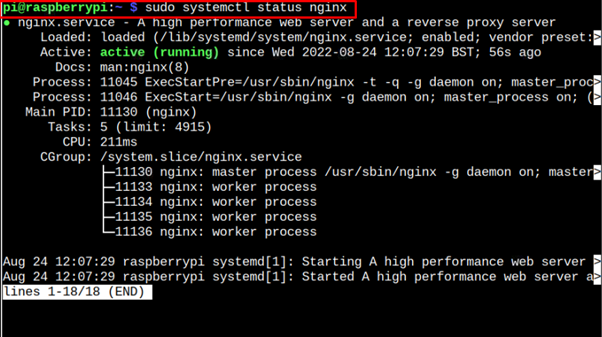
Step 4: Check NGINX Service Status on Raspberry Pi
Ensure that the NGINX service is successfully running on your Raspberry Pi system and you can confirm it by applying the following command:
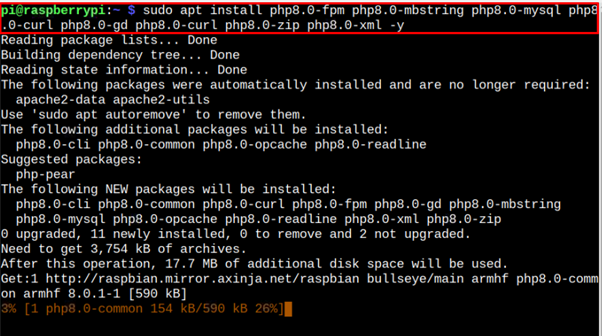
Step 5: Install PHP Dependencies on Raspberry Pi
NGINX server requires some PHP dependencies that you should install on your system using the following command:
Step 6: Configure NGINX on Raspberry Pi
After successfully installing dependencies, you should need to do some configuration within the NGINX configuration file and you can open this file through the following command:
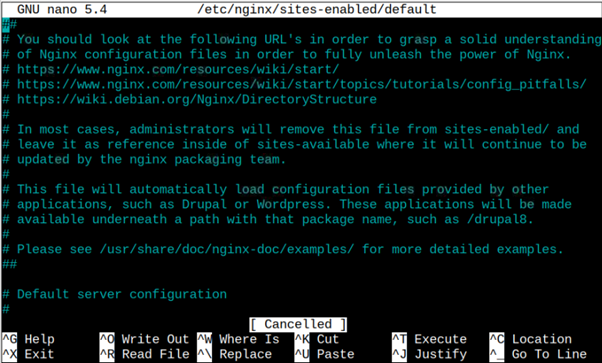
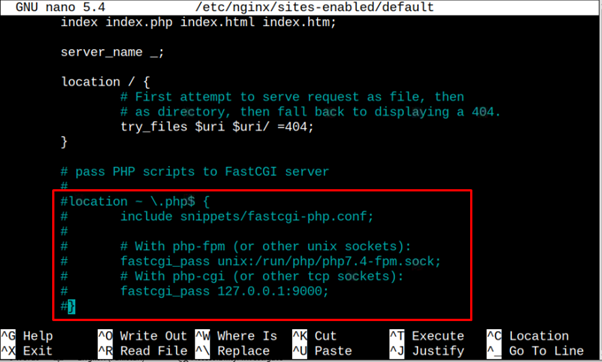
Inside the file, first find the following highlighted line:

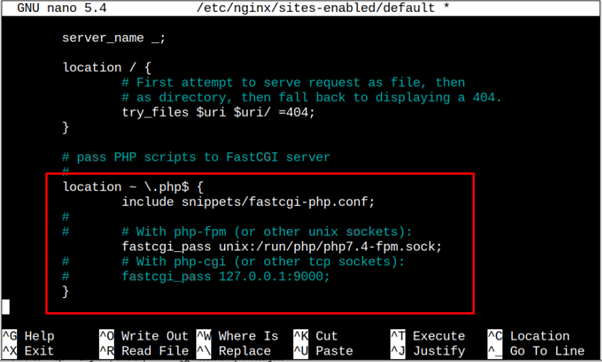
Replace the above lines with the following line:

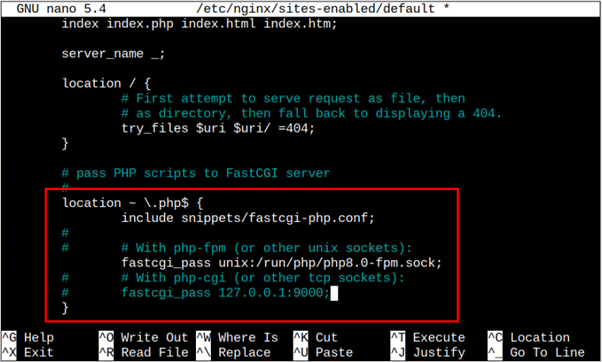
Further, you should also uncomment the following highlighted lines inside the file.
Since you have installed php 8.0, you should replace php 7.4 with it.
Save the file using CTRL+X, add Y and then restart the NGINX service via following command:
![]()
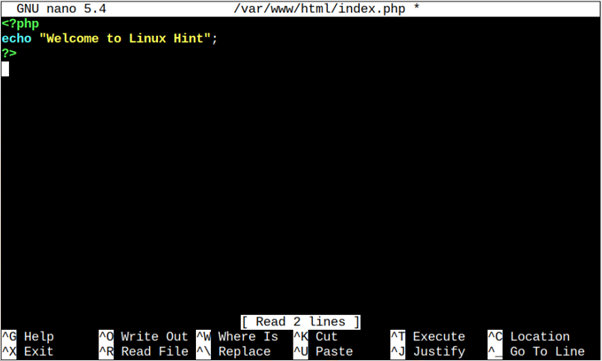
After the configuration, open the index.php file using the following command:
Then add the simple code for publishing the message on the web.
echo “Your Message”;
?>
Save this file and head to your browser and enter the IP address of your Raspberry Pi system that you can find through the “hostname -I” command.
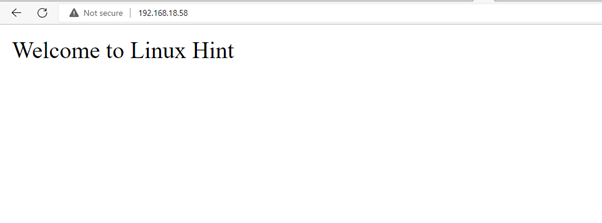
The above output on the web shows that we have successfully configured and built our NGINX web server on Raspberry Pi.
Conclusion
NGINX is a lightweight web server that is easy to set up and can easily be installed on your Raspberry Pi through the “apt” installation command. Afterward, through some configuration, as mentioned in the guidelines above, you can successfully build your own NGINX web server using your device’s IP address.