The bootloader is present in the main memory of Arduino, when Arduino is turned on, the bootloader decides what to do. In other words, it is a small software that comes as pre-programmed on every Arduino board, mainly assisting in uploading the codes on Arduino. Apart from Arduino, in every microcontroller, the behavior of the microcontroller is defined by the bootloader. In this write-up, the bootloader of Arduino has discussed in detail also the reasons for burning a bootloader in Arduino boards.
What is a bootloader in Arduino
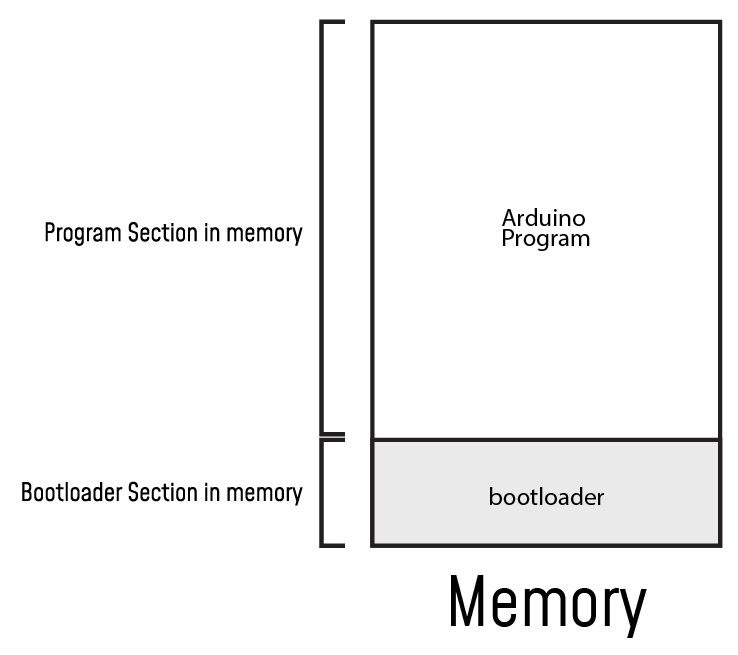
In Arduino boards, the programs are sent to them from the Arduino IDE software according to which it gives the output. Now, in the main program memory of Arduino, there is a specific location where the bootloader is present. When the Arduino is connected with a voltage, the bootloader first waits for the new code which is ready to upload on Arduino from a computer, and if so, then it will erase the previous code if any exists in the memory and place the new code in it. Else, if there is no piece of code to be uploaded, then the bootloader will look for the code in Arduino memory, and if it is already present then execute the instructions of that code.
Why do we need to burn a bootloader on Arduino
We need to burn a bootloader on Arduino because of the following reasons:
- The pre-installed bootloader in Arduino is corrupted which happens rarely but if it happens then we have to burn a new bootloader in it
- We have replaced the microcontroller of the Arduino board and we have to burn a bootloader
- We want to change the bootloader because by default the bootloader comes with Arduino boards usually waits for 10 seconds when it turns on for the new code, but in some projects, we want to execute the instructions of code immediately, then we have to burn a new bootloader in Arduino
How to burn the bootloader on Arduino
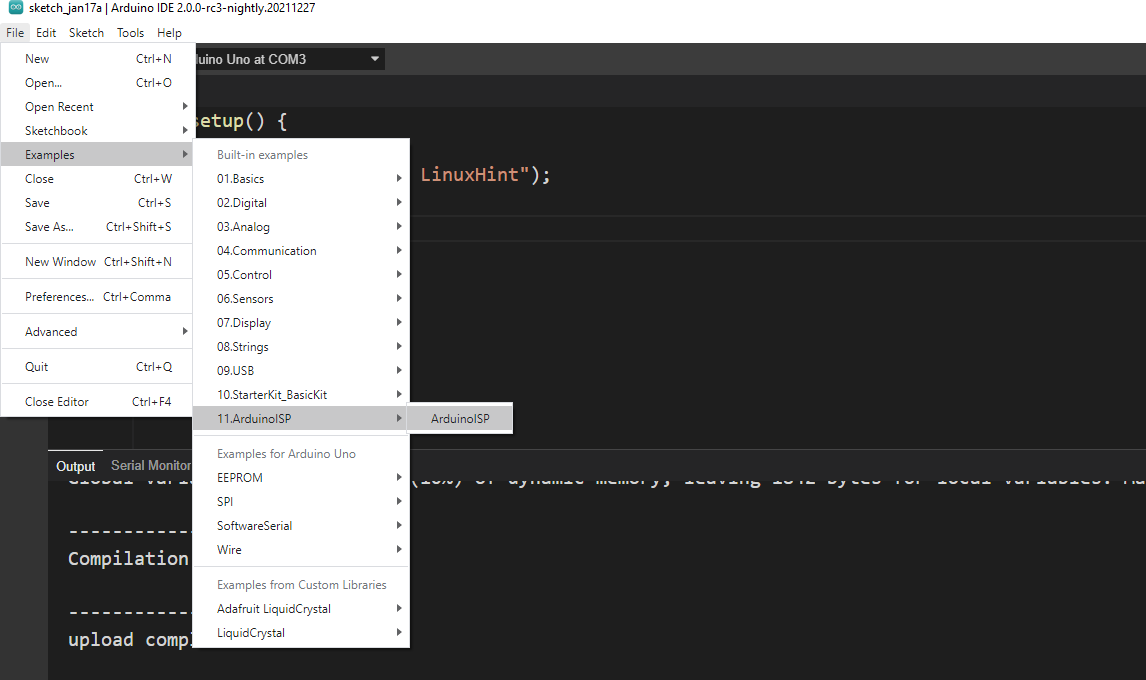
To burn the bootloader we have to open the ISP Programmer by clicking on “Files”, a drop-down menu will be open, select “Examples”, then “11.ArduinoISP”, and finally click on the “ArduinoISP”:
The screen of ArduinoISP will be opened as:
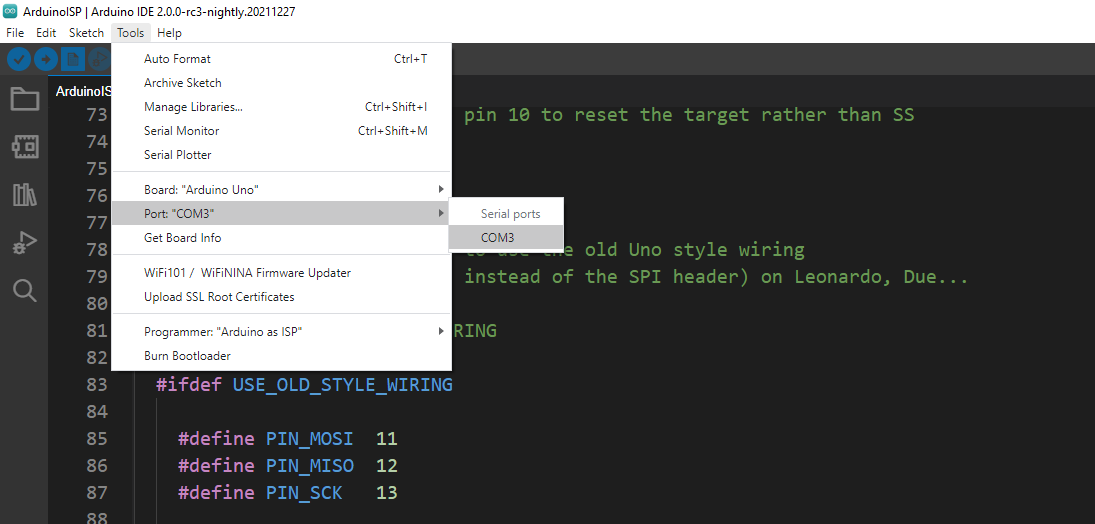
Now in ArduinoISP, select the port where Arduino has been connected, we can choose by clicking on “Tools”, then “Port: “COM3”, and finally choose the port where it is connected:
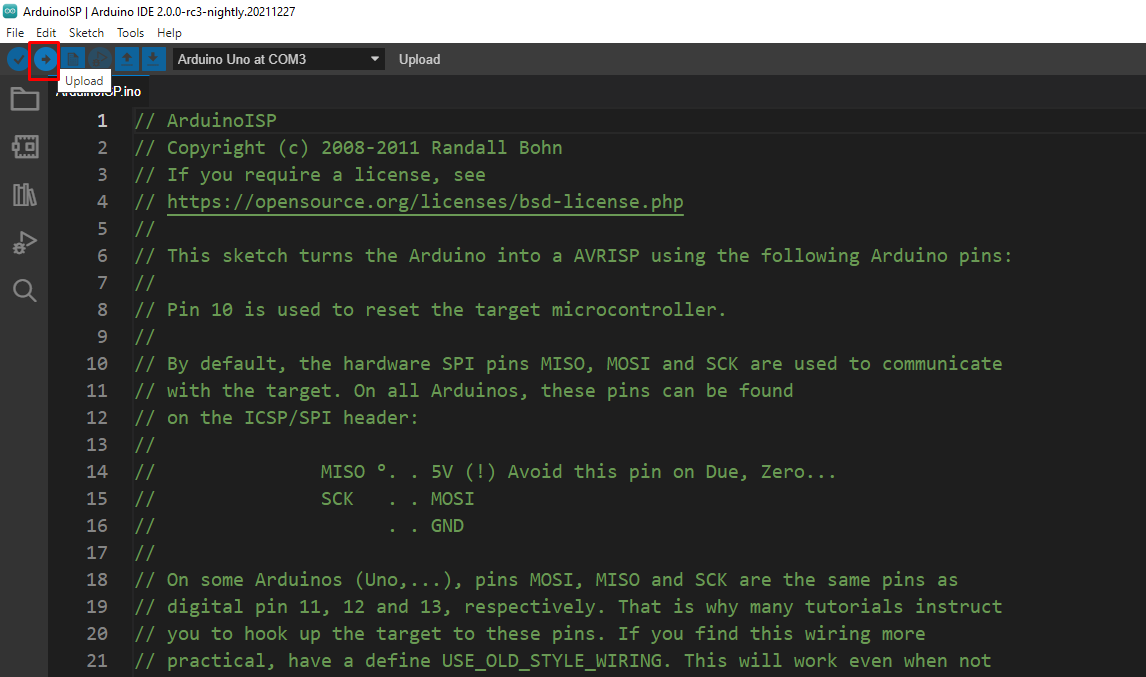
Upload the code in ArduinoISP by clicking on the upload icon so that it behaves as an AVRISP:
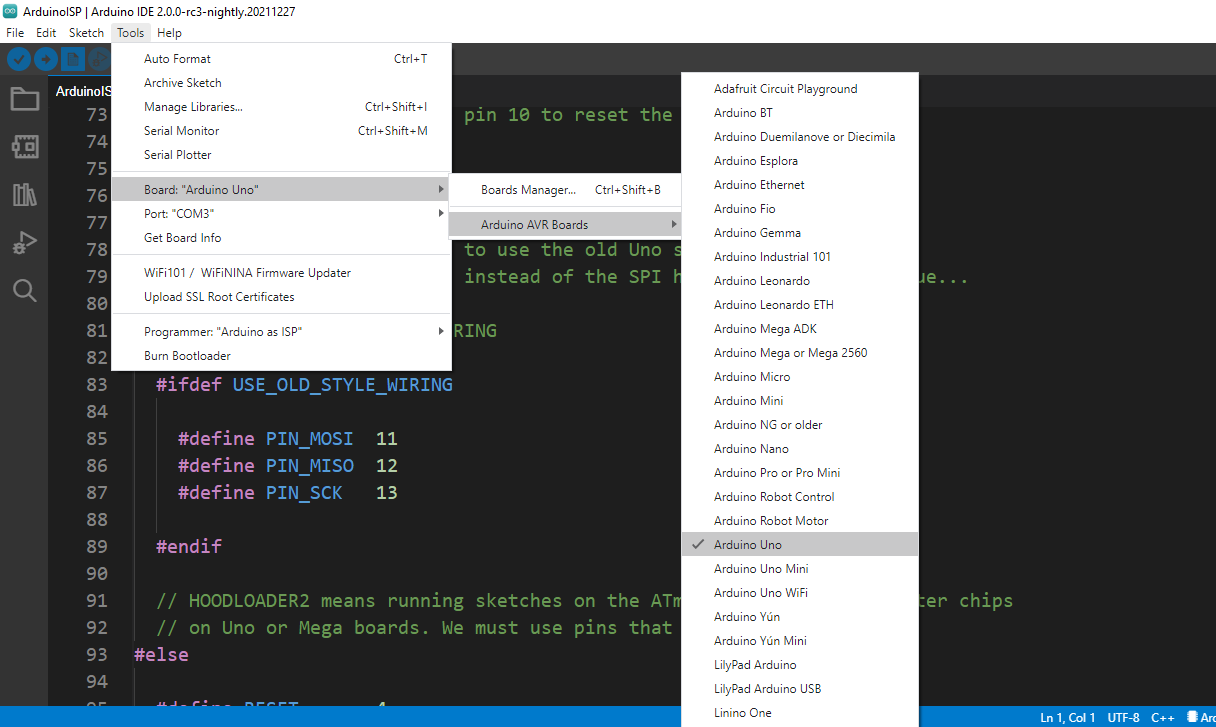
Once the code is uploaded, go to the “Tools” and select your Arduino board of Arduino:
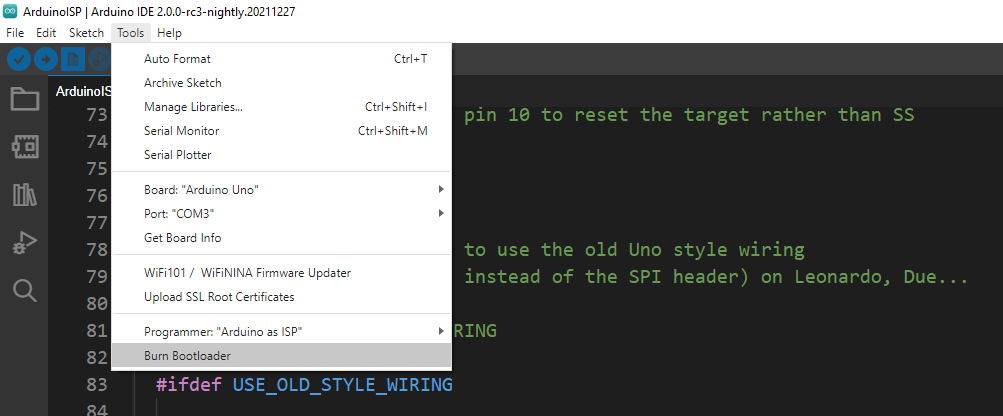
Once the board is selected, again to the “Tools” and select “Burn Bootloader”:
Conclusion
A bootloader is a file(containing a set of instructions) stored in the main memory of Arduino which controls the behavior of Arduino and tells whether to wait for the code from a computer or execute the already present code in Arduino memory. The bootloader has to burn on board especially when you change the microcontroller of the Arduino board. In this write-up, the bootloader in Arduino is explained with its working and also how to burn the bootloader in Arduino.

