Why do we need to blink without using the delay() function in Arduino
The delay() function produces a delay of a defined time in the execution of statements or we can say, the delay() function pauses the entire program and no statement will be executed until the delay() does not come to an end.
It means we cannot do any other task until the delay is not completed, this is the main concern why sometimes it is discouraged to use the delay() function. Let us consider the example of a courier-man, he goes to the house and finds no one in-home, the neighbors told, the concerned person will be back to his home in an hour. Now, What should the courier-man do? Either he can wait or can deliver the parcels of the neighboring customers and come back after an hour to deliver the parcel of that person.
Similarly, in programming we don’t recommend using the delay() function and pausing the entire program for some time, instead of that we prefer to perform some other task while the LED’s blink.
Blink without using the delay() function code in Arduino
In Arduino, we can blink LEDs without using the delay() function by a very simple code. Before going through code, let us explain the purpose of some built-in functions which are being used in the code:
| Functions | Purpose |
|---|---|
| pinMode() | This function is used to define the specific pin to act as an output or input |
| digitalWrite() | This function is used to configure the pin according to High or Low states |
| Serial.begin() | This function is used for the serial communication |
| millis() | This function is used to extract the execution time of code in Milliseconds |
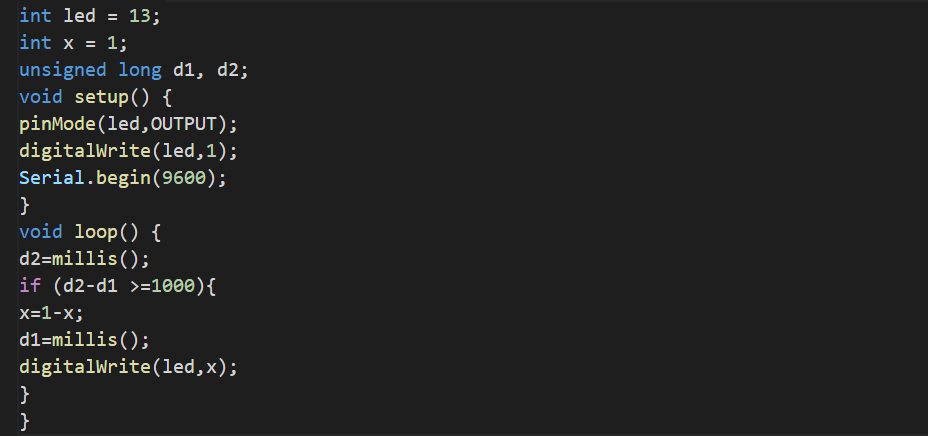
Consider the following code:
int x = 1;
unsigned long d1, d2;
void setup() {
pinMode(led,OUTPUT);
digitalWrite(led,1);
Serial.begin(9600);
}
void loop() {
d2=millis();
if (d2-d1 >= 1000){
x=1-x;
d1=millis();
digitalWrite(led,x);
}
}
The explanation of the above code is:
- We have defined a variable “x” with an integer data type and it will be used to change the state of the LED.
- We also define a variable LED with an integer data type and store 13 in it. This 13 will be used for the thirteen number pin of Arduino.
- Two variables d1 and d2 are defined with the unsigned long data type. The “unsigned long” data type is used to store 32 bits of number and it can store up to 4,294,967,295 numbers and the thing to be necessary to tell is that this data type does not store negative numbers in it.
- In the void setup(), first, we use the pinMode() function and declare pin 13 as an output pin.
- Next, we used the digitalWrite() function to make the state of pin 13 high.
- Lastly, we used serial communication at a baud rate of 9600.
- In the void loop(), we type the code of blinking of LEDs because we want to repeat it for an infinite time period.
- We extract the time of execution of the code till now and store the value in variable d2.
- Then using the if statement we checked the condition if (d2-d1>1000), if it is true, it will change the value of x.
- Then we store the other value of execution of code in d1.
- Lastly, using the digitalWrite() function, changed the state of the LED using the value of x.
- This will continue for infinite time (because the value of d2-d1 will not be greater than 1000 in any case).
Simulation
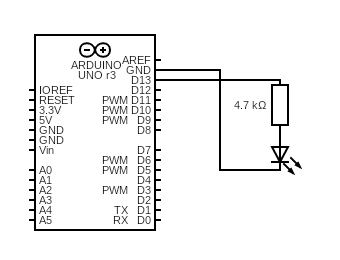
We will run this code in the Proteus simulation, we will open the Proteus and find the following components:
- Arduino Uno R3
- LED
- Resistor
- Ground
Connect the one terminal of the resistor with pin 13 of Arduino, connect the positive terminal of the LED with the other terminal of the resistor, and connect the ground with the negative terminal of the LED. Once the circuit is completed, double click on Arduino and upload a “hex” file of Arduino code in it.
Play the project and the LED will start blinking as shown below:
Hardware configuration
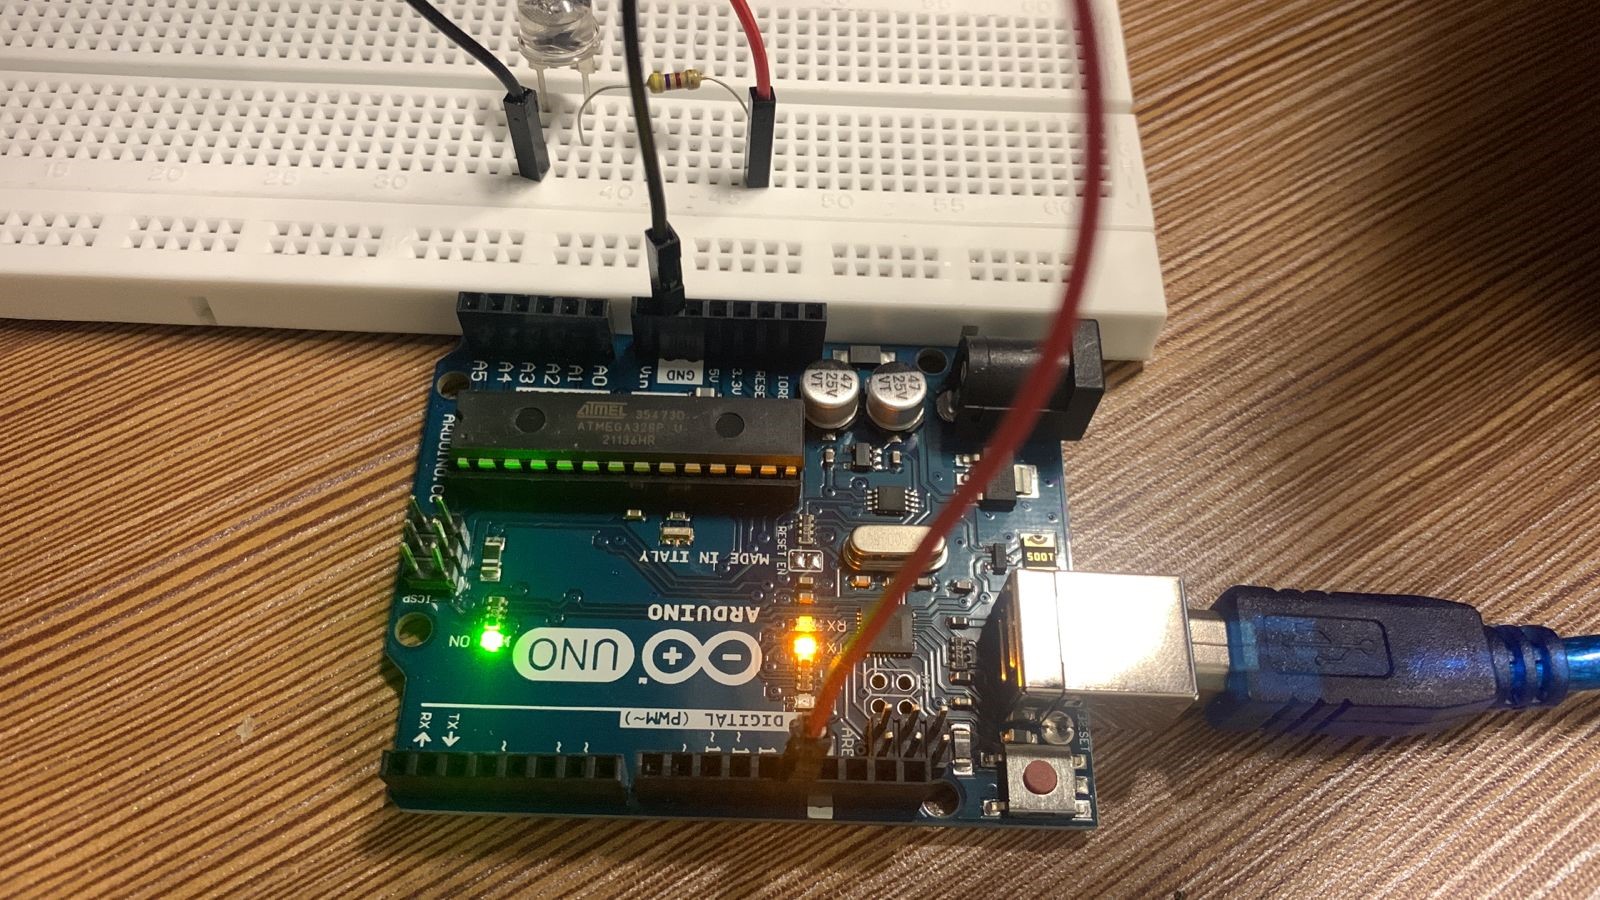
The same circuit which is simulated on the proteus will be assembled on the breadboard. We used jumper wires to connect the components that are LED, Arduino, and resistor:
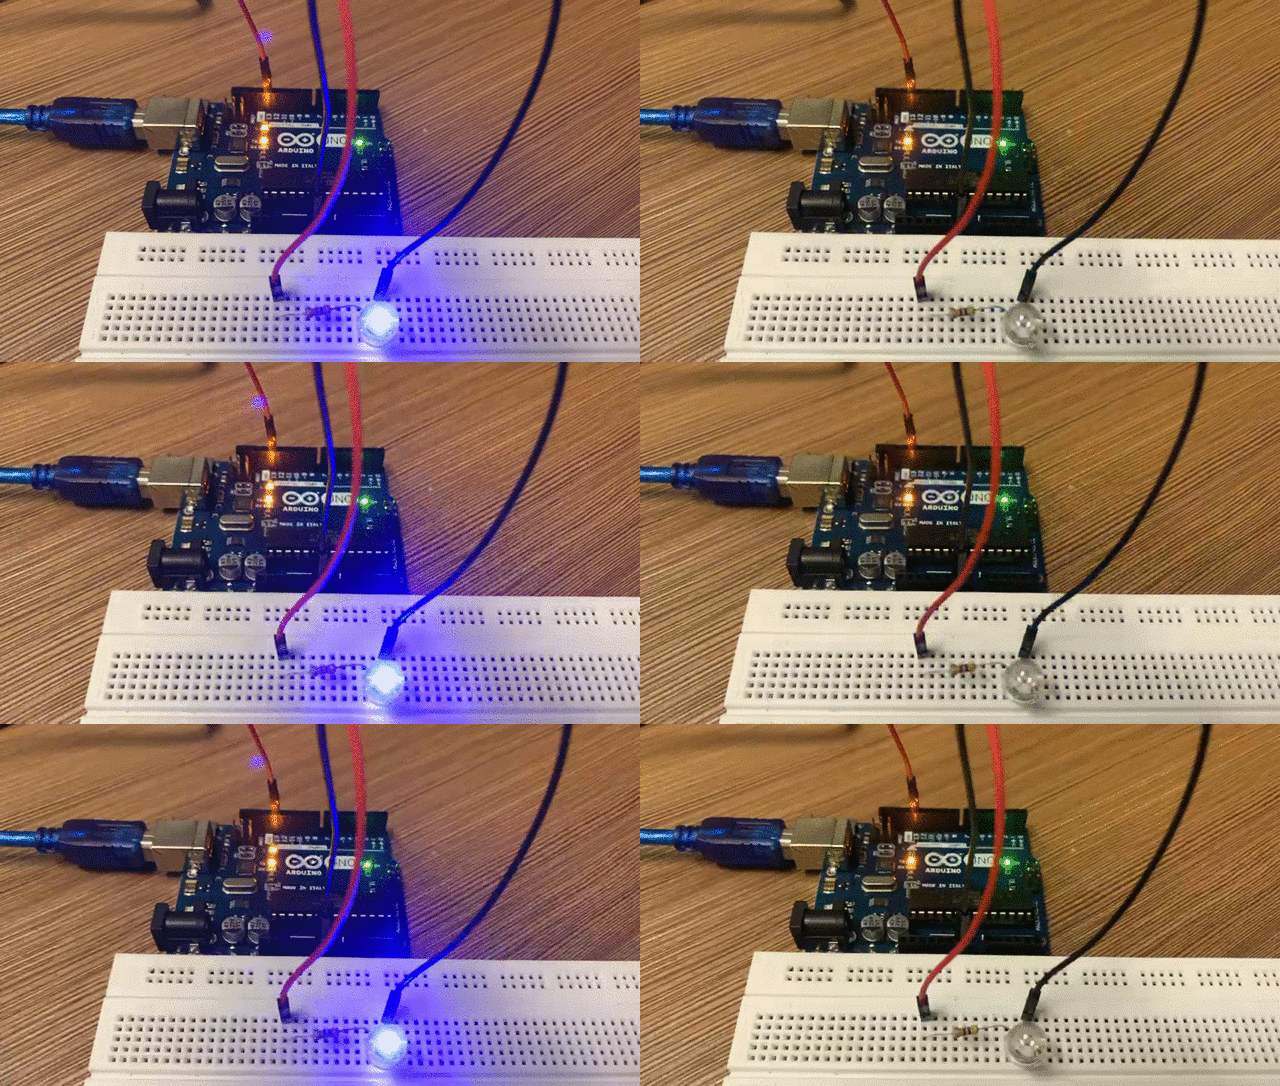
The black jumper wire is connected to the Ground of the Arduino and the negative terminal of the LED. Then a resistor(220 ohms) is connected to the positive terminal of the LED and another leg of the resistor(220 ohms) is connected to pin 13 of Arduino using the red jumper wire. The code is already uploaded on the Arduino, the working of the project is:
The LED is successfully blinking without using the delay() function.
Conclusion
The blink without delay() function in Arduino is the beginner level project which is used to demonstrate how the project can be executed without using the delay() function. Without using the delay() function we are not restricted to a single task and can run any other instructions of the code. In this write-up, we have explained the blink LED without delay() function in Arduino with the help of a demonstration of its simulation as well as its hardware configuration.


