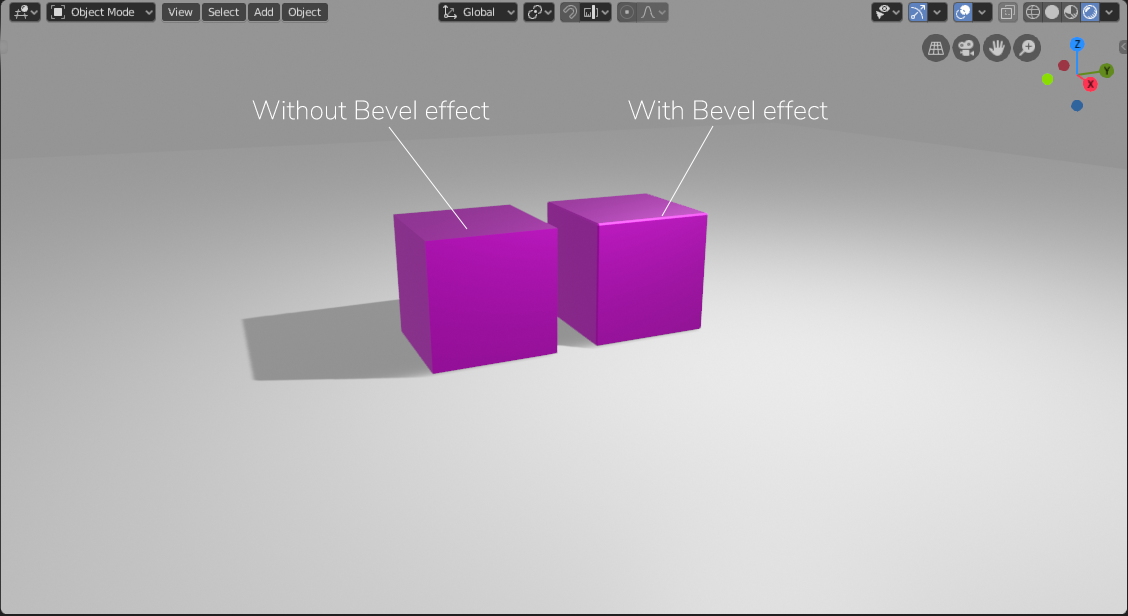
In real life, no surface is perfectly sharp. Bevel helps in bringing out the detail. With bevel applied, objects look much more appealing than without bevel. This effect can be exaggerated or subtle one, it depends on the shape of the mesh and your preference. The bevel allows you to chamfer the corners and edges of a mesh. The beveled edges catch light and change shading around corners, which gives realism to the mesh.
There are various ways to access and apply Bevel to 3D models:
- Using the Bevel Tool
- Using Modifier
- Using Shortcut Keys
Using the Bevel Tool
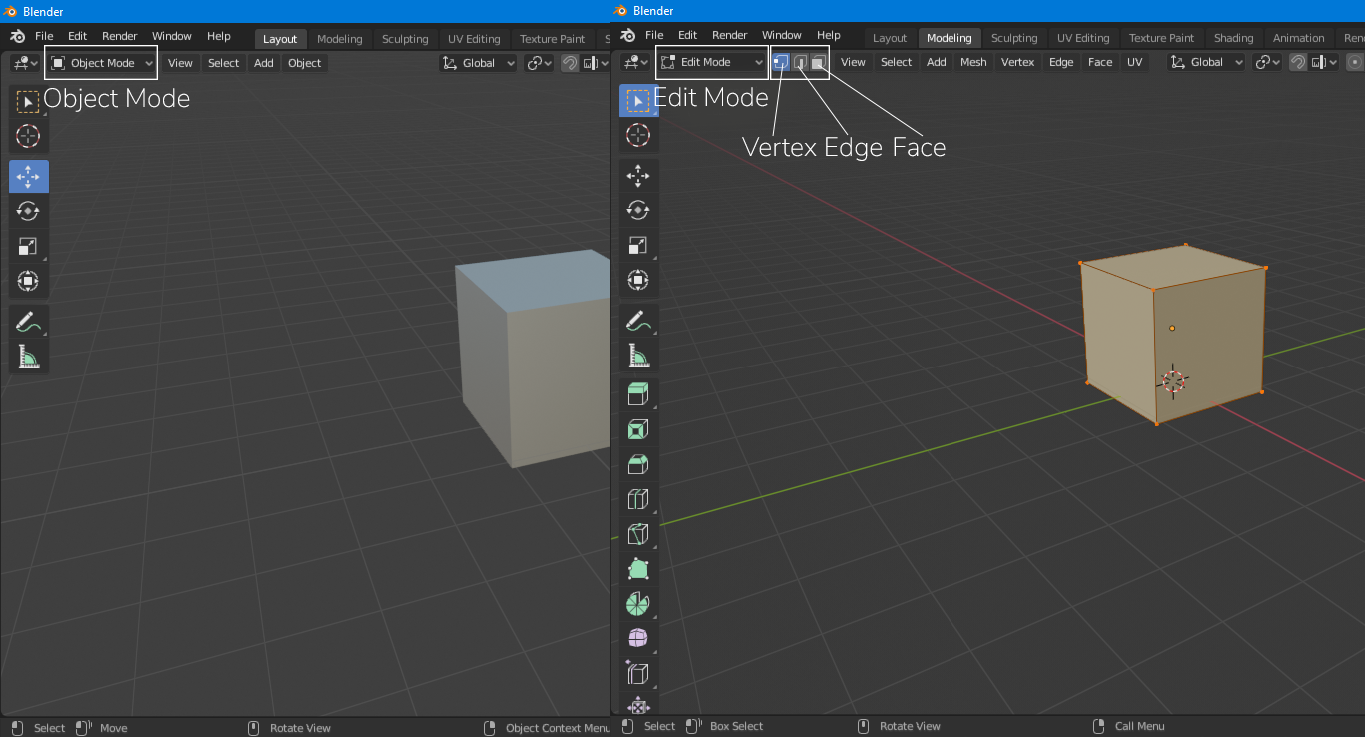
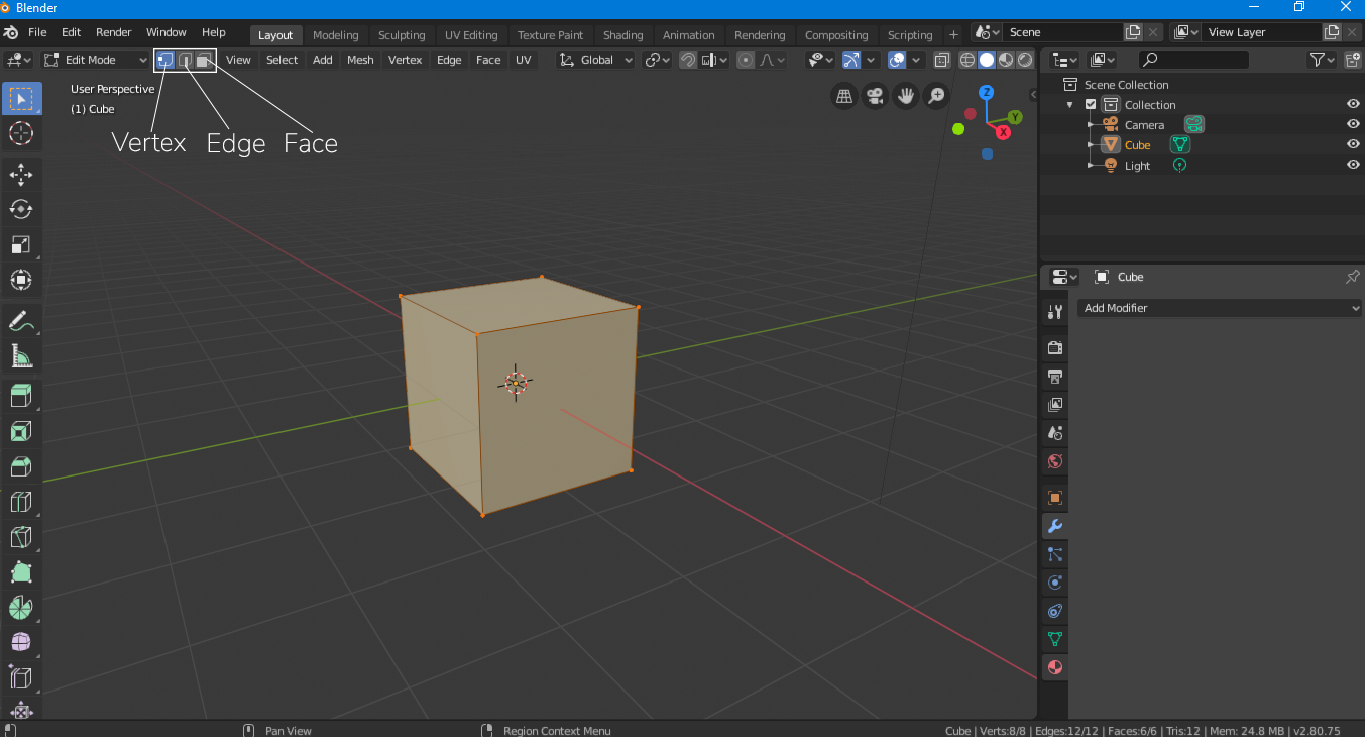
Enter Edit Mode from Object Mode to apply bevel on any object/mesh. Select the object and click on the “Modeling” tab at the top or simply use the hotkey “Tab” to enter the Edit Mode. A small window will change from “Object Mode” to “Edit Mode”, which will indicate that you are in the “Edit Mode”. Bevel can only be applied to edges and vertices. So, select the edge option from the top and then edge of the mesh.
Choose the bevel tool from the Quick Tool menu on the left side. Then left click-drag anywhere on the viewport window to apply the bevel. The selected edge will be beveled.

If you want to apply it simultaneously on all edges then select all edges by pressing “A” and then repeat the procedure. If you want to increase the resolution of the bevel then simply rotate the scroll wheel to add segments to the bevel.
A small tab appears called “Bavel Tool Operator Panel” on the bottom left corner while applying the bevel, click to open it, you will be presented with the following options,
Width Type: Mode of calculating the bevel. Bevel can be applied by the amount offset, width, depth, and percent.
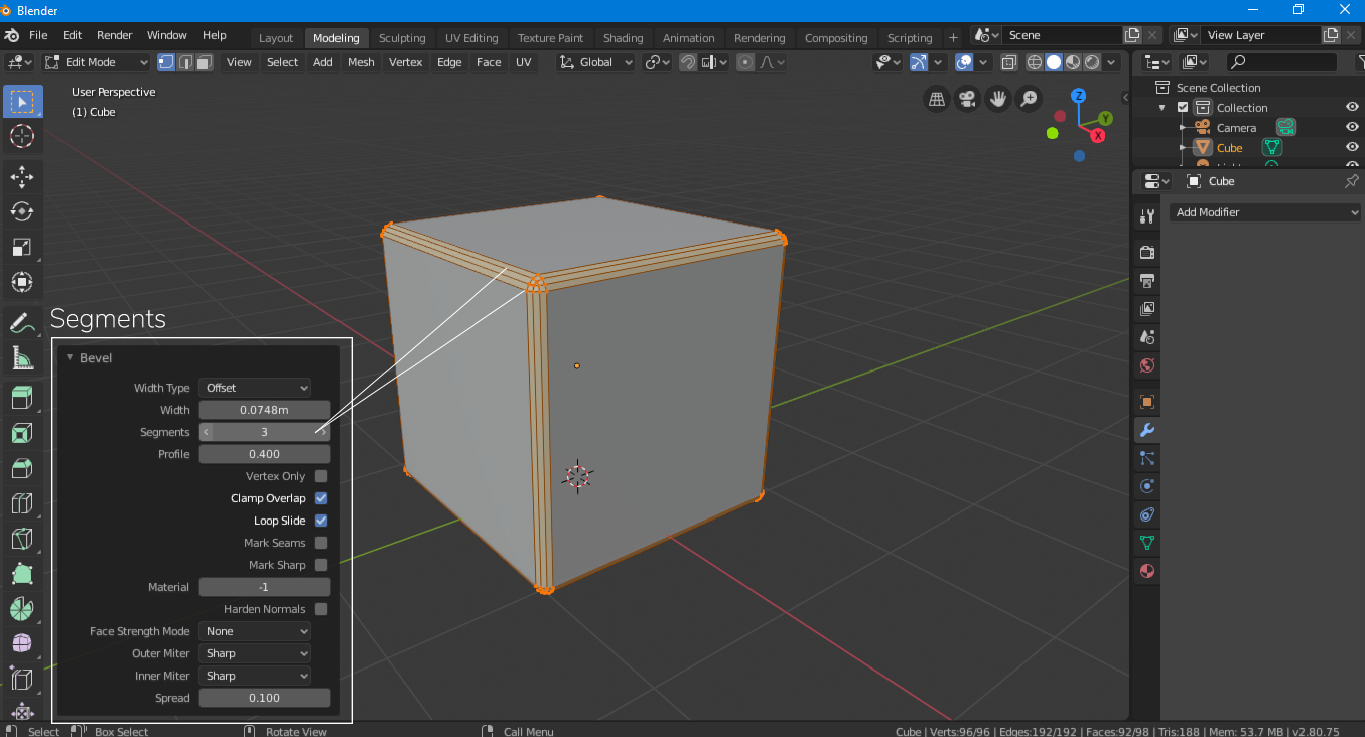
Width: Width is the amount of width according to the selected Width Type.
Segments: The number of segments increases the resolution of the bevel, the more segments are there, the more chamfered corners will be.
Profile: Profile adjust the curvature of the bevel. Profile value can be set any number ranging from 0-1.


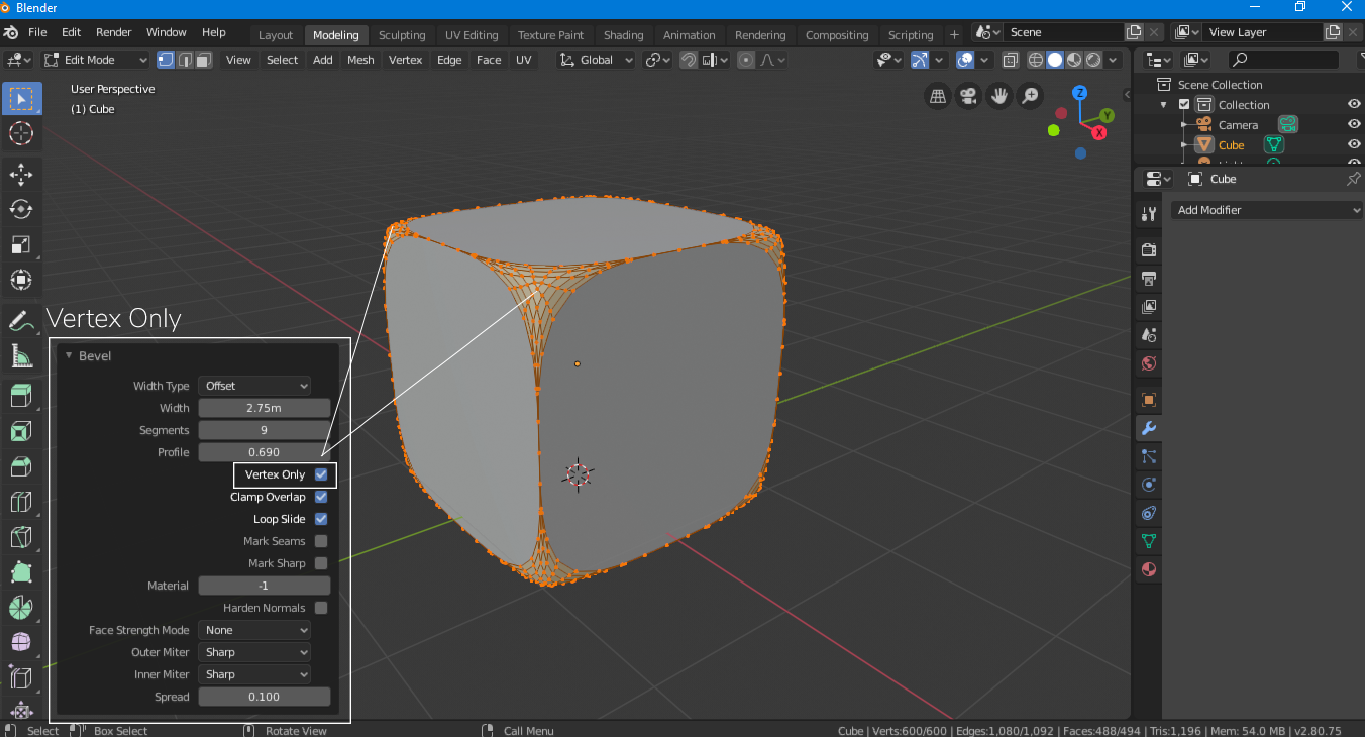
Vertex checkbox: If you want to apply a bevel to the vertices only, then check this option.
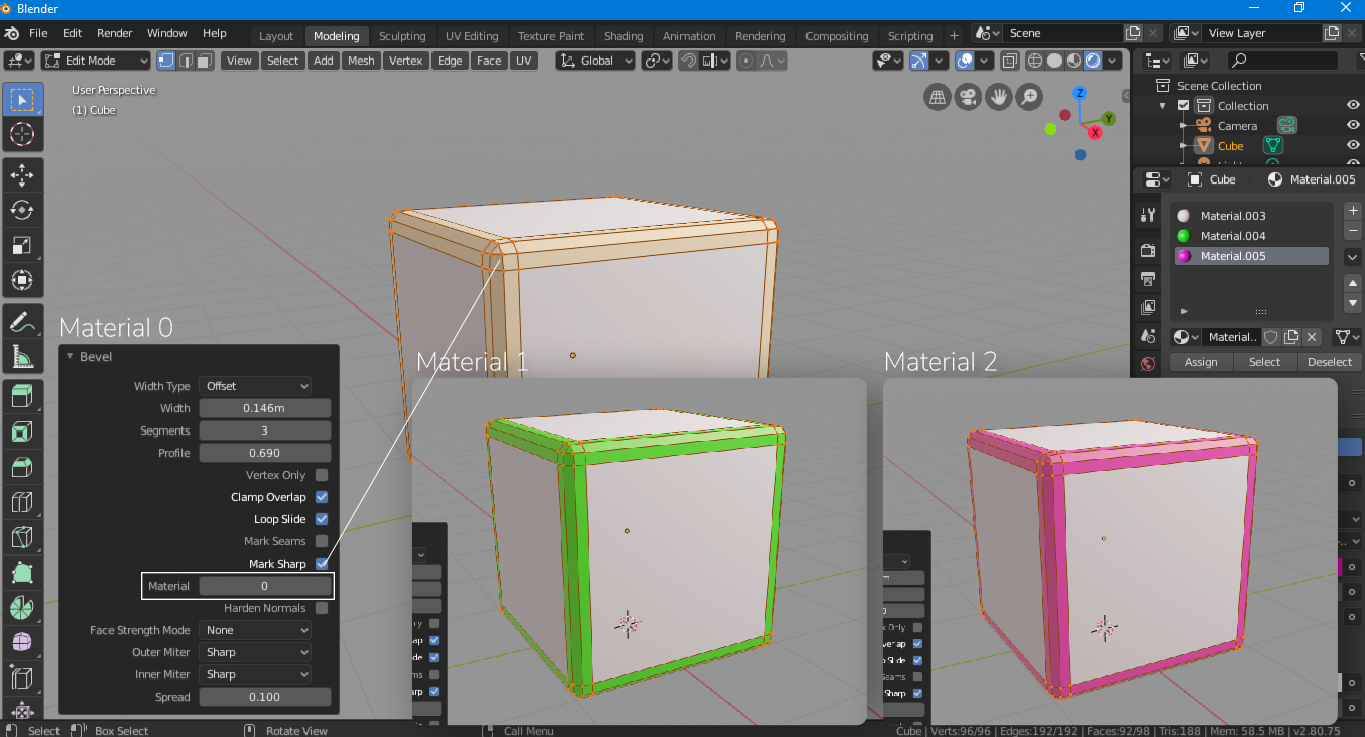
Material: The material option allows you to add material to your bevel. To add material first, create materials of your choice in the material tab. And then apply it from the operator panel. For example, Material 0 would be the default material.
Using Modifier
Another method to apply bevel is through modifier, all settings are pretty much the same. But there is one option which is not available while applying bevel through the tool and that is the “Limit” option. The Limit option allows us to apply a threshold concerning angle.
To add this modifier click on the modifiers wrench icon. And then select Bevel Modifier.


By default, the “Limit Method” is none, and the modifier will indiscriminately apply a bevel to all the edge loops and vertices. When you select the angle limit, the modifier will apply a bevel to those edges and vertices which are exceeding that limit.

Similarly, “Weight” and “Vertices” allow you to be a handpicked corner to be modified.
Like many other modifiers, the bevel modifier is also non-destructive, you can modify the mesh with bevel applied on the top of it.
Using Shortcut Keys
Bevel can be applied by using some hotkeys, it would be a much easier and faster way if you remember these keys. Steps to apply this effect using shortcut keys are given below:
Select object/mesh and press ”Tab” to enter the edit mode.
If you want to apply a bevel to all vertices and edges then select all edges and vertices by pressing “A”. Press “Ctrl B” a dashed line will appear attached to the mouse, and then move your mouse in any direction without clicking. It will apply a bevel to your mesh.
If you want to apply bevel on a specific edge then select that edge and then use “Ctrl B” to apply the effect.
To add segments just rotate the “Scroll Wheel” of the mouse.
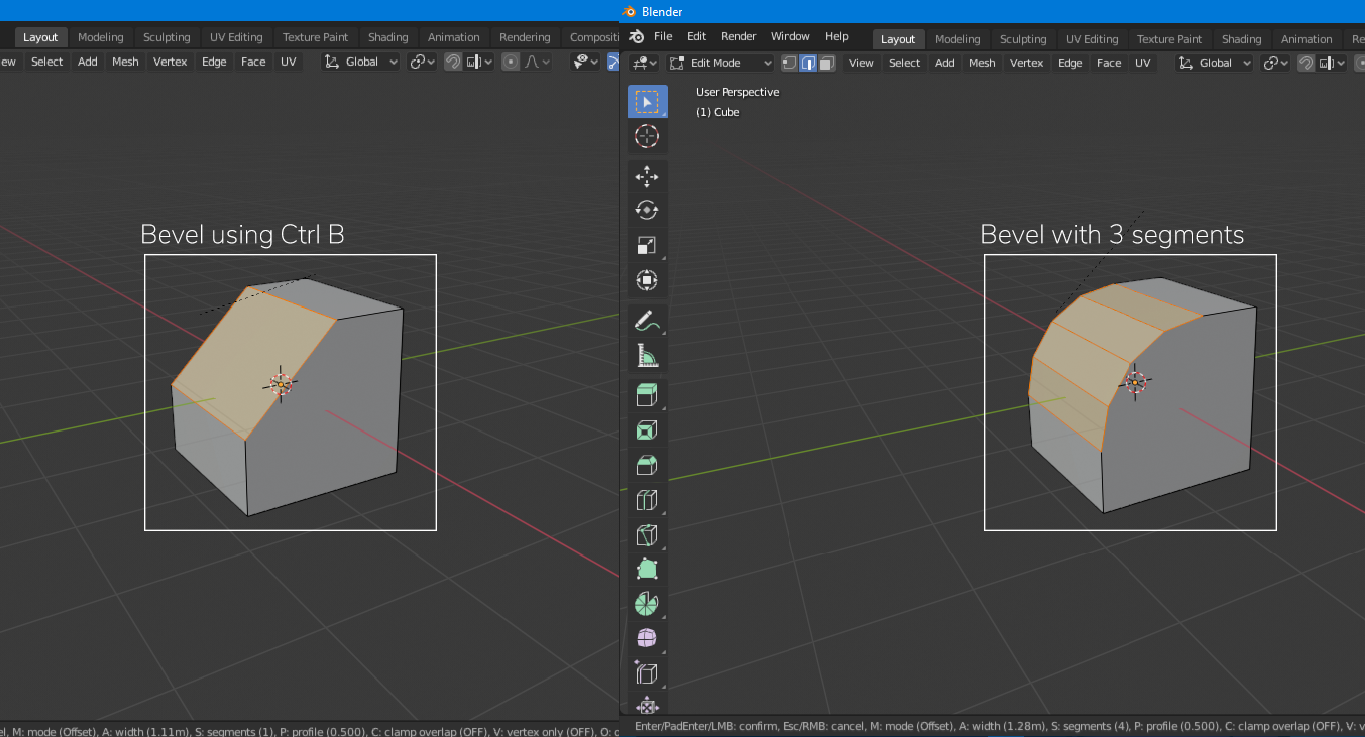
The bevel effect can also be applied to the vertices of the mesh, the shortcut key for that is “Ctrl+Shift B”, and use “Scroll Wheel” to add segments.

Conclusion
In this article, we learn how to apply bevel on a mesh using different methods and approaches. If you are a novice then try using the first method, simply select the Bevel tool from the quick tool menu and apply it. Applying bevel using modifier is pretty much the same thing. But if you require some speedy work then shortcut keys are always handy.