In Arduino, we can interface an LCD to display the characters, and in order to scroll the characters on LCD automatically, we use the autoscroll() function of the liquidCrystal library of arduino and in this write-up, we will explore about the autoscroll() function.
What is autoscroll() function in Arduino
The autoscroll() function in Arduino is responsible for the automatic scrolling of the characters that are printed on LCD. The autoscroll() function moves the characters from left to right on LCD by default or from right to left depending on the current direction of printing of characters on LCD.
In autoscroll(), the characters displayed on the LCD push the previous character to the next position, replace its position with themselves and this process continues until the last character adjusts itself on the LCD.
For this purpose, we have to use two variables so that the first variable values print on LCD and then the next variable values will make their place on LCD by pushing the values of the first variable.
What is the syntax of autoscroll() in Arduino
The syntax of using the autoscroll() function in Arduino is:
We simply use the autoscroll() with “lcd” and it will turn on the autoscrolling of the characters on the screen.
What is noAutoScroll() in Arduino
Once the auto-scrolling in Arduino is turned on, it will not stop until you stop it. To stop the auto-scrolling, we use another function that is noAutoScroll() which simply stops the auto-scrolling.
The syntax of noAutoScroll() is also similar to the autoscroll():
What is an Arduino code for scrolling the text on LCD
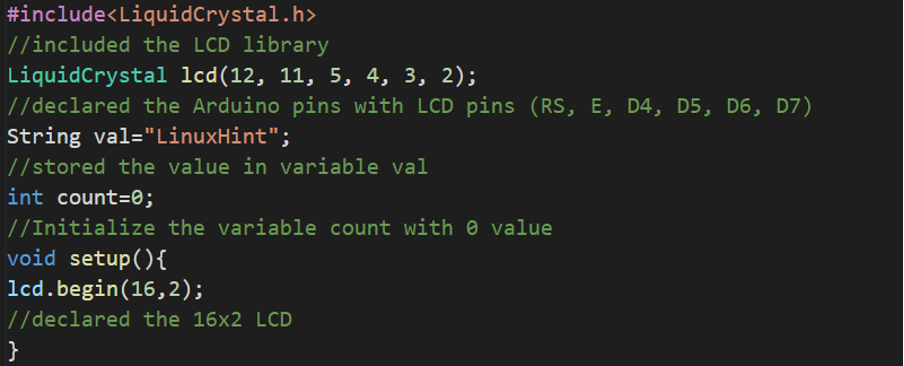
We will type a code in Arduino IDE for displaying the “LinuxHint” and then scroll the characters of this single row by using the autoscroll() function:
//included the LCD library
LiquidCrystal lcd(12, 11, 5, 4, 3, 2);
//declared the Arduino pins with LCD pins (RS, E, D4, D5, D6, D7)
String val="LinuxHint";
//stored the value in variable val
int count=0;
//Initialize the variable count with 0 value
void setup(){
lcd.begin(16,2);
//declared the 16x2 LCD
}
void loop() {
lcd.setCursor(0, 0);
//set position of cursor at (0,0)
lcd.print(val);
//printed value of val on LCD
delay(500);
//generated the delay of 500 milliseconds
lcd.autoscroll();
//started auto-scrolling of text displayed on LCD
count=count +1;
//increment the variable “count” by one
if (count>=20){
//applied if condition on count variable
lcd.noAutoscroll();
//stopped auto-scrolling
delay(3000);
//generated delay of 3 seconds
lcd.clear();
//cleared the LCD display
count=0;
//stored 0 in count variable
}
}
Explanation of the code: For using the LCD with Arduino, we have to include a library of “LiquidCrystal.h” and use the function of LiquidCrystal() to initialize the pins of the LCD depending on the use of data lines either 4 or 8. We will start communicating the LCD using lcd.begin() as our LCD is 16×2, so we use this value.
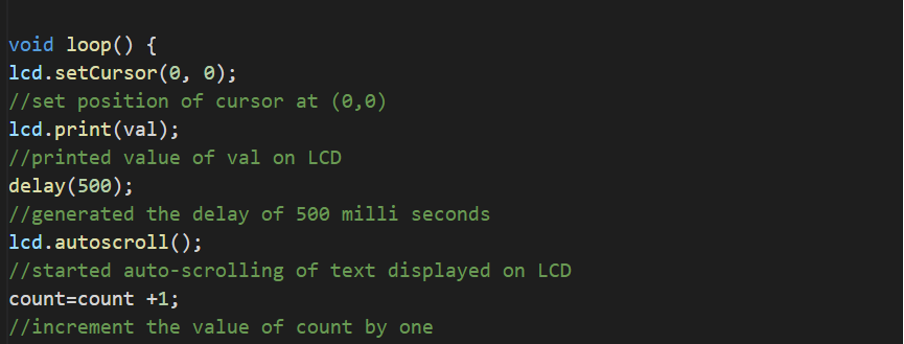
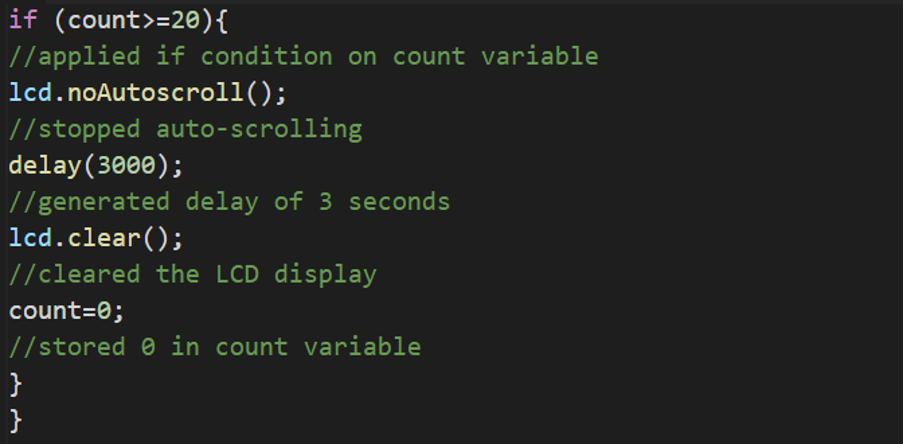
In the loop function, we displayed the value of ”val” variable, increment the value of “count on every iteration”, and auto scroll the display. Then applied the condition on the “count” variable that if its value is greater than 20, stop the autoscrolling, clear the display and also declare count with zero value.
Hardware and Simulation
The components we need for the above circuit is:
- 16×2 LCD
- Connecting wires
- Arduino Uno
- Potentiometer
- Breadboard
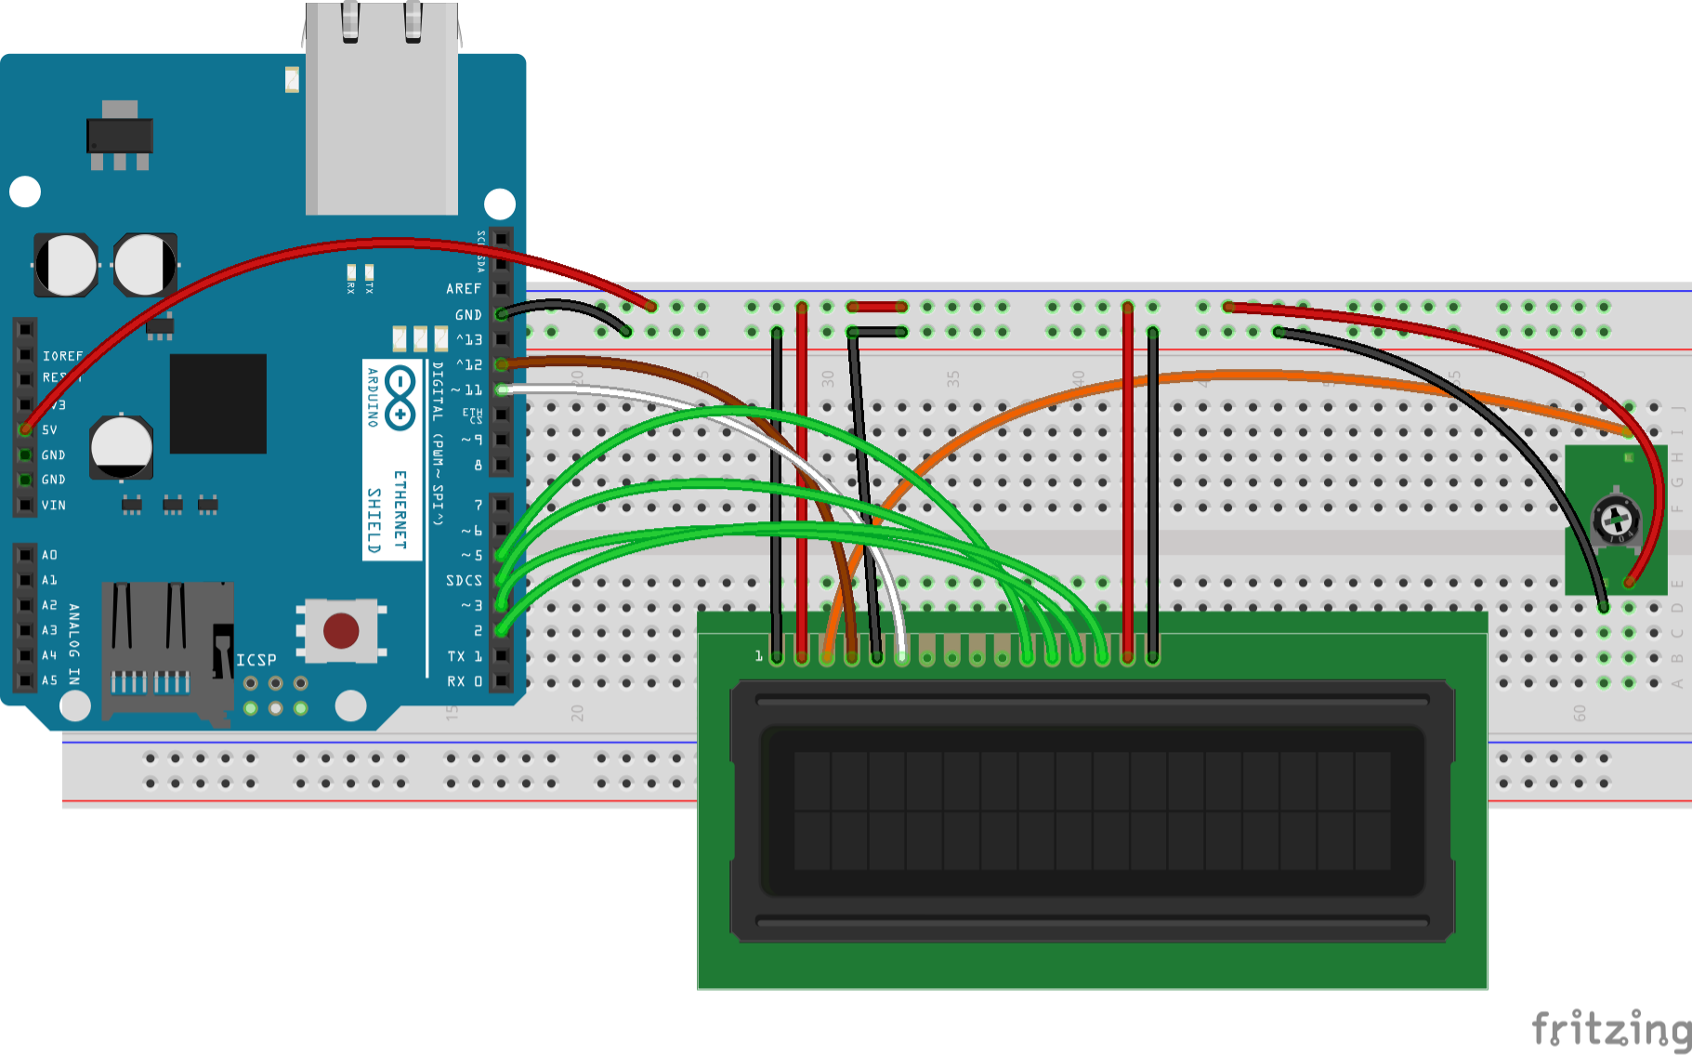
The circuit diagram for the above circuit will be:
As we used Arduino pins 12 for RS of LCD, 11 for Enable, 5 to 2 for D4 to D7 of LCD, we will ground the RW pin of LCD. We will connect the Vss of LCD and one terminal of resistor with the ground, the VDD of LCD and one terminal of resistor with the 5 volts, and the output terminal of potentiometer with the VEE or Vo pin of Arduino.
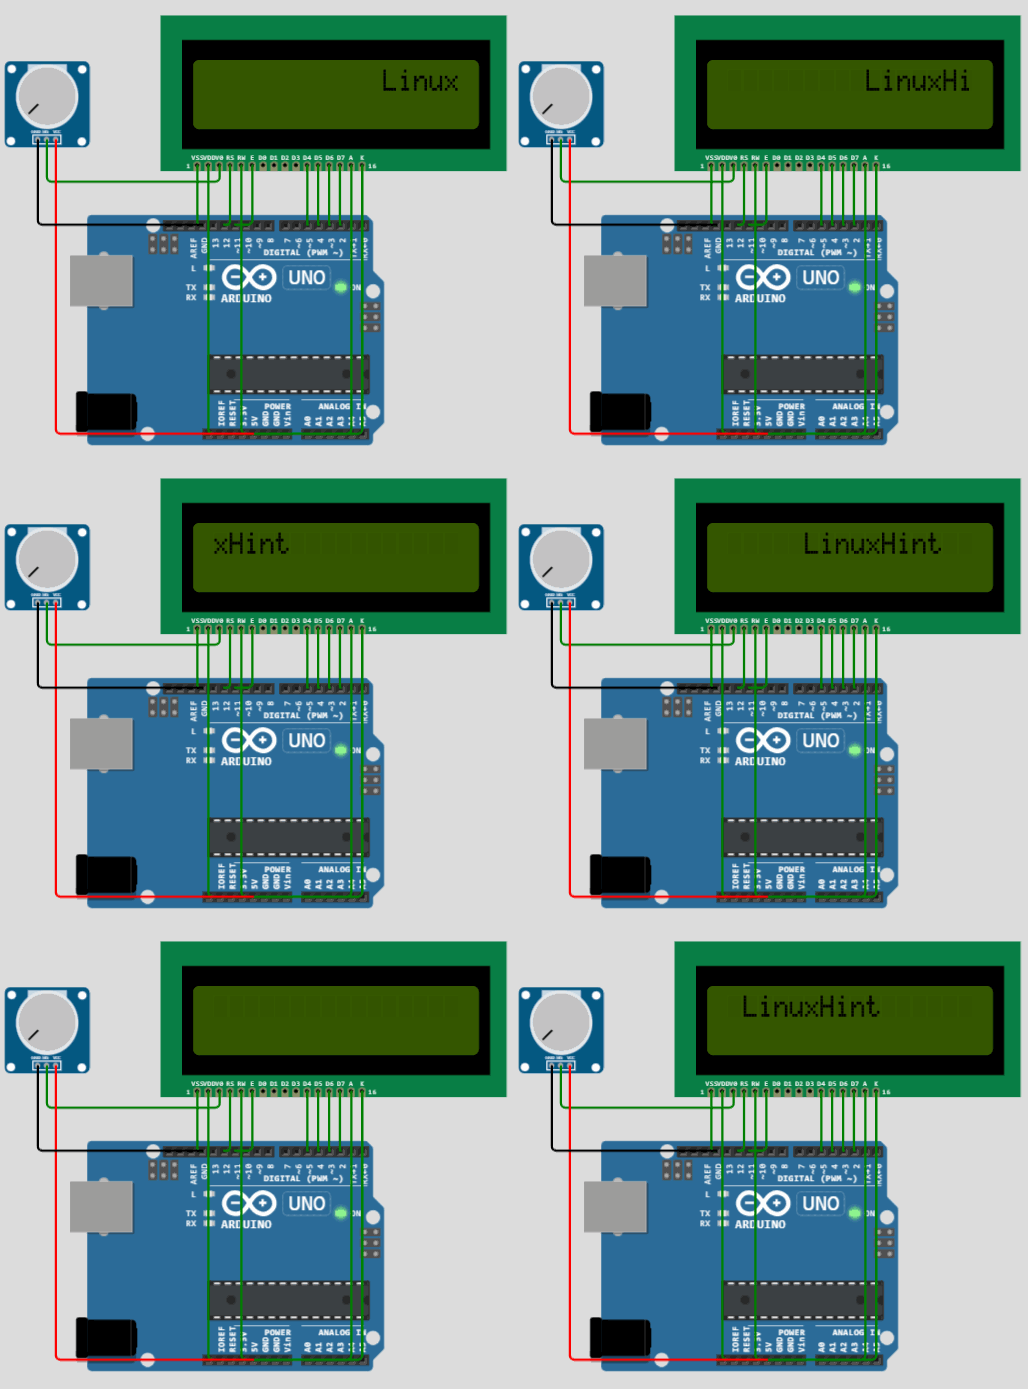
The simulation of the above circuit diagram will is:
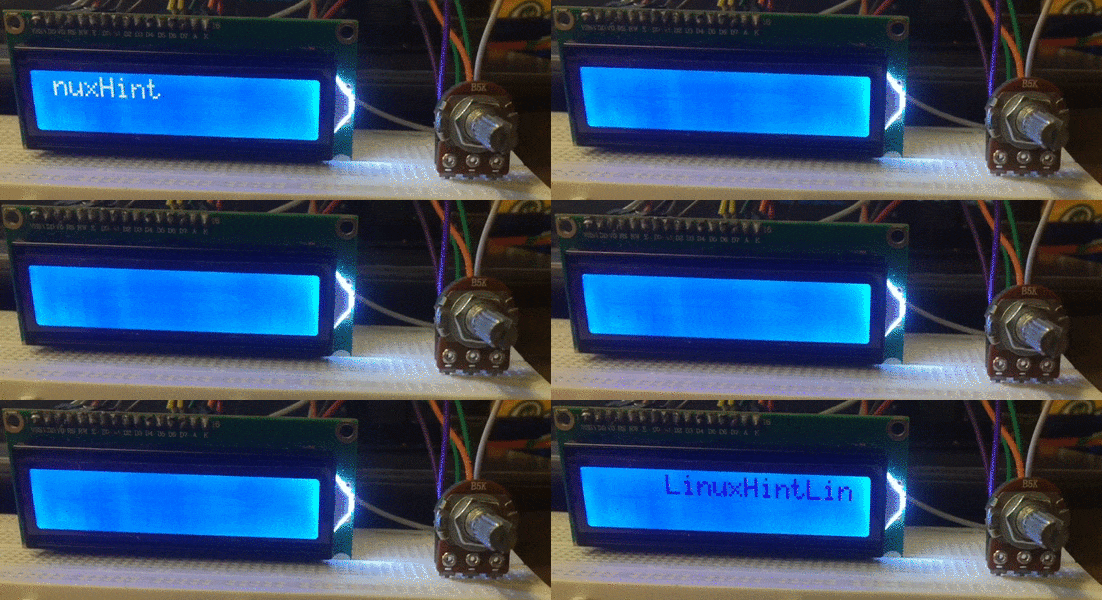
The hardware configuration of the following circuit diagram is:
In the above figure, we have connected the pins of the LCD with Arduino and potentiometer according to the circuit diagram. We have connected the “K” of the LCD with the ground of Arduino and “A” of the LCD with the 5 volts of Arduino.
The working of the hardware is:
Conclusion
The scrolling of the display on LCD can be done easily by interfacing the LCD with Arduino and using its built-in function of the autoscroll(). The autoscroll() function scrolls the characters of LCD from left to right or right to left according to the current position of the cursor and the application of scrolling LCD is to display different advertisements and for decoration purposes. In this write-up, autoscroll() and noAutoScroll() functions are explained in detail with its Arduino code and an electric circuit.

