Technical specifications of the Arduino Nano
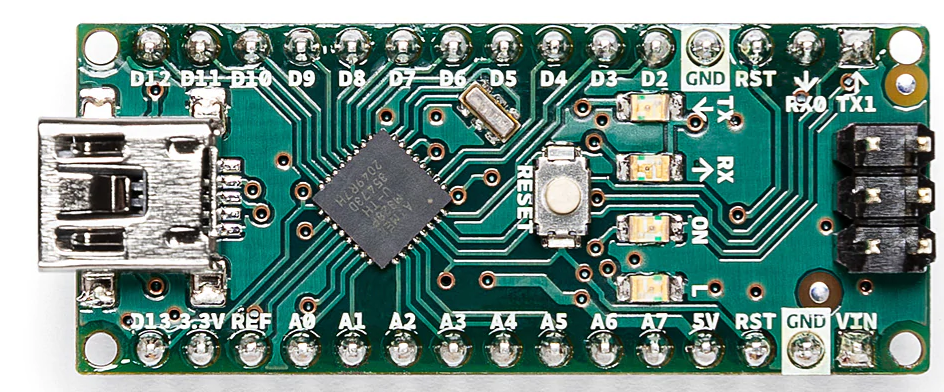
Like other Arduino boards the Arduino Nano also comes with the AVR microcontroller of ATMEL family having a model name ATmega328P. This controller is equipped with a clock speed of 16 MHz and has a flash memory of 32 kilobytes along with static RAM of 2 kilobytes and EEPROM of 1 kilobyte. To power up the Arduino Nano it requires 5 volts and 40 mA current and that can be provided by either the USB port or the Vin pin of the Arduino Nano.
Arduino Nano Pinout
Since this is a small size board it comes with a limited number of 36 pins that can be used for various purposes. Among the 36 pins 6 pins are for the ICSP (In Circuit System Programming), 14 digital input and output pins, 8 pins for powering the devices, 8 analog input and output pins and lastly there are two pins for data receiving and transmission.
For the TWI communication protocol there are SCL, and SDA pins required and for that purpose pins A5 and A4 are used. Moreover, for SPI communication protocol you can use D11, D12, D13 for COPI (controller out, peripheral in), CIPO (controller in, peripheral out) and SCK.
For user understanding we have divided the pins of Arduino Nano into different categories and based on these categories we have made a table that is given below that demonstrates the pinout of the Arduino Nano.
| Pin Categories of Arduino Nano | Pin Representation | Explanation |
|---|---|---|
| Power pins of Arduino Nano | 5V, RESET, 3.3V, GND (3), Vin,REF | To power up the devices connected with Arduino Nano |
| Digital pins of Arduino Nano | D2 to D13 (D11 for COPI, D12 for CIPO D13 for SCK) | For connecting digital devices with Arduino Nano |
| PWM pins of Arduino Nano | 3,5,6,9,10,11 | To generate the pulsating signal |
| Analog pins of Arduino Nano | A0 to A7 ( A4 for SDA and A5 for SCL) | For connecting the analog devices Arduino Nano |
| Pins for programming the Arduino | ICSP | Pins used to program the Arduino Nano |
Further we also explained the pins according to the categories we made in the above table
Digital Pins of the Arduino Nano
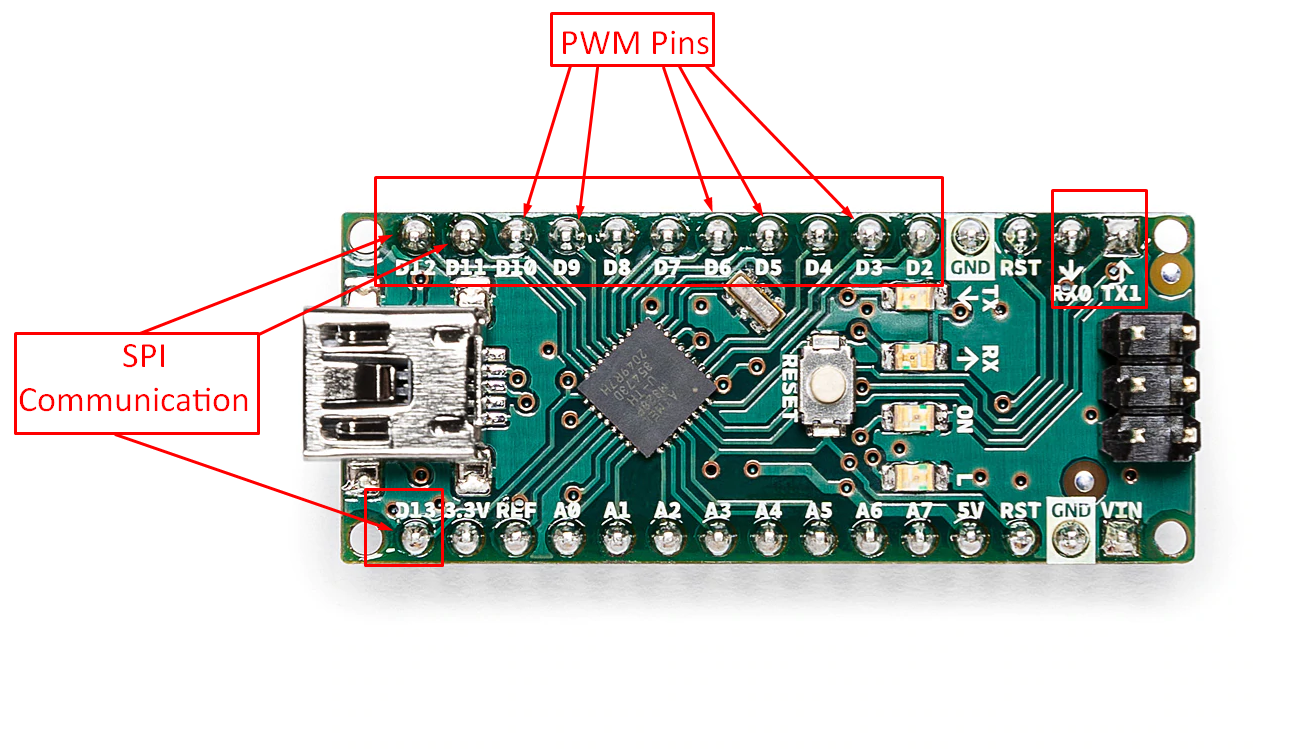
For the devices that have digital input and output and are to be connected to Arduino Nano there are 14 pins in which 2 pins are data sending and receiving pins that are TX and RX pins. Similarly, there are 6 PWM pins that are D3, D5, D6, D9, D10, D11 and the duty cycle ranges from 0 to 255.
For SPI (Serial Peripheral Interface) communication protocol you can use the digital pins D11 to D13 for COPI, CIPO and SCK. For further clearance we have highlighted the digital pins of Arduino Nano as in the image below:
Analog Pins of Arduino Nano
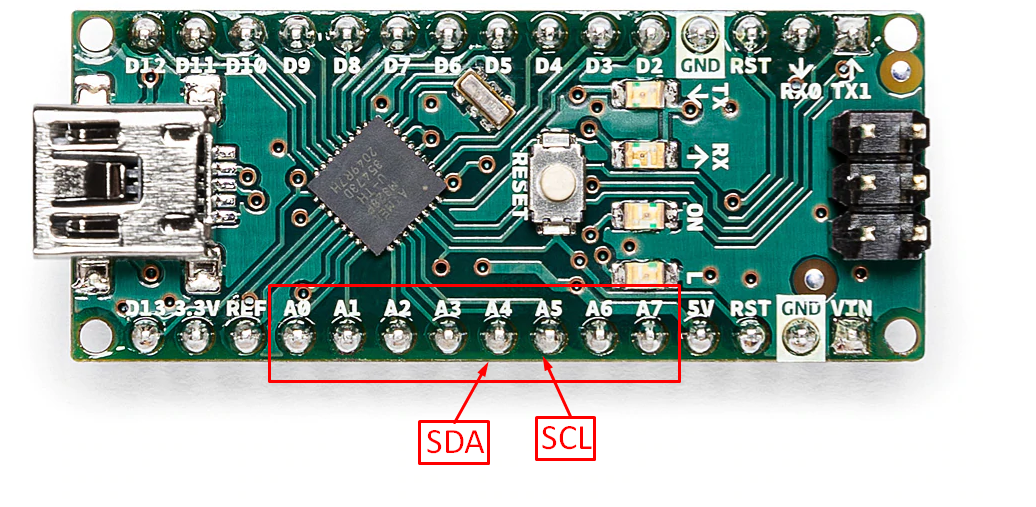
To connect the analog devices the Arduino Nano provides its user with 8 analog pins that have a 10 bit data resolution. In terms of voltage the 5 volts will be 1024 and 0 will be 0 volts and for TWI communication protocol you can use analog pin A5 and A4 for SCL and SDA respectively. The SCL pin is the clock pin whereas the SDA pin is the data transferring pin for the communication device connected.In the image below we have highlighted the analog pin of Arduino Nano and also we have indicated the SDA and SCL pins.
Power Pins of Arduino Nano
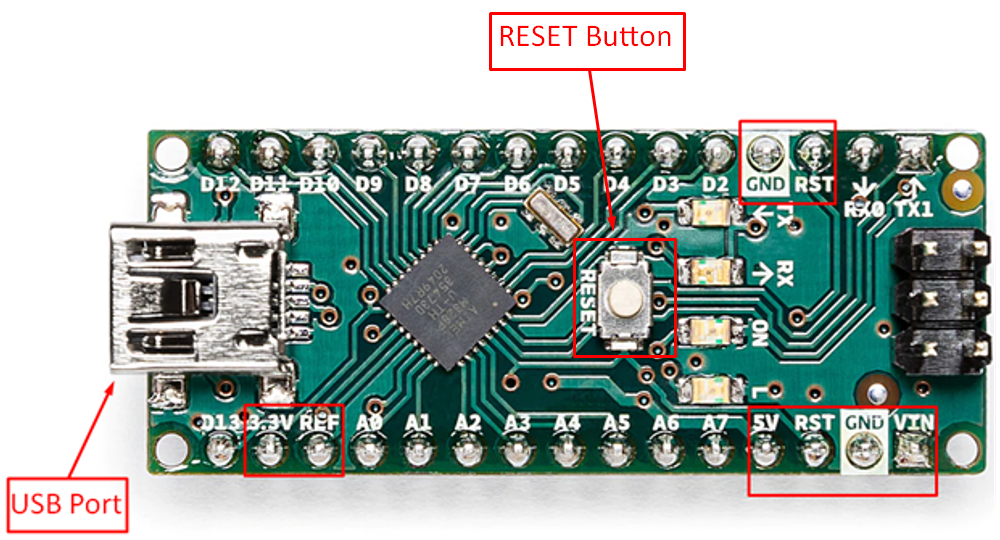
For powering up the devices connected with Arduino Nano there are 8 pins which includes the two RESET pins, two ground (GND) pins, one pin for 5-volt output, one pin for 3.3-volt output. We can also power up the Arduino Nano by supplying power at its VIN pin. There is also a RESET button given on the Arduino Nano which is used to restart the Arduino Nano. In the image below we have highlighted the power pins of the Arduino Nano.
ICSP Header Pins of Arduino Nano
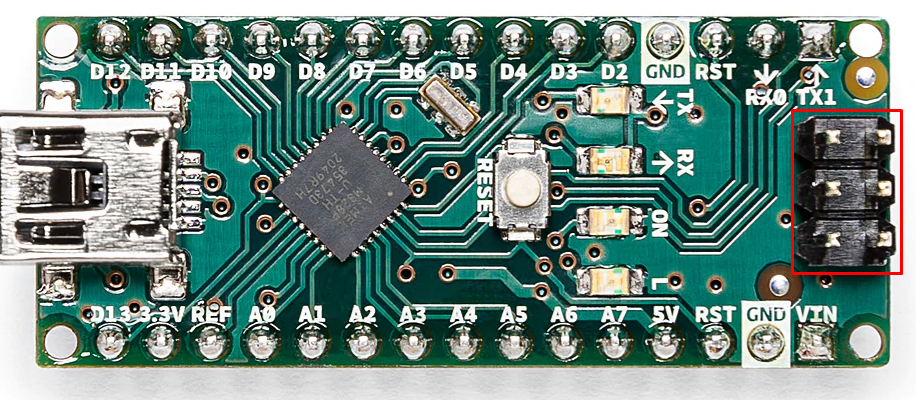
For updating the firmware of the Arduino Nano or to program it without taking it off from the circuit, there are 6 ICSP header pins given on the Arduino Nano. We have highlighted the ISCP pins of Arduino Nano in the image below:
Conclusion
The Arduino Nano is a small size Arduino board that can fit on the breadboard and makes it easy for the users to connect the devices with it. Also, it can reduce the size of the projects which can make the design of the project more compact. Moreover, in general practice the user must be aware of the technical specifications and pinout of the Arduino board. So, we have explained the use for each pin of the Arduino Nano briefly.

