In the above discussion, we gave an example of room temperature, the room temperature can be 35 degrees or 10 degrees. It is not restricted that the room temperature should be 0 or 1. These types of values are known as analog values. In this write-up, the analogRead() function is explained in detail with the help of which we can take analog input values in Arduino.
What is the analogRead() function in Arduino
In Arduino, there is a built-in function that takes the analog values as input from its pins that are dedicated to the analog values. In Arduino Uno, the pins A0 to A5 are used to take the input values of analog signals and these pins have a pre-installed ADC (analog to digital converter) which converts the analog signal to digital so it can be read by the machine. The ADC reads the changing voltage and converts the analog signal from 0 to 1023 and communicates this value to the machine.
Example : analogRead() in Arduino
Consider the following Arduino code:
Serial.begin(9600);
}
void loop() {
int in=analogRead(A0);
Serial.println(in);
delay(5000);
}
Explanation: We have declared an integer variable “in” and using the analogRead() function, store the value from analog input from pin A0, then display the value on the serial monitor using the serial communication at a baud rate of 9600.
In the last statement, we use the function of delay to generate a delay of 5 seconds so that the output can be readable. We are taking the input of a variable resistor on pin A0 and displaying its output.
Hardware assembling
The circuit for this contains the following components:
- Variable resistor of 1KΩ
- Jumper wires – male to male
- Arduino Uno
- Breadboard
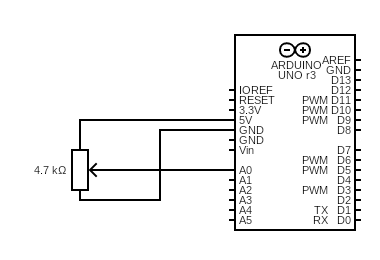
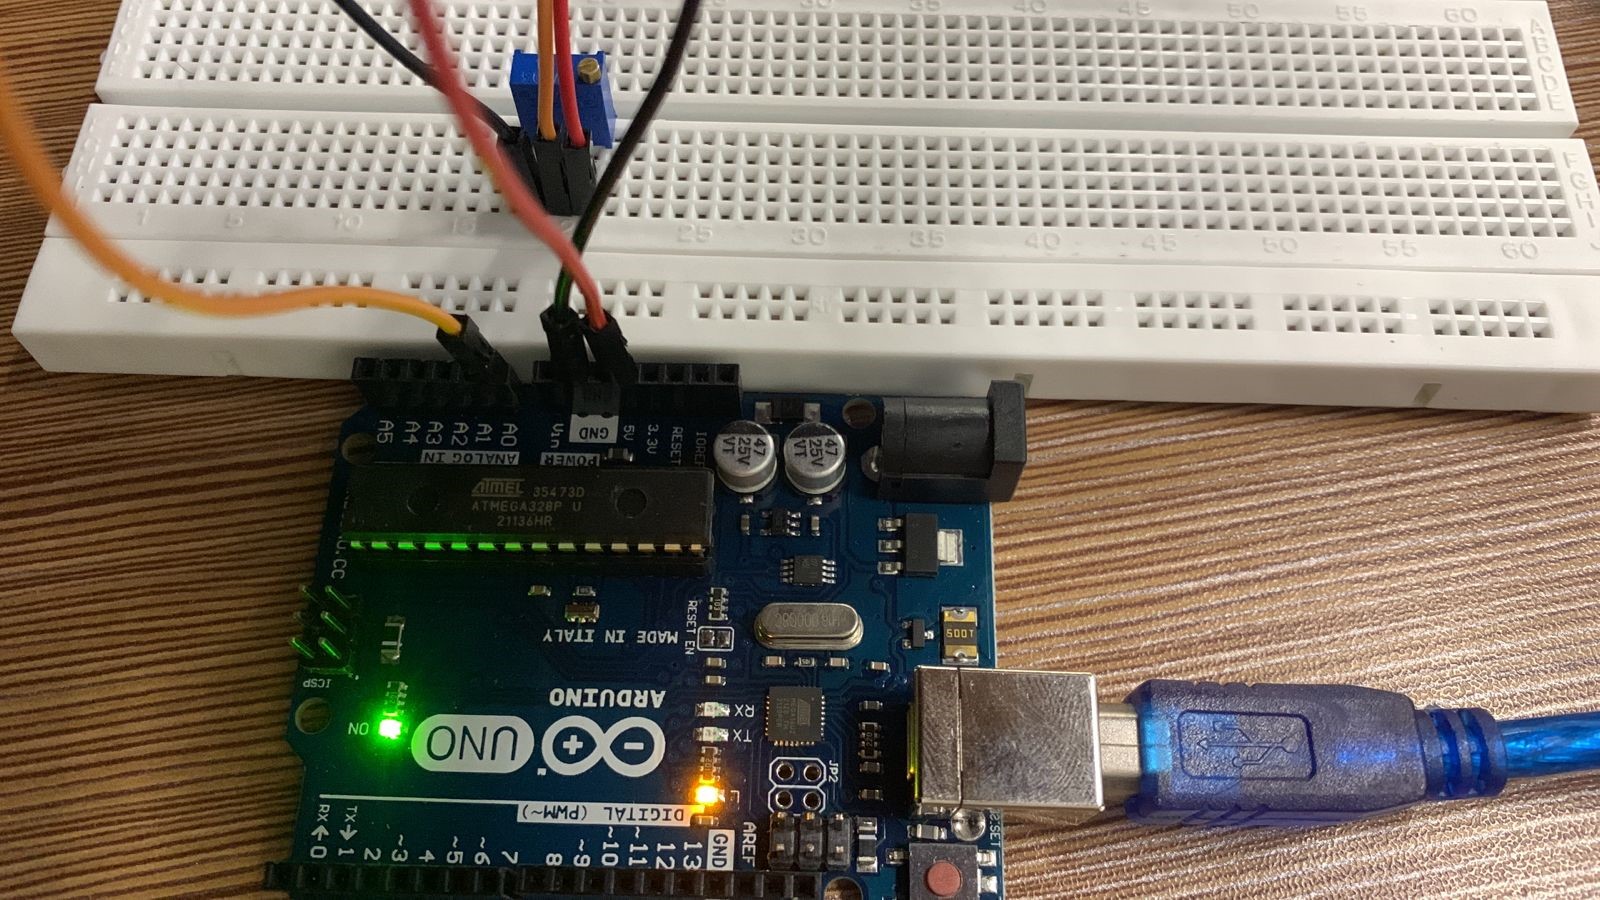
Connect one end of the potentiometer with a 5V pin of Arduino and the other end terminal to the ground pin with the help of jumper wires. Connect the middle terminal of the potentiometer with pin A0 of Arduino.
The circuit diagram will be like this:
The circuit will look like this:
The serial monitor output of the above circuit is:
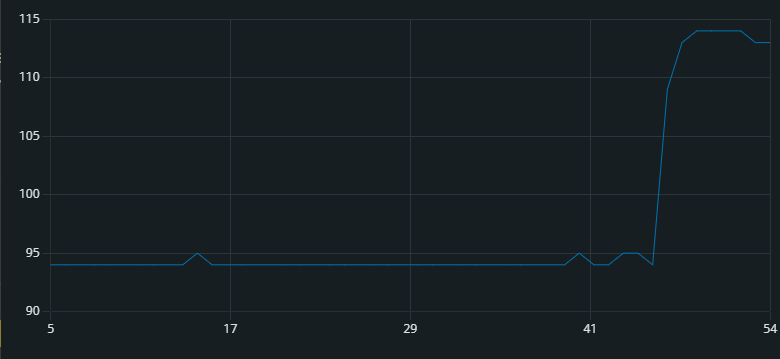
We can also visualize the output on the serial plotter as well:
As we change the value of the variable resistor, the value on pin A0 changed which can be visualized on both; serial monitor and serial plotter.
Conclusion
The analogRead() is a function that is used to read the input from analog pins which is a continuous value and then converts it into digital by using the ADC circuits which are already present in the circuit. In this write-up, an example is demonstrated to explain the use of the analogRead() function in Arduino.


