How to Connect and Interface a Raspberry Pi with an Arduino
The step-by-step procedure to connect and interface Raspberry Pi with an Arduino is given below:
Step 1: Enable Serial Communication on Raspberry Pi
You can interface Raspberry Pi and Arduino together via serial communication, so for that, it is mandatory to enable serial communication on Raspberry Pi.
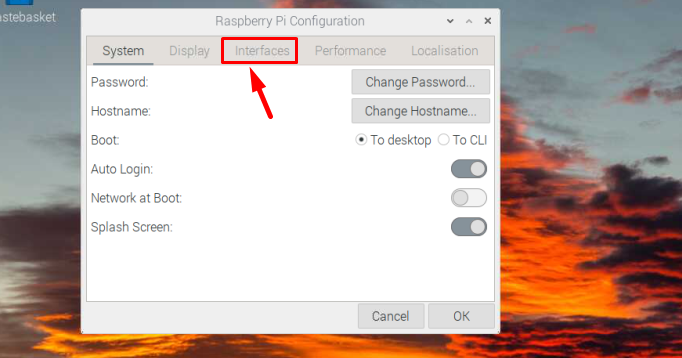
To enable serial communication, open the Raspberry Pi Configuration tool from the Preferences option of the Application Menu:

Then click the Interfaces tab:
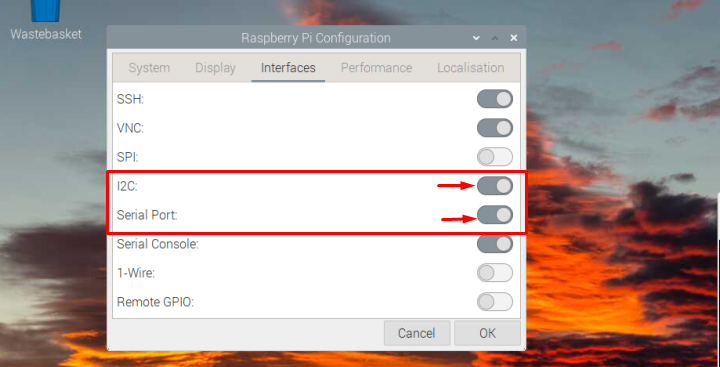
And enable I2C and Serial Port by turning the buttons in front of them to the right:
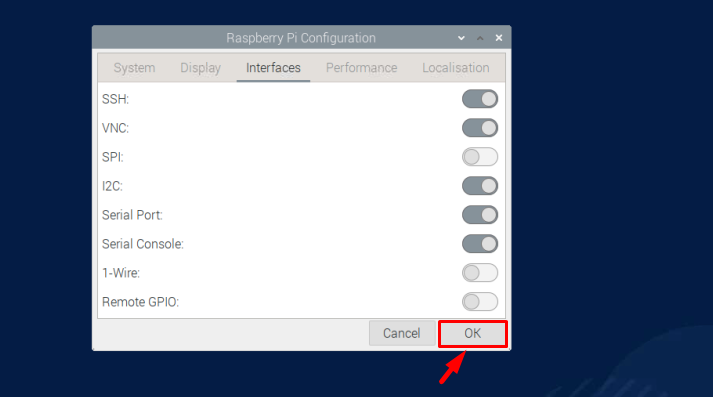
Then click OK to save the setting:
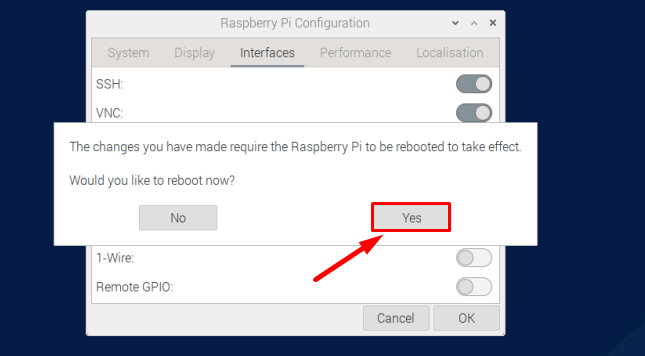
The system will ask you for a reboot click on Yes here:
Step 2: Install Required Python Libraries
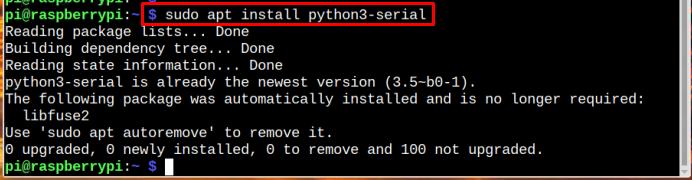
We will interface the Raspberry Pi with an Arduino using the Python code, but the communication between Arduino and Raspberry Pi will be a serial communication so for that a serial library is required. Though it’s already installed on Raspberry Pi, but it’s better to confirm its availability using the following command:
The command will install the serial library on the Raspberry Pi system if it’s not installed, otherwise you will get confirmation that it’s already installed on the Raspberry Pi system.
Alternatively, you can also install it through pip if you won’t be able to find Python serial on Raspberry Pi system:

Step 3: Install Arduino IDE on Raspberry Pi
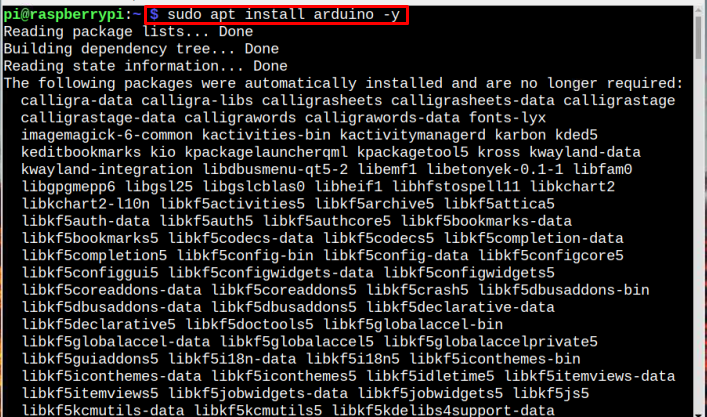
To install Arduino IDE on Raspberry Pi, run the below-mentioned command:
Then verify the installation of Arduino IDE by running the below-written version command:

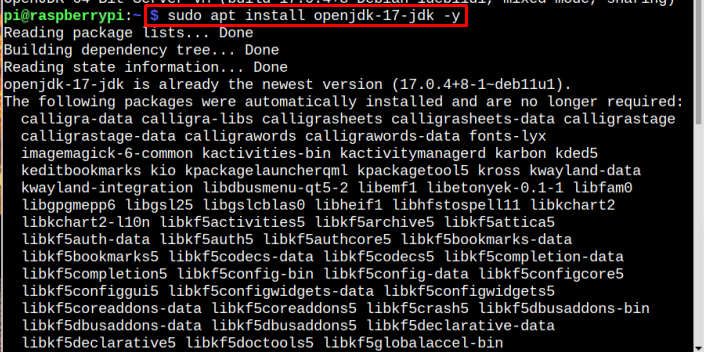
For an Arduino to run on Raspberry Pi it is mandatory to have a Java package installed in Raspberry Pi. To check if the java is installed on Raspberry Pi or not run the below-written command:

Just in case if Java package is not already installed on Raspberry Pi, then you can use the below-mentioned command to install Java on Raspberry Pi:
Step 4: Program an Arduino
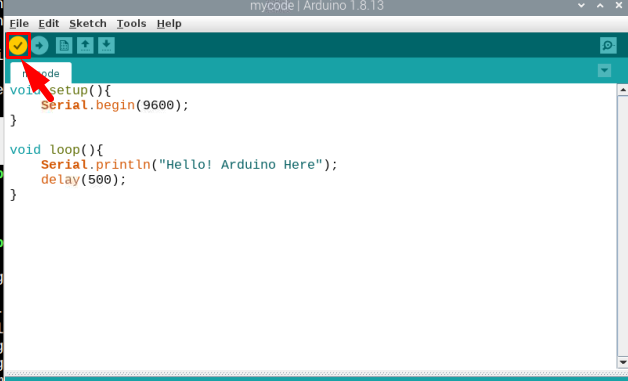
Now open the Arduino IDE on Raspberry Pi from the Application Menu in the Programming section. And write the code that you want to run on Raspberry Pi after interfacing it with Arduino. The code for serial communication would look something like this as shown in the below example, here I am just printing a simple message string:
Serial.begin(9600);
}
void loop(){
Serial.println("Hello! Arduino Here");
delay(500);
}
After writing the desired Arduino code, compile the code by clicking on the compile button:
Save the file with the desired name, here I have named my Arduino file as mycode:

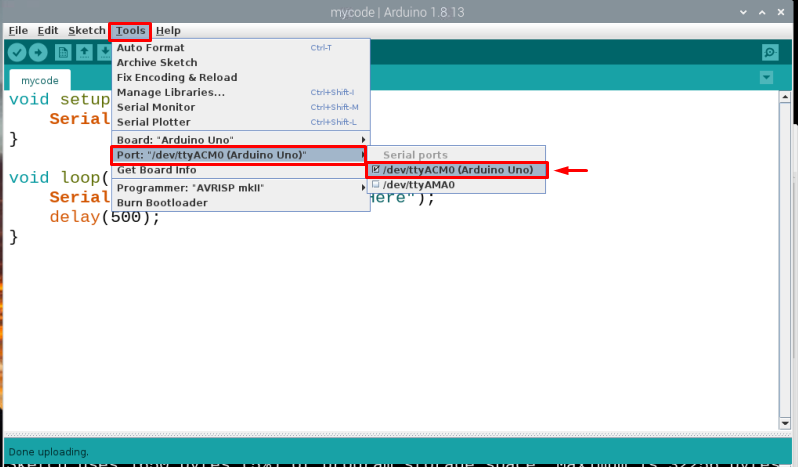
After compiling successfully, now it is time to select the Port and for that click on Tools then Port and then select the port with which the (Arduino Uno) is mentioned:
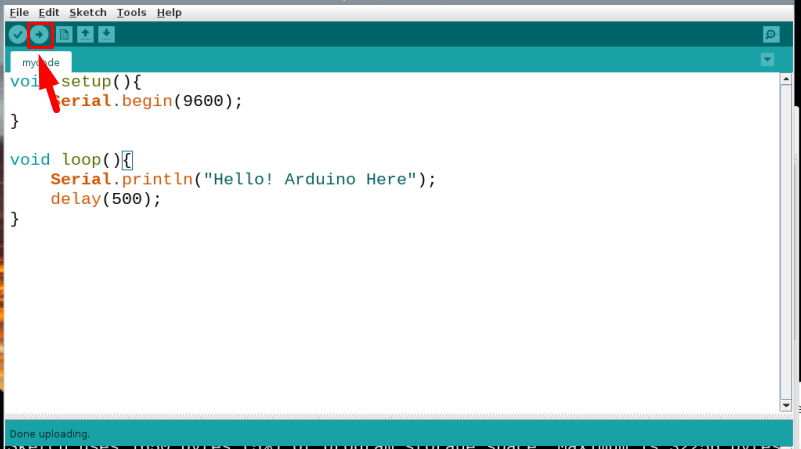
After compiling, upload the code to the Arduino board by clicking on the upload button highlighted in the image below:
Step 5: Write a Python Code
After uploading the code, now it is time to write a Python code on Raspberry Pi to communicate Raspberry Pi and Arduino. To write the Python code on Raspberry Pi, open the Thonny Python IDE from Application Menu:

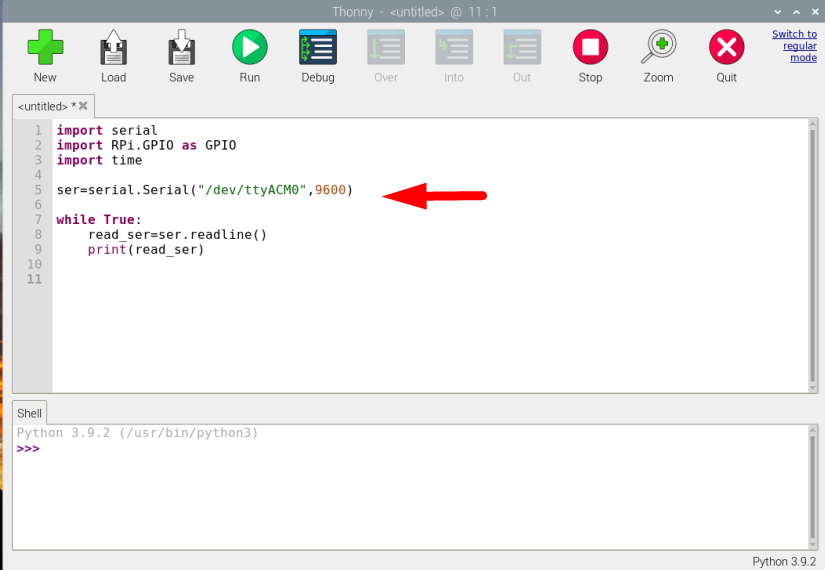
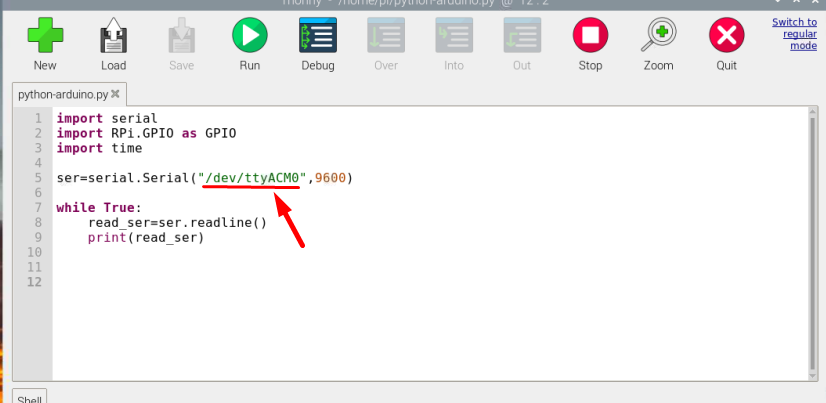
Now copy the below-mentioned Python code for the serial communication between Arduino and Raspberry Pi:
import RPi.GPIO as GPIO
import time
ser=serial.Serial("/dev/ttyACM0",9600)
while True:
read_ser=ser.readline()
print(read_ser)
The read_ser will store the message or string which will be communicated serially through an Arduino.
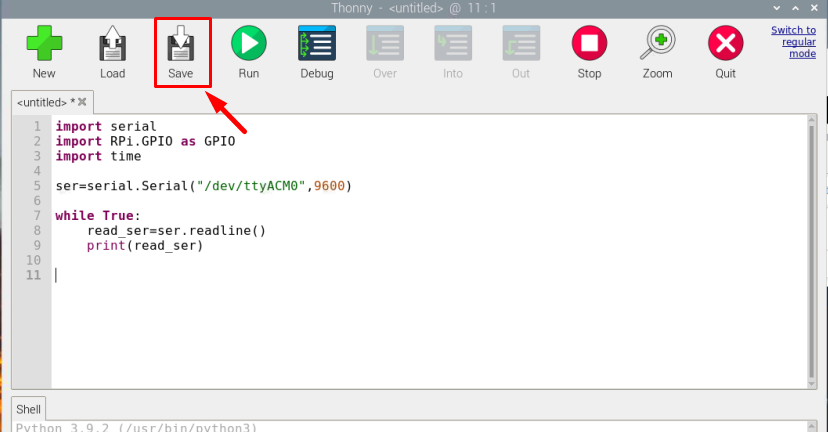
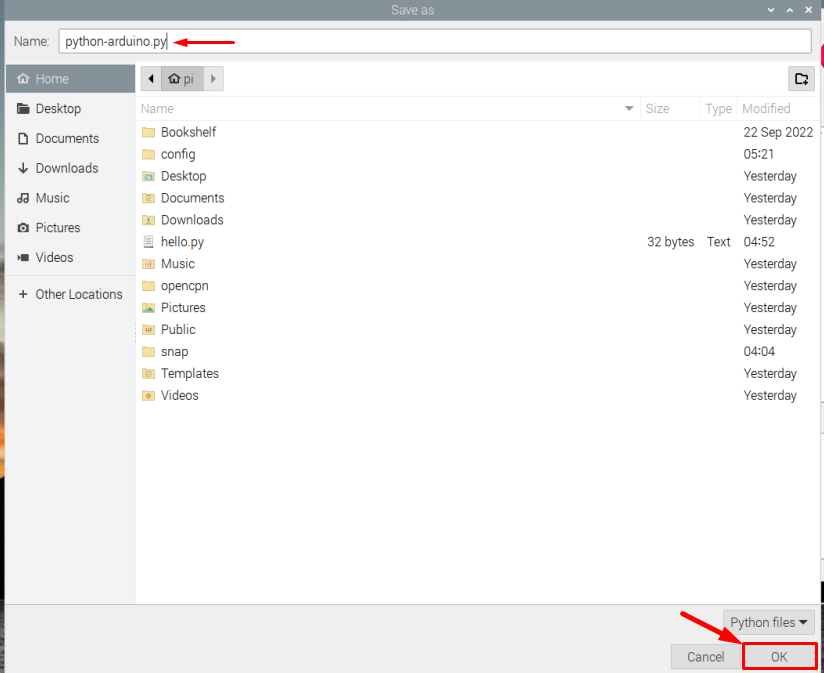
Then save the written code by clicking on the Save button:
Then write any desired name for the file and click on OK:
Step 6: Find the ACM Port Number
In the above Python code, the ACM number is the number of ports for serial communication and to find the ACM number, run the below-mentioned command:
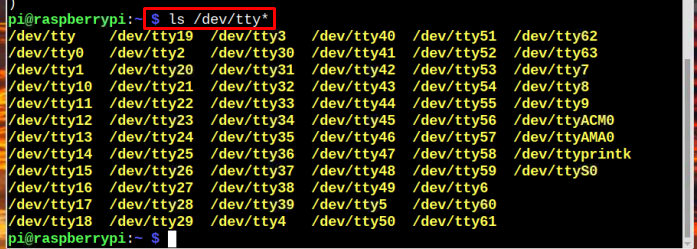
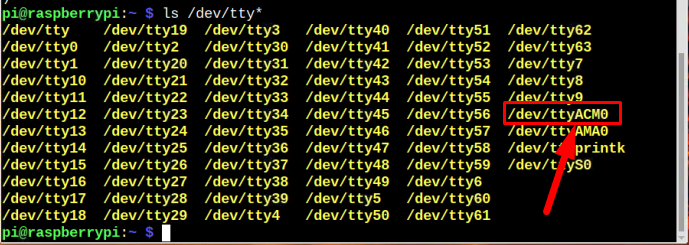
The output of the command will display different ttys out of which you have to find the one with an ACM number it could be ACM0, ACM1, ACM2 or other number:
After finding the ACM number, go back to the python code and type the ACM number that you have just found out:
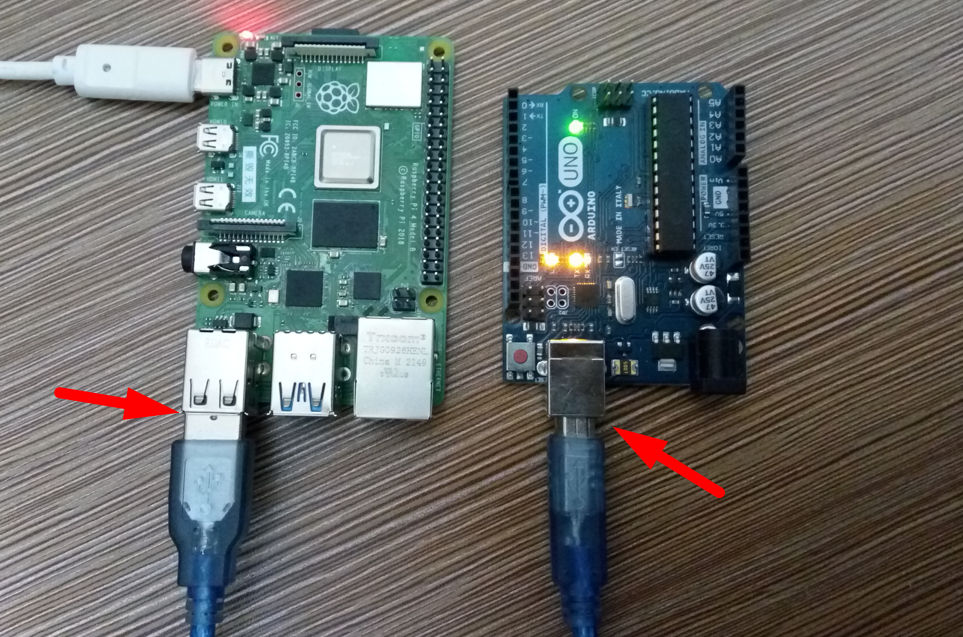
Step 7: Connect the Arduino with Raspberry Pi and Run the Code
Now it is the time to connect both Arduino and Raspberry Pi together using an Arduino cable. Insert one end of the Arduino cable into the Arduino and connect the other end to the USB port of the Raspberry Pi.
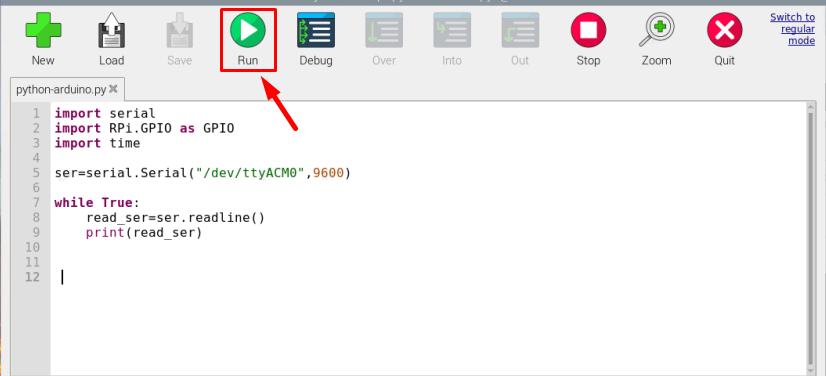
Then click on the Run button in Python IDE:
Right after running the code the string coded in an Arduino will be transmitted to Raspberry Pi and is display as an output on Raspberry Pi:
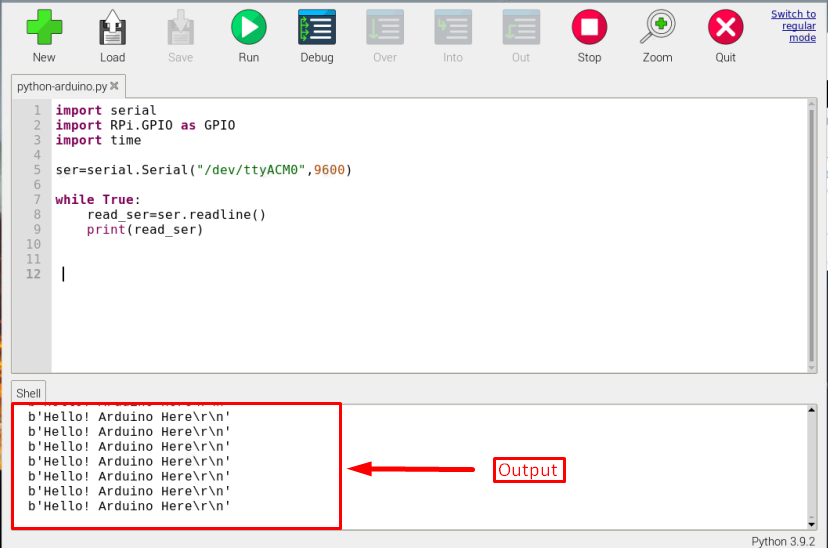
The above output confirms that Raspberry Pi is successfully connected and interfaced with the Arduino.
Conclusion
To connect and interface Raspberry Pi with an Arduino, serial communication is used. Enable the serial communication and install the serial library in Raspberry Pi. Then code the Arduino and configure the serial port to send data serially. After that write a Python code on Raspberry Pi along with the ACM port number to serially receive data from the Arduino. Finally, run the Python code to display the serial output on Python IDE.