This article is going to elaborate the use of PuTTY to access Raspberry Pi terminal.
Access Raspberry Pi Terminal Through PuTTy
To access Raspberry Pi terminal on PC through PuTTY, follow the below-given steps:
Step 1: Download PuTTy on you PC through here.
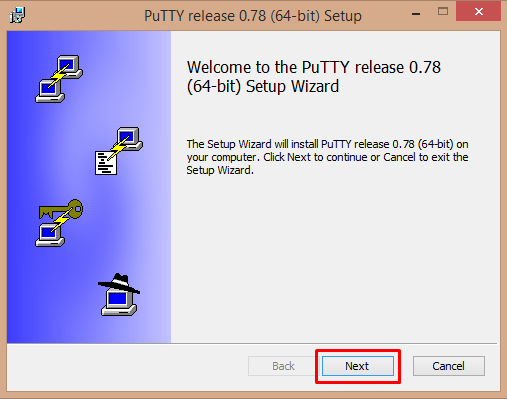
Step 2: Then execute PuTTy setup. Below screenshot will prompt you to allow Next to proceed for installation.
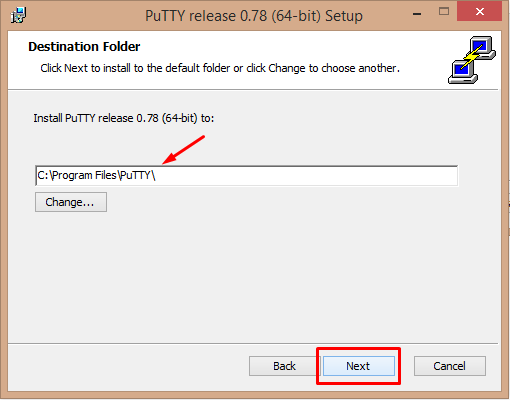
Step 3: Now press the Next button, if you want to install PuTTY in the desired location, then it’s up to you.
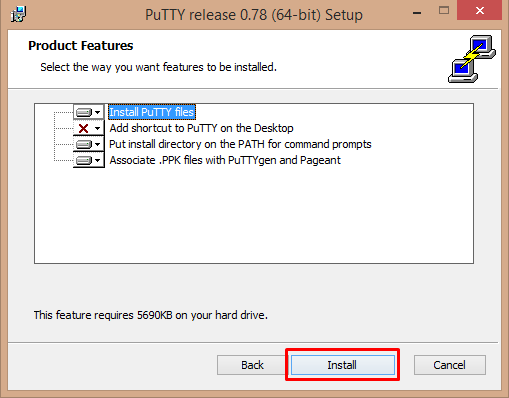
Step 4: After that, click the Install button to proceed with installation.
Step 5: When the PuTTY installation gets completed, you are free to click on the Finish button.
Step 6: After the installation, you need to enable SSH on Raspberry Pi first.
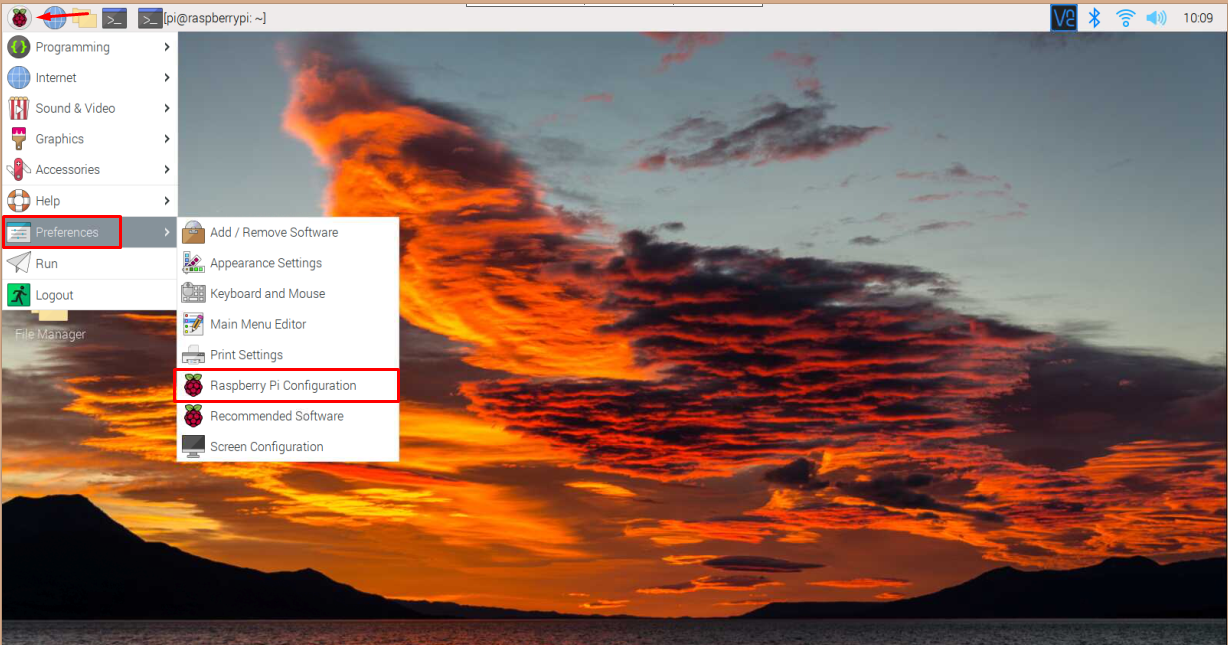
To do this, go the Raspberry Pi Application Menu > Preferences > Raspberry Pi Configuration.
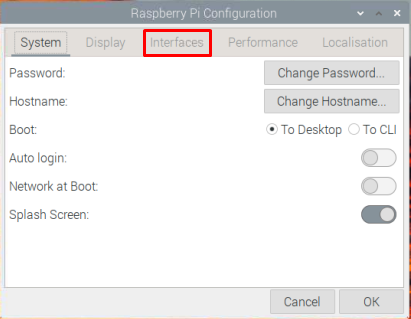
Step 7: A window will appear; there you need to directly click on the Interfaces tab.
Step 8: Enable SSH and press OK.
Step 9: Open the Raspberry Pi terminal and run the following command to find IP address of Raspberry Pi:
Step 10: Go back to PC and open the PuTTY application on the desktop.
Step 11: Use Raspberry Pi IP address in the Hostname section, leave the default port to 22, connection type as SSH and click on the Open button.
Step 12: A security alert will appear, simply Accept it.
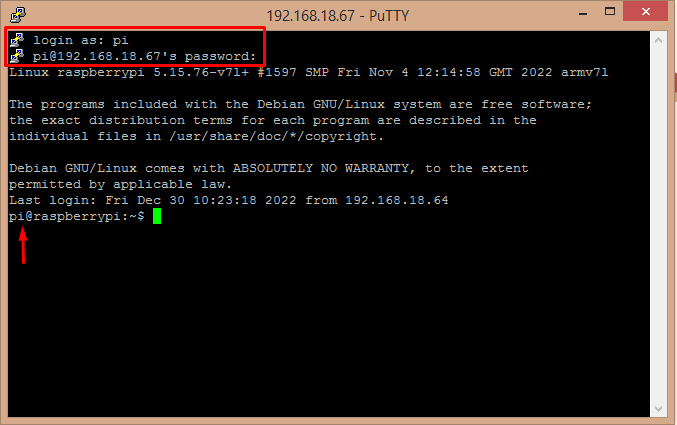
Step 13: Now type login as “pi” and the password for the Raspberry Pi.
This will open the Raspberry Pi terminal on PuTTY.
Conclusion
You can easily access the Raspberry Pi terminal remotely by installing PuTTY application on your PC. However, you first have to enable SSH connection on Raspberry Pi. Later, you can use the IP address of Raspberry Pi and enter the login details to successfully access the Raspberry Pi terminal on PC through PuTTY.

