
Most of the time ESP32 is programmed using Arduino IDE however if you are Visual Studio Code user it would be difficult for you to switch to Arduino IDE. ESP32 can easily be programmed using VS Code as well. VS Code has some advanced features like auto completion and error checking.
To program ESP32 with VS Code PlatformIO extension is used. Follow all the steps to complete ESP32 installation in VS Code.
Here is the list of content we will be covering:
1: Installing VS Code on Windows (Visual Studio Code)
2: Installing Python on Windows
3: Installing PlatformIO IDE Extension on VS Code
4: Installing C++ Extension in VS Code
5: Creating a New Project in VS Code Using PlatformIO IDE for ESP32
Prerequisites
Before we move forward here is the list of programs and extensions, we must have in our PC to start programming ESP32 with VS Code:
- VS Code
- Python 3
- PlatformIO IDE extension
- C++ Extension
- ESP32 Board
1: Installing VS Code on Windows (Visual Studio Code)
First step towards installation is to download the VS Code. Now below mentioned steps will guide on VS Code installation.
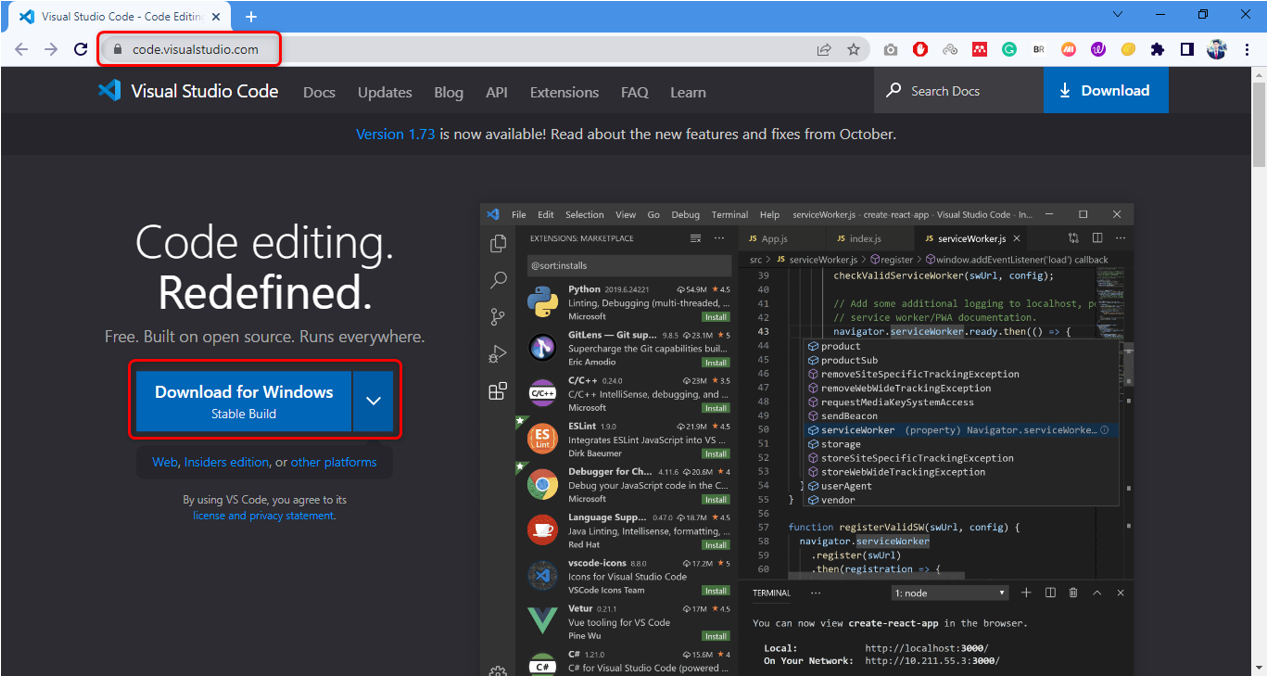
Step 1: Open Visual Studio Code official download page and download the stable build VS Code for Windows.
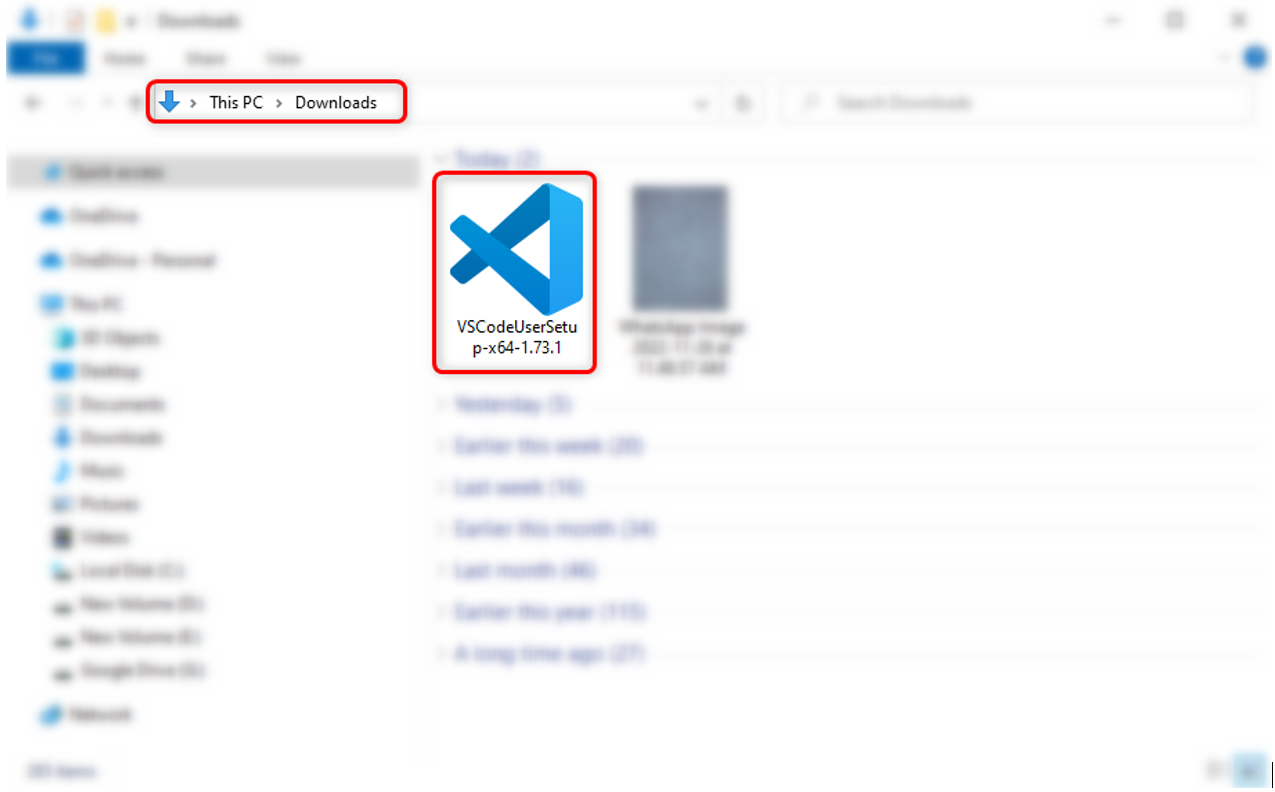
Step 2: A new installation file can be seen in the download folder. Double click to open the installation wizard.
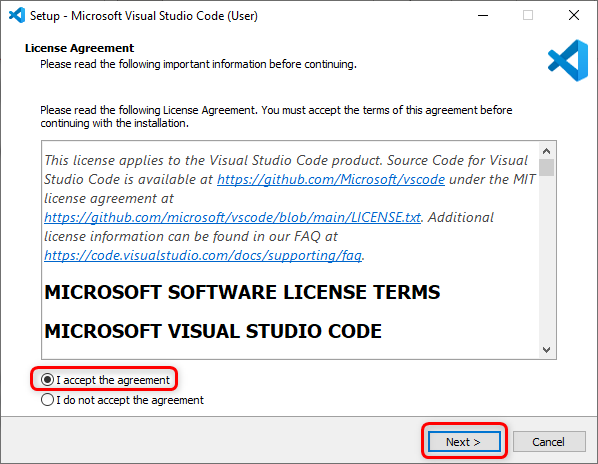
Step 3: Give permission to license agreement and click Next.
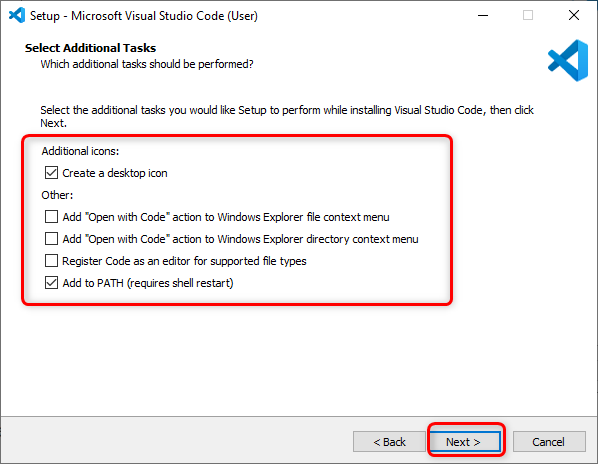
Step 4: Check Add to Path option and click Next.
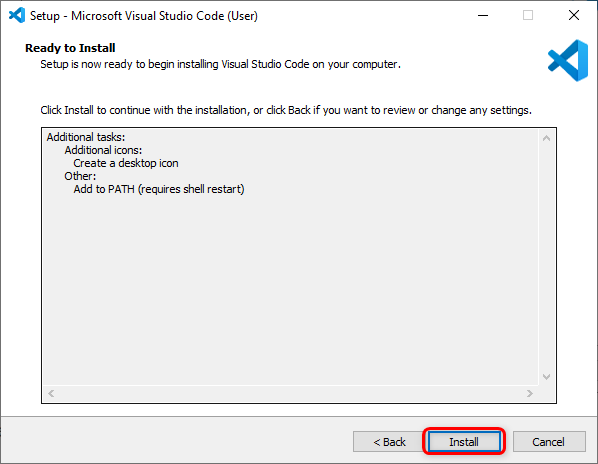
Step 5: Now click Install to begin the installation process of VS Code.
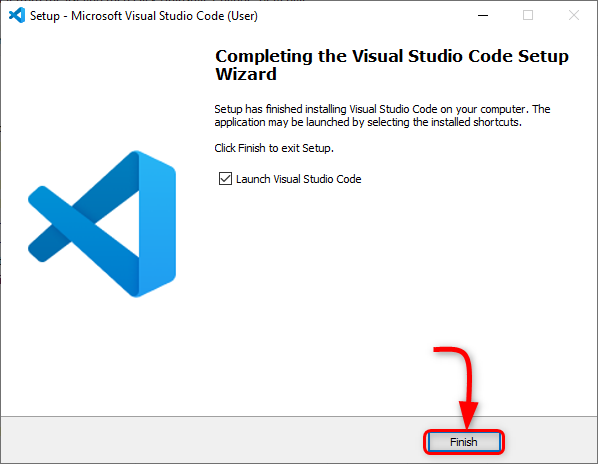
Step 6: Once the installation process is finished click Finish to close the window.
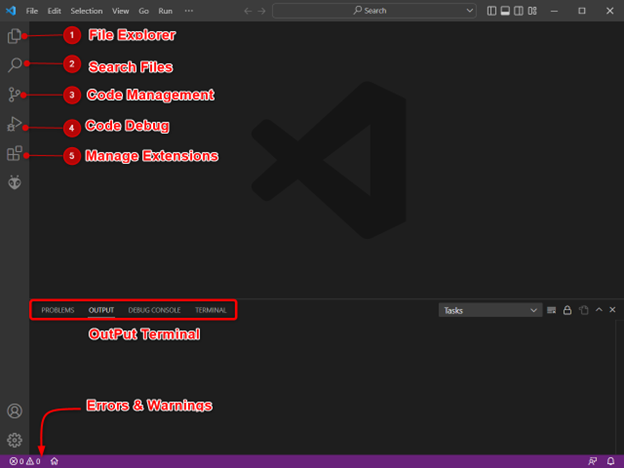
Step 7: Open VS Code. Following window will open showing us the VS Code interface. Move the cursor over any icon it will show the meaning of every icon plus a shortcut to access them easily.
We have successfully installed the VS Code on our PC. Now we will move towards installation of Python 3 on the PC.
2: Installing Python on Windows
To program an ESP32 board in VS Code Python 3 is needed. We need Python 3 because PlatformIO Core (CLI) is written in Python. By default, CLI is installed in most of the operating systems except Windows.
Below steps will guide you on Python 3 installation.
Step 1: Open Python 3 download page. Download the latest version available.

Step 2: Following files of Python 3 will be downloaded, double click installation file.

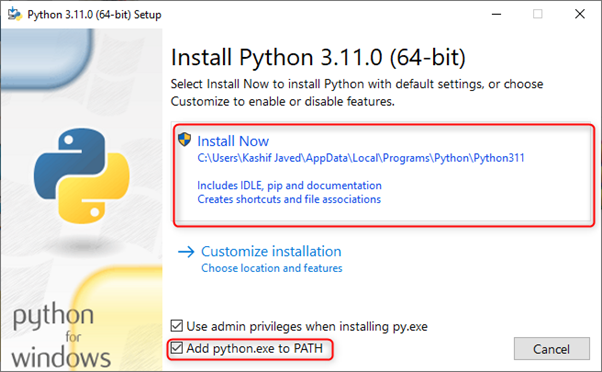
Step 3: To begin installation check the Add to PATH option then select Install Now.
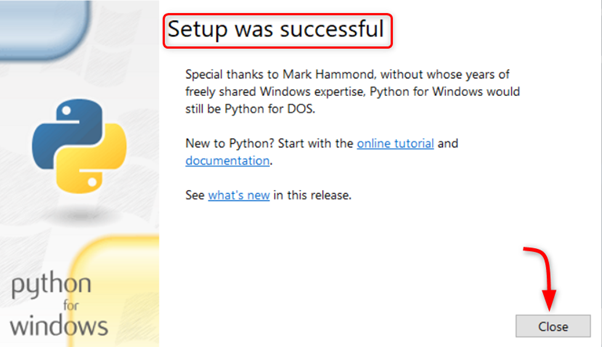
Step 4: After the setup is successfully installed click Close to finish.
As Python 3 is ready now open VS Code and install the PlatformIO extension for ESP32.
3: Installing PlatformIO IDE Extension on VS Code
Last step to setup ESP32 with VS Code is to install the PlatformIO extension in VS Code. PlatformIO is a cross platform and multi framework professional IDE for embedded systems and designs. Using this extension in VS Code we can easily program the ESP32 board.
Follow the steps to setup PlatformIO in VS Code:
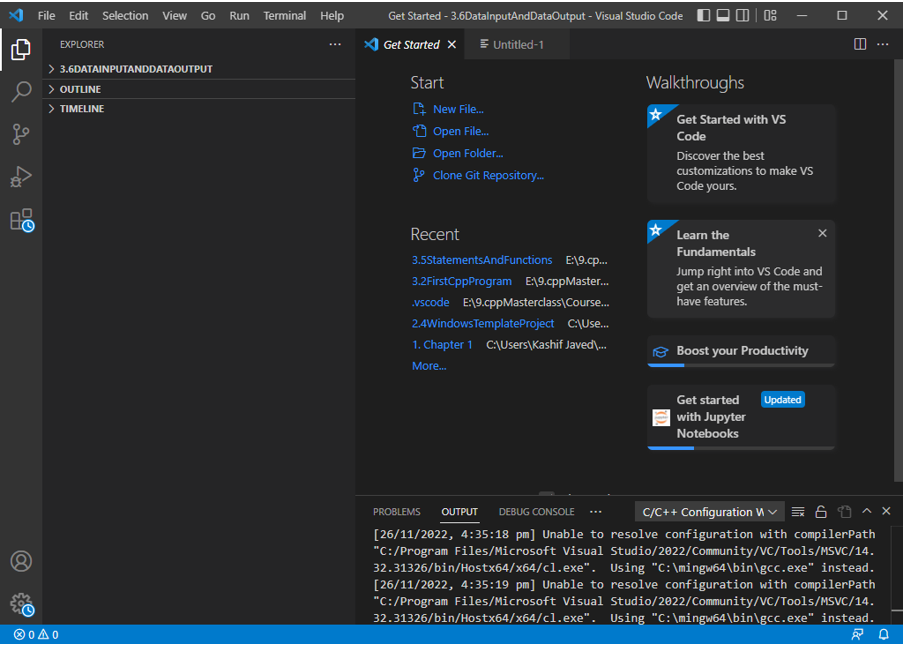
Step 1: Open VS Code, following interface will open.
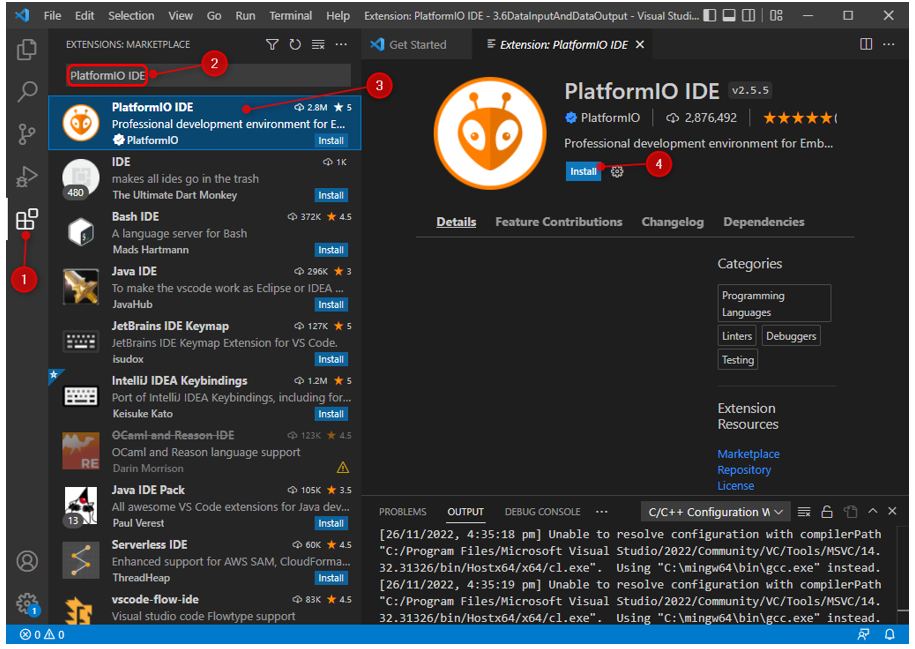
Step 2: Open the extension tab and search for the PlatformIO IDE extension in the search bar. Click install to begin installation.
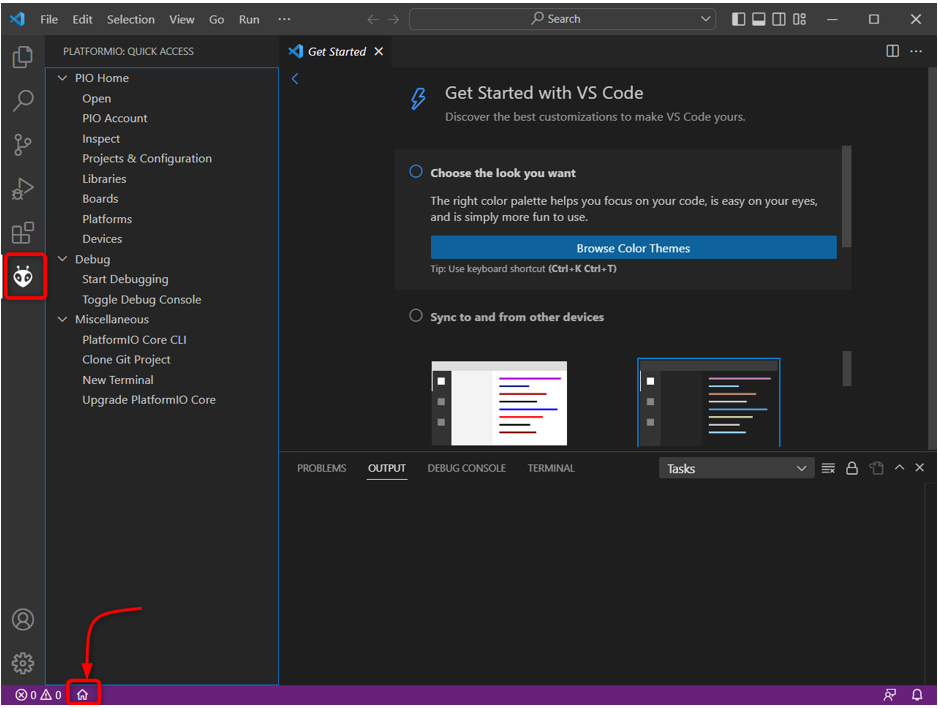
Step 3: After the installation is complete you will see the PlatformIO icon on the left side bar while a home icon is also available in the bottom of the window to open PlatformIO IDE.
We have successfully installed the PlatformIO IDE extension in VS Code. Only extension which is left is C++. Now we will move towards C++ extension installation part.
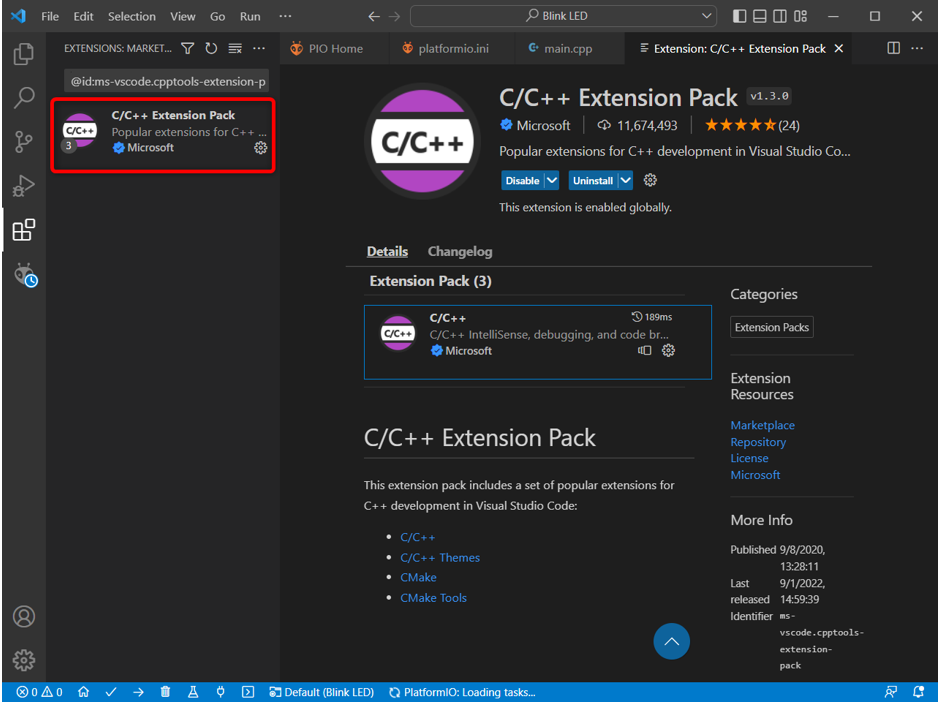
4: Installing C++ Extension in VS Code
As most of the code written for ESP32 is in C++ language, we need C++ extension to program and upload code in ESP32. This extension also helps when PlatformIO IDE fails to compile a program, so we have to manually convert Arduino code written for ESP32 in C++.
To install C++ extension, search it in the extension window and click Install.
We have completed all the required installations. It’s time to upload the first code in ESP32 using the VS Code.
5: Creating a New Project in VS Code Using PlatformIO IDE for ESP32
Before we can write a new code, the first thing is to set up PlatformIO IDE for ESP32. Follow steps to setup PlatformIO:
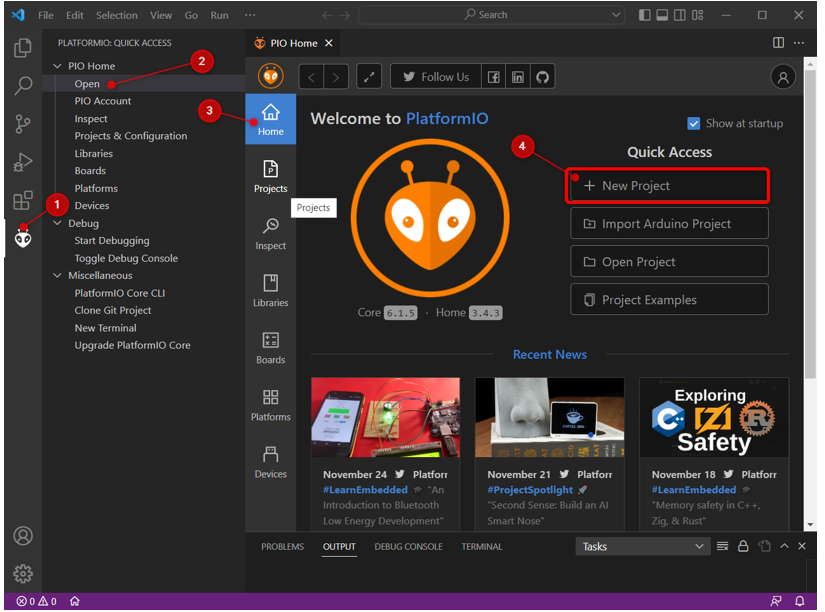
Step 1: Open PlatformIO IDE home page and select New Project.
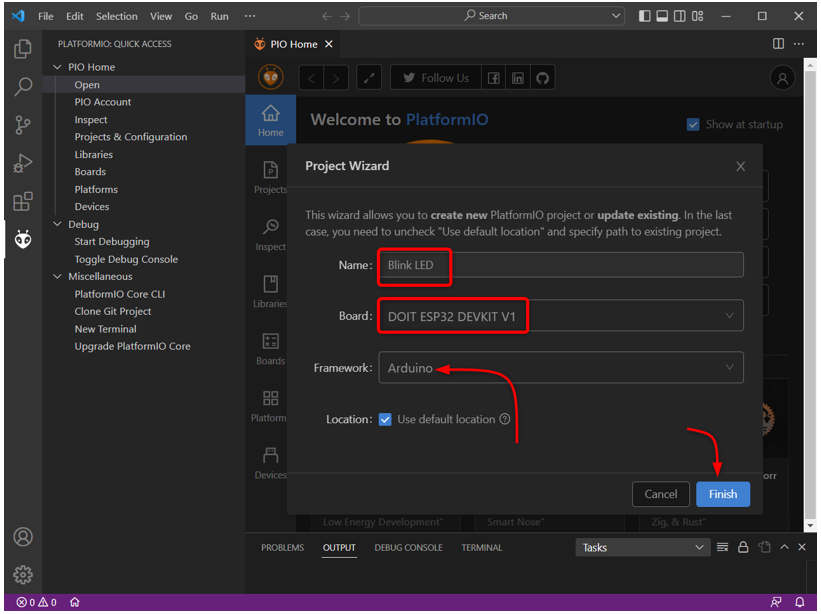
Step 2: Create a new file. Select the board name and Arduino framework. After that click Finish.
Step 3: Following window will appear and wait for PlatformIO to set up the new project.
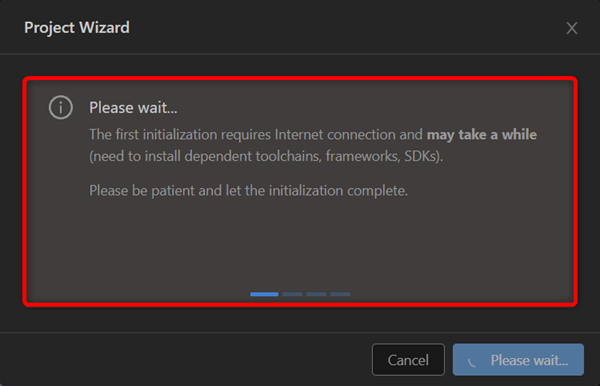
Note: This window might take time for the first time. PlatformIO needs to install the dependent tool chains, framework and required SDKs. So please be patient, time may vary from 5 minutes to 15 minutes. If it takes longer than that try restarting VS Code.
Step 4: Below window will appear which shows us all files under the new project we just created. Here we can access the source files and .cpp file where we will write C++ code for ESP32.
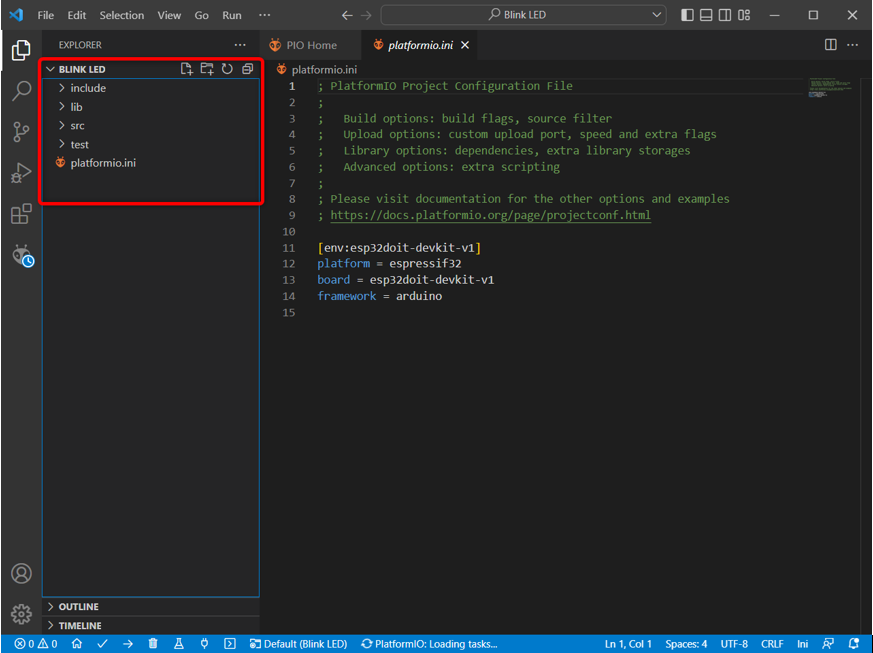
Note: Don’t modify or move these files otherwise you will not be able to compile code using the PlatformIO IDE.
Step 5: Here we can see the platformio.ini file which shows us the PlatformIO configuration for the current project. It shows us the platform, board, and framework we are using.
We can also modify it like including libraries, defining baud rate and other configurations.
As we are using ESP32 board so set the baud rate as 115200 using the command:
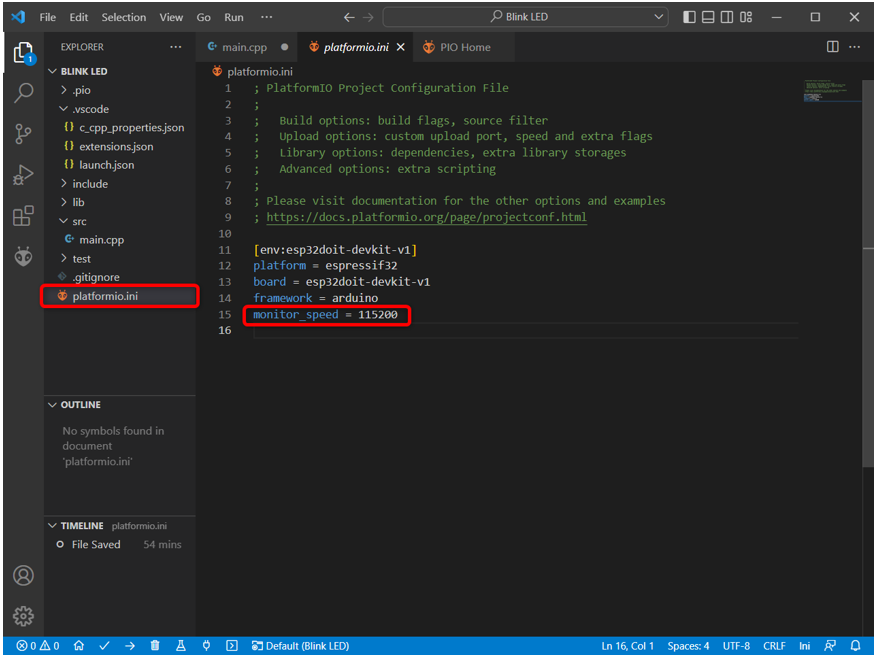
After defining serial baud rate make sure to save the file or press Ctrl + S.
We have created a new file and set up the PlatformIO IDE for ESP32. Now we will upload the first code in ESP32.
5.1: Uploading Code in ESP32 Using PlatformIO IDE
To test the installation of PlatformIO we will upload code in ESP32. Connect the board with the PC. Make sure the serial drivers for UART communication are installed on the PC. If the drivers for ESP32 are not available PlatformIO will be unable to detect the ESP32 board.
For further detailed information read the article How to setup ESP32 drivers in Windows.
Follow the given steps to finish uploading code in ESP32:
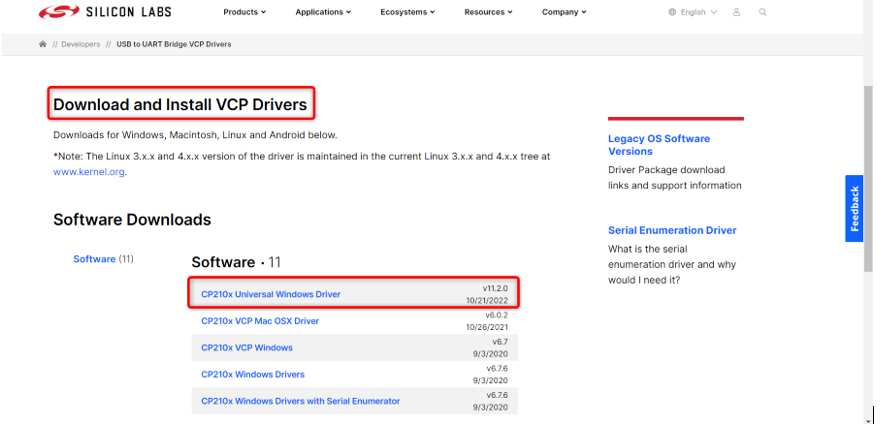
Step 1: Download the latest USB-to-UART Bridge VCP Drivers.
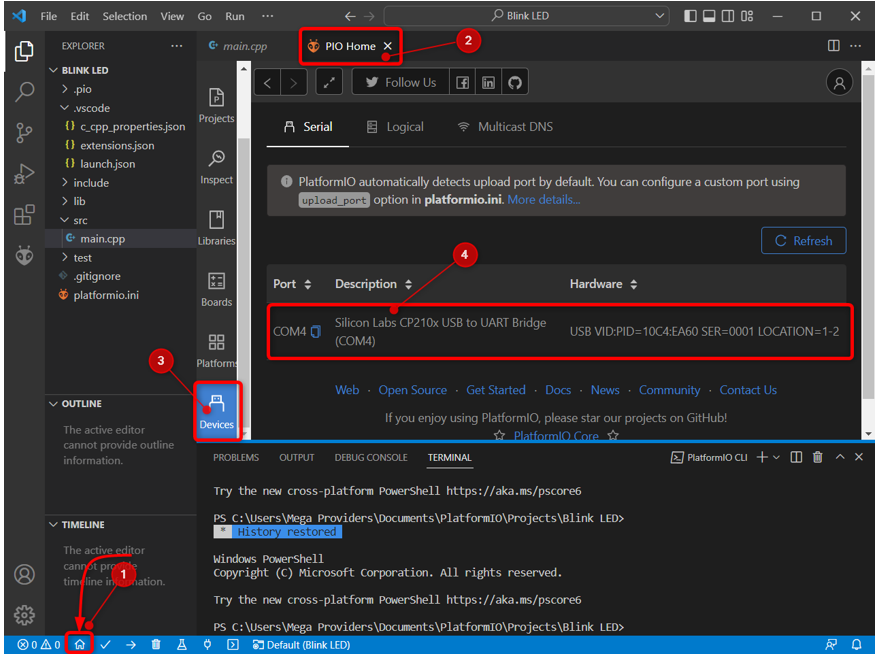
Step 2: Once the drivers are installed open VS code and go to PlatformIO home page then go to devices to refresh the drivers. If the drivers were properly installed, PlatformIO will automatically detect the COM port for ESP32.
Step 3: Now the ESP32 is connected to the PC. Open the main.cpp file under the src folder. Paste given code in editor.
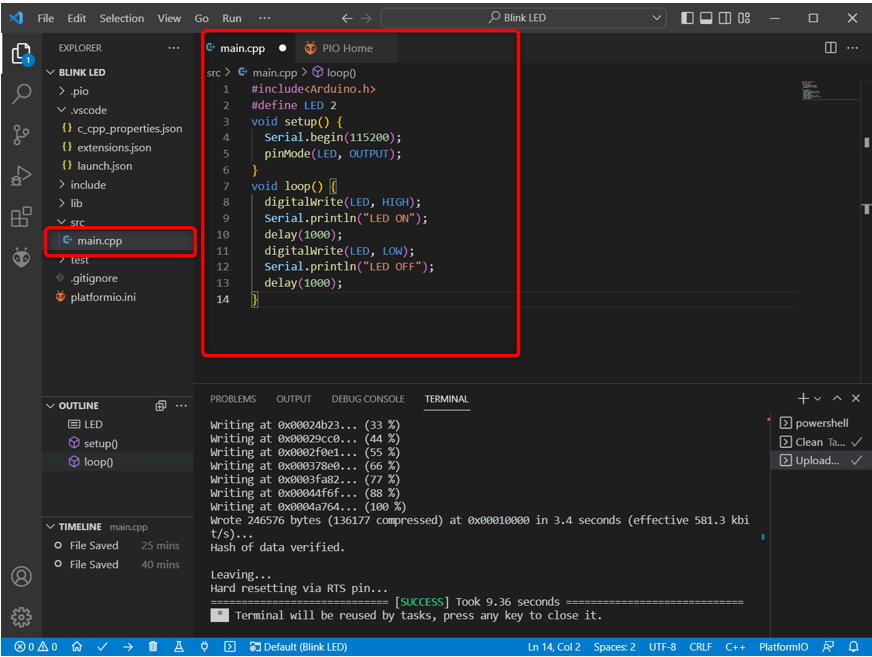
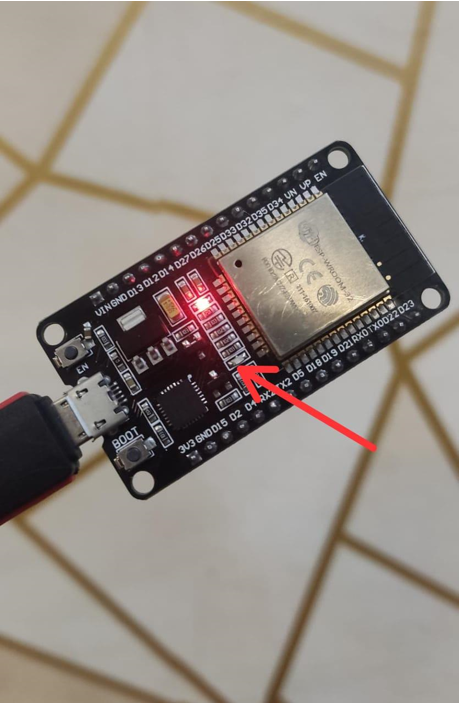
This code will blink the onboard blue LED on ESP32.
#define LED 2
void setup() {
Serial.begin(115200); // SERIAL BAUD RATE
pinMode(LED, OUTPUT);
}
void loop() {
digitalWrite(LED, HIGH); //LED PIN SET HIGH
Serial.println("LED ON"); // LED TURN ON
delay(1000); // 1 SEC DELAY
digitalWrite(LED, LOW); //LED PIN SET LOW
Serial.println("LED OFF"); // LED TURN OFF
delay(1000); // 1 SEC DELAY
}
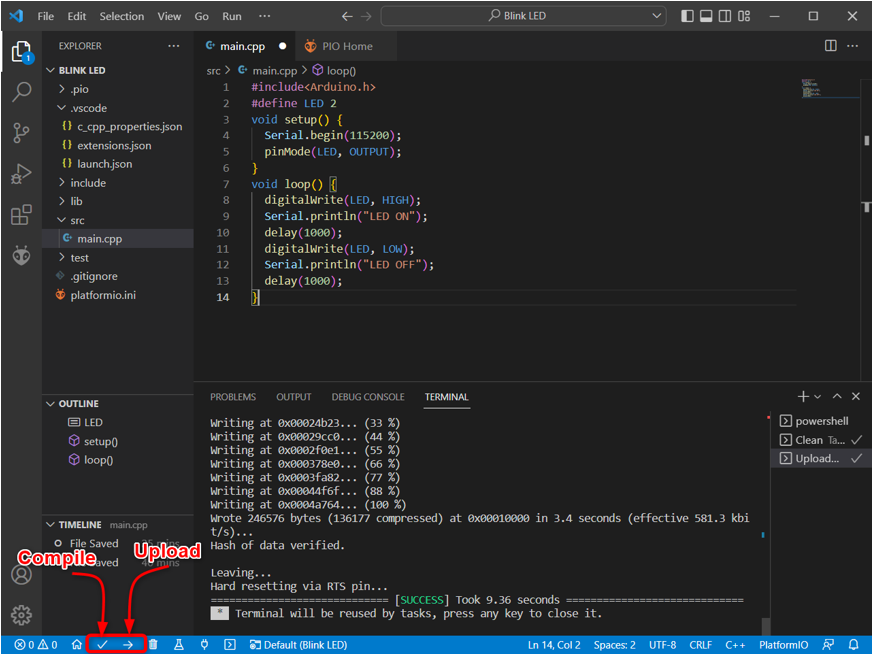
Step 4: Compile and upload code using the button in the bottom menu.
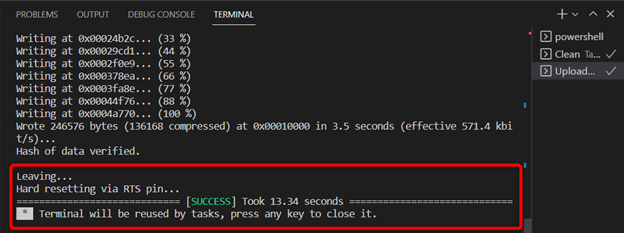
Step 5: Once the code is successfully uploaded the new message will appear on the output window as shown in image.
5.2: Output
In the output we can see that the built in LED connected to pin 2 of ESP32 starts blinking.
LED turned ON for 1 sec.
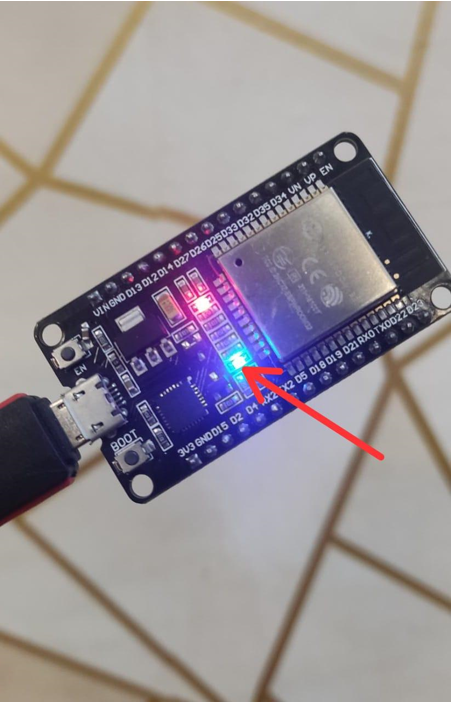
LED turned OFF for 1 sec.
Conclusion
Visual Studio Code is a very versatile platform for writing advanced level programs. Like Arduino, ESP32 can also be programmed using the VS Code; we just need to install the PlatformIO IDE extension. PlatformIO IDE extension is designed for embedded system applications. This guide covers all steps needed to program ESP32 using VS Code.