Adminer is a web-based data management tool that supports multiple databases like Oracle, SQLite, MySQL, PostgreSQL, and others. Adminer allows users to create tables, add columns, export data and perform other database management tasks.
In this article, we will discuss in detail how to install Adminer on Raspberry Pi.
How to Install Adminer on Raspberry Pi?
To successfully install Adminer on Raspberry Pi, follow the below-mentioned steps:
Step 1: Updating Packages
It is always recommended to update packages before any new installation. So, use the below-mentioned command to update the packages on the Raspberry Pi system:
Step 2: Installing Apache Server
Before installing Adminer, it is important to have Apache installed on your Raspberry Pi system. You can follow the below-mentioned command to install it:
Step 3: Installing PHP
You should also install PHP on your Raspberry Pi system from the following command as this will help us in server-related tasks:
Step 4: Installing MariaDB
Since, Adminer is a data management tool, you must install MariaDB (database management tool) as too from the following command:
Step 5: Installing SQL
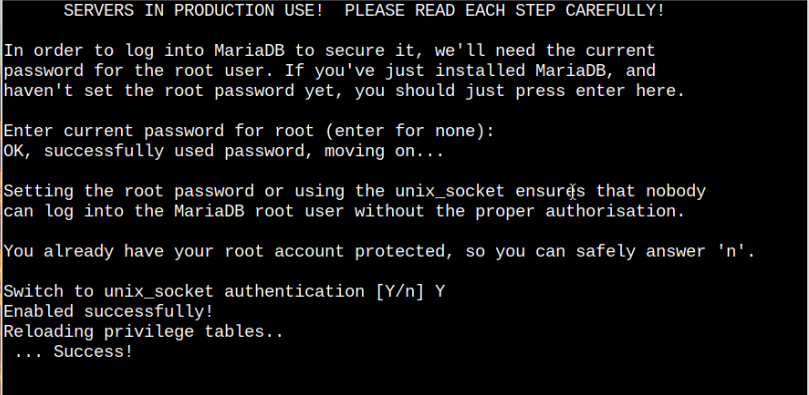
To secure the MariaDB database management system, you should configure it first from the following command:
Note: Enter the password for root when asked
Add “Y” or “N” on the options that come during this phase as you have to do this step by yourself.
Step 6: Creating Database
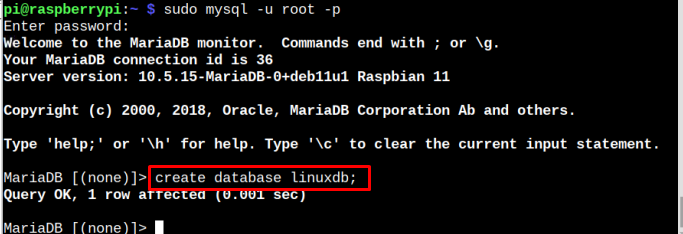
To access the Adminer, it is important to have a database. So, to create a database, use the following command:
You have to enter the system password to enter the MariaDB monitor.
Then type the following syntax to create the database for Adminer:
Remember that you can keep any name for your database in place of <database_name>. I have used “linuxdb” in my case.
Press “Enter” to create the database and then type the following command to set the username and password for the database:
Note: Remember to replace <database name>, <username>, and <password> according to your choice. .
Now to apply all the changes that we made, enter the following command as written below:
Now it is time to exit from database using the following command:
Step 7: Installing Adminer
After creating the database, we can move towards the Adminer installation process. For this purpose, first, create a directory for Adminer at location “/usr/share” through the following command:
Then follow the below-mentioned wget command to download Adminer .php file from the official website at location “/usr/share”:
Step 8: Create Apache Conf File
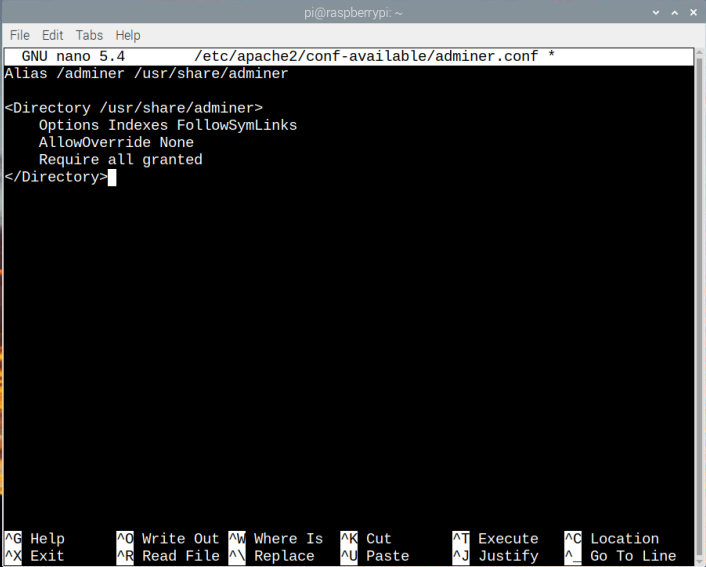
Now it is time to create an Apache Conf file from the following command to perform Adminer related configuration:
Paste the following content inside the file:
<Directory /usr/share/adminer>
Options Indexes FollowSymLinks
AllowOverride None
Require all granted
</Directory>
Then press “Ctrl + X”, and “Y” and finally press the “Enter” button to exit the file and go back to the terminal.
You have to tell Apache to read this file and for that purpose, you must execute the following command:
Afterwards, you must restart the Apache server to apply the above changes you made:
Step 9: Accessing Adminer through Browser
To access Adminer interface on the browser, you must know the IP address of your system, which you can find through the following command:
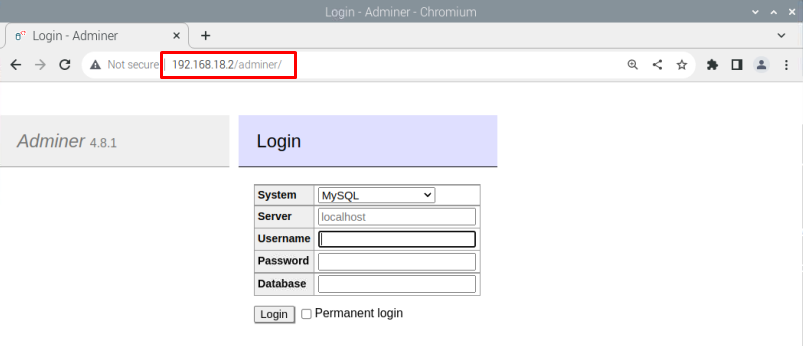
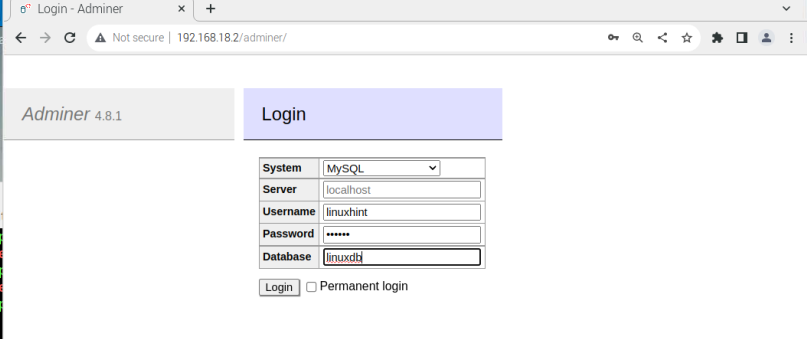
Now go to your browser and type the host_IP along with /adminer to access the Adminer login screen.
Enter the Username, Password, and Database name that you have created from Step 6 and onwards.
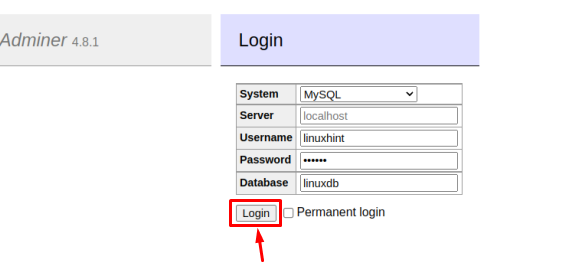
Then click on the “Login” button to log in to the database.
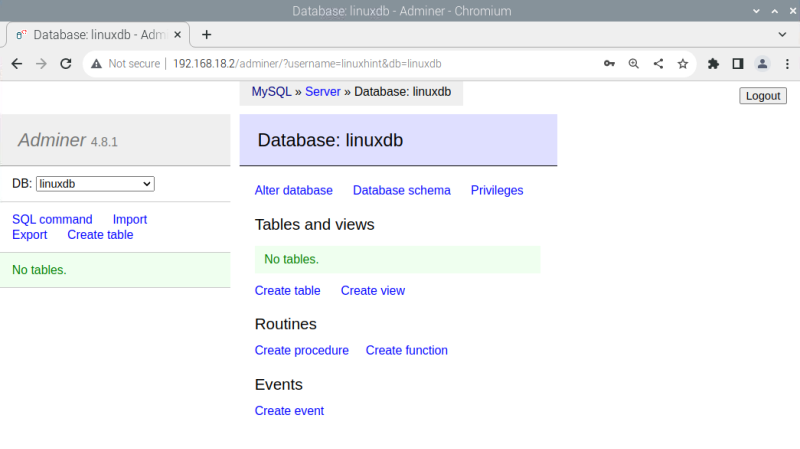
At this moment, you have accessed the Adminer interface and you are now good to add columns, export data, and perform other database management tasks right from your browser.
That’s it for the guide!
Conclusion
Adminer is a web-based tool used for performing different database management tasks. You can set up this tool on your browser by first installing prerequisites like Apache, PHP, and MariaDB servers on your system. Afterward, you must create a database that you can use later at the Adminer dashboard for login purposes. Once the database is created, you must download the Adminer PHP file and perform some configuration within the Apache conf. file to complete the process. Later, you have to use the Raspberry Pi IP address in the browser with the “/adminer” and enter the login details to open the Adminer dashboard.


