WiFi is important for any system, including the Raspberry Pi as well, since it allows users to perform various features like online chatting, web search, installing applications, and others. Further, most of the tasks perform on Raspberry Pi system easily be done through terminal. Thus, if you are looking for a way to connect your Raspberry Pi to WiFi through terminal, you should follow this guide as this will also help you in connecting the WiFI on Raspberry Pi lite version.
Let’s start!
How to Connect Raspberry Pi to WiFi by Using a Terminal
To connect Raspberry Pi to WiFi using the terminal, follow the below-mentioned steps:
Step 1: Check the Available Networks
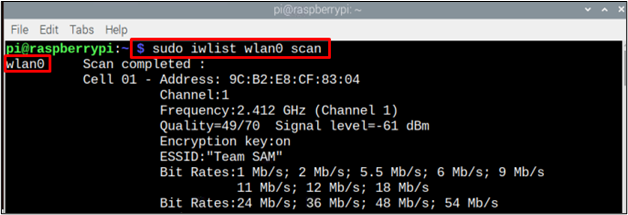
Before connecting to WiFi if you want to check all the available networks in our area, use the below-mentioned command
Step 2: Open the Configuration File
To configure the WiFi network, we need to create a “wpa_suuplicant .conf” file and for that follow the below-mentioned command:

By using the above command a blank config file will appear on the screen.
Step 3: Configuring the File
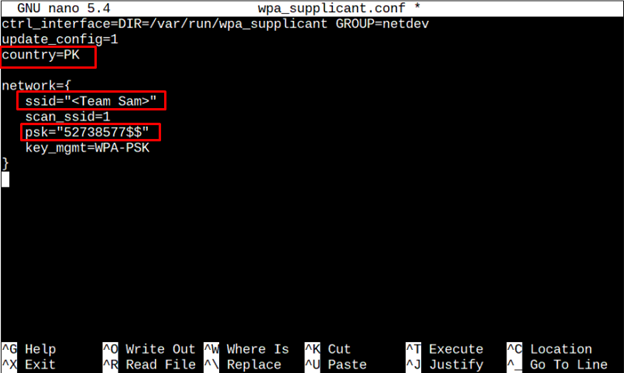
Now, finally it is time to configure the .conf file according to the available network. For configuration, at the top of the file, add the country code and network details as shown below:
update_config=1
country=<country code like “US” for USA>
network={
ssid="<Wifi-Network-Name>"
scan_ssid=1
psk="<Password>"
key_mgmt=WPA-PSK
}
Note: Remember that “country”, “ssid”, and “psk” will be set according to user requirements.
Now, rress the keys “Ctrl + X” and then “Y” to save the file. Finally, press “Enter” to get back to the terminal.
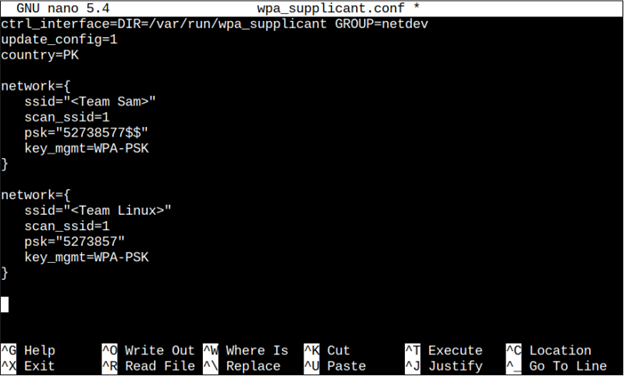
Just like above, multiple networks can also be added to the system so in case if one network is not working fine it automatically gets connected to another one without bothering a user. To add more than 1 network you can just simply copy the above network code (with the credentials of the second network) below the first network’s credential code.
ssid="<Wifi-Network-Name>"
scan_ssid=1
psk="<Password>"
key_mgmt=WPA-PSK
}
Step 4: Reboot
It is always recommended to reboot the system after configuring the WiFi network so that the changes can successfully be applied. To reboot, follow the below mentioned-command

Step 5: Verifying Network
Now to verify the network, we will check the network connection and for that follow the below command
Check the IP address written in front of inet to verify the network.

That’s it for this guide!
Conclusion
To connect Raspberry Pi to WiFi using a terminal, the user simply has to open the terminal first. Afterward, he/she has to enter the command to open the conf file, and then add the network credentials inside the file including the ssid, password and location. After saving the changes, he/she must reboot the system to ensure Raspberry Pi is connected to the WiFi network.