If you want to set a time and date on your Raspberry Pi system, you should follow article guidelines.
Let’s start it.
Setting up Time and Date on Raspberry Pi
There are two simple methods to set up time and date on Raspberry Pi.
- Set Time and Date on Raspberry Pi from Raspberry Pi Configuration
- Set Time and Date on Raspberry Pi using date Command
Method 1: Set Time and Date on Raspberry Pi from Raspberry Pi Configuration
If a user wants to set up the time and date on Raspberry Pi through this method, he/she needs to follow the following steps:
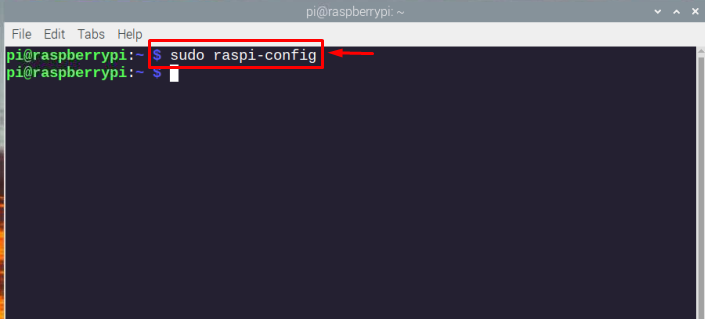
Step1: Open the Raspberry Pi terminal and type the below-mentioned command to go to Raspberry Pi configuration menu.
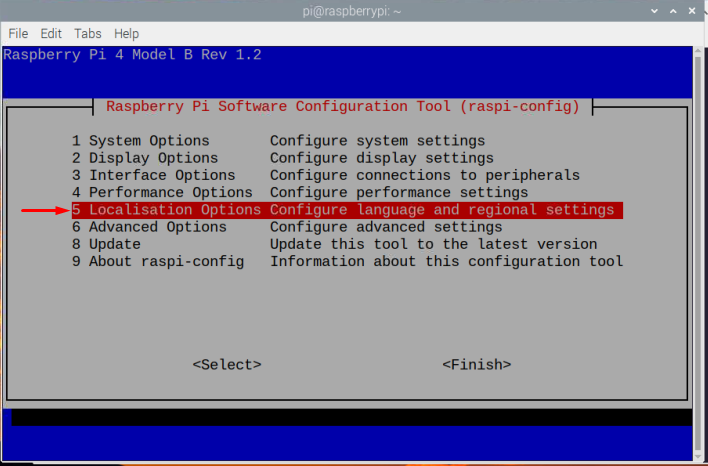
Step 2: Now from the configuration menu, choose the “Localisation options”.
Step 3: Then pick the “Timezone” option.
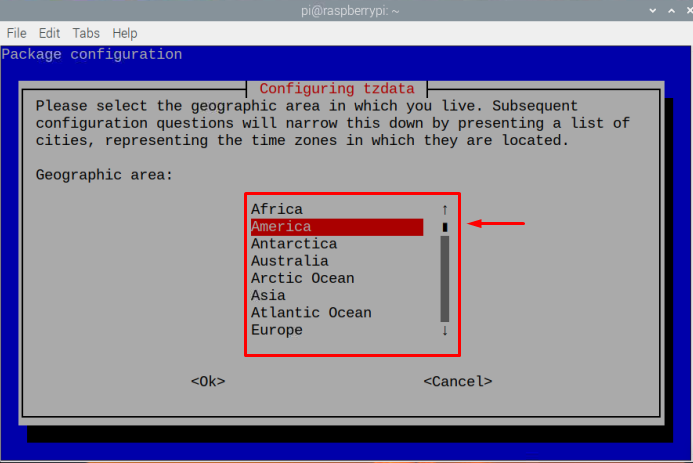
Step 4: Now, you have to choose a Geographic Area you are currently living. In my case, its America.
Step 5: Finally, choose your city or region from the “Time Zone” section.
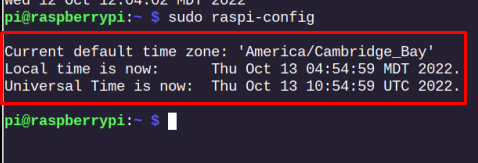
This will set up the time and date and it will display on your Raspberry Pi terminal.
Step 6: You can also verify the date and time by executing the below-mentioned command:
Method 2: Set Up Time and Date on Raspberry Pi Using Date Terminal
There is a terminal command too that allows you to set up the date and time manually. With this method, you can set the date and time on your Raspberry Pi system from the following command:
From the above command, you have to set the date and time by yourself and then execute this command to update the time and date on your Raspberry Pi system. -s flag is used to set the date. For example:
That’s it for this guide!
Conclusion
Setting a date and time is not a hectic task on Raspberry Pi. Generally, when a user starts the system date and time is set automatically. But still, if any problem arises and a user wants to change the date and time, then they can correct it by opening the Raspberry Pi configuration using “raspi-config” command to set up date and time on Raspberry Pi system.


