If you don’t want to trust these applications to be installed on your system, you can add the official Raspberry Pi weather plugin on your desktop to continuously monitor the weather situation in your area.
This guide will help provide you with the guidance to add and set up a weather plugin to your Raspberry Pi desktop.
Monitor Weather on Raspberry Pi Through Weather Plugin
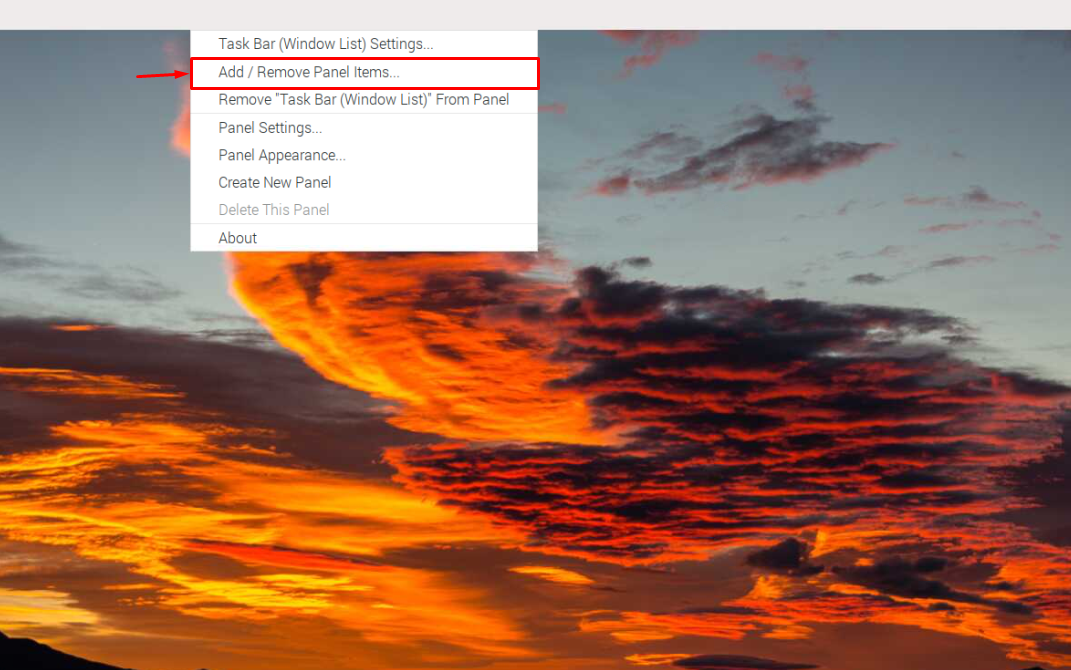
The “Add/Remove Panel Items” option includes the weather plugin on your Raspberry Pi system and to use this plugin, follow the below-mentioned steps:
Step 1: Right-click on the Taskbar panel and select “Add/Remove Panel Items”.
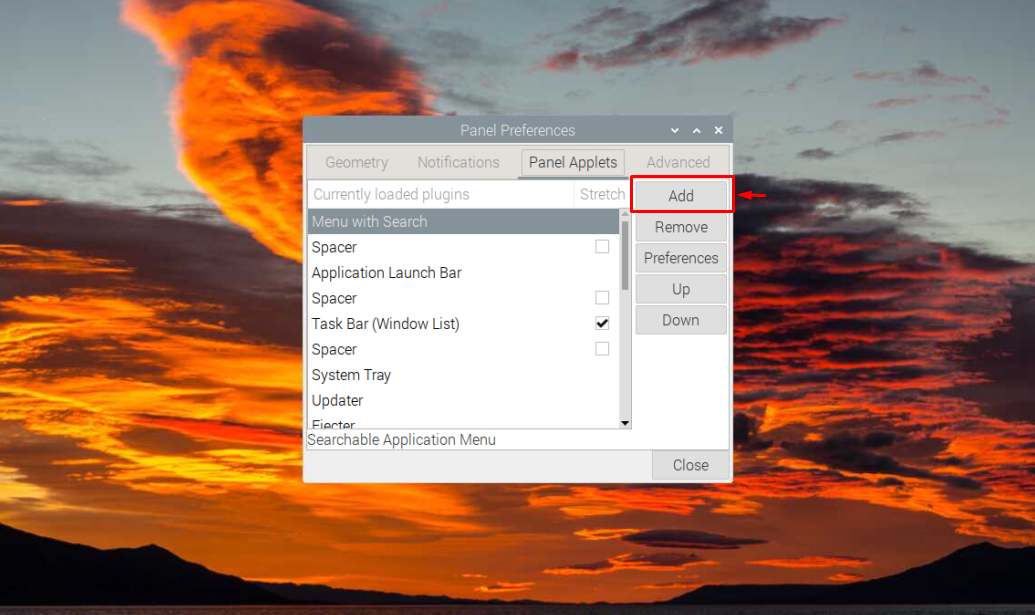
Step 2: Click on the “Add” button on the Panel Preferences menu.
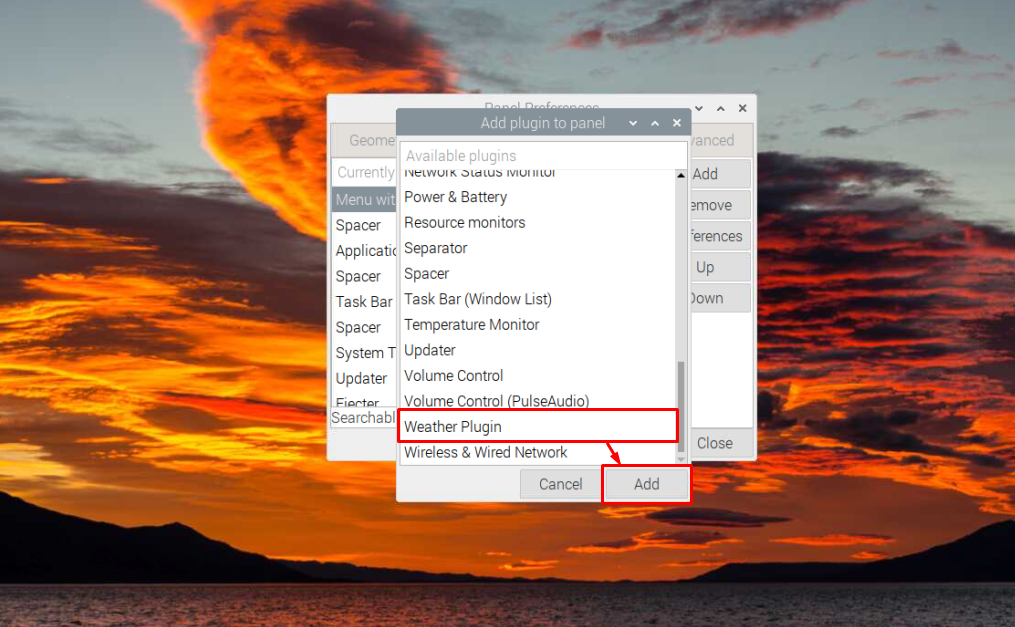
Step 3: Search for Weather Plugin and add it using the “Add” button.
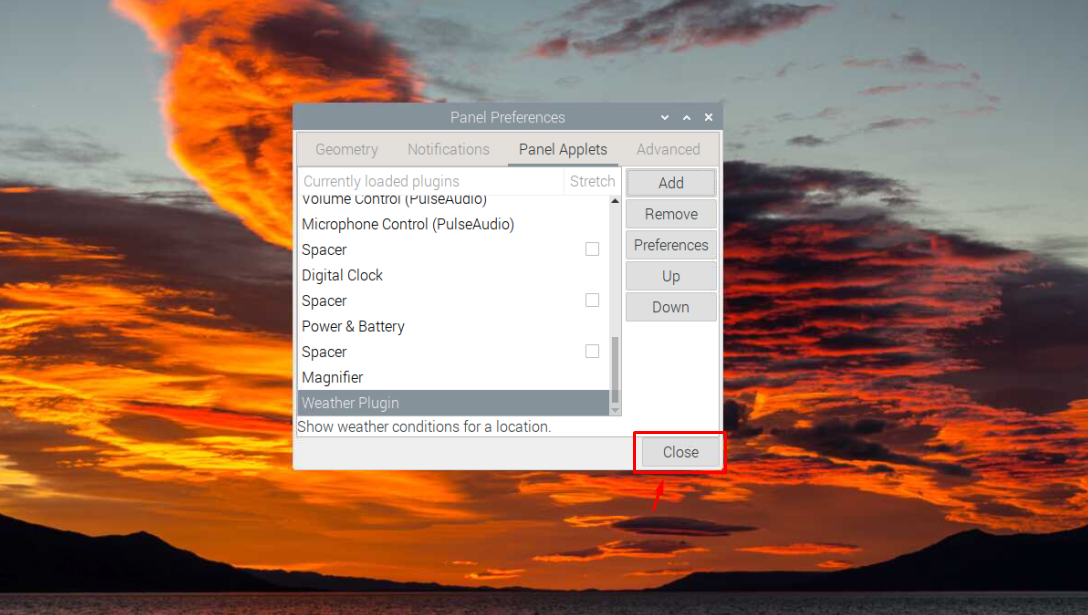
Step 4: The appearance of the Weather Plugin option in the Panel Applets section confirms the addition of the plugin on the Panel items. Close the menu using the “Close” button.
Step 5: Head to the taskbar panel to see the weather plugin option as highlighted in the image below.

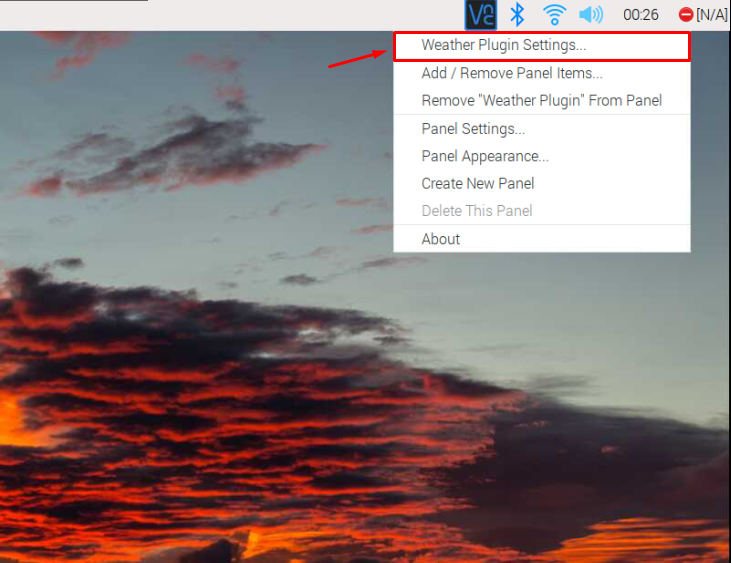
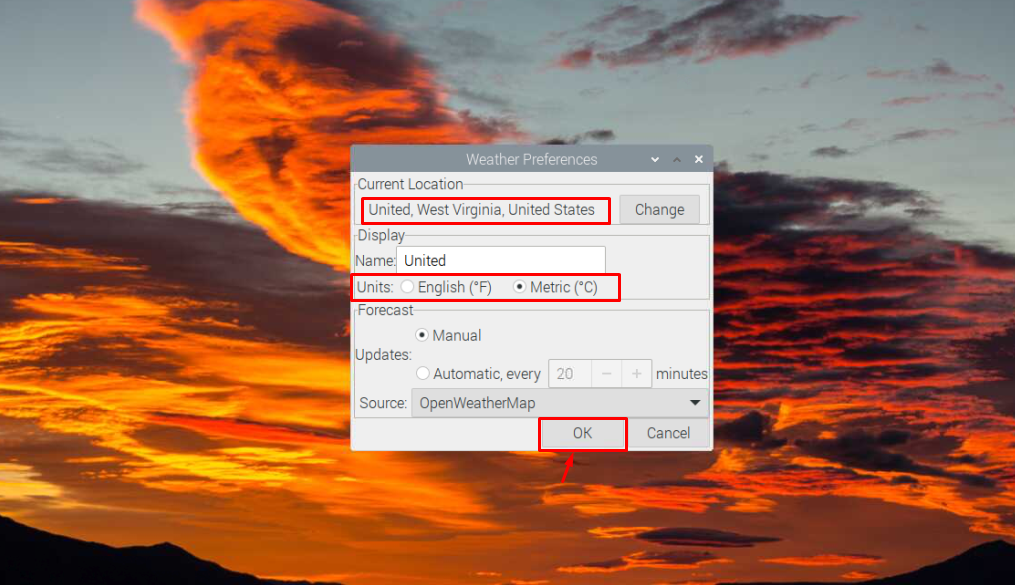
Step 6: You will need to select your area to get the weather information and for that, you right-click on the weather plugin icon and select the “Weather Plugin Settings” option.
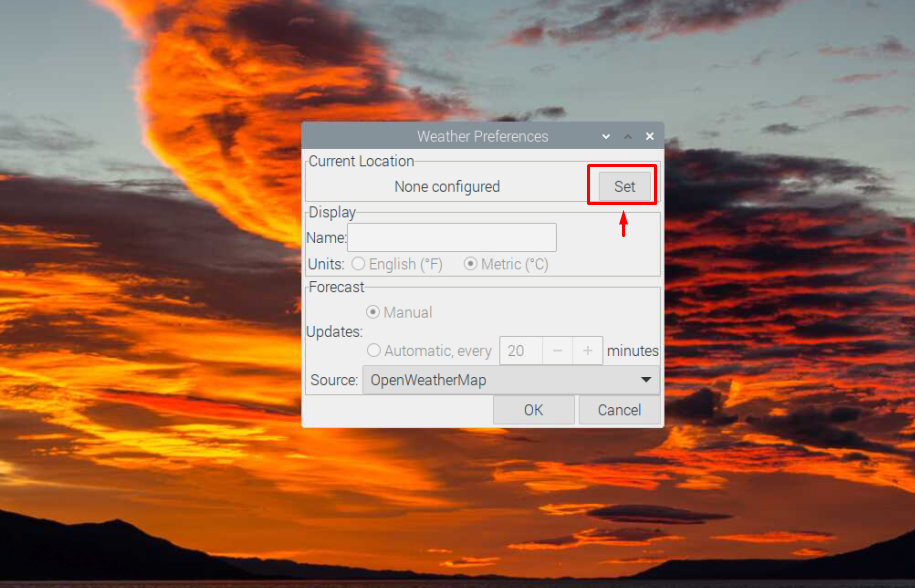
Step 6: Choose your current location from the “Set” option.
For the user living in the USA, they can enter “United” in the search box to see the list of countries.
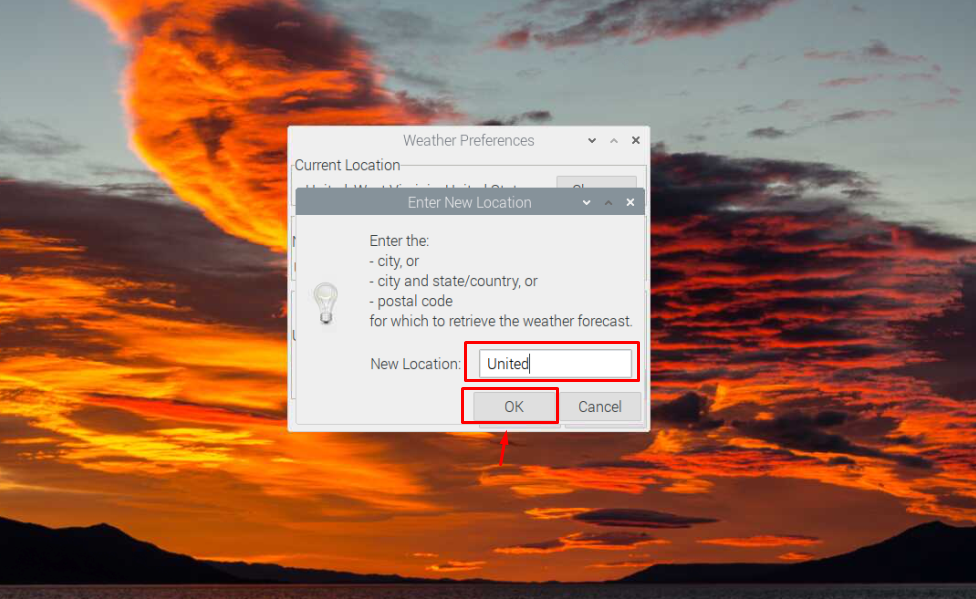
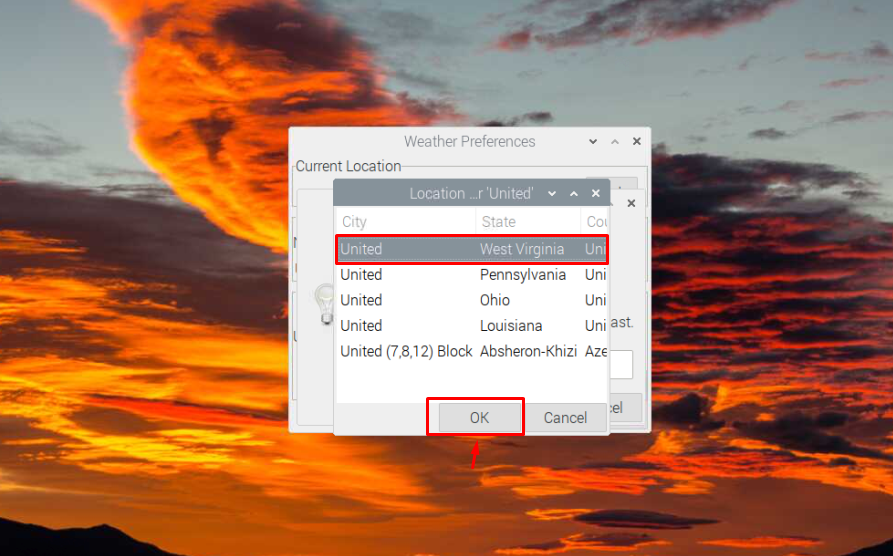
Step 7: Add your country and select the “OK” button to confirm.
Step 8: You can also choose the weather display units based on your preference. In my case, I selected a degree Celsius.
Once you select the “OK” button, the weather information of your selected location will appear on the Taskbar panel.
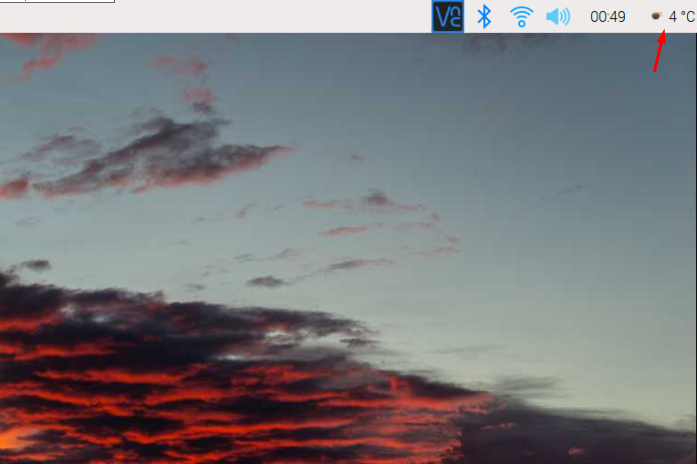
At this phase, the Weather plugin is successfully added to your Raspberry Pi desktop, and you can change your location anytime you want from its settings.
Conclusion
Adding a weather plugin to your Raspberry Pi desktop will help you continuously monitor the weather situation in your area. It also releases the tension of installing a separate third-party application for monitoring the weather. The above setup guide will help you add a Weather plugin to your Raspberry Pi system from the “Add/Remove Panel Items” option. You can change the country location and temperature unit according to your choice from the main Weather plugin settings and start getting weather information on your Raspberry Pi desktop.