It will need an extensive amount of work before we begin to start with our project. Although there is a great range of open-source libraries available, sometimes we need to write a custom library so this guide will assist you in writing your very first Arduino library.
How to Create Arduino Custom Library
Libraries are usually written in C/C++ language so to write Arduino libraries we need some sound knowledge of functions and classes. Libraries are a bunch of .cpp files combined to run a single hardware. Libraries make Arduino programming easier and efficient. We do not have to write a new code every time we use some hardware. Libraries are a great way of sharing codes which saves a lot of time and cost.
As Arduino is an open-source platform, the Arduino community has created thousands of libraries. But still there is a room for new libraries to be written or if you are going to turn an Arduino project into a product then one might need to write a separate library for its hardware.
Before we move forward let’s take a quick review of the basic structure of the Arduino library.
A library typically consists of:
- Header file (.h): This contains the library’s definitions.
- Source file (.cpp): This contains the library’s code.
- Keyword file (.txt): This file explains keywords used in the library.
- Readme file (.txt): This contains extra information related to the Arduino library.
- Examples (ino): Examples help users to operate the library.
All these files help users to understand and operate libraries in Arduino.
The header file(.h) and source file(.cpp) are the two necessary files needed to operate an Arduino library. All other files are an add-on which give users some necessary information like what this library is doing or who is the writer of this library.
Now we will create a new library .h and .cpp file.
Step 2: Create Library Header and Source File
Step 3: Adding Custom Library in Arduino IDE
Step 4: Calling Custom Library Inside an Arduino Code
Step 1: Create a Sample Code
i: Write a simple code in the Arduino IDE editor that will take two numbers and sum both numbers to show the result on the serial monitor:
{
return a + b;
}
void setup()
{
Serial.begin(9600);
int Answer = SUM(1,2);
Serial.println(Answer);
}
void loop() {}
Compile the above code following output will appear in the output window. Output will print the sum of two numbers 1 and 2.
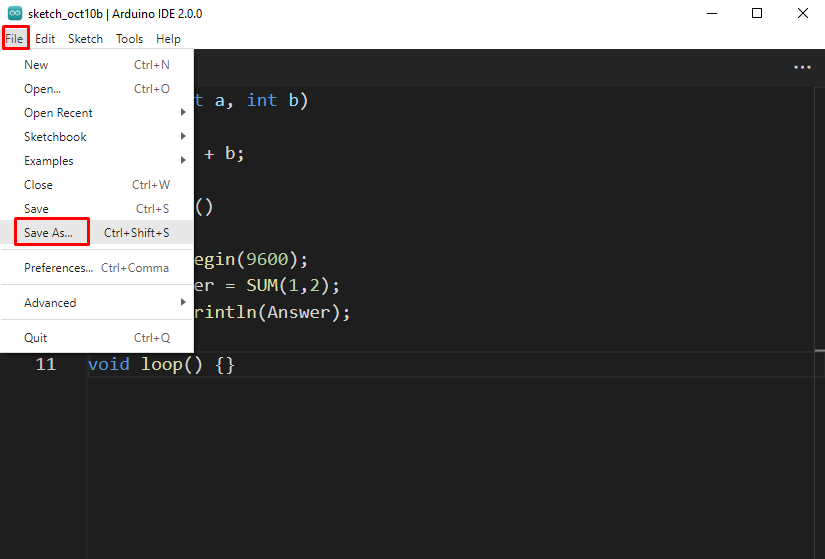
ii: Once the code is written in IDE save your code by Going to Save As option under the File menu:
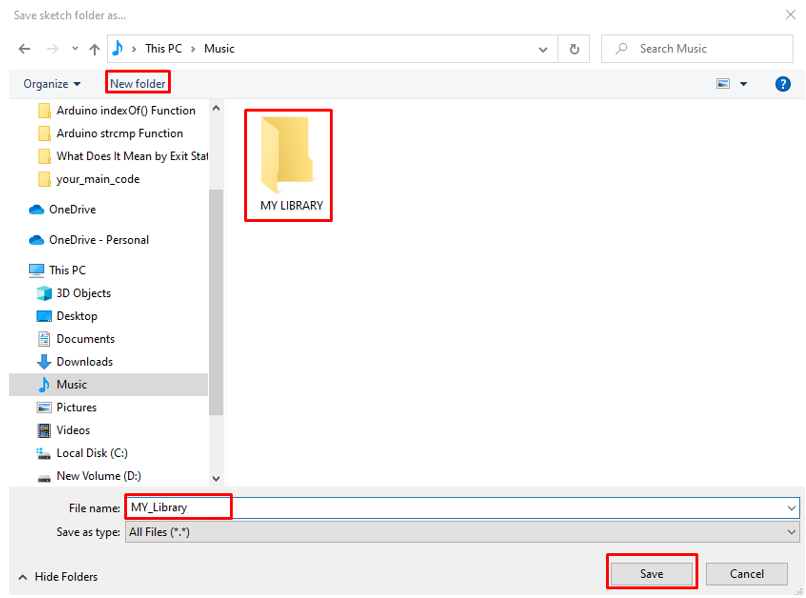
A new window will open, create a new folder MY_LIBRARY and save the Arduino file inside that folder.
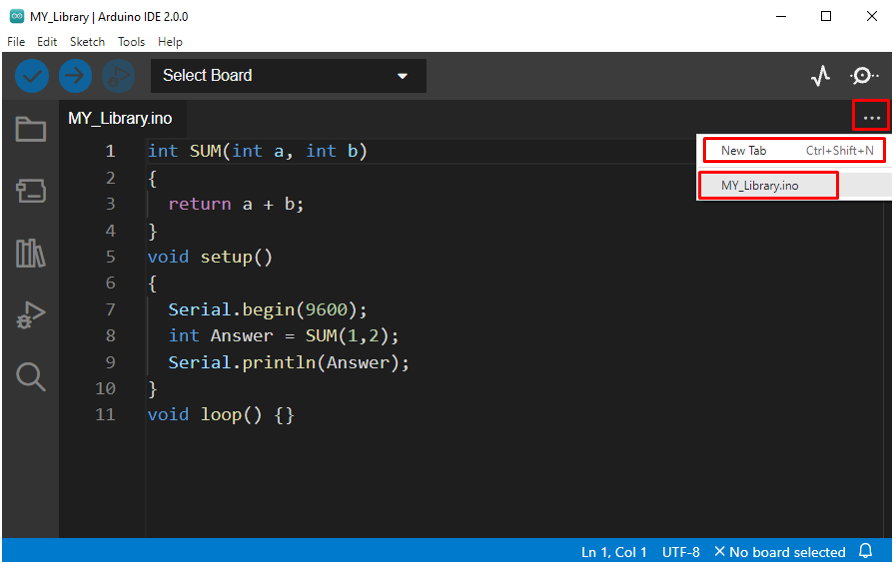
Once the new library folder is created you will see a new .ino file there. Inside this file we will call a custom library and test its output.
Step 2: Create Library Header and Source File
i: Now create two main files of the library that are header and source file. To do this press “Ctrl+Shif+N” or click the ellipsis icon at the right side of the IDE then click New Tab:
ii: A new window will open here and write the name of files we want to create. Type My_Library.cpp and My_Library.h to create source and header file respectively:
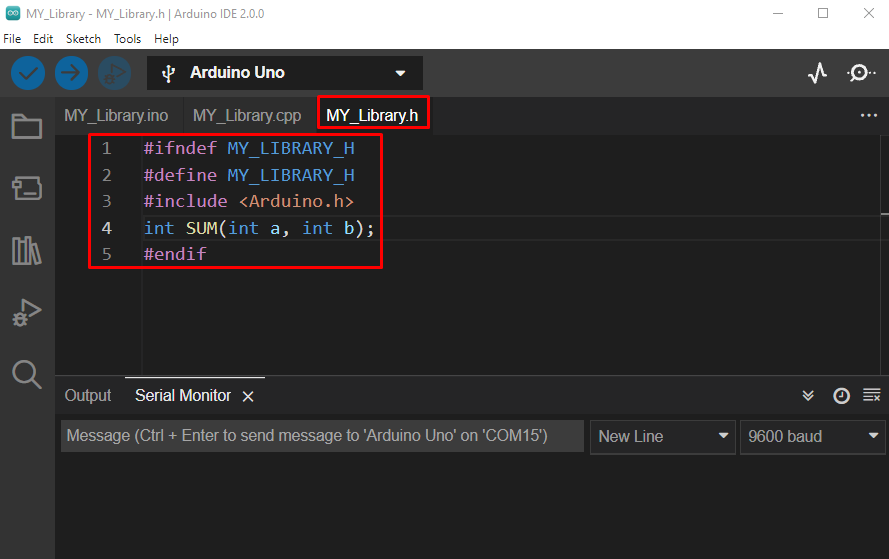
iii: After the two new files will be created the IDE interface will look like this. Next step is to write code for source and header files so we can call our own custom library in the main code file.
Code for Header File
First, we will create a Header file for the Arduino custom library. Type code below inside the “.h” file.
#define MY_LIBRARY_H
#include <Arduino.h>
int SUM(int a, int b);
#endif
This is a general syntax for writing code for Arduino library we start with defining header guard’s name and ends with #endif statement. Normally, while writing the header guard’s name, it is better to write in upper case letters and add “_H” at the end of the name.
After that it is necessary to add an Arduino library as the library might require the use of some Arduino functions. In our main program normally, it is added by default but writing a custom library we must include it ourselves. Next, we created a variable “SUM” that will be called by our source file .cpp inside a function.
Code for Source file
Our Header file is ready now we will move towards creating source code (.cpp file). Type below code in source file:
int SUM(int a, int b)
{
return a + b;
}
Here in above code, we started by calling header file using #include directive. Header file contains descriptive comments include files such as (#include <Arduino.h>), some constant definitions and classes that contain different functions and variables that we call in our library.
Step 3: Adding Custom Library in Arduino IDE
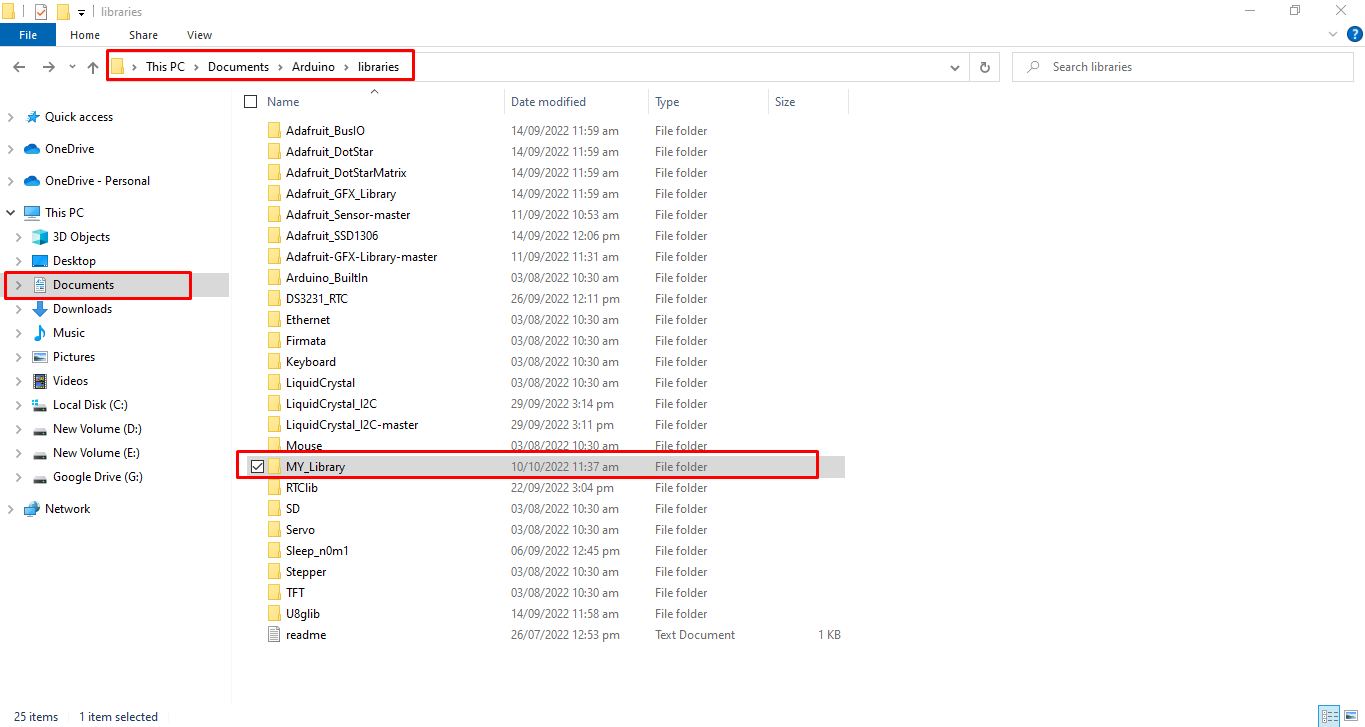
Once we have created an Arduino library, the next step is to add it to the Arduino IDE so we can call it inside any code. To do this copy the folder that contains the library header and source code, paste that folder inside the Arduino library directory. The Arduino directory folder path will look like this: Documents>Arduino>libraries:
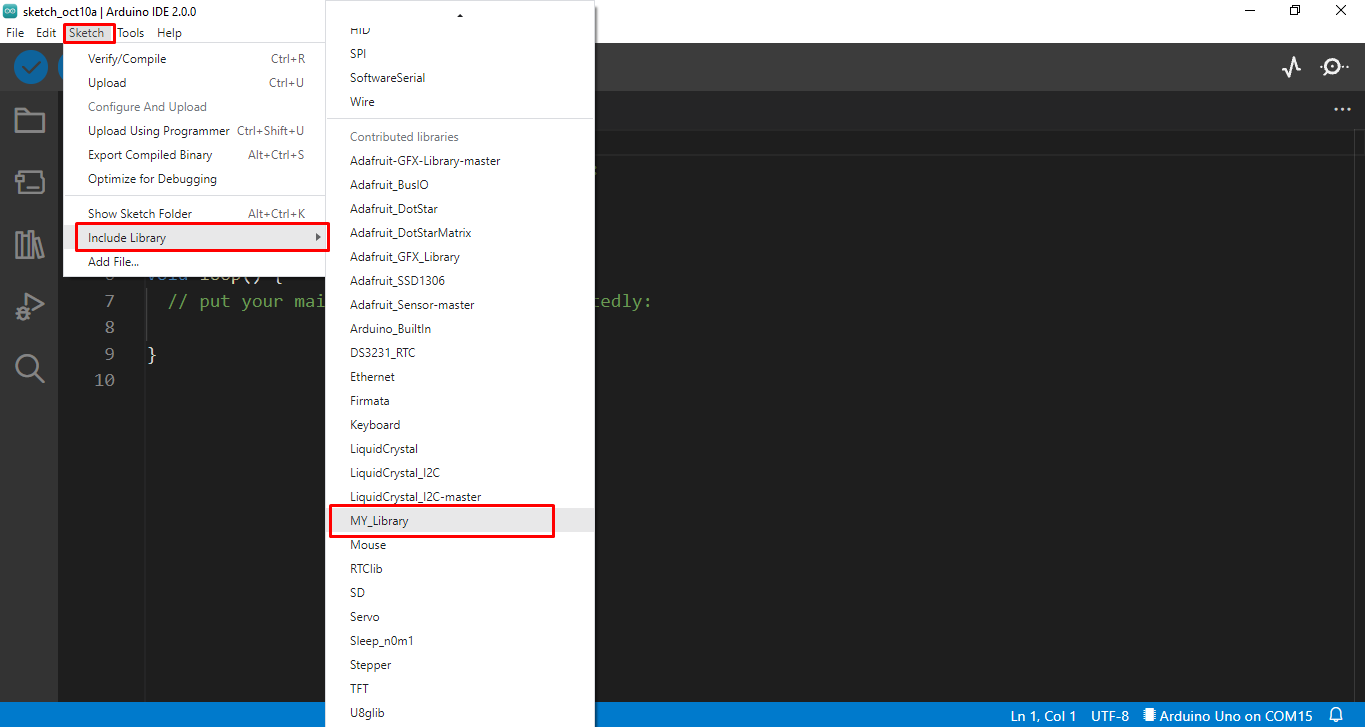
Once the library is added inside the Arduino IDE. We can call it inside any code by going to: Sketch>Include Library>My_Library:
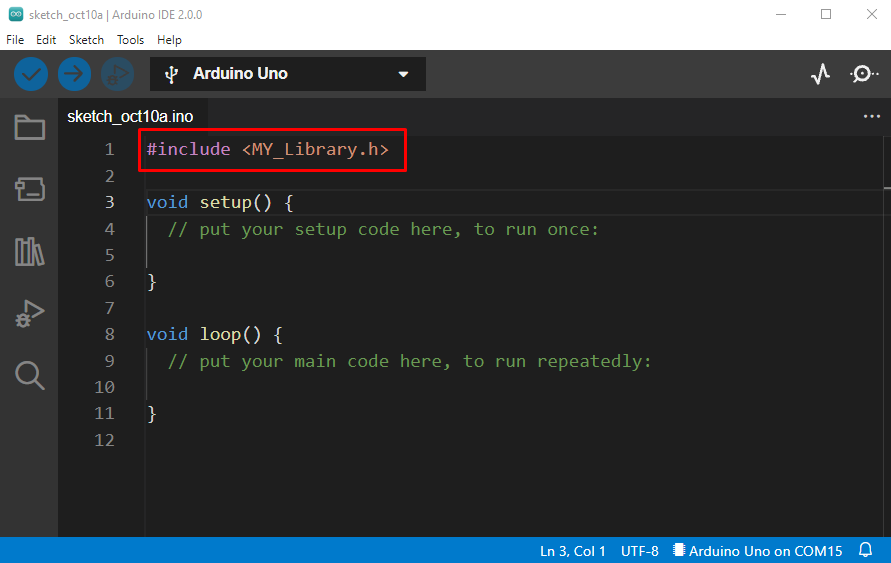
Open a blank Arduino sketch and try to call the library you just created the code will look like this:
We have successfully created a library for calculating the sum of two integers and called it inside Arduino code.
Step 4: Calling Custom Library Inside an Arduino Code
As our Arduino library is completed now, we will write the same above sum code by calling our custom library into it. Type the following code in IDE:
void setup()
{
Serial.begin(9600);
int result = SUM(1,2);
Serial.println(result);
}
void loop() {}
In above code first we included “MY_Library.h” then in the setup part we began serial communication. Next result variable will be called and the sum of two numbers will be printed on the serial monitor by calling the result function from the library .cpp file. While calling the custom library inside the Arduino .ino file make sure to use the exact same file name as you named the header file.
After compiling the code, the same result is printed like our previous code. Just here the code is more optimized using a separate library.
How to Share Arduino Custom Library
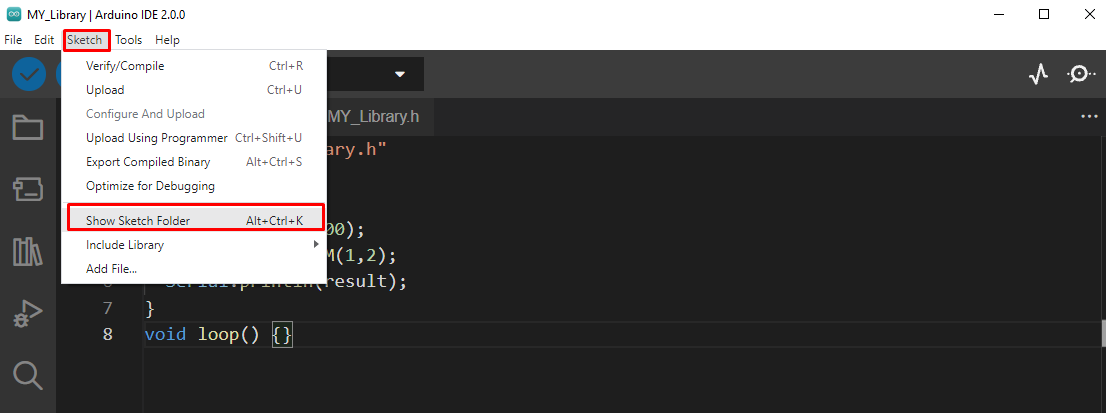
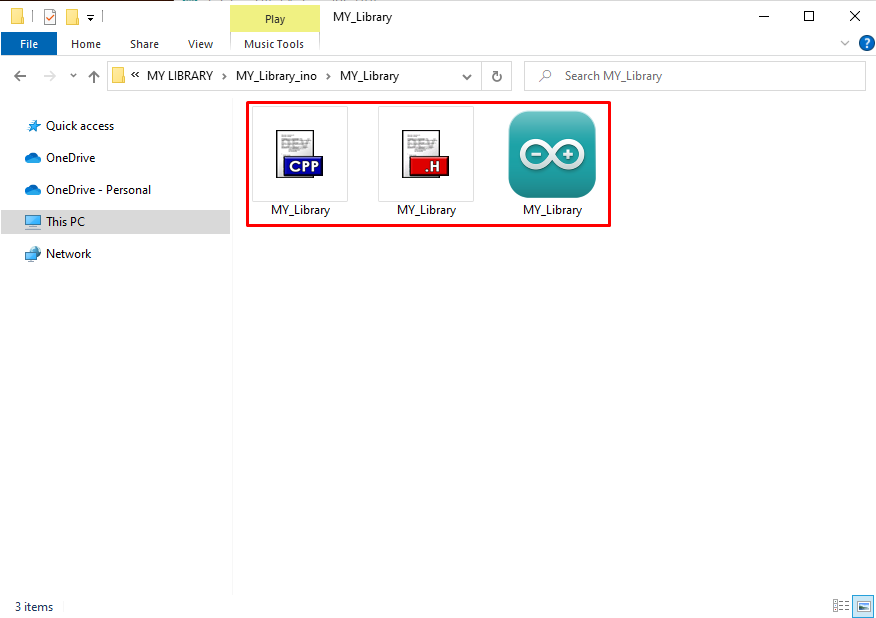
To share the Arduino library first open the folder where two main files with .cpp and .h format are saved. Sketch folder can be open by going to: Sketch>Show Sketch Folder.
A new window will open here where all the files of the library can be seen. To share libraries first compress these files and share them using a zip file:
Conclusion
Arduino has a wide range of open-source libraries available but sometimes we need a custom library to increase our project productivity or to optimize the code. This article covers all necessary steps needed to write your own library code. Mainly two files are required for an Arduino library, Source and Header files. Both these files can be created following the steps mentioned in this guide.


