If you don’t know where and how to enable this feature, follow this article’s guidelines to enable the SSH feature on Raspberry Pi.
3 Different Ways to Enable SSH on Raspberry Pi
There are three methods to enable the SSH feature on your Raspberry Pi device, which are as follows:
- Enable SSH Via Terminal
- Enable SSH on Via GUI
- Enable SSH Via SD Card
The detailed discussions of all these methods are discussed as follows:
Method 1: Enable SSH Via Terminal
To enable SSH on Raspberry Pi from the terminal, you first need to open the terminal and then add the following command for opening the Raspberry Pi configuration.

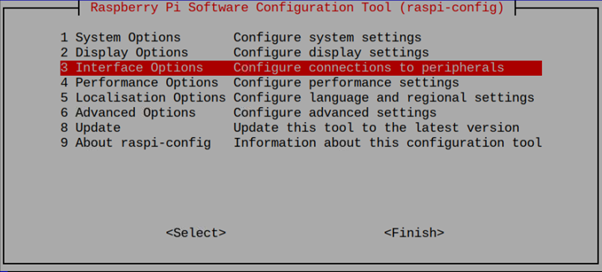
In the Raspberry Pi Configuration, you will find several options; however, to get the SSH feature, you must select the “Interface Options”.
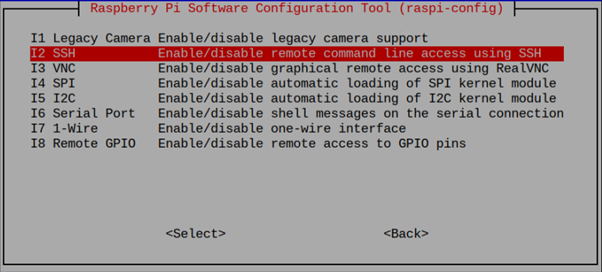
Within the “Interface Options” section, select SSH.
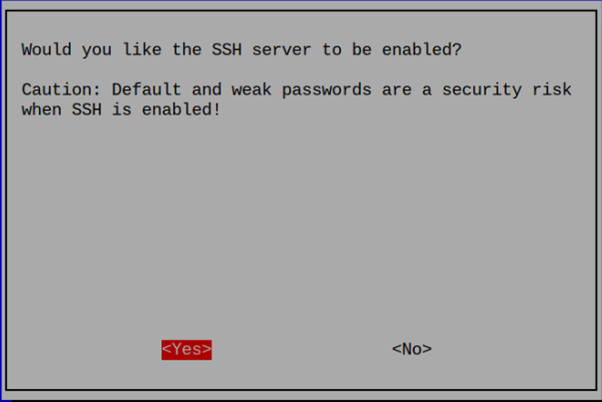
The next window will need your permission to enable the SSH service and once you click on the “Yes” option, the service will be enabled on your Raspberry Pi device.
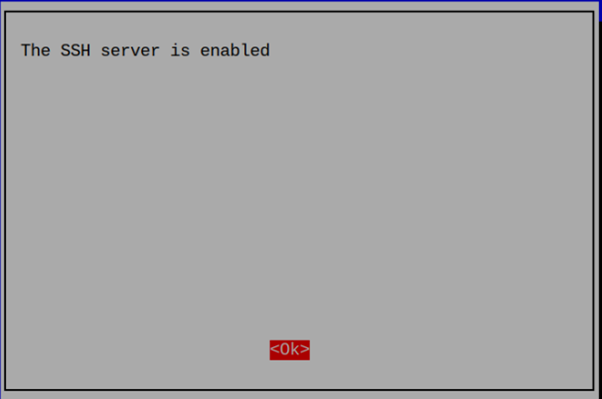
The next screen will confirm the enabling of SSH service.
Method 2: Enable SSH Via GUI
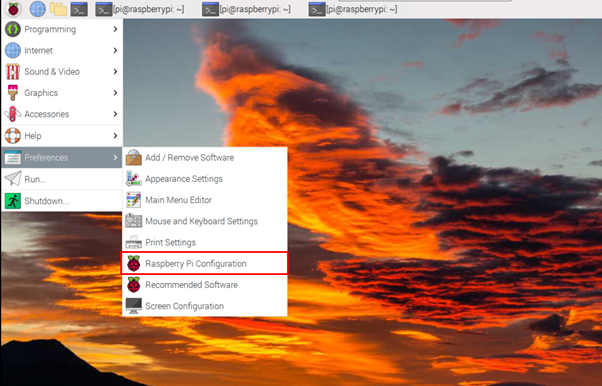
Although this approach won’t be possible for the lite Raspberry Pi version with no GUI, if you are using a Raspberry Pi desktop environment, then this will be the easiest approach to enable SSH service on Raspberry Pi. For performing the process, you must open Raspberry Pi Configuration from the main menu.
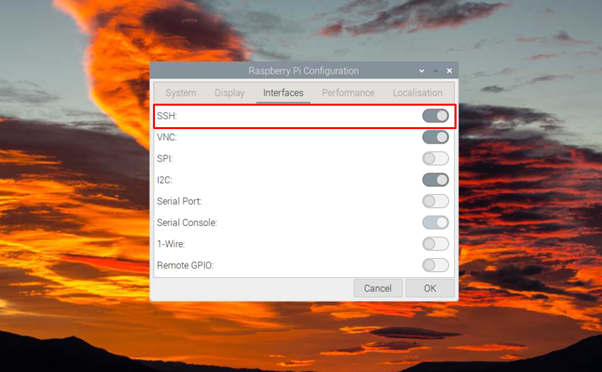
You can find the SSH option in the “Interfaces” section in the Raspberry Pi Configuration. To enable the SSH service, you should need to move the toggle button in the right direction.
Method 3: Enable SSH Via SD Card
Enabling the SSH service on Raspberry Pi from the above two methods can easily be done. However, these methods won’t be helpful if you use a completely changed desktop environment where you may find it difficult to search for commands to enable the SSH service. In that case, you can create an SSH file within your Raspberry Pi SD card directory to enable the SSH service. To do this, you must first install any operating system on your Raspberry Pi SD card, then follow the steps below:
Step 1: Insert your Raspberry Pi SD card into the system and create a new empty file with the name ssh.txt within your Raspberry Pi SD card directory.

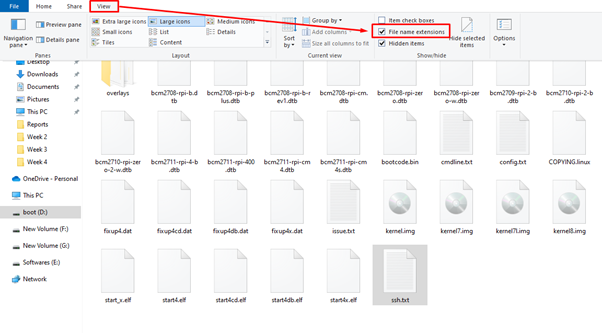
Step 2: In the Veiew sction, checkbox the “File name extensions” option.
Step 3: Remove the .txt extension from the ssh.txt file and press Enter.
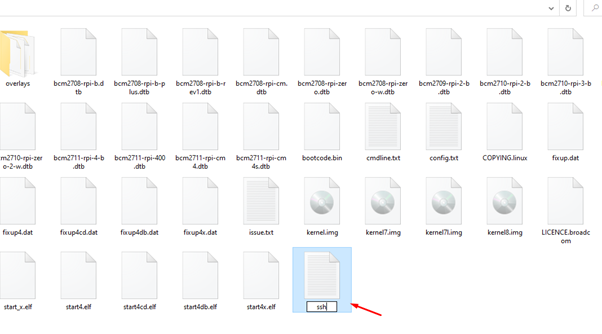
Step 4: Select the “Yes” option to change the file name extension.
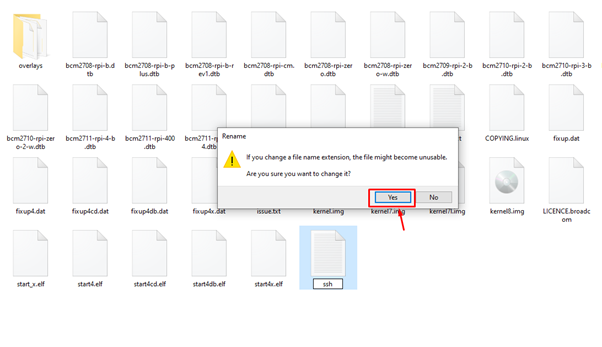
This will create an empty SSH file on your Raspberry Pi SD card, which ensures that the SSH service is successfully enabled on your Raspberry Pi device.

You can remove the SD card from your system and put it back in your device to confirm enabling the SSH service on Raspberry Pi.
Conclusion
Enabling the SSH service on Raspberry Pi allows users to access the device using the device’s IP address remotely. Three methods are discussed in the above guidelines for enabling the SSH service on the Raspberry Pi device. If you are using the Raspberry Pi lite version on your system, you must follow Method 1. For a desktop environment, you can pick the first two methods; however, Method 2 looks the easiest to follow. Method 3 will be ideal for enabling the SSH service on Raspberry Pi in case of a completely new look desktop environment.