Raspberry Pi not only manufactures small size computers but it also has created a microcontroller board just like Arduino known as Raspberry Pi Pico. The main purpose of introducing the Raspberry Pi Pico was to have a development board which is cost efficient. This development board is equipped with a RP 2040 microcontroller which is a dual core Arm cortex processor having an internal RAM of 264 KB.
Before using any development board, it is imperative to have knowledge about its pinouts to use it effectively. So, if you are planning to use Raspberry Pi Pico then this guide can be a life saver for you as I have explained the pinouts of Raspberry Pi Pico in a very understandable way.
Pin Configuration of Raspberry Pi Pico
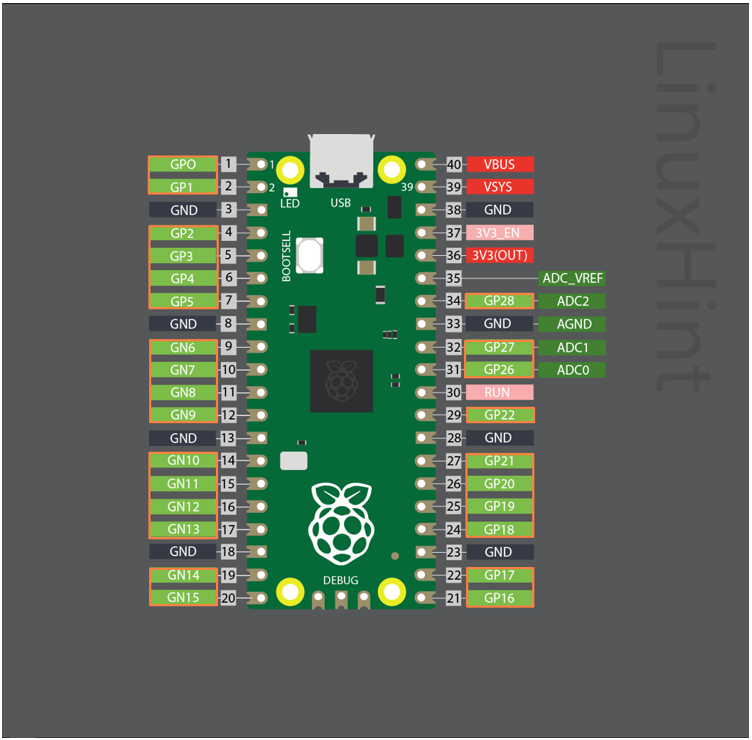
The Pi Pico is a low cost and high-performance microcontroller board that comes with a RP2040 that has a dual core arm cortex processor having a clock speed of 133 MHz. The Pi Pico comes with 26 general input and output pins but in total it has 40 pins, a feature that makes it unique from Arduino is that it comes with a temperature sensor. The table below shows the brief details about the pins of Raspberry Pi Pico:
|
Pins of Pi Pico |
Pin Representation |
Description of Pins |
| General purpose pins | (1-2), (4-7), (9-12), (14-17),(19,22), (24-27 and (29,31,32,34) | All these pins can be used for connecting the other device or for any other relevant purpose |
| Communication Pins (SCL, SDA, TX, RX) | All the general-purpose pins except 29, 30 and 34 pins in the order SDA, SCL and Tx, Rx | Theses pins are used for communicating with devices connected |
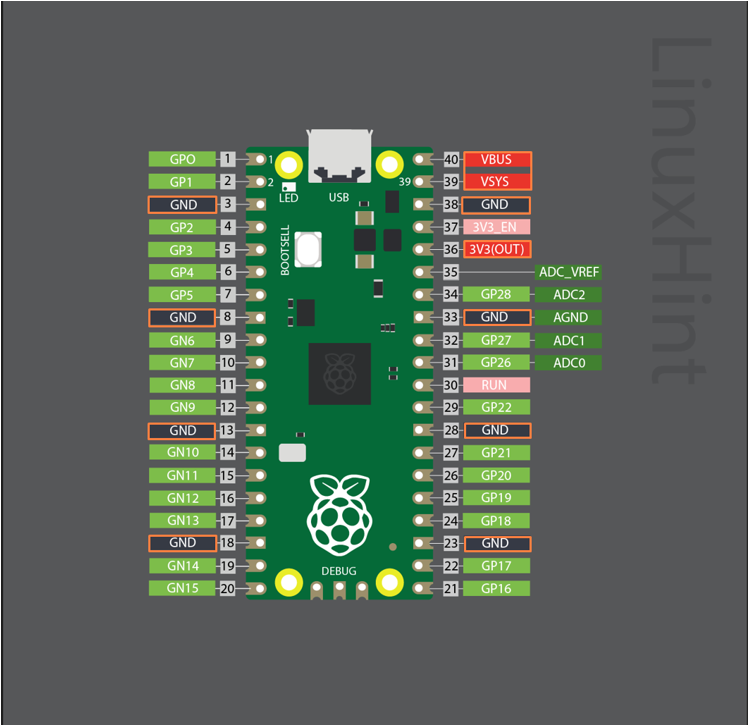
| Power Pins | 40, 39 and 36 for supply power, 3,8,13,18,23,28,33 and 38 for ground | To supply power to the connected devices these pins can be used |
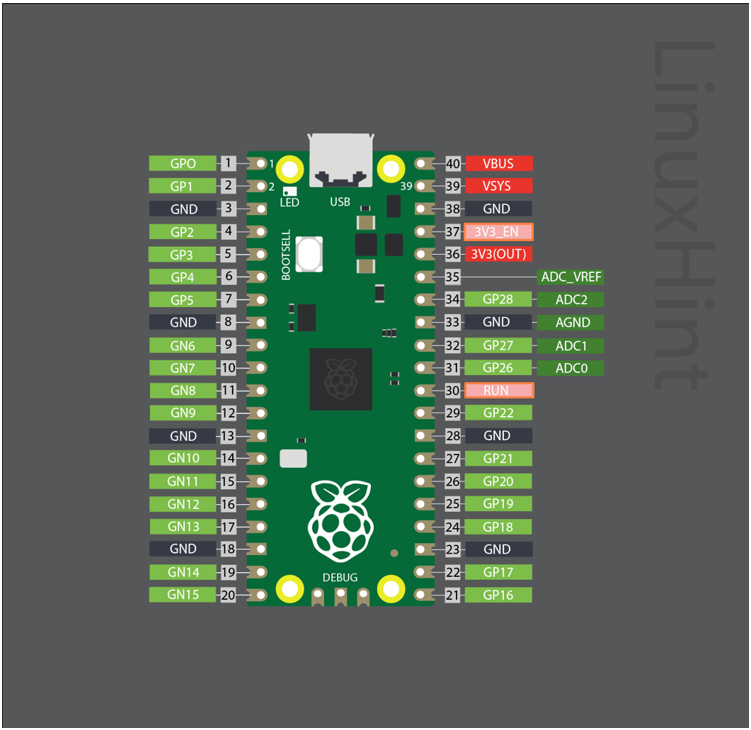
| System control pins | 37 and 30 | To disable the Rp2040 or to reset it these pins are used |
| Debugging Pins | DEBUG | Pins used to find any inefficiencies or bugs in Pi Pico |
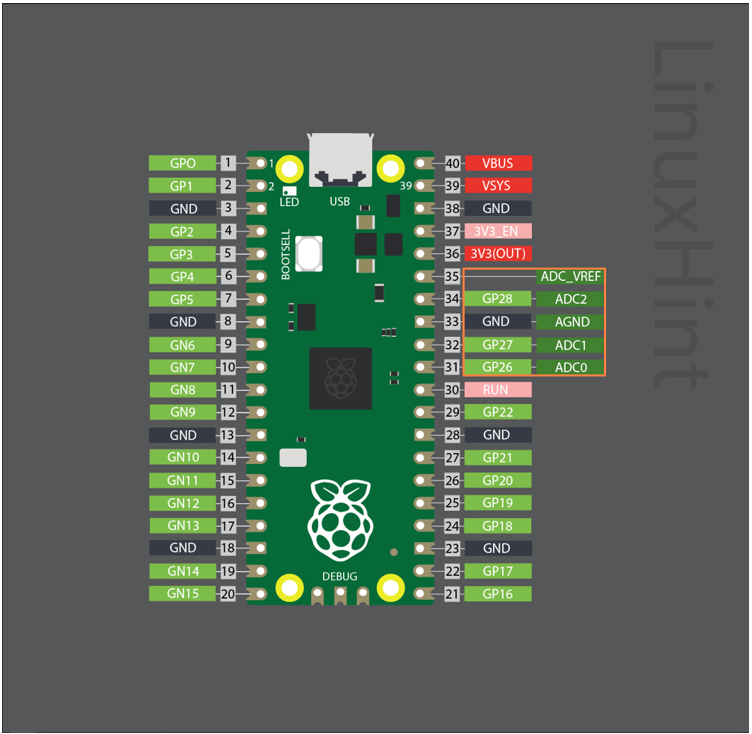
| Analog Pins | 31 to 35 | Pins used for giving analog reference signal to analog devices or can also be used to connect them |
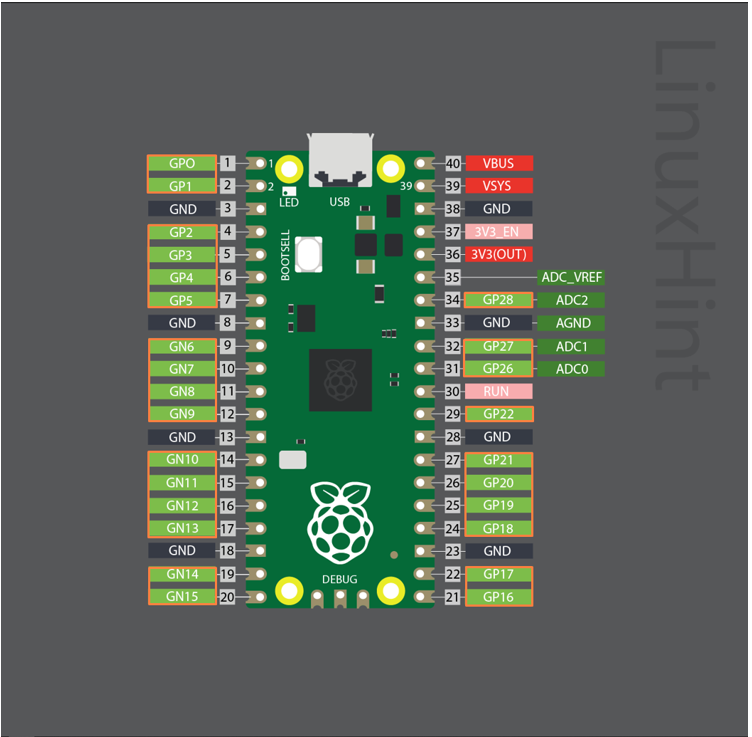
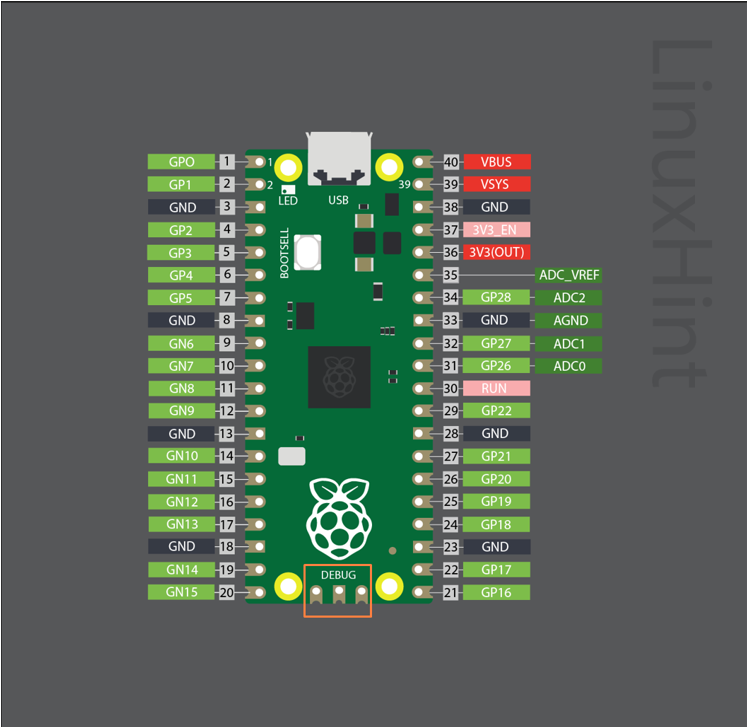
Since there are no numbers engraved on the Raspberry Pi Pico so in order to get familiarized with the pin numbering the pin 39 is labeled so that one must not forget from where the counting starts. So, for further elaboration I have explained all the pins of Pi Pico based on the categories of the pins stated in the table above.
General Purpose Pins
The major chunk of pins in any microcontroller board is generally used for the purpose of connecting different devices that include sensors, modules, or different peripherals. So, there are 26 general pins in total which seems to be more than enough for using multiple devices with Pi Pico.
Communication Pins (SCL, SDA, TX, RX)
To communicate with other devices these pins SCL, SDA and TX, Rx pins are used. The main difference between the two is that TX and RX are used for SPI whereas the SCL and SDA are used for I2C communication. Moreover, in Raspberry Pi Pico, all of its 26 general purpose pins can be used for the SCL, SDA and TX, RX but remember the order for using both pins that is SDA, SCL and TX and RX
Power Pins
Since to connect the different devices with Raspberry Pi Pico you need to power them up and for that Raspberry Pi Pico comes with 7 ground pins one 3.3-volt pin, two 5-volt pin, to understand pins more clearly see the image below:
System Control Pins
Unlike other microcontroller boards there are pins provided in the Pi Pico to enable or disable its microcontroller and for that it has two pins that you can see highlighted in the image below:
Debugging Pins
To look for any potential errors or bugs that are causing any inefficiencies while running any project or code then there three for the debugging are provided with the Raspberry Pi Pico:
Analog Pins
To connect any analog devices there are some general-purpose pins that can function as a analog pins, though they are limited in number but they can serve the purpose well:
Conclusion
Raspberry Pi Pico is one of the most affordable and high-performance microcontrollers available on the market. Before getting hands on any microcontroller board there should be a common practice of getting familiar with its pin configuration first. So, if you are looking to get started with Raspberry Pi Pico then you should know that it has 40 pins in total having 26 GPIOs, 10 power pins, 3 debug pins and 2 system control pins.

