Some of the basics that you need to know about Arduino Code
To program the Arduino, one must have the knowledge of the programming structure. So, I have explained the basics of Arduino code
Arduino code basics
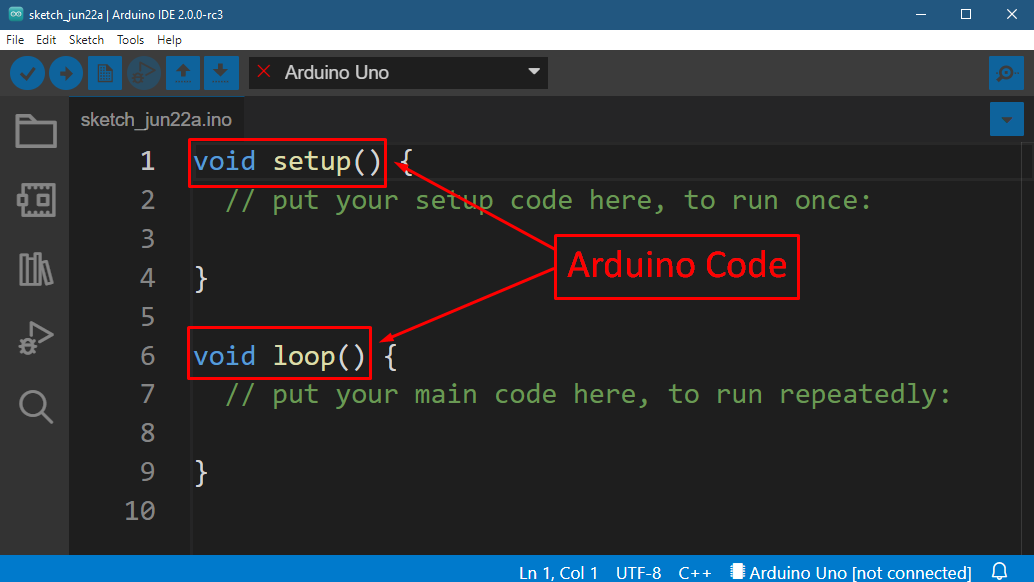
The Arduino code is primarily divided into two parts one is setup section and the other is loop section:

Each section serves different purposes so let’s study them in detail:
Setup section
This function is normally used to initialize variables, pins, arrays or any other similar things that are to be used in the code. Moreover, the baud rate for communication between the Arduino IDE and Arduino board is also initialized in the setup function, however libraries are defined outside the setup function.
Loop section
In this section the main logic of the Arduino program is implemented which might include if else, for or while loops, conditional statements, different mathematical or logical operators. The main feature of this section is that it is an infinite loop that will continue to run, whereas the set-up function only runs once.
Using loops in Arduino code
From the above explanation you might get an idea of how to program the Arduino so to further elaborate let’s see what different types of loops one can are use in Arduino code:
- For loop
- While loop
- Do while loop
For loop
The for loop is primarily used when the loop has to run for a definite number of times, so it will terminate once it has been executed for the specified number of times. Below is the syntax for loop in Arduino code:
{
// statement to be executed
}
For loop example
For(int i = 0; i < 5; i++;) {
Serial.Print(i);
}
The above example is printing numbers on the console window from 0 to 4.
While loop
While loop is mainly used in those scenarios in which the program terminates when the condition given in the loop gets false until then it will continue to execute the statement given in the while loop. Below is the syntax of while loop in Arduino code along with the example:
// statement to be executed
}
// for example
while (i<10){
Serial.print(“Linux Hint”);
i++;
}
Example
while (i < 10) {
Serial.print(“Linux Hint”);
i++;
}
The above example is printing “Linux Hint” on the console window 9 times.
Do while loop
The do while loop is mostly used in the cases when the statement has to be executed first and then validated by the conditional statement provided in the loop. Below is the syntax for the for using do while loop in Arduino code along with the example:
// Execute the instruction
}
While (conditional statement);
Example
do {
Serial.print(“Linux Hint”);
i++;
}
while (i < 5);
The above example is printing “Linux Hint” on the console window 6 times.
Using conditional statements in Arduino code
There are mainly two types of conditional statements that can be used in Arduino programing:
- If else statements
- Switch case statements
If else statements
These statements are primarily used when the given instructions are to be executed based on some conditions and if the condition gets false then there is a substitute instruction given with the else block. Below is the syntax for the for using if else condition in Arduino code along with the example:
// instruction to be executed
}
else {
// instructions to be executed
}
Example
if (a > b) {
c = a + b;
Serial.print(c);
} else {
c = a - b;
Serial.print(c);
}
In the above example if has a condition of a greater than b so if the condition becomes true then both the variables will be added otherwise both will be subtracted.
Switch case statements
To execute multiple instructions based on different conditions the switch case statement is normally used. Below is the syntax for the for using switch case statements in Arduino code along with the example:
case (conditional value):
// instruction to be executed
break;
case (conditional value):
// instruction to be executed
break;
default:
// instruction to executed if any of the case conditional value is false
}
Example
for (int i = 0; i <= 3; i++) {
switch(i) {
case 1:
// instruction 1
case 2:
//instruction 2
case 3:
// instruction 3
case 4:
// instruction 4
default:
// instruction to executed when case 4 is not validated
}
}
The above example first generates the conditions (b) from 0 to 3 using a for loop and based on the condition the relevant cases will be run.
Creating functions in Arduino code
Functions are normally created in Arduino code when an instruction is to be called or executed at multiple places in the program. So, by creating a function the instruction just needed to be called which reduces the size of the code to a greater extent. Below is the syntax for the for using switch case statements in Arduino code along with the example:
// instructions
}
Example
int subtract(int a, int b) {
int c = 0;
C = a - b;
}
void setup() {
Subtract(); // the subtract function
Serial.print(c);
}
The above example creates a function that subtracts the values of two variables and is named as subtract, this function is called in the setup function of the Arduino code.
Conclusion
Arduino is one of the best platforms for getting started with electrical circuits and programming as it provides all the required tools. Moreover, if you are new to Arduino then read this guide as I have explained all the basics of the Arduino code that will help you in getting started with Arduino.
