If you need guidance, follow our article where you will find the easiest approach to install Joomla on Raspberry Pi.
Installing Joomla on Raspberry Pi
The Joomla installation on Raspberry Pi can be completed by performing the following steps carefully:
Step 1: Install Basic Perquisites
First, you will need to install the following perquisites:
- PHP
- MariaDB or MySQL
- MySQL secure installation
These perquisites will enable you to setup Joomla server on Raspberry Pi. To learn how to install them, follow our published article.
Step 2: Install PHP dependencies
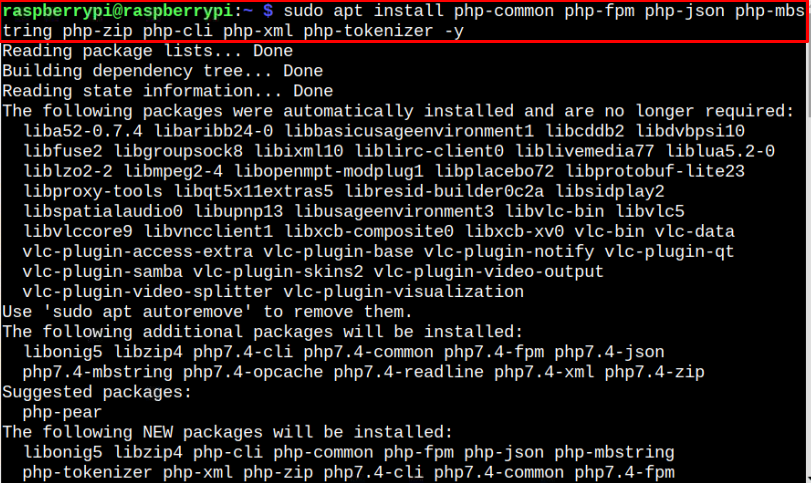
After completing the above installation, run the following command to install some PHP dependencies on your Raspberry Pi device:
Step 3: Install Nginx
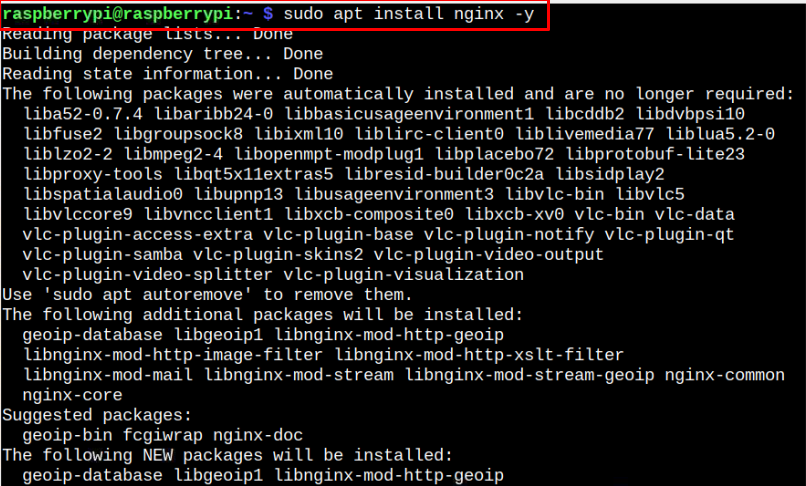
Now, install Nginx web server on Raspberry Pi via the following command:
Step 4: Configure Nginx
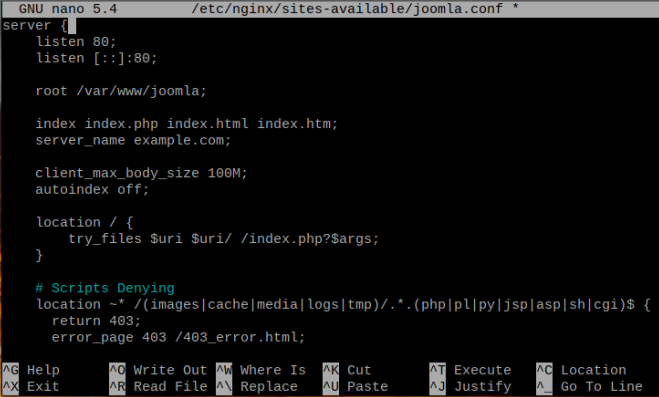
After completing the Nginx installation, you will need to set up a Virtual Host configuration that enables Nginx to understand how it can process the web request. To do this use the following command to open Joomla’s configuration file.
With the file open, you will need to add below-given text in the file.
listen 80;
listen [::]:80;
root /var/www/joomla;
index index.php index.html index.htm;
server_name example.com;
# In the above server name option you can choose your own domain name or can go with example.com
client_max_body_size 100M;
autoindex off;
location / {
try_files $uri $uri/ /index.php?$args;
}
# Scripts denying
location ~* /(images|cache|media|logs|tmp)/.*.(php|pl|py|jsp|asp|sh|cgi)$ {
return 403;
error_page 403 /403_error.html;
}
#php location
location ~ .php$ {
include snippets/fastcgi-php.conf;
fastcgi_pass unix:/var/run/php/php7.4-fpm.sock;
fastcgi_param SCRIPT_FILENAME $document_root$fastcgi_script_name;
include fastcgi_params;
}
#expiry
location ~* \.(ico|pdf|flv)$ {
expires 1y;
}
location ~* \.(js|css|png|jpg|jpeg|gif|swf|xml|txt)$ {
expires 14d;
}
}
Save this file using “CTRL+X” keys, followed by adding “Y” and pressing the Enter key.
Next, apply the following command to create a symbolic link for the configuration file into the created directory:
After that remove the default virtual host from the directory by applying the following command:
Step 5: Create Joomla Database
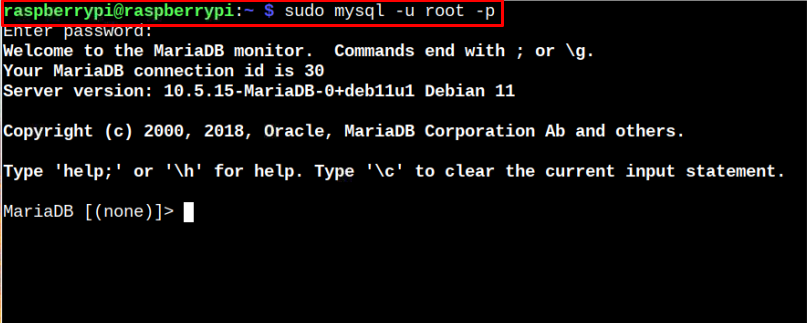
With the Nginx configuration completed and database server is installed, it’s now time to create Joomla database by first login into MySQL through the following command:
Next, use the following statement to create Joomla database:
Afterwards, execute the following statement to setup username and password for Joomla Database:
Choose your own username and password.
Next, you will need to grant privileges to the created user so that it can access the Joomla database. Apply the below-given statement to make the things happen:
Finally, use the FLUSH PRIVILEGES statement to make the changes take place:
And use the exit statement to finalize the database setup process.
Step 6: Integrate PHP with MySQL
You will also need to apply the following command to integrate PHP with my SQL database:
Step 7: Install Joomla on Raspberry Pi
Now, to install Joomla on Raspberry Pi. you will first need to create a directory with the name “joomla” at the location “/var/www”. Once created, navigate towards the created directory.
The following commands will be used for this purpose:
$ cd /var/www/joomla
Then, you can use the following command to download Joomla on Raspberry Pi in the created directory.
The above file is downloaded in zip so you will need to unzip the file through the following command:
You will take the ownership of data present in the Joomla directory using the following command:
Step 7: Access Joomla Web Page
After completing the above step, you are good to access Joomla server on your browser tab by first knowing your Raspberry Pi IP address using the following command:
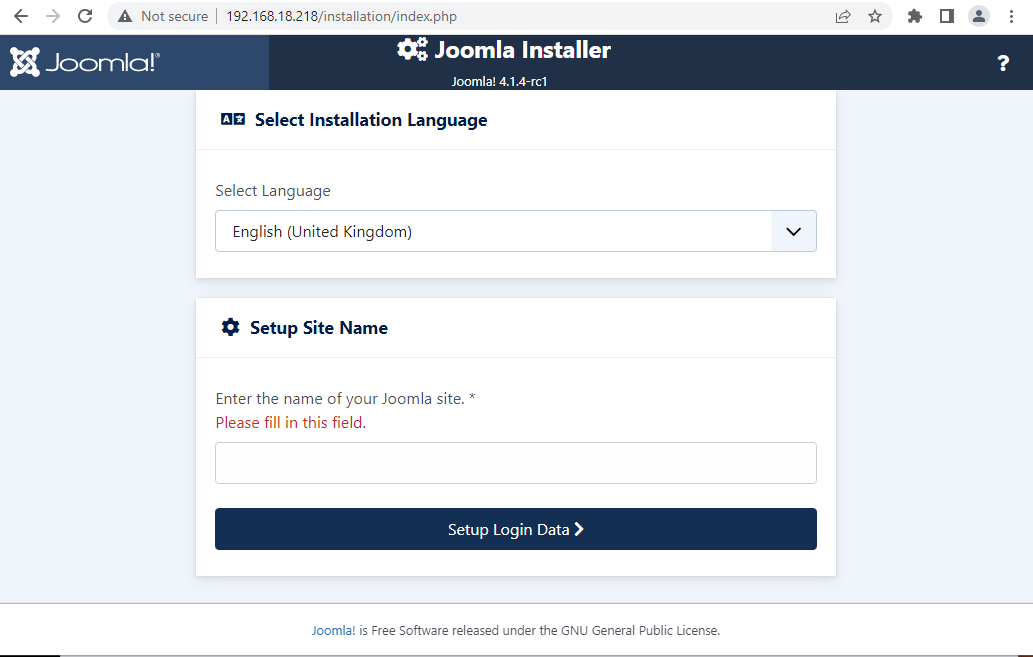
Then, use the host address in the browser to open up the Joomla installer page, in our case it is “192.168.18.218”.
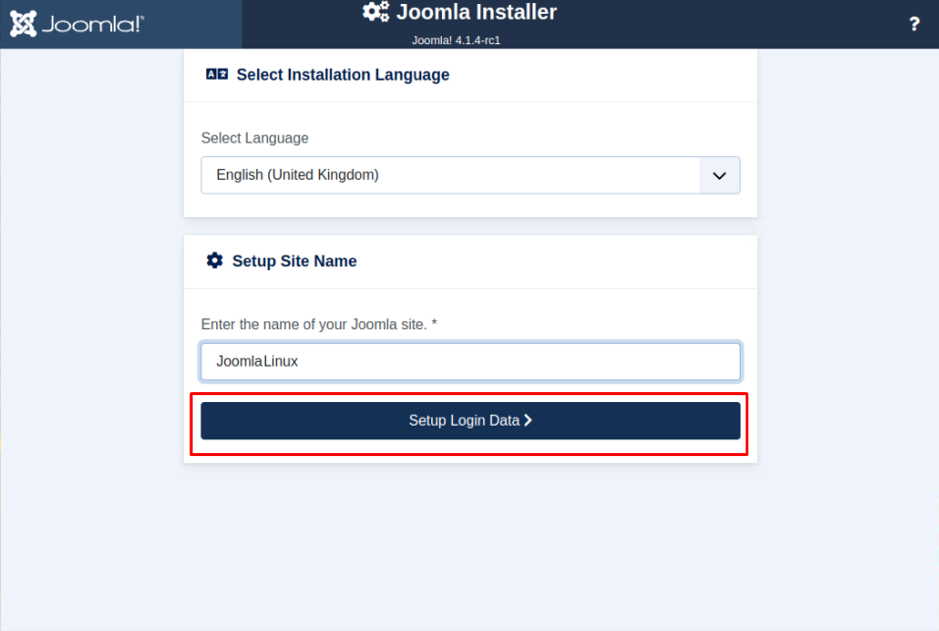
Choose your Joomla site name by yourself and once it is done, click on the “Setup Login Data” to proceed.
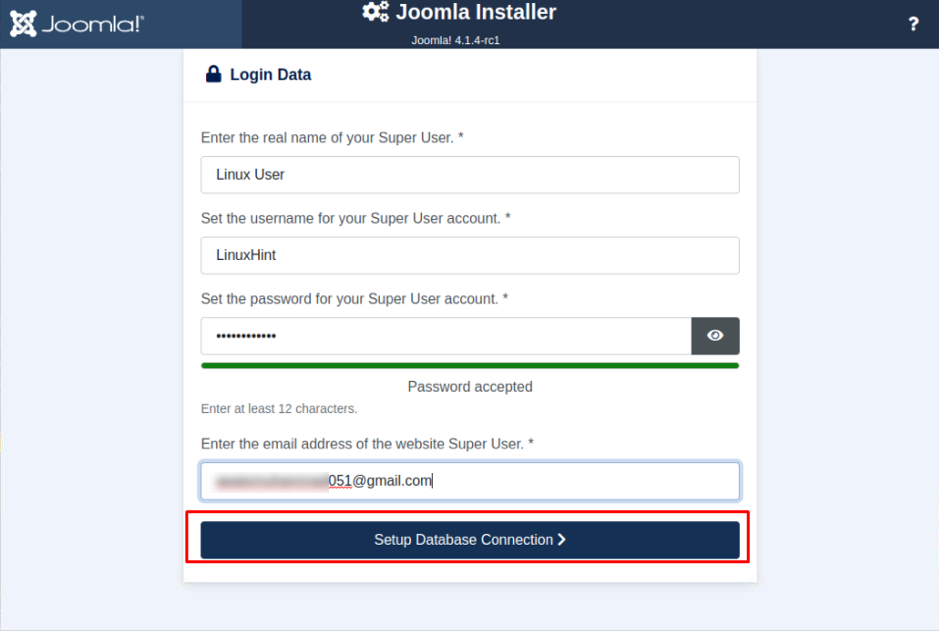
Fill in the given information in the next step and then choose the “Setup Database Connection” option to proceed.
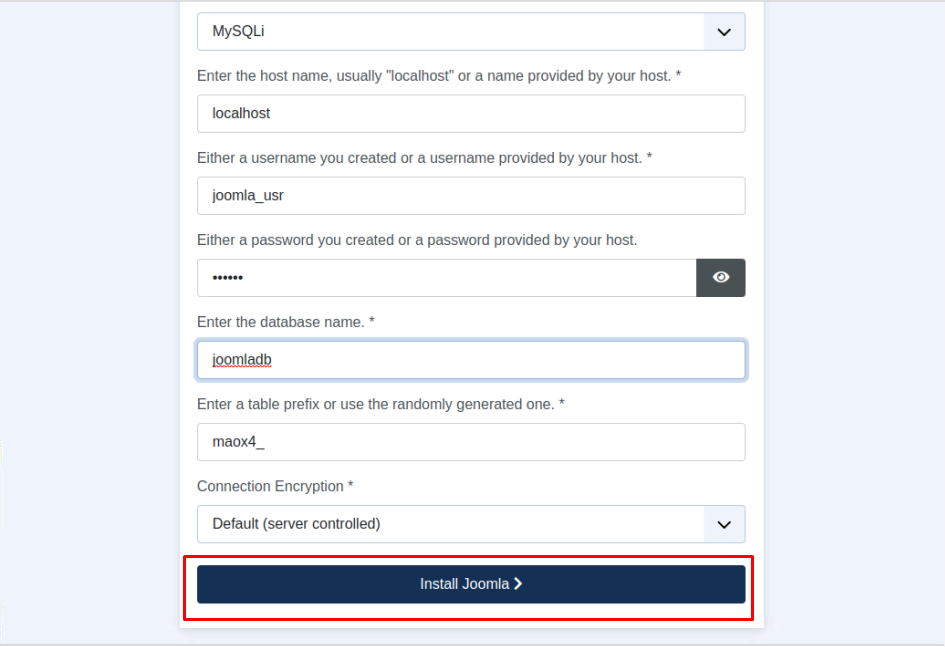
Follow and choose the below option as recommended. However, you have to pick your own database username and password as it might be different in your case. You can confirm it from Step 4.
Click on the “Install Joomla” option to begin installing Joomla on your browser.
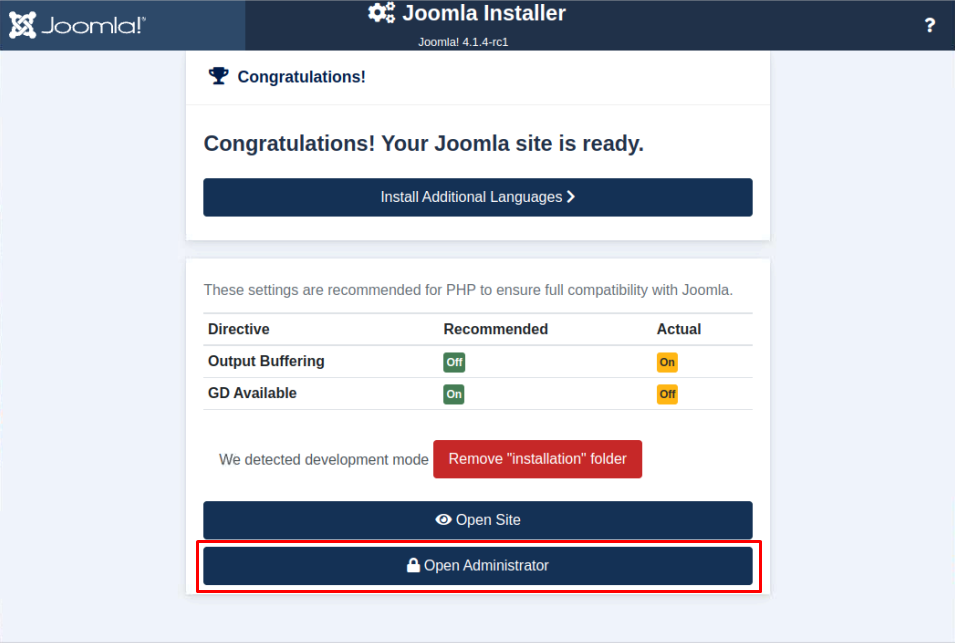
Wait till Joomla installation completes. If you see the below screen in the next step, you are good to go by selecting the “Open Administrator” option.
In case, if it doesn’t appear, reboot your device and reload the website again.
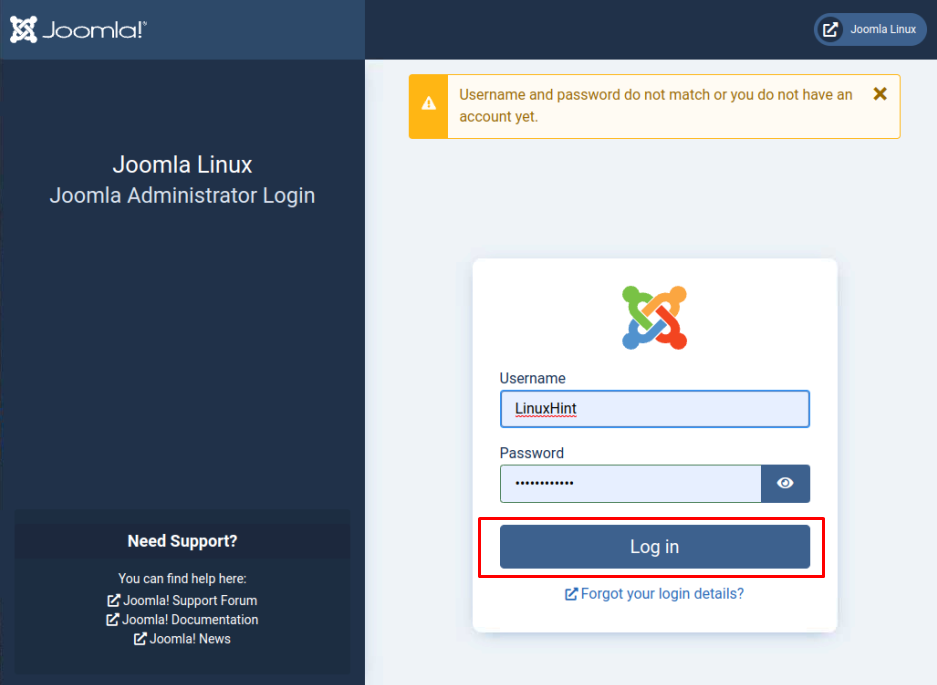
Now, in the next window, add Joomla’s username and password which you have set above and then click on the “Login” button.
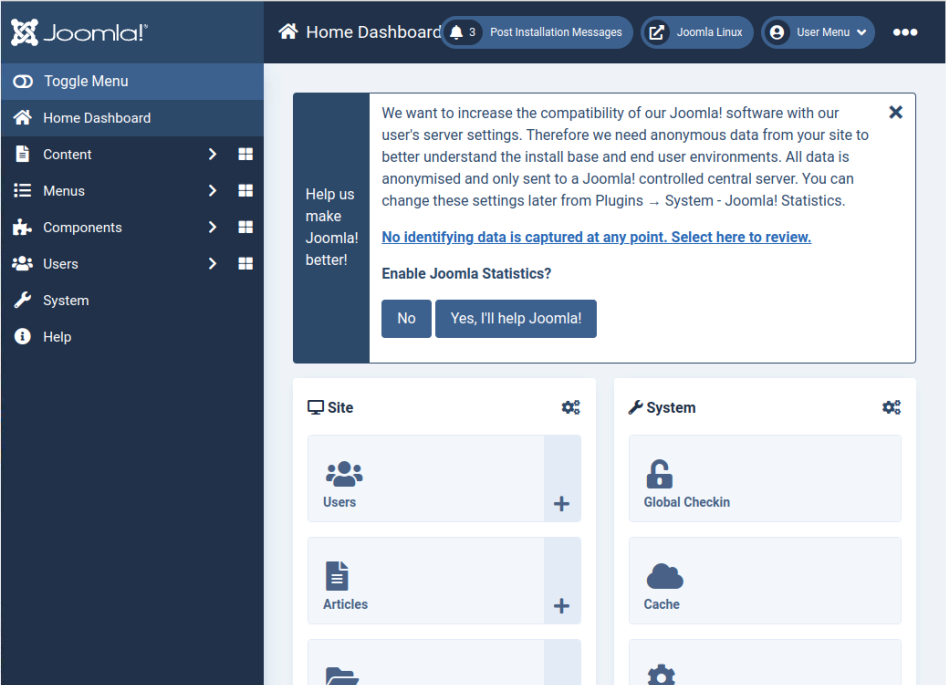
This opens up Joomla dashboard on your browser tab and you are good to start working in Joomla.
Conclusion
Joomla is a robust content management system that is used to publish web content on websites. You can create several web applications with ease right onto Joomla’s dashboard. To access the dashboard, you will require to install essential perquisites, some dependencies, Nginx server, Database setup and Joomla files on your device. After carefully setting these things according to the above guidelines, you can access the dashboard using the device’s IP address.

