The Arduino is the best platform when it comes to learn about circuits or to create projects that involve microcontrollers. Arduino can be used to control the device without any human interface and can bring ease in controlling the device thus making it touchless. To demonstrate how we can control the device without touching it we have made a touchless LED control using Arduino Uno.
How to make touchless LED control using Arduino Uno
To make the touchless LED we have to first design a circuit and for that we have listed the components that are necessary for designing the touchless LED that is given below:
- Breadboard
- Connecting wires
- Arduino Uno
- Ultrasonic distance sensor (HC-SR04)
- LED
- 1 220-ohm resistor
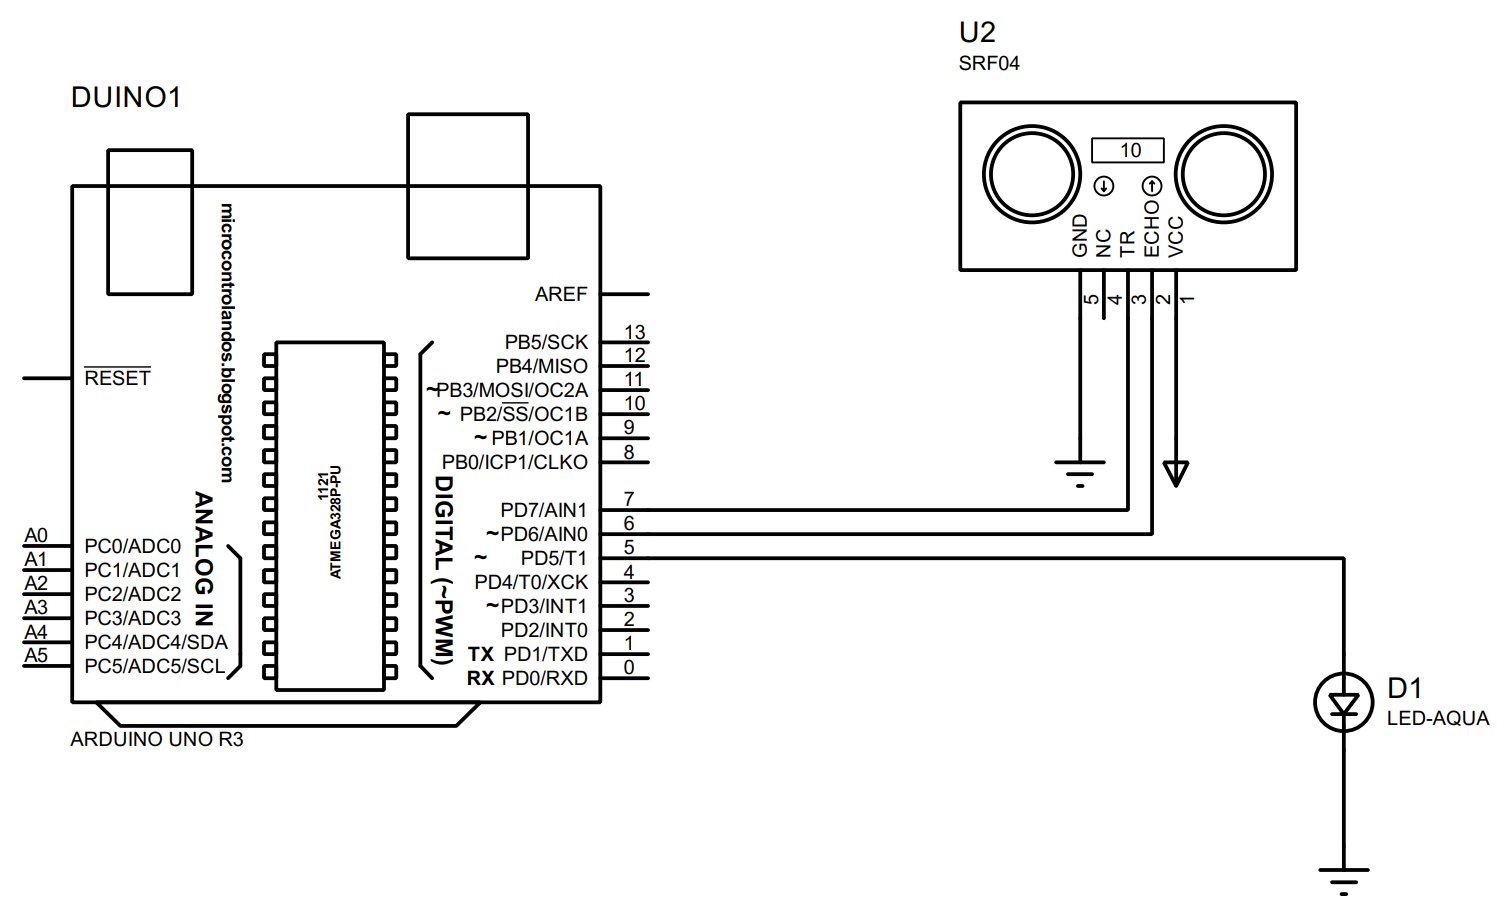
After listing the components, we have designed the circuit and the image given below is the schematic of the designed circuit:
How to create hardware assembly for designing a touchless LED using Arduino Uno
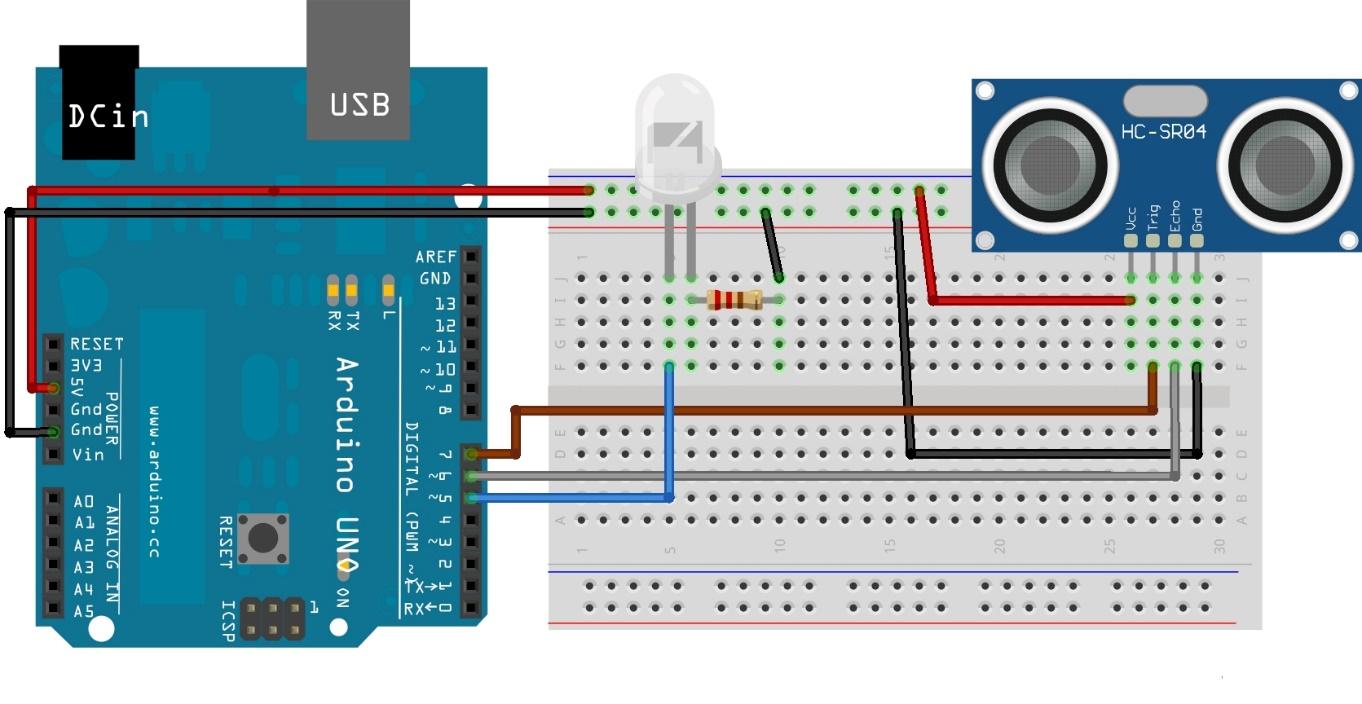
To implement the circuit schematic given above on hardware we have first given the hardware assembly in the image below:
To make the contactless LED we have used the ultrasonic obstacle detection sensor that will detect obstacles within its specified range. For interfacing the ultrasonic sensor with Arduino Uno we have to connect its trigger and echo pin with Arduino. So, for that purpose we have used pin 6 and pin 5 of the Arduino Uno using the brown and gray wires.
The LED is connected with Arduino using its pin 5 and in the above figure this connection is represented by the blue color wire.
We have supplied 5 volts to the topmost pin rows of the breadboard using the 5 volt pin of Arduino and from there we have connected each component with supply.
To further understand how we can use the ultrasonic sensor with Arduino you can read Interfacing Distance Sensor with Arduino.
How to write Arduino code for creating a touchless LED using Arduino Uno
The Arduino code used to program the microcontroller for creating the touchless LED is given below:
#define echo 6 // assigning Arduino Pin for the Echo pin of sensor
#define led 5 //assigning Arduino Pin for LED
int duration;
void setup(){
/* assigning pin modes for the components */
pinMode(trig, OUTPUT);
pinMode(echo, INPUT);
pinMode(led, OUTPUT);
}
void loop()
{
long dist; /* defining the variable that will store the distance value*/
digitalWrite(trig, LOW); // assigning LOW state to trigger pin
delayMicroseconds(2); /*trigger pin will be on LOW state for 2 microseconds*/
digitalWrite(trig, HIGH);// assigning HIGH state to trigger pin */
delayMicroseconds(10); /* for 10 microseconds trigger pin will remain in HIGH*/
digitalWrite(trig, LOW); // assigning the trigger pin the LOW state
duration = pulseIn(echo, HIGH);/*detecting the pulse in the HIGH state of sensor */
dist = (duration / 2) / 29.1; /* formula for calculating the distance in cm*/
if (dist <= 10) // if hand comes in 10 cm range of sensor
{
digitalWrite(led, HIGH);/* turn the LED on */
}
else { /* if there is no hand in the 10 cm range*/
digitalWrite(led, LOW);/* keep the LED off*/
delay(700);
}
}
For interfacing the components with Arduino, we have first assigned the respective pins for each component and after that we have assigned the working modes to each component. In the loop section we have first generated the signal using the trigger pin of the sensor. To read the incoming signal the echo pin of the sensor is used from which the duration of reflected wave is found.
To calculate the distance that the wave has covered we have used the following formula:
To detect the obstacle, we have specified the range for it using the if condition and, in this program, we have given the range of 10 cm to the sensor for detection. When there is an obstacle within the 10cm then the LED will turn on otherwise it will keep in the off state.
The primary purpose of this program is to make any device contactless where no human interface is required.
How to create hardware for making a contactless device using Arduino Uno
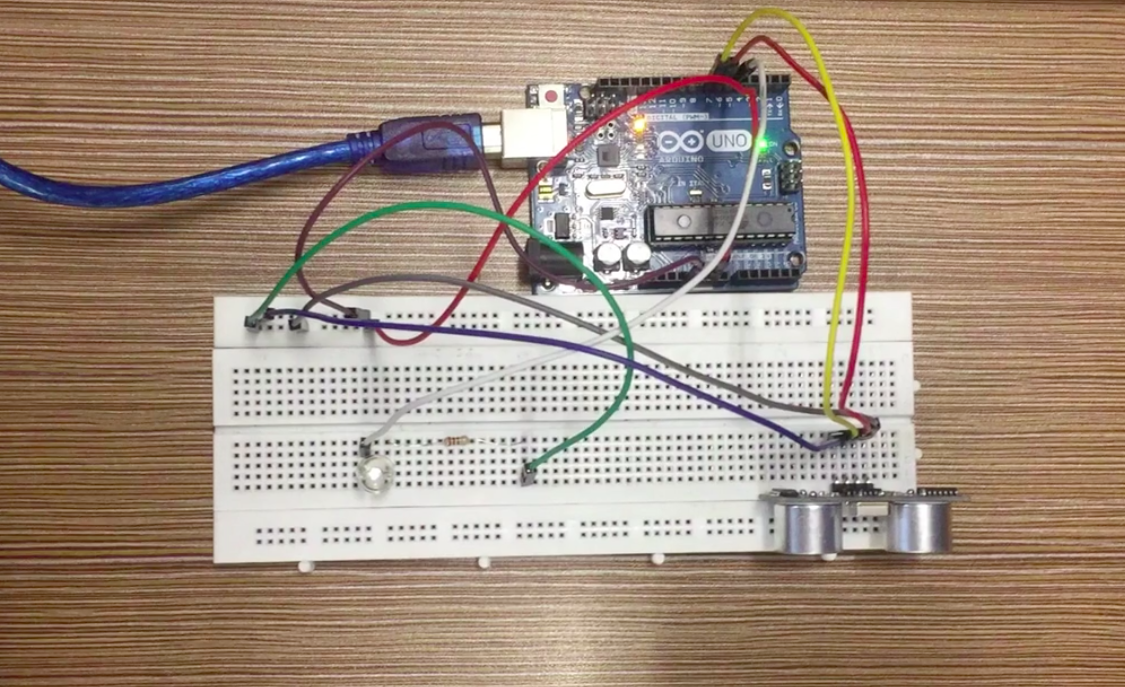
We have implemented the circuit designed on the hardware according to the hardware assembly described above and the image of which is given below:
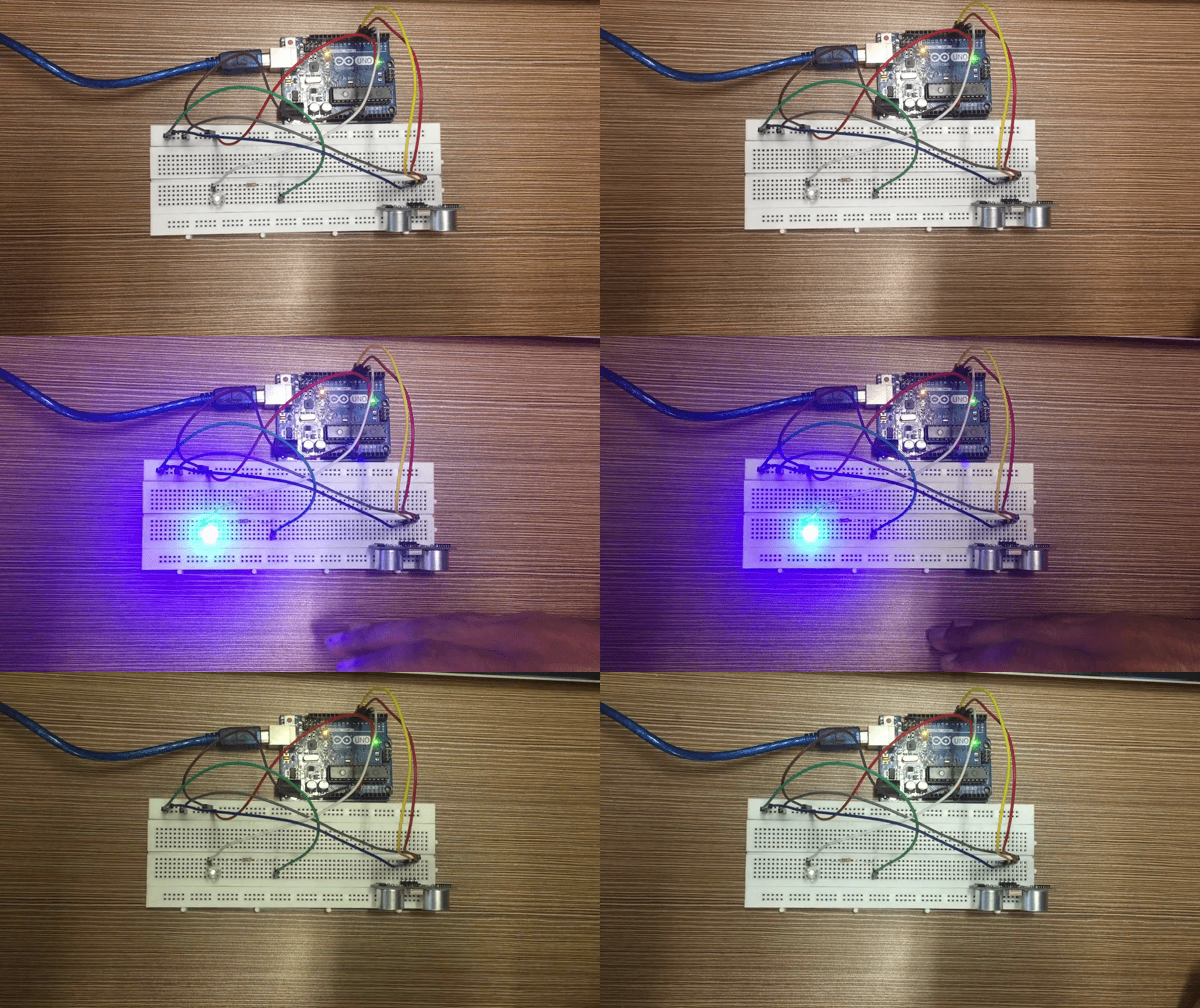
To demonstrate the working of circuit designed for creating the contact less LED using the ultrasonic sensor with Arduino Uno we have given an animation Gif below:
Conclusion
The devices that operate without any human contact can be named as the contactless devices and such devices can be used in different automation projects like touchless door bell, automatic lights system and so on.To make a contactless device we have made a touchless LED that turns off and turns on using ultrasonic obstacle detection sensors. To illustrate the working of the project we have provided the Arduino code and the hardware implementation of the project as well.


