Adjusting the displayed data gives more space for displaying the data simultaneously and there are two functions that can be used for adjusting the displayed data:
- scrollDisplayLeft function
- scrollDisplayRight function
Using scrollDisplayLeft() function in Arduino
This function moves the data towards the left position in the display module and to further demonstrate the working of this function an Arduino code is simulated.
In the example code two lines are printed on the display module and if we do not use this function, we will be unable to print long lines simultaneously. So, by using this function we can print the big data on one line and can save a space of one line. Moreover, the two lines displayed simultaneously can also be updated every time the loop function runs again in case of any varying output of Arduino or input of the sensor. So here we have explained the Arduino code very briefly:
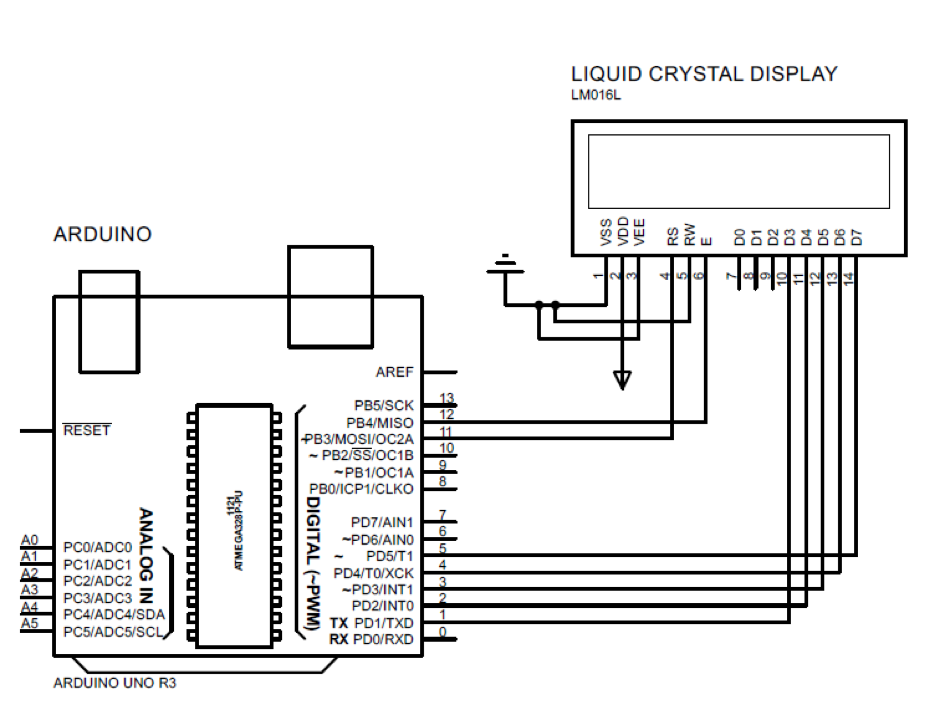
First the library of the display module is defined then the pins of the Arduino connected to the display module are initialized.
LiquidCrystal lcd(11, 12, 2, 3, 4, 5);
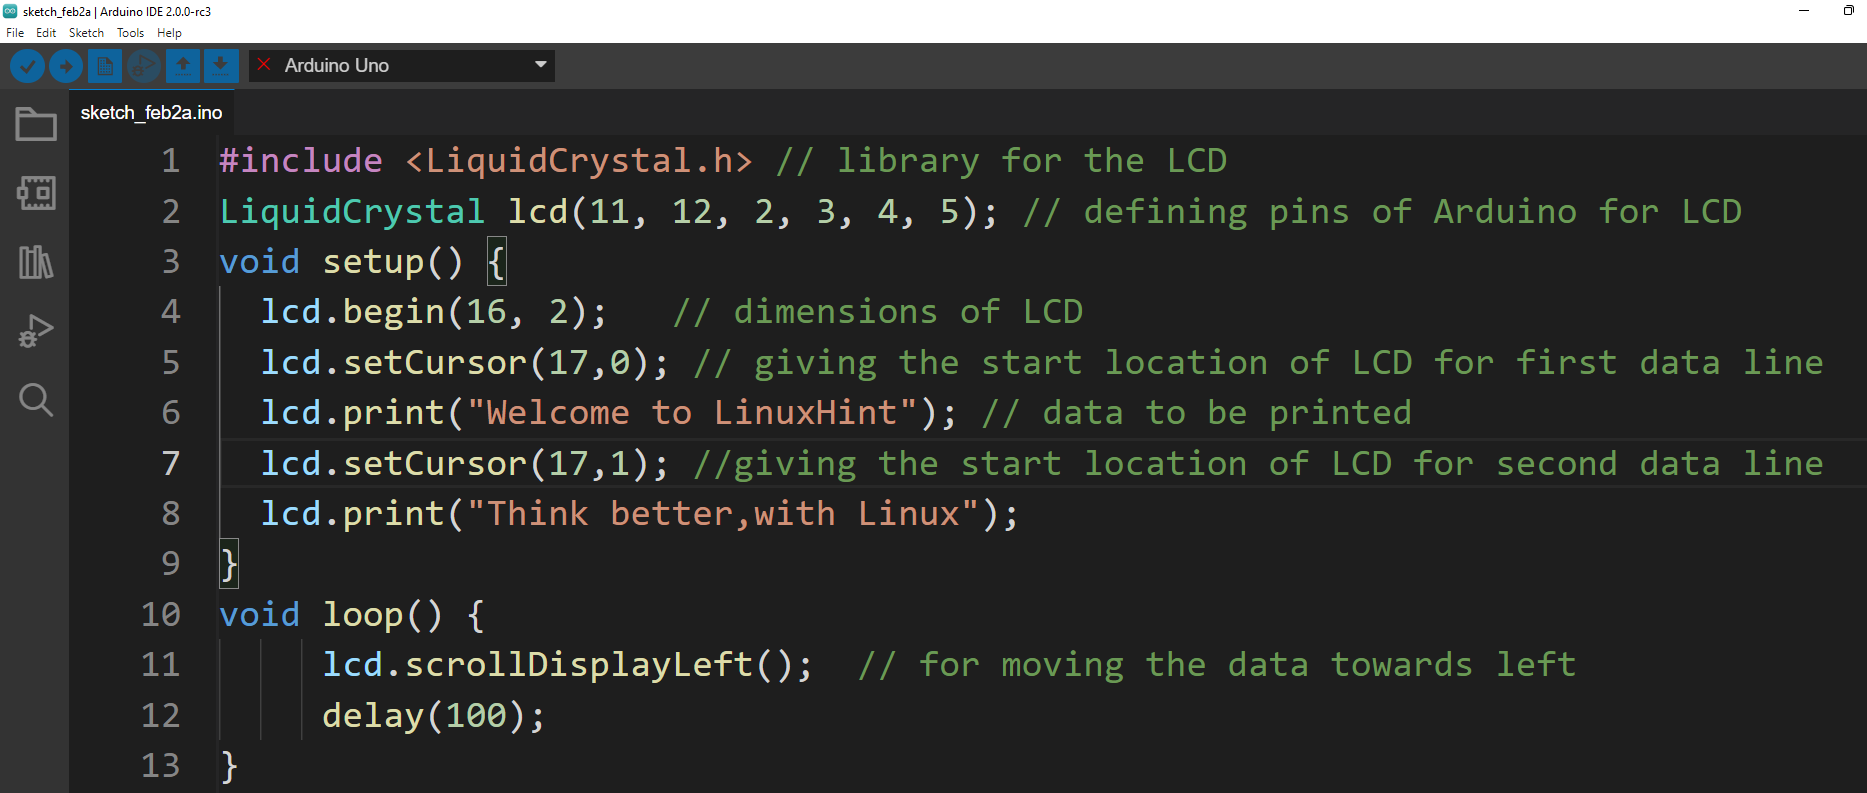
Coming to the setup function we have initialized the dimensions of the LCD that is 16×2 using the function lcd.begin(). As we are using the Lcd of size 16×2 we have set the data to start from the 17th column so that it starts from the 0th column of the display so there is no loss of the data that is to be displayed. To give a specific position for starting the display of the data we have used the function lcd.setCursor() that has two arguments: the first argument is the column number and the second argument is the row number.
Then we have displayed our first line using the lcd.print() function:
For the second line we have just changed the row number:
After that the data is displayed on the second line by using the same lcd.print () function:
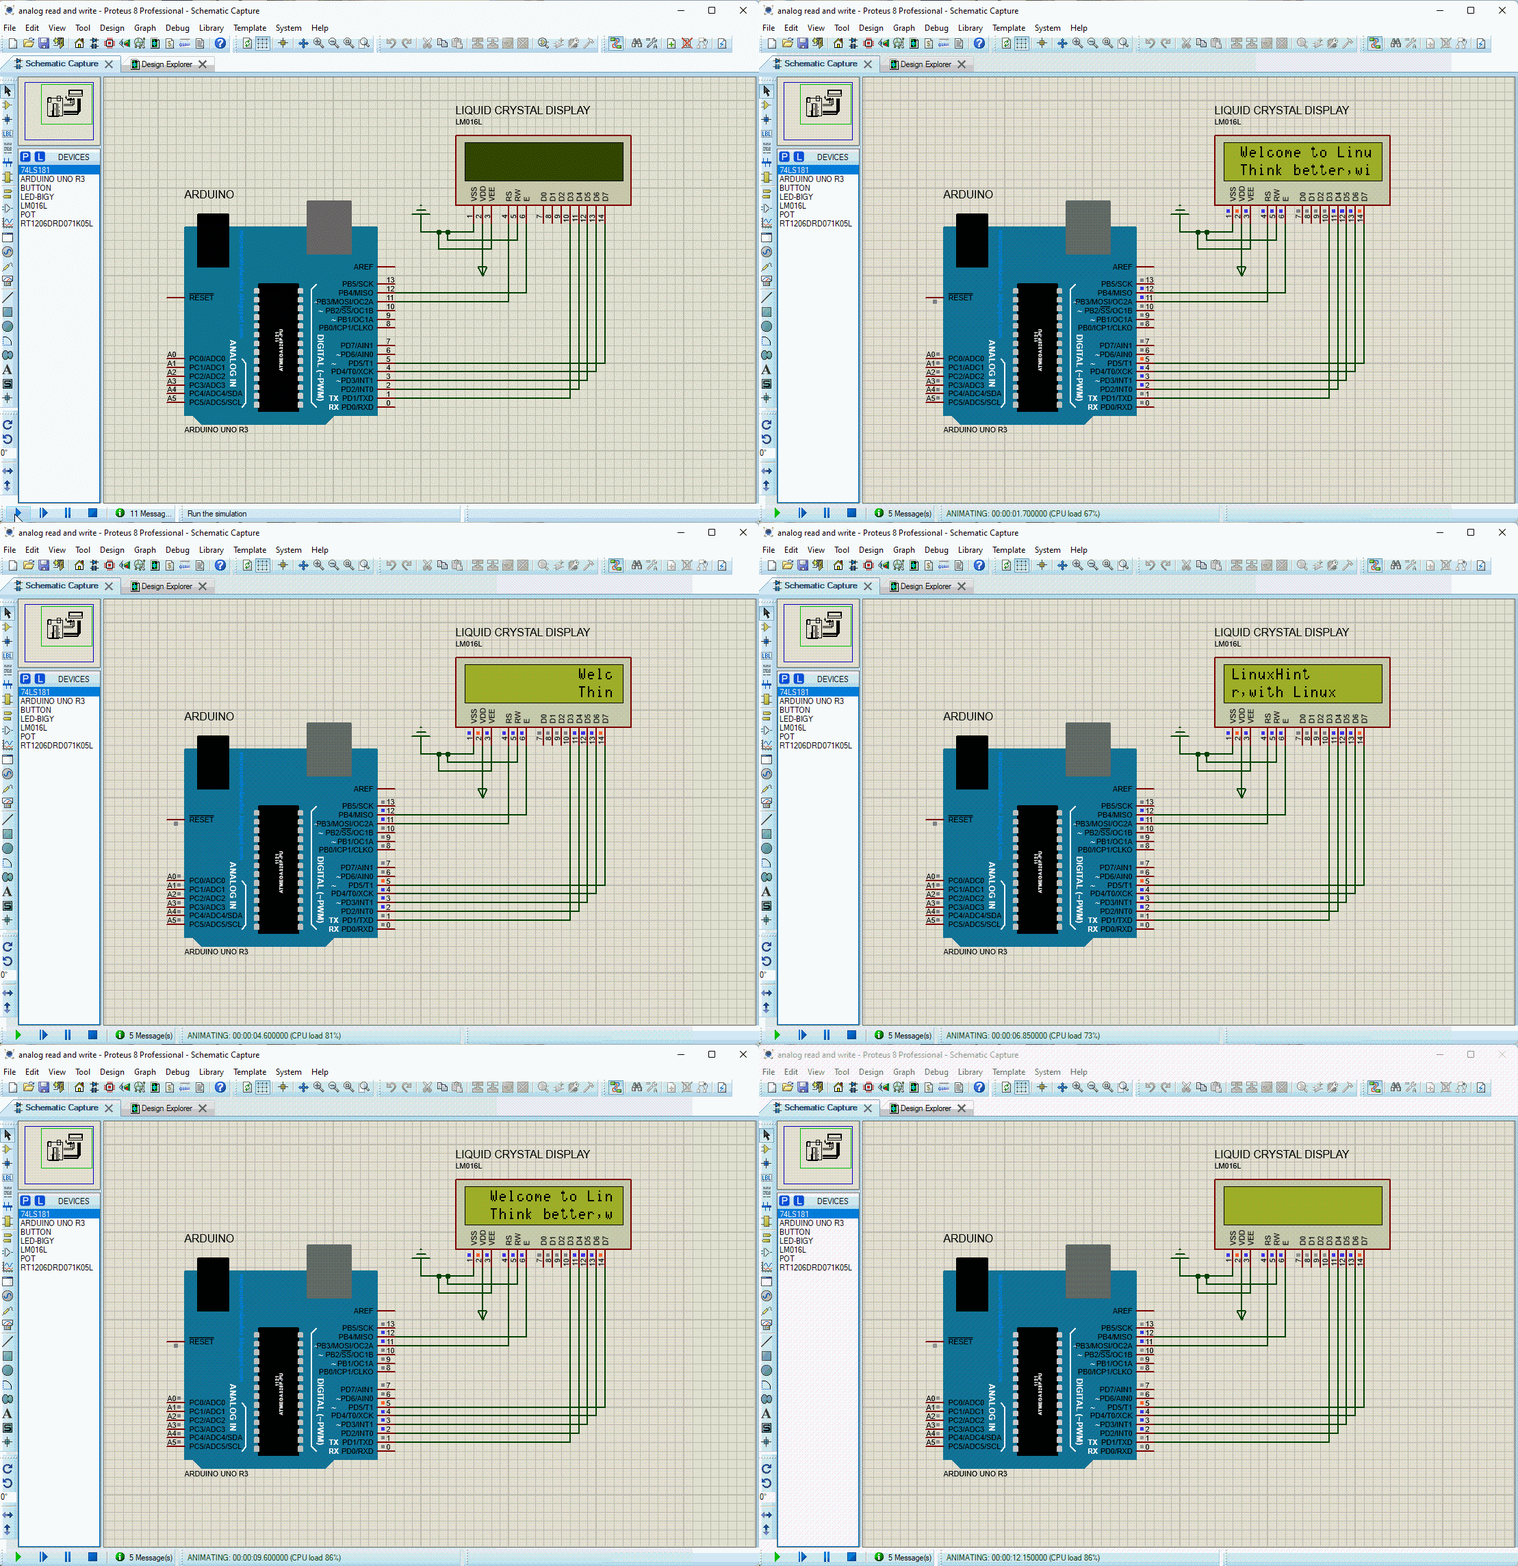
Now coming to the loop function of Arduino the two data lines are moved towards left using the lcd.scrollDisplayLeft() function and to slow the speed of the movement of the line we have added a delay of one milliseconds.
delay (100);
Here is the complete Arduino code for the use of the lcd.scrollDisplayLeft() function:
LiquidCrystal lcd(11, 12, 2, 3, 4, 5); // defining pins of Arduino for LCD
void setup() {
lcd.begin(16, 2); // dimensions of LCD
lcd.setCursor(17,0); // giving the start location of LCD for first data line
lcd.print("Welcome to LinuxHint"); // data to be printed
lcd.setCursor(17,1); //giving the start location of LCD for second data line
lcd.print("Think better,with Linux");
}
void loop() {
lcd.scrollDisplayLeft(); // for moving the data towards left
delay(100);
}
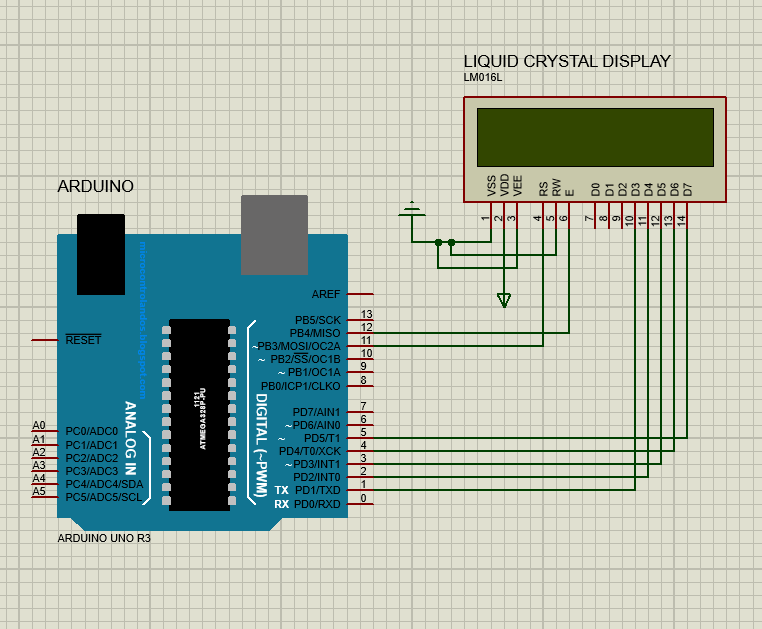
The schematic for the circuit is:
Output
Using scrollDisplayRight() function in Arduino
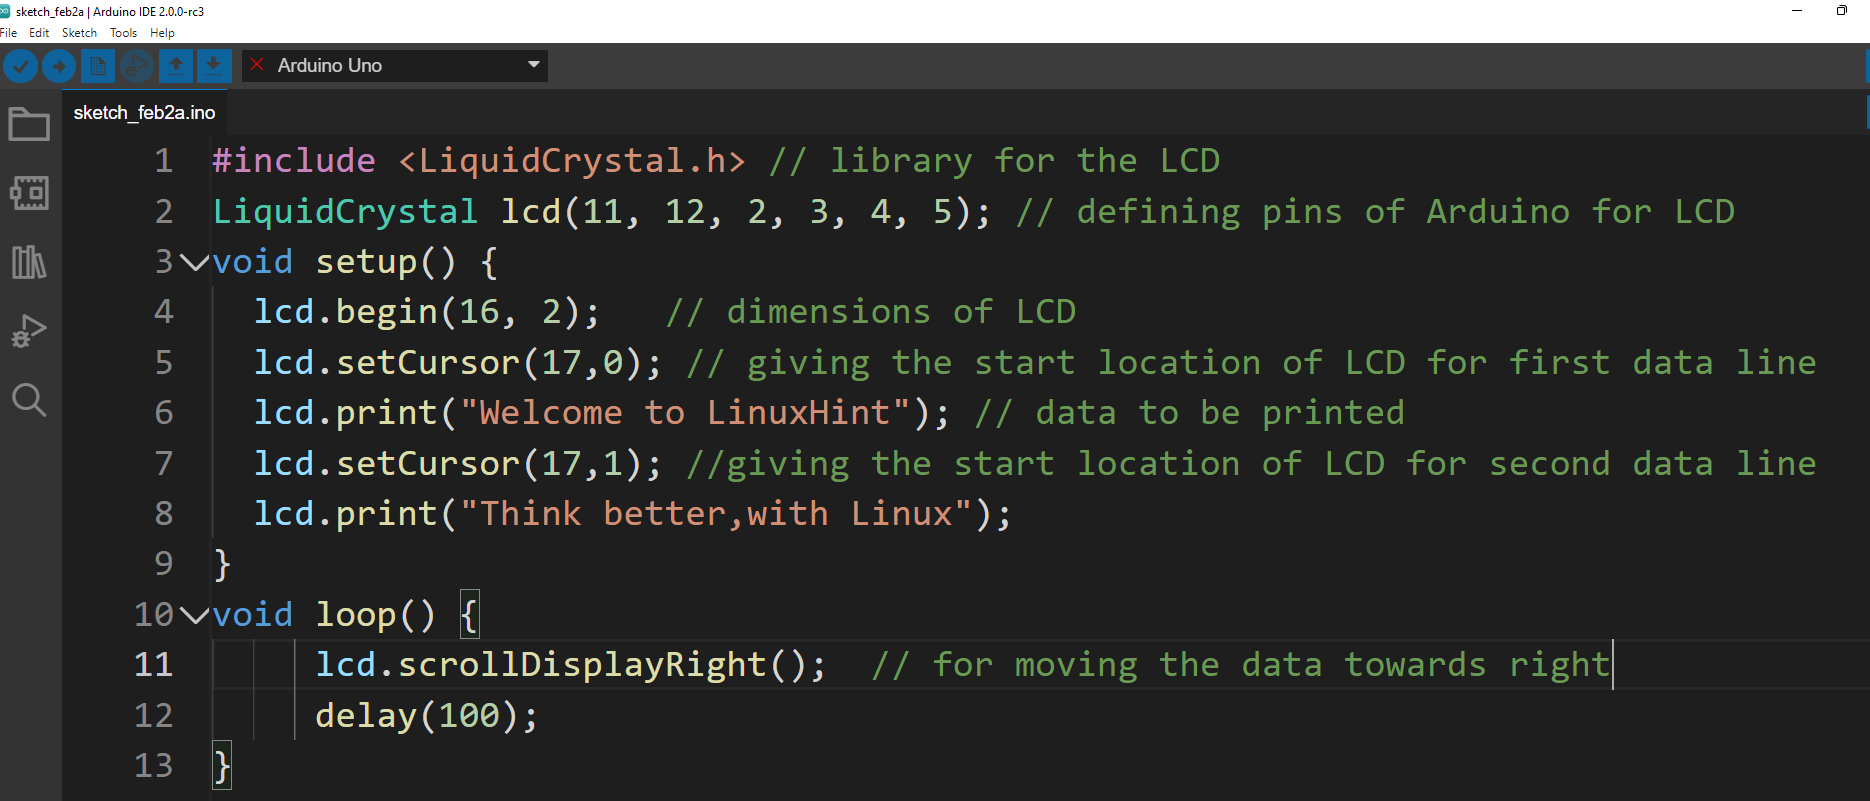
This function also shifts the data but towards the right side on the LCD. The Arduino code for this function is somewhat same as that of scrollDisplayLeft() function we discussed. To shift the data towards right we have use the lcd.scrollDisplayRight() function in the loop function of the Arduino code:
LiquidCrystal lcd(11, 12, 2, 3, 4, 5); // defining pins of Arduino for LCD
void setup() {
lcd.begin(16, 2); // dimensions of LCD
lcd.setCursor(17,0); // giving the start location of LCD for first data line
lcd.print("Welcome to LinuxHint"); // data to be printed
lcd.setCursor(17,1); //giving the start location of LCD for second data line
lcd.print("Think better,with Linux");
}
void loop() {
lcd.scrollDisplayRight(); // for moving the data towards right
delay(100);
}
Output
Conclusion
To correctly interpret the inputs and output of an Arduino program it is necessary that the data should be displayed in a very effective manner. Similarly, to display the data it can be adjusted using a number of functions. There are two functions that are discussed in this write-up, one is lcd.scrollDisplayLeft and the other is the lcd.scrollDisplayRight to move the text left and right.

