In this discourse the temperature sensor values are displayed on the on LCD using Arduino.
Temperature sensor
To sense the temperature of an area or any device there are different types of sensors that can be used like LM35, thermistor, resistance Temperature Detector (RTD), semiconductor-based chips and many more. In this project we are using the LM35 module to detect the temperature. This sensor has three pins, the middle pin is for the data that will send its measurements to the Arduino board. The rest of the two pins can be used for the supply voltage and ground.
Since all the sensors have varying outputs, they are used as an analog device.
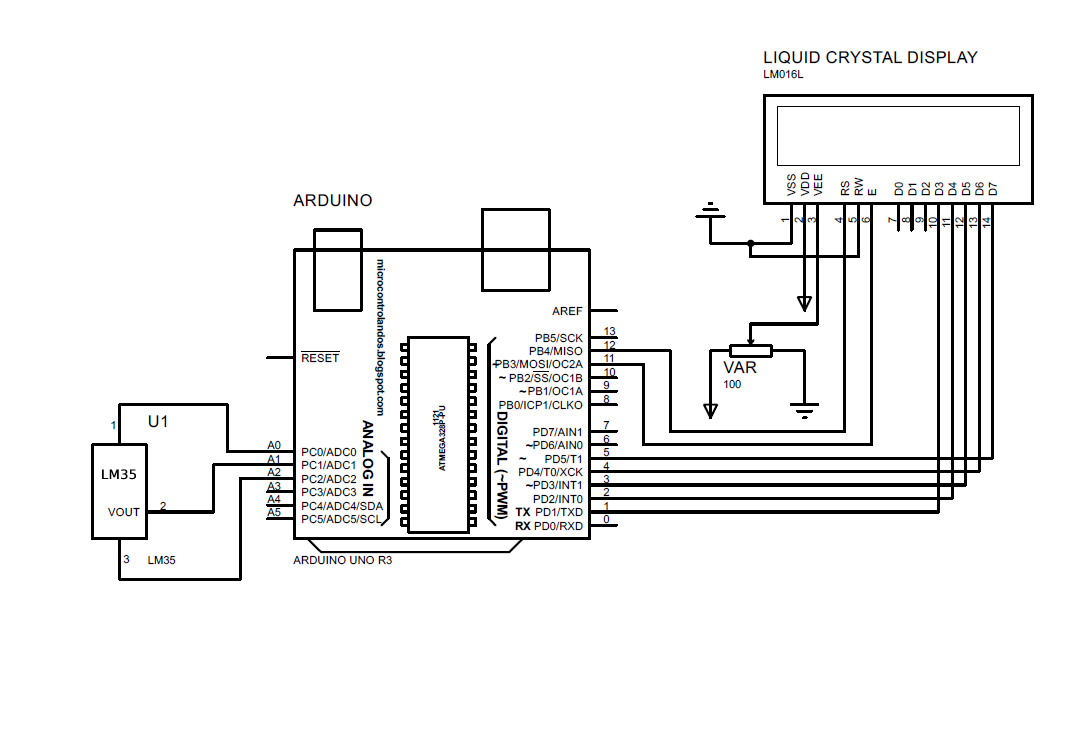
The schematic of the circuit for displaying the values of the temperature sensor is:
The Arduino program given below displays the temperature values in both Centigrade and Fahrenheit.
int vcc=A0; // A0 pin supply of LM35
int vout=A1; // A1 pin for the output of the LM35
int gnd=A2; // A2 pin grounding the LM35
int sensorvalue; // declaring the data type for output of LM35
float valueinC; // declaring the data type for degree celsius
float valueinF; // declaring the data type for fahrenheit
LiquidCrystal lcd(12, 11, 5, 4, 3, 2); // Arduino pins for LCD
void setup()
{
// initializing the modes of the pins of LM35
pinMode(vcc,OUTPUT);
pinMode(vout,INPUT);
pinMode(gnd,OUTPUT);
// initializing the states for the pins of LM35
digitalWrite(vcc,HIGH);
digitalWrite(gnd,LOW);
lcd.begin(16, 2); // initializing the dimensions of LCD
lcd.setCursor(2,0); // giving the start location for the data
lcd.print("TEMPERATURE");
void loop()
{
sensorvalue=analogRead(vout); // reading the output of the LM35
valueinC=sensorvalue*0.488; // converting the values in celsius
valueinF=(valueinC*1.8)+32; // converting the celsius in fahrenheit
// displaying the temperature values
lcd.setCursor(1,1);
lcd.print(valueinC);
lcd.print((char)223); //displaying the symbol for degree
lcd.print("C");
lcd.setCursor(9,1);
lcd.print(valueinF);
lcd.print((char)223);// displaying the symbol for degree
lcd.print("F");
delay(5000);
}
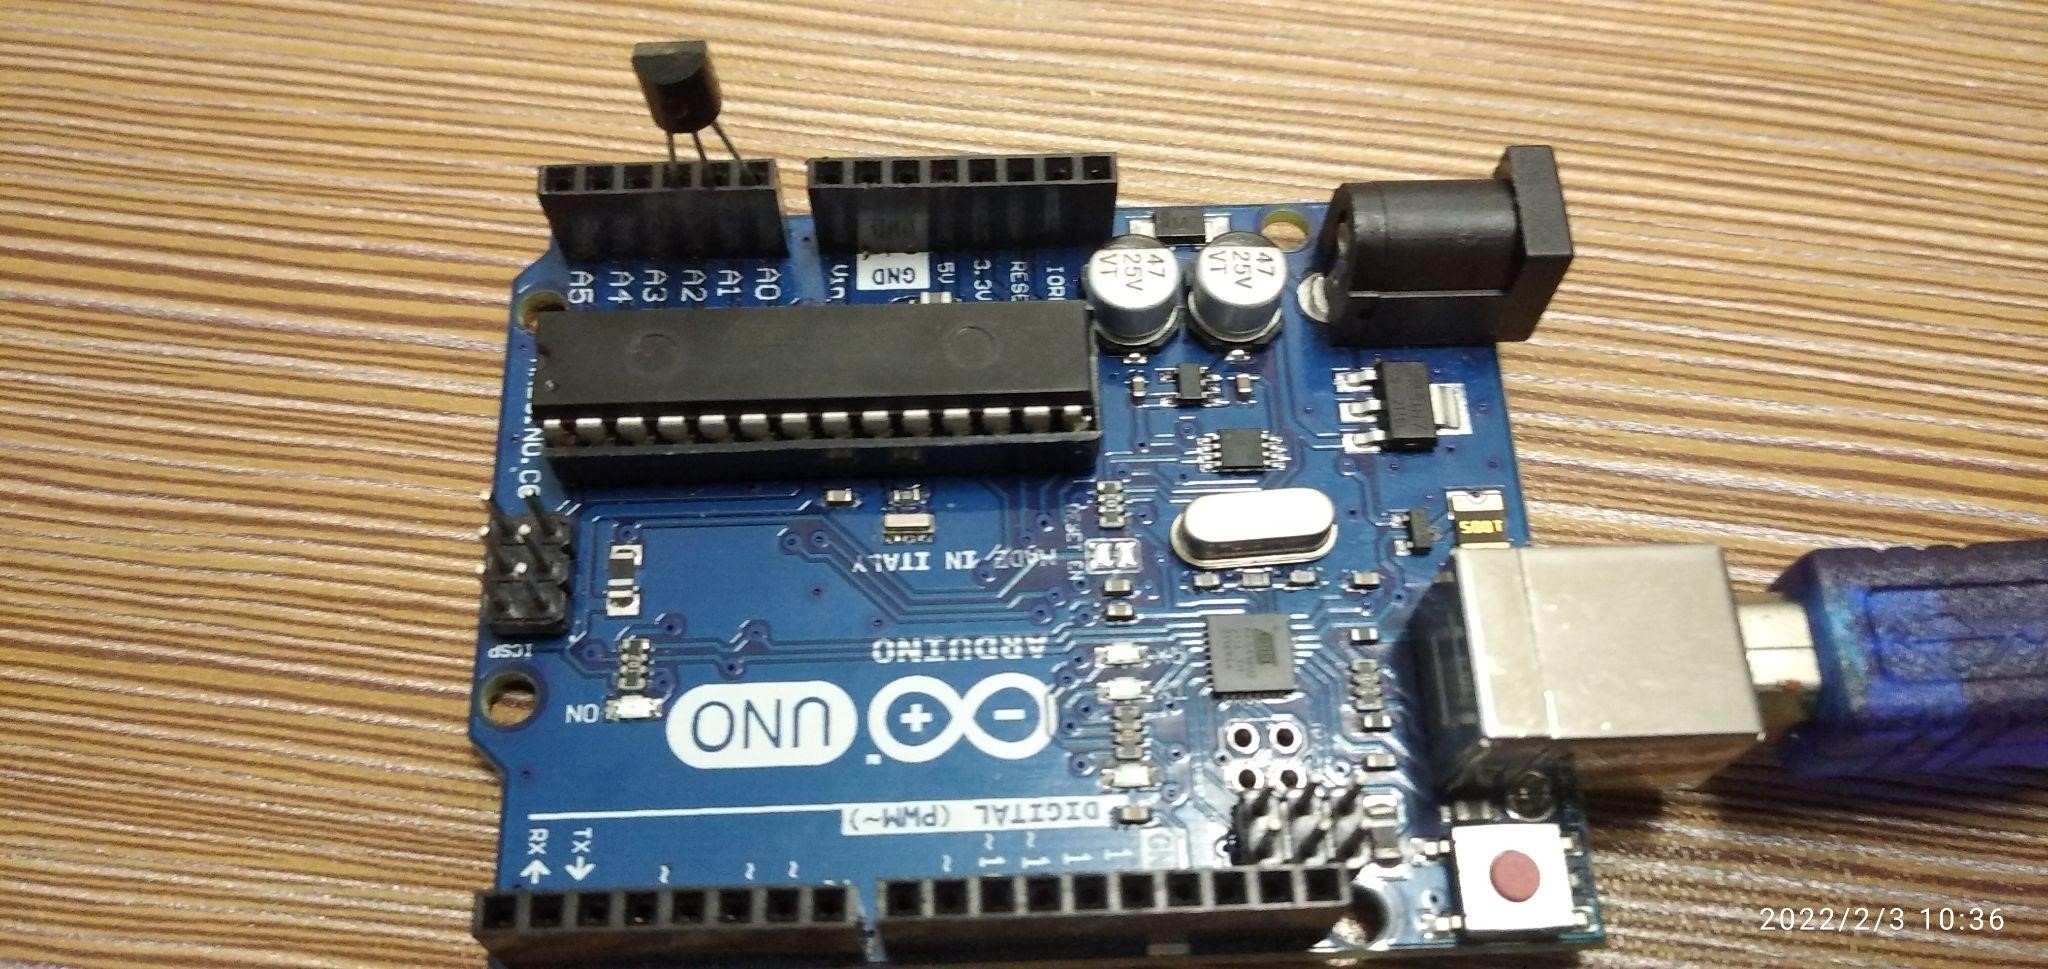
The sensor is interfaced with Arduino Uno in such a way that all of its pins are connected to the analog pins of the Arduino board.
The pin A0 is initialized as voltage supply to the temperature sensor. The analog pin A1 of Arduino is initialized as a data pin which will receive the output of the sensor. For grounding the sensor, the pin A2 is initialized as the ground pin of the LM35.
Similarly, after the data pins of the liquid crystal display that are to be connected to the Arduino are initialized the pins of the sensor are given the modes. As the output of the sensor will act as an input for the Arduino so pin A1 is given the INPUT mode and the other pins work in the OUTPUT mode
Similarly, pin A0 is given the High state for the voltage supply and the A2 pin is given the LOW state as it is used as a ground.
To read the values of the sensor the analogRead() function is used and it is then multiplied with 0.488.
As the output of the temperature sensor is in the form of analog values of voltage ranging from 0 to 1023 that is for 0 volts the value will be 0 and for the value 1023 the voltage will be 5 volts. We have divided 500 by 1023 which is 0.488 as there is an increase of 10 millivolts per degree Celsius increase in temperature.
After converting the voltage values in temperature, the temperature is converted into the Fahrenheit as well using this formula
For adjusting the data that is displayed on the LCD we have used the lcd.setCursor() function by giving different rows and columns to the data.
For displaying the degree symbol, we have used the ASCII for the degree symbol that is 223 and the loop function is working with a delay of 5 seconds.
Further we have connected the sensor directly on the Arduino analog pins like this:
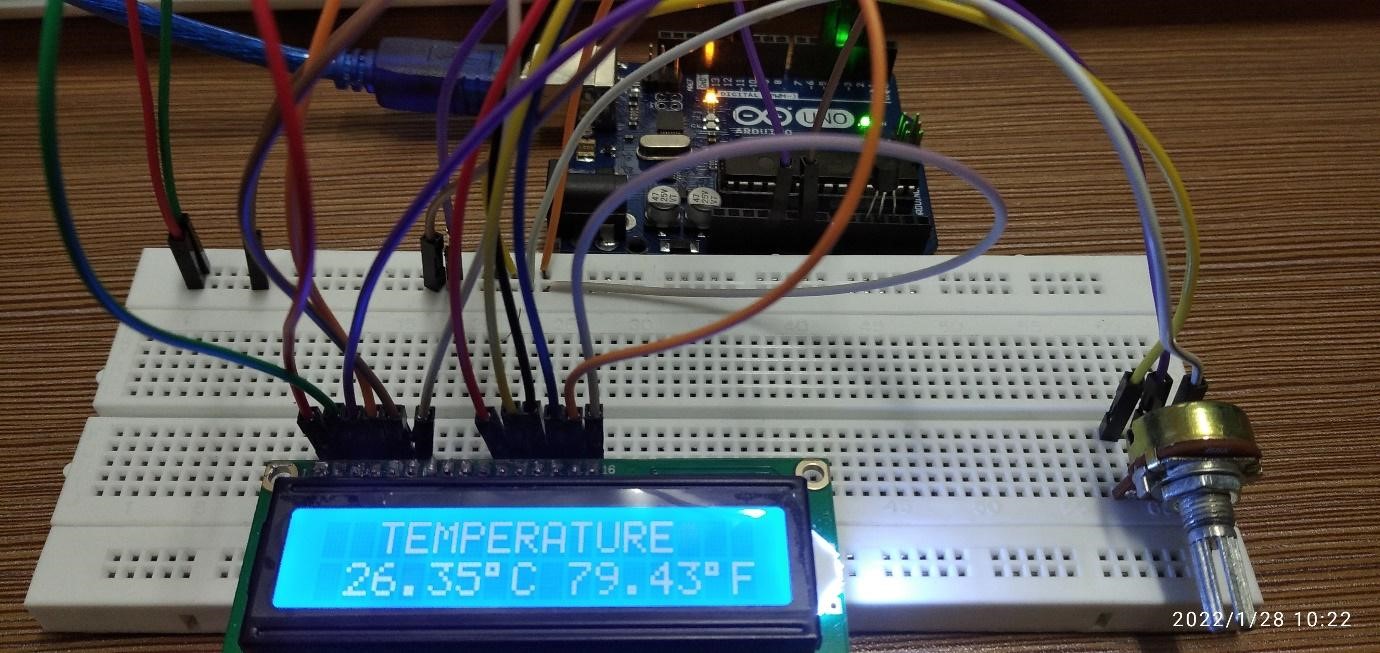
Output
Conclusion
The sensors are the devices that interact directly with the environment and gather the information of the surroundings. There are different types of sensors for gathering different types of data. In this write-up we have measured the temperature of a room using the temperature sensor (LM35) and the value of the temperature is displayed using a 16×2 liquid crystal display (LCD).


