Nowadays, the C programming language is gaining importance over other languages due to its simple syntax. The program written in C language can be used in a wide range of platforms which includes personal computers, microcontrollers and so on. The other main advantage of C programming is that it runs almost as fast as assembly code and you can easily control powerful machines through C programming.
If you are a Raspberry Pi user and want to start writing code in C language then you will love to hear that you can code on your Raspberry Pi quite easily as you just need to have a good understanding of the code and IDE to write and compile the code.
How to write and compile C program in Raspberry Pi 4
Here, in this article, you will learn how to write and compile C programs in Raspberry Pi 4 and before moving forward to write your first code, you probably need to have an environment where you can easily write and compile your code.
Geany is one of most used platforms by the Raspberry Pi users and you can experience writing code in Python, C or C++ and it is considered a fast enough IDE that can compile your code in no time. Geany comes pre-installed in the Raspberry Pi OS and you can run it by heading towards the menu of the Raspberry Pi and in the “Programming” option, you will see the “Geany Programmer’s Editor” and click on it and it will open on your Raspberry Pi desktop.

If you want to write your first code in C language you will need to do the below steps.
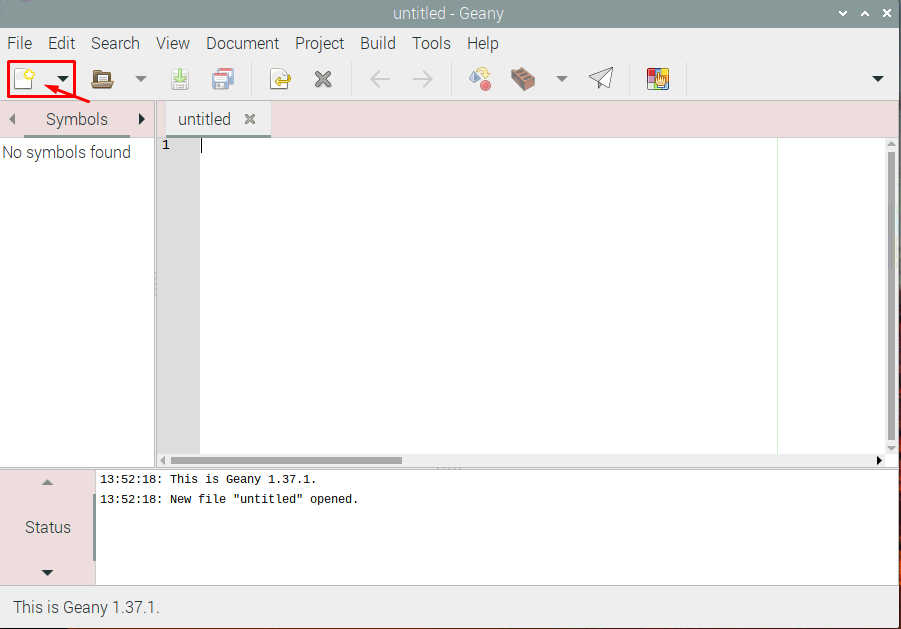
Step 1: The first thing you will need to consider is to create a source file on your Geany text editor. To do it, open the Geany IDE and create a new file by clicking on the option as shown in the image below.
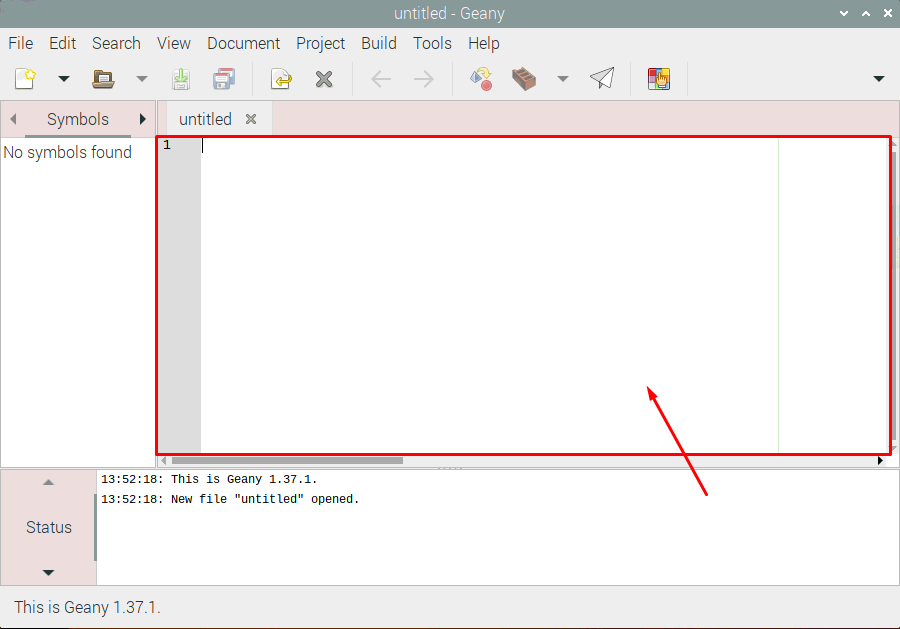
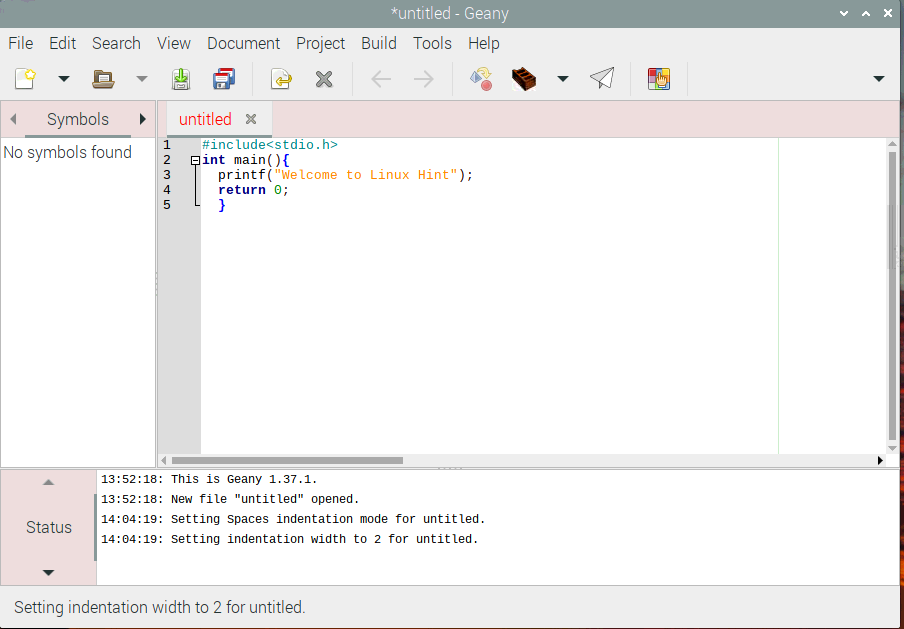
Step 2: When you click on the “Create New File” option, you will see a window appear on the Geany where you can write your C code in it.
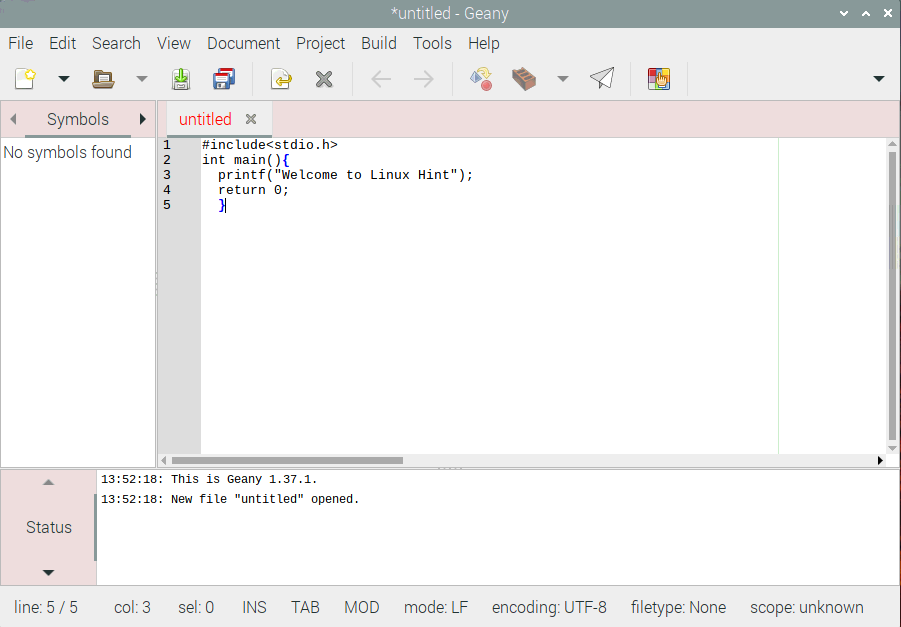
Step 3: Now, you can start to write your first basic code in C which is printing the text “Welcome to the Linux Hint” and the code will be like this as shown in the image below.
int main(){
printf(“Welcome to Linux Hint”)
return 0;
}
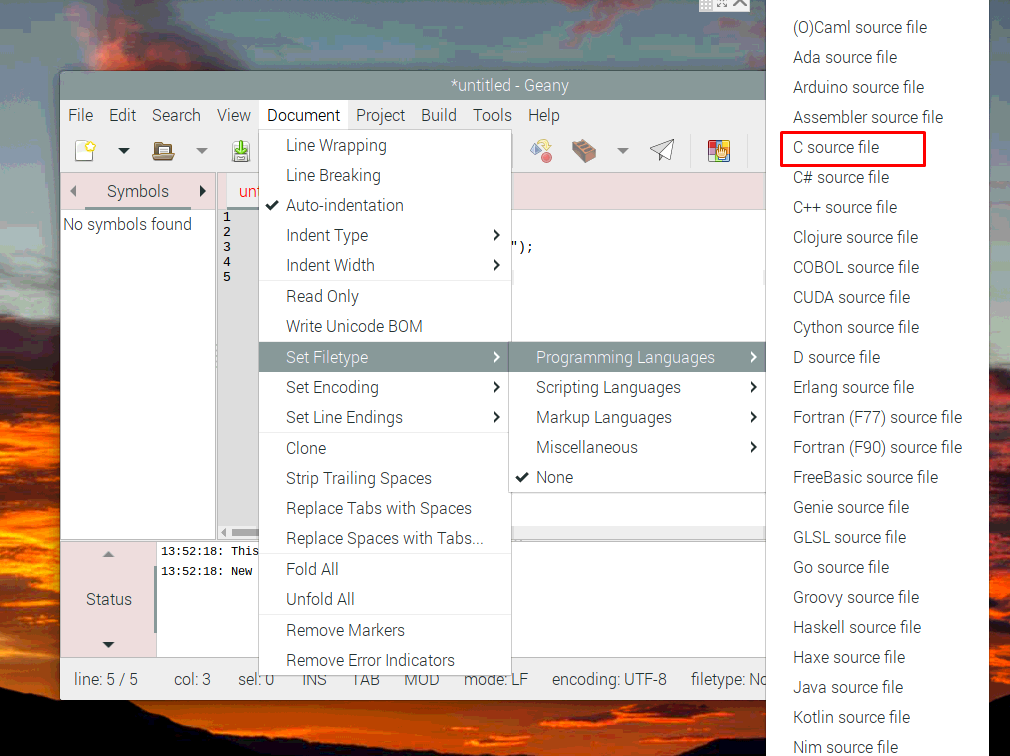
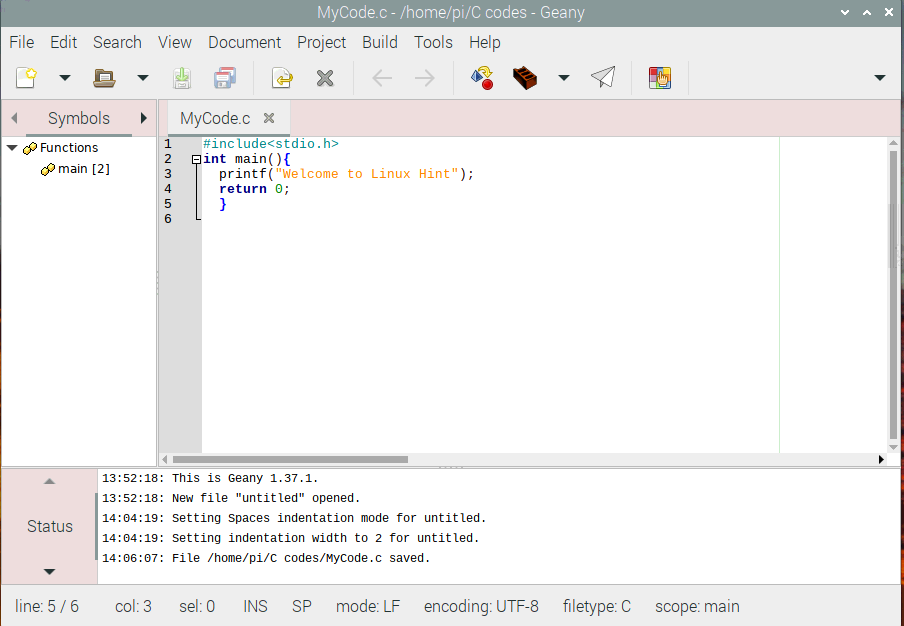
Step 4: Click on the “Document” option, then select “Set Filetype” and in the “Programming Languages Option” select “C source file” option. When you do this, you will see the code which will look like this as shown in the image below.
Step 5: After writing the above code press “Ctrl+S” to save the file with the name of your choice by making a folder with the name “C codes” and save the file in it.
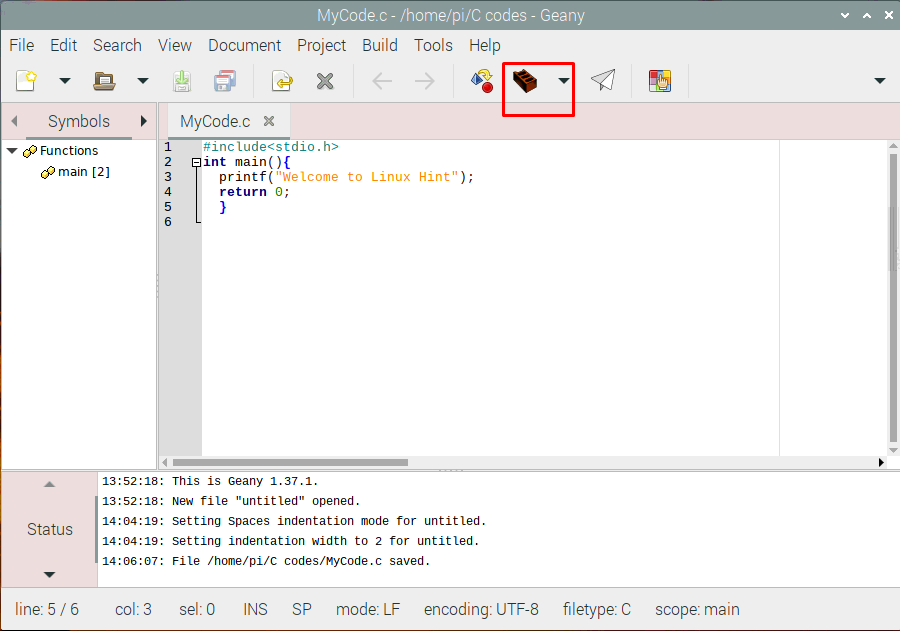
Step 6: Now, click on the “Build” option as shown in the image below or press the “F9” button from the keyboard.
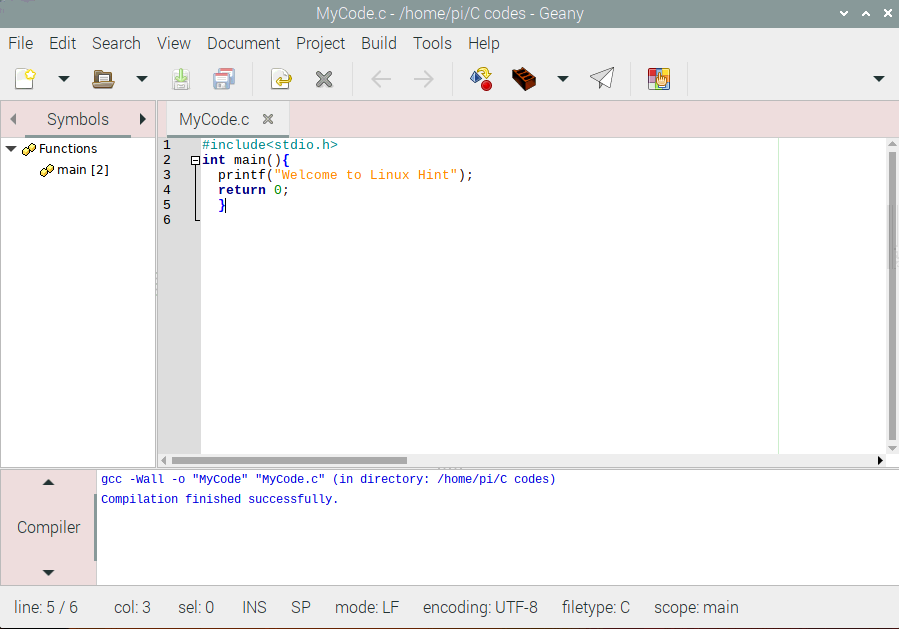
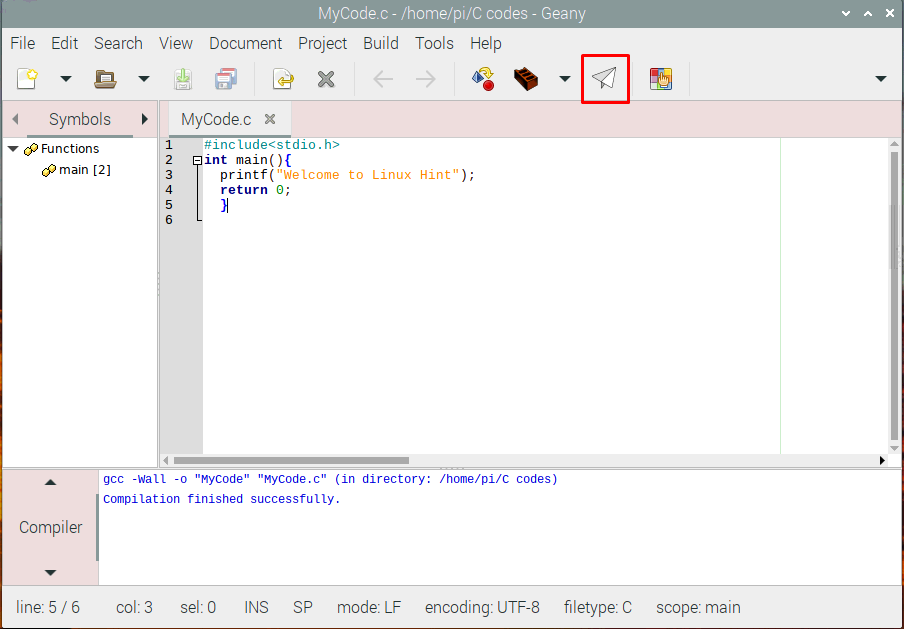
You will see that your code is successfully built in the compiler.
Step 7: Now, click on the “Run or view the current file” option to run the code.
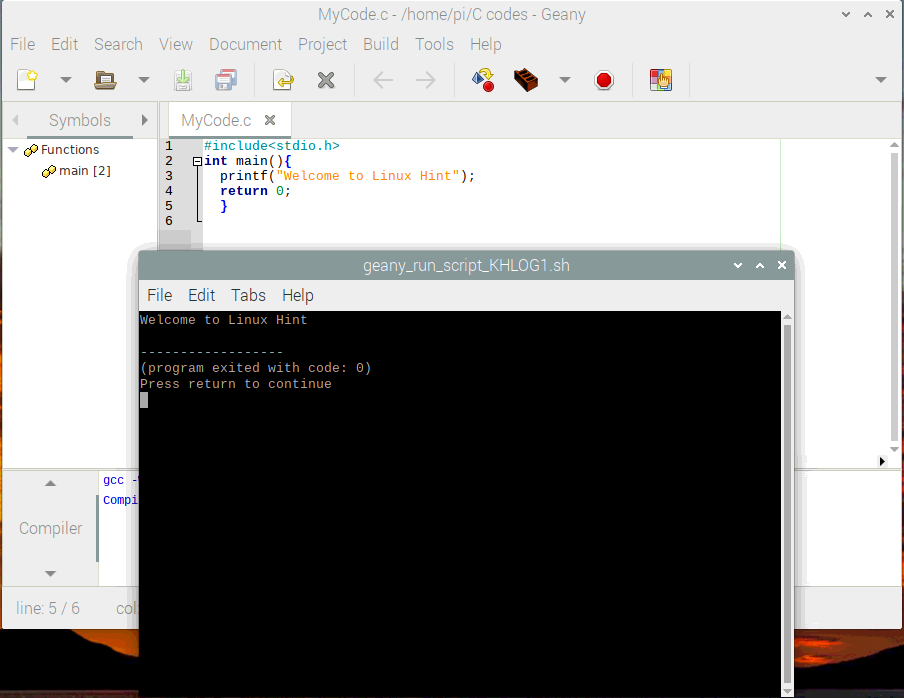
Step 8: When you click on it, you will see a dialog box open on your screen, where you will see your message “Welcome to the Linux Hint” which is your required output.
Conclusion
C programming language is easy to write, learn and fast language that offers tons of libraries. Raspberry Pi is one of devices that can run and execute C programs in a very less complex way. Now that you have successfully learned how you can write and compile your C program on an IDE in Raspberry Pi 4, you should start to write your own codes in C language because this is the only way you can become an expert in C programming and you can easily build projects on it.

