Screen recording is one of the most amazing features used in today’s technology like phones, tablets, laptops, and desktops. It allows users to record meetings, videos, lectures, gaming videos, and other such material. If you are a Raspberry Pi user and want to record your desktop screen then this guide is for you as 5 different ways to record a desktop screen are discussed in this article.
5 Ways to Record Your Desktop Screen on Raspberry Pi
The list of 5 screen recording apps/softwares that are highly compatible with Raspberry Pi are:
Let’s discuss the usage and installation process of each in detail.
1: VLC Media Player
This is the default media player of Raspberry Pi so that the user does not have to waste time installing new software. The VLC media player is a versatile media player that allows users to not only record the desktop screen but also allow users to view videos, and all kinds of media. Since it’s a default application for Raspberry Pi OS, it is also highly compatible with Raspberry Pi and it works great on it.
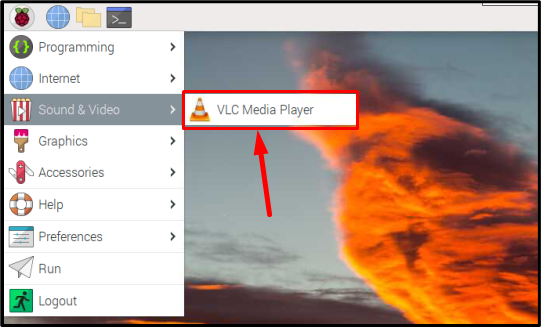
VLC media player can be accessed from the Sound & Video option in the Applications menu.
Or it can also be accessed through the terminal by typing in the command written below:

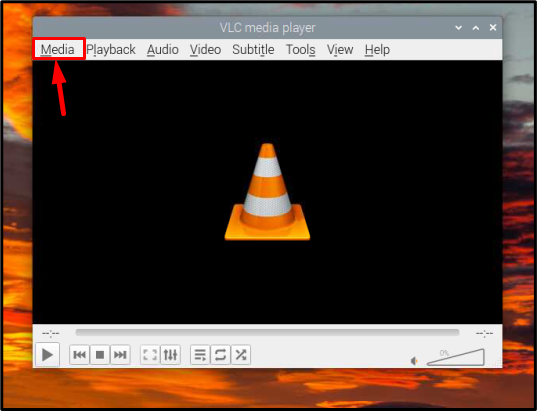
When VLC starts it will look like as shown in the below image; go to the Media tab:
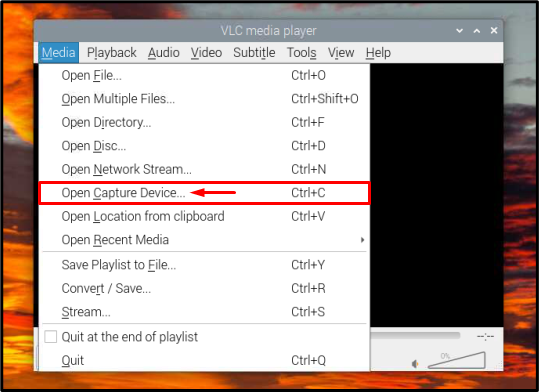
Then select the Open Capture Device option:
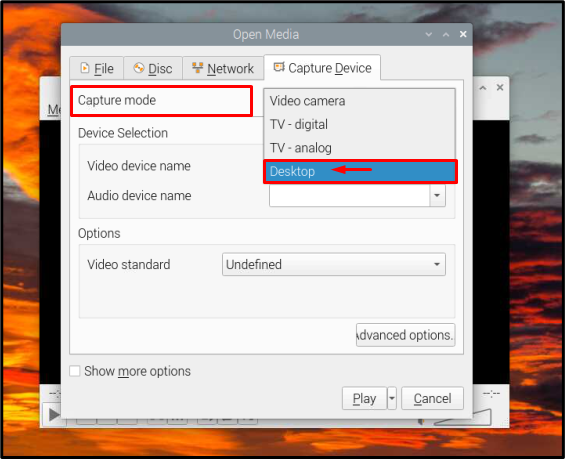
A new window pops up; hit the Capture Video tab which is highlighted in the below image:

Select the Desktop option from the capture mode list:
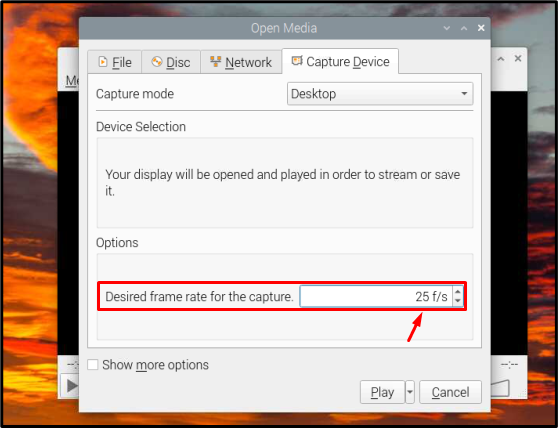
Then set the desired frame rate, 30 f/s is recommended:
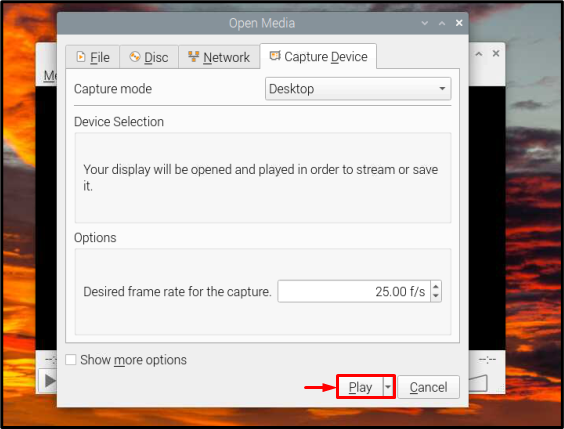
Finally, click the Play button to start screen recording:
2: Kazam
Kazam is considered the best screen-recording app due to the variety of features it provides, such as an audio recording option, support for both 32 and 64-bit architecture, choosing the specific area of the desktop for recording, full desktop recording, and other such features.
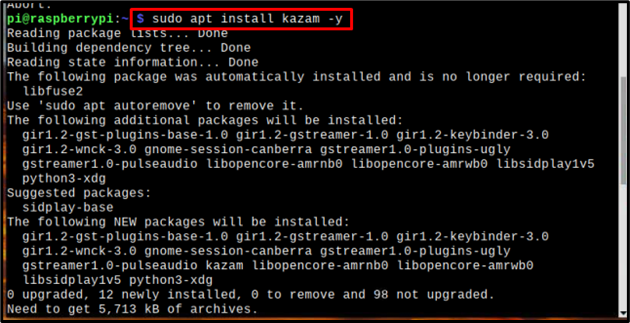
To install Kazam on a Raspberry Pi device type the below-mentioned command in the terminal:
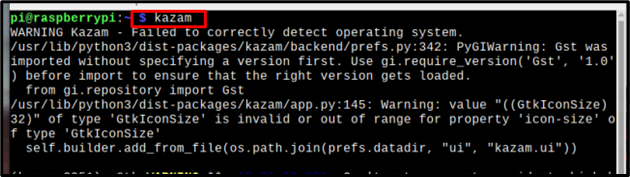
Once the installation process is completed Kazam can be easily accessed or run through the terminal by using the below-mentioned command:
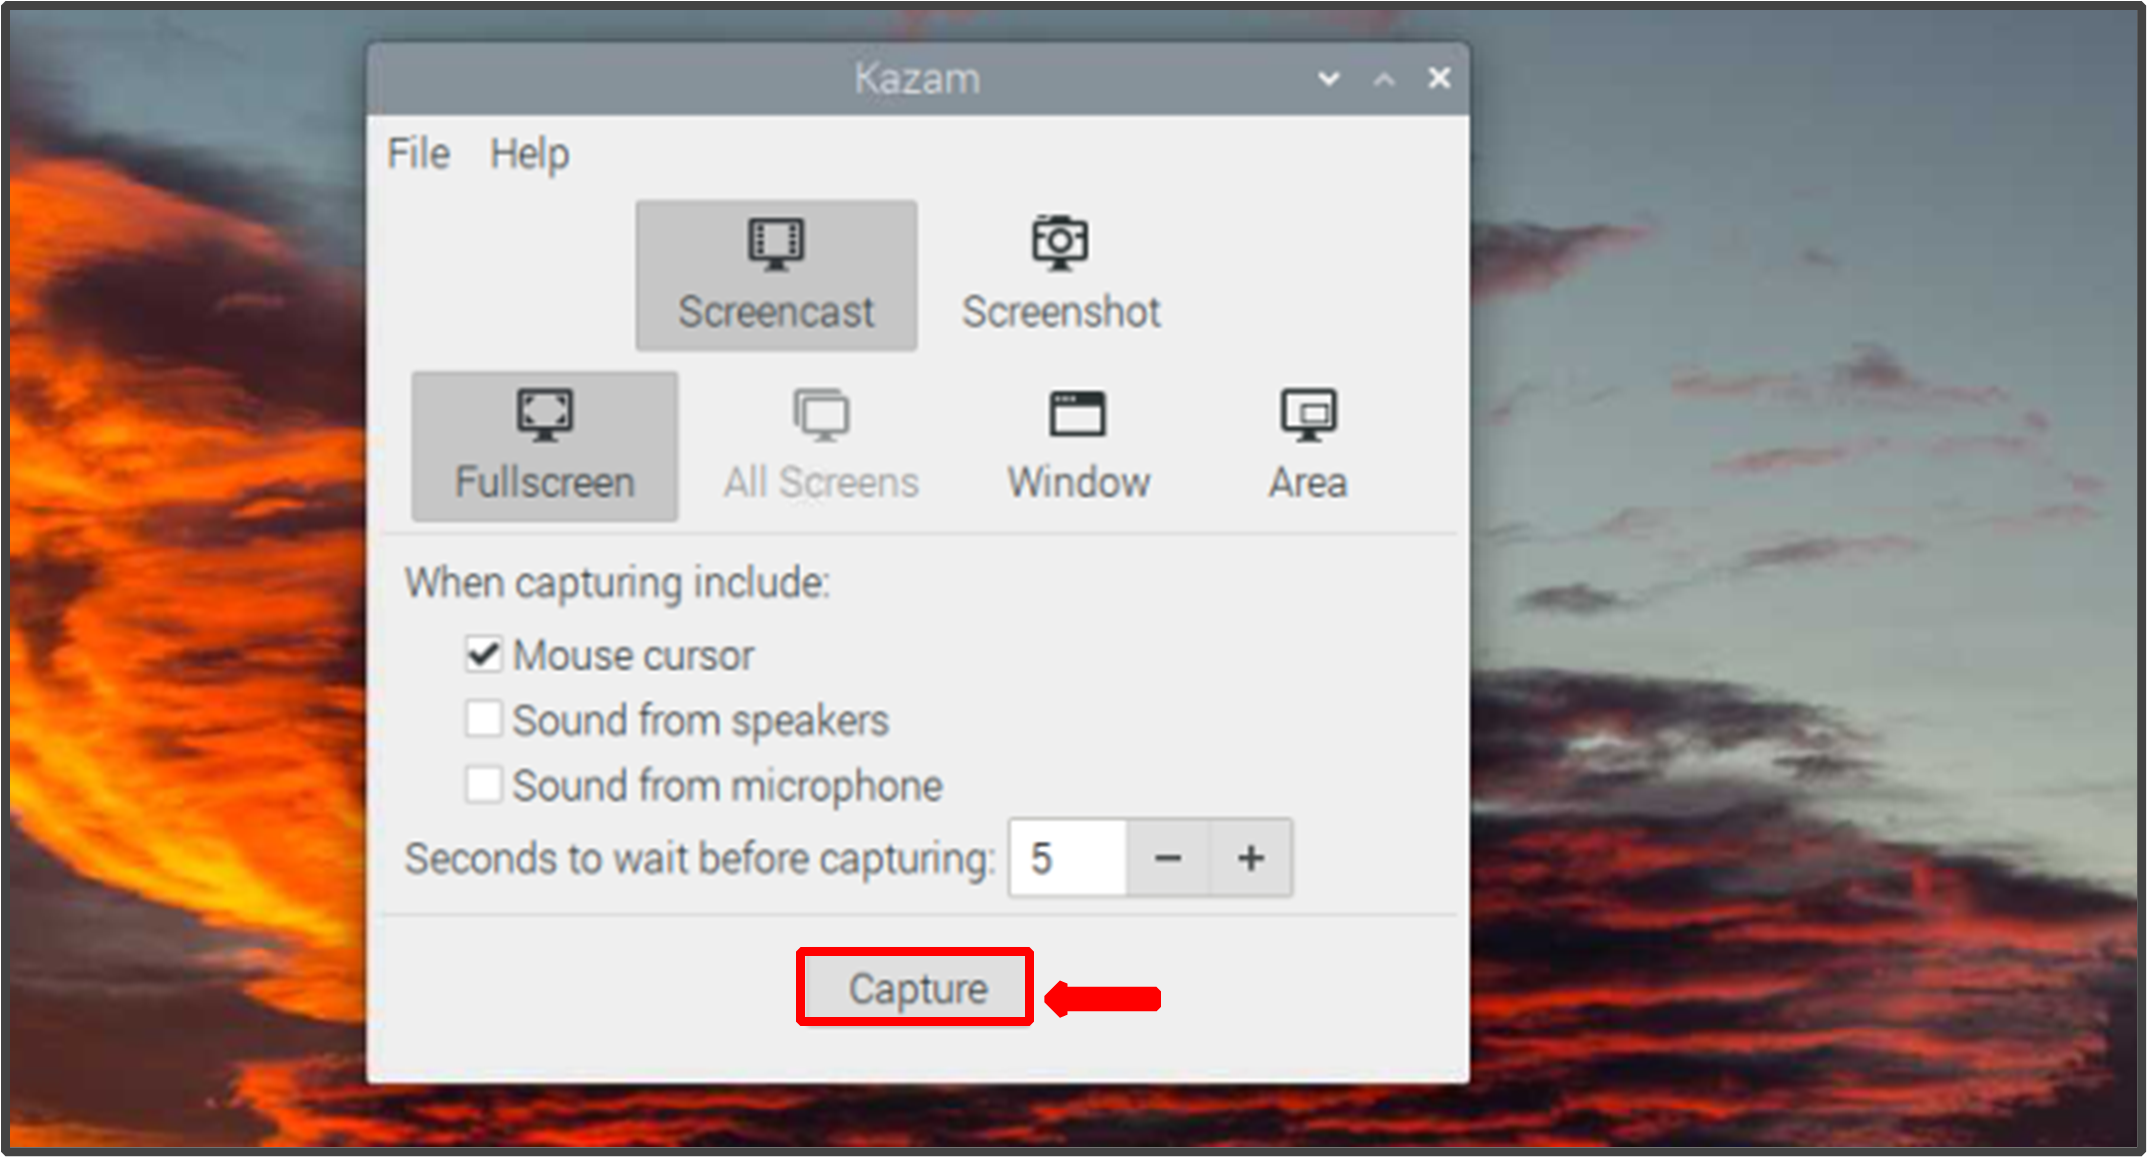
The Kazam window will appear on the screen with various options; it also provides an option to choose the waiting time before starting screen recording so users can get prepared. Once you are done with setting your required time and option for screen recording then click the Capture button to start recording.
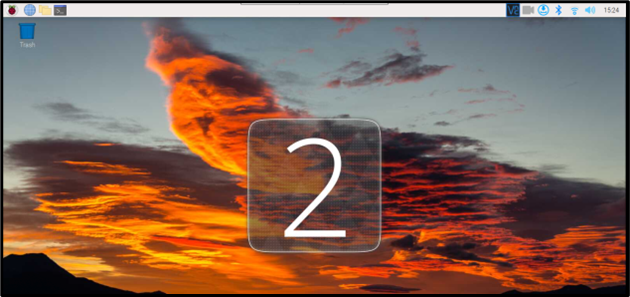
A countdown will start on the screen as soon as the Capture button is pressed and the screen starts recording as soon as the countdown ends:
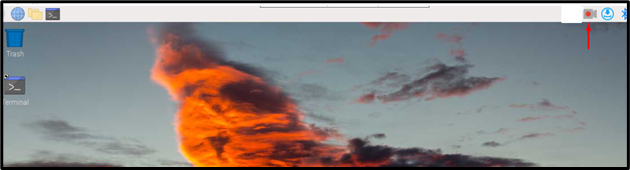
A video-camera icon will display on the menu bar to confirm that screen is being recorded and as soon as the recording is stopped this icon will disappear:
3: Simple Screen Recorder (SSR)
Another very wonderful yet a very simple screen recorder that can be used on Raspberry Pi is the Simple Screen Recorder. It might be named simple but the features it provides are more amazing than many other screen recording apps. The best thing about it is that it can work even if the operating system is slow. It is highly compatible with Raspberry Pi as it is lightweight and puts a low burden on the processor.
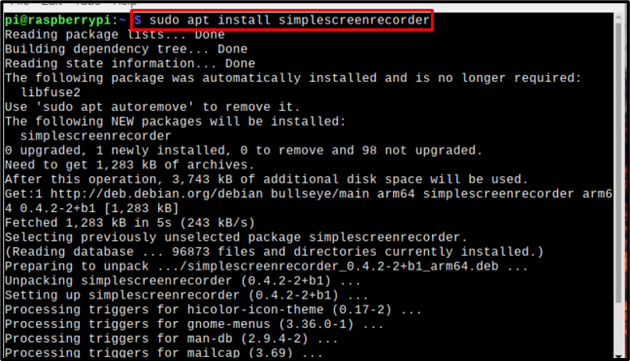
To install a simple screen recorder on Raspberry Pi, follow the below-mentioned command:
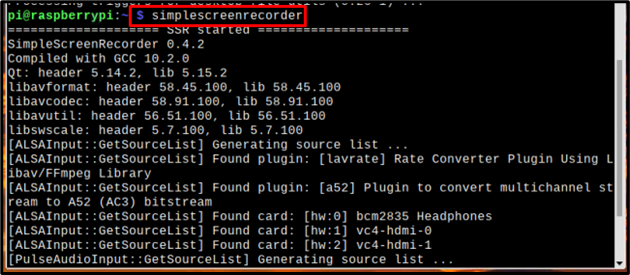
After the installation is complete then you can easily access the simple screen recorder to record the screen by typing the below-mentioned command:
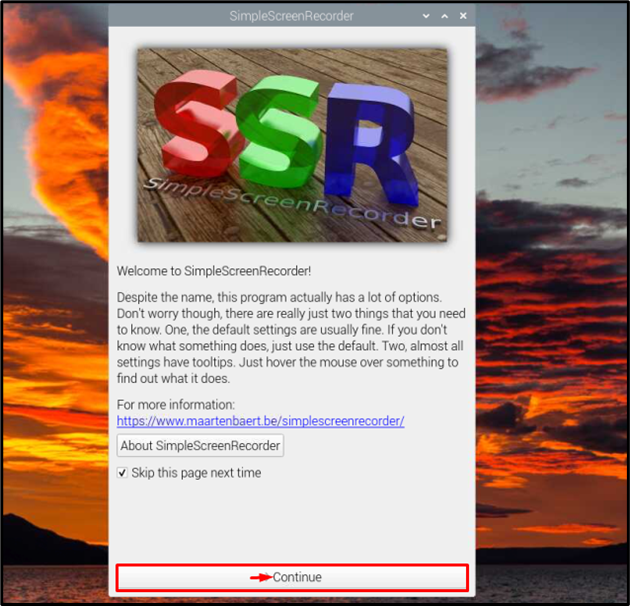
The simple screen recorder will start running and a welcome window will appear on screen, click the Continue button here:
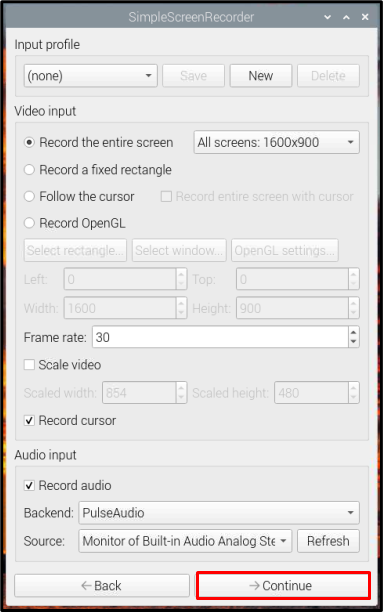
Then a few other settings options will appear that the user can easily set according to their requirement or else default settings are okay; once done with settings then hit the Continue button:
Then again click Continue:

Finally, click the Start Recording button to start the screen recording; the buttons to stop or save recording is also available here:

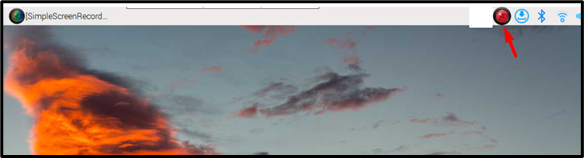
Once the recording will start a red button icon will be displayed on the menu bar to inform that the screen is getting recorded:
4: VokoScreenNG
If you want to go for a lightweight and small-size screen recorder then VokoScreenNG could be an option to have. It includes features to record and stream desktops which is great for people who mostly use Raspberry Pi for gaming.
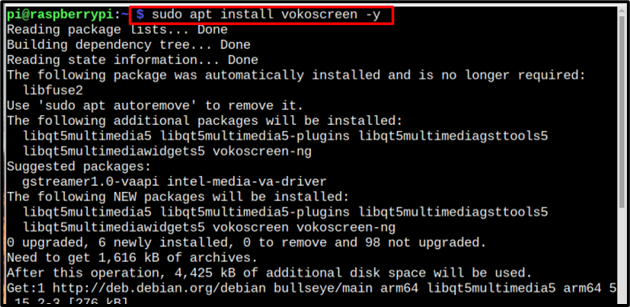
The below-written command can be used to install VokoScreen on Raspberry Pi:
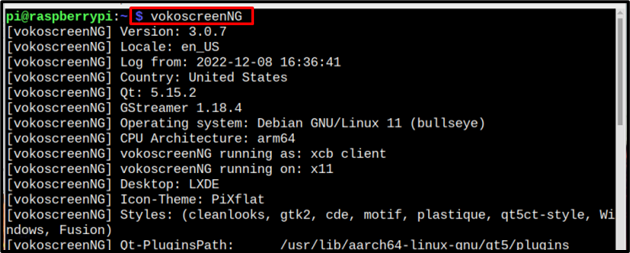
After installation VokoScreen can be accessed through the terminal by typing the below-written command:
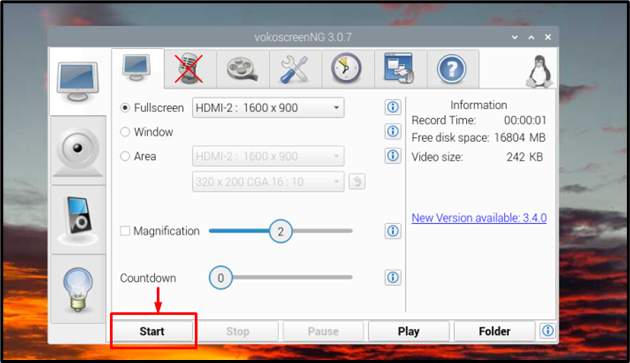
The Voko interface will appear on the screen from where you can click on the Start button to start recording the desktop screen:
5: Asciinema
Asciinema is a great tool to record activities that are performed using the Linux terminal. It will allow users to record terminal sessions which can be easily shared to the web.
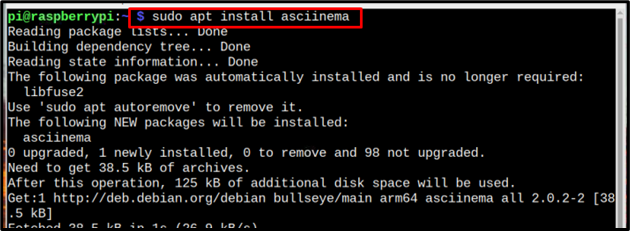
To install asciinema on Raspberry Pi follow the below-written command:
Then by using the below-mentioned command the recording can be started:

And to stop the recording you can use the below-mentioned command:

Or the shortcut key Ctrl + D can also be used to stop the recording.
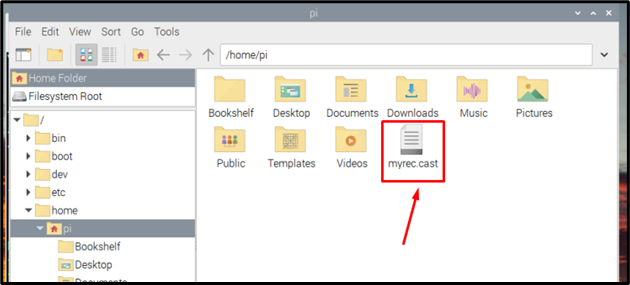
All the recorded data will automatically get saved into the file which can be accessed easily from the system’s home/pi directory:
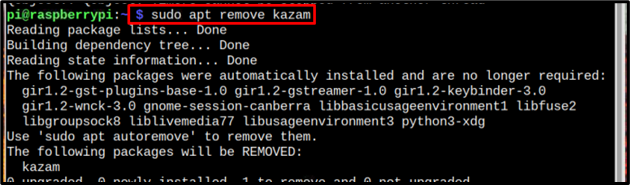
All the 5 ways that are discussed in the article are really helpful. Users can opt for any of them depending on their needs. To uninstall any of the above-mentioned software/packages user can use the below-mentioned command:
Note: The package name in the above command should be replaced with the name of the software user wants to uninstall.
Conclusion
The default media player app on the Raspberry Pi is a VLC media player that can be used for screen recording but there are several other options too which can be easily installed on Raspberry Pi. In article 5 screen recording applications along with their installation process is discussed. Users can opt for any of these to record the screen.