How To Power Arduino Using Solar Cell
Sometimes working with Arduino required remote monitoring such as weather station designing using the Arduino board. In projects like these, power is the main issue in remote locations so using a 12V or 5V solar cell with Arduino solves the power issue.
As Arduino can easily work in the range of 5V to 12V thanks to its onboard voltage regulator. We can convert the power from solar to a stable regulated 5V using the charge controller and apply it to the 5V USB port of Arduino.
Let’s discuss different ways of powering Arduino using the solar cell.
Ways To Power Arduino Using Solar Cell
Different kinds of methods can be used with Arduino in the case of solar cells, but it all depends upon the requirement of projects and the availability of equipment. So here are some widely used method:
- Using a Solar Charge Controller with USB Port
- Using a 12V to 5V Solar Charge Converter
- 5V Solar Power Manager Board
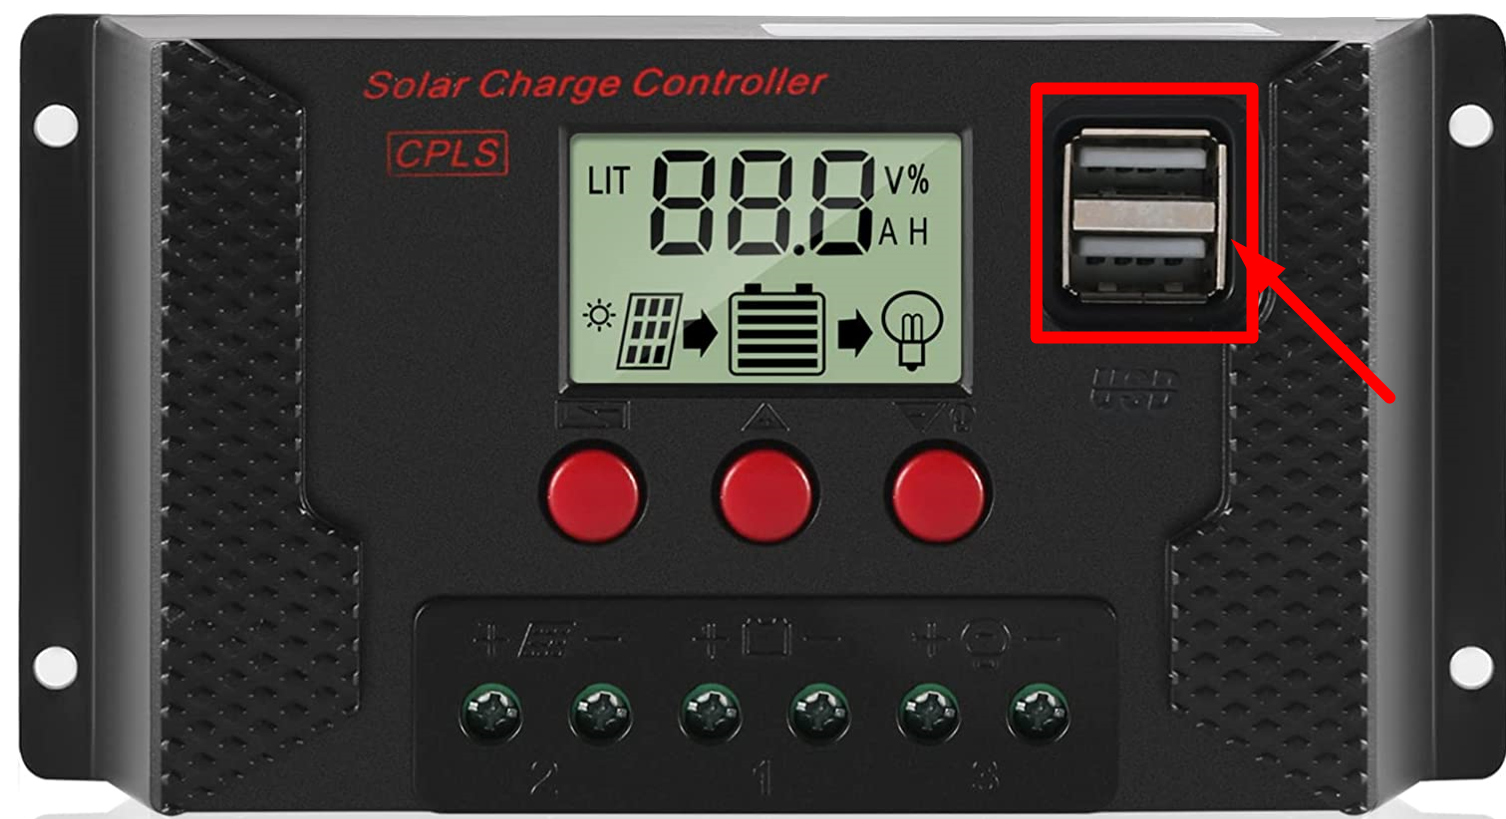
1: Using a Solar Charge Controller with USB Port
Solar charge controllers can be used to regulate the power coming from solar cells. These charge controllers not only can power devices directly but also manage to charge the backup batteries.
Solar charge controllers keep the batteries safe from overcharging. So, to power Arduino a charge controller with 5V USB output can be used. We just need the following equipment.
We need the following equipment to power Arduino with a 12V solar cell using the charge controller and a battery backup.
- Arduino UNO – $28
- 12V PWM charge controller – $16
- 12V solar panel – $25
- 12V rechargeable battery – $14
- Connecting wires – $12
- USB B cable – $4
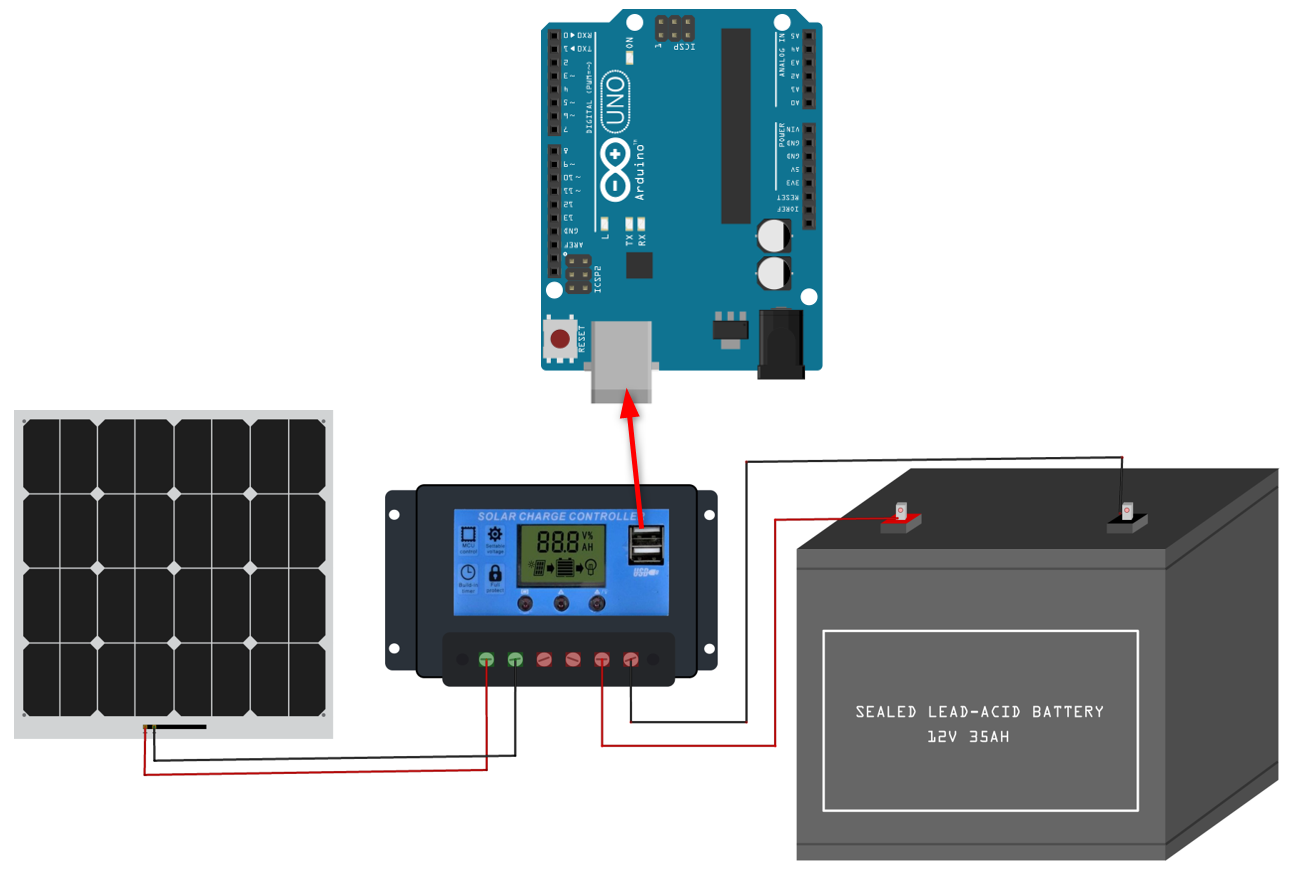
Below image illustrates the connection diagram of a 12V PWM solar charge controller with Arduino.
Here the charge controller is receiving the input from the 12V solar panel and at the terminal output it charges the 12V Li battery. Also, at 5 V output the USB port Arduino is connected.
2: Using a 12V to 5V Converter
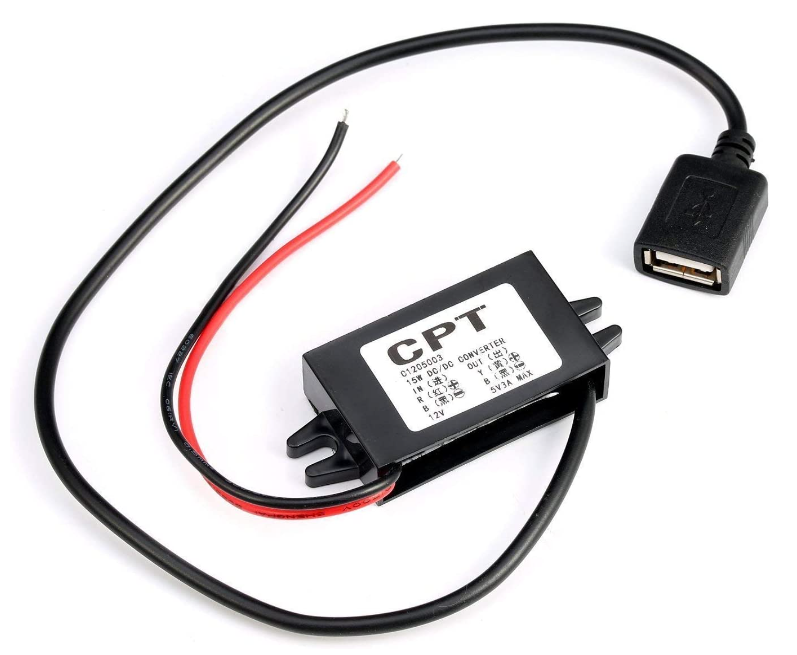
Next Arduino can also be connected with solar panels using the 12V to 5V DC-DC converter. Sometimes we have solar charge controllers that don’t come with 5V USB output so we can use a DC-DC converter to low voltage from 12V to 5V.
Multiple converters are available that output 5V in the USB port.
Following equipment is required to design this system:
- Arduino UNO – $28
- 12V PWM charge controller -$16
- 12V solar panel – $25
- 12V rechargeable battery – $14
- 12V to 5V USB DC-DC converter – $10
- Connecting wires – $12
- USB B cable – $4
Following image illustrates the connection of the solar charge controller with a 12V solar panel along with the battery. Arduino is connected to the output of a 12V-5V DC converter.
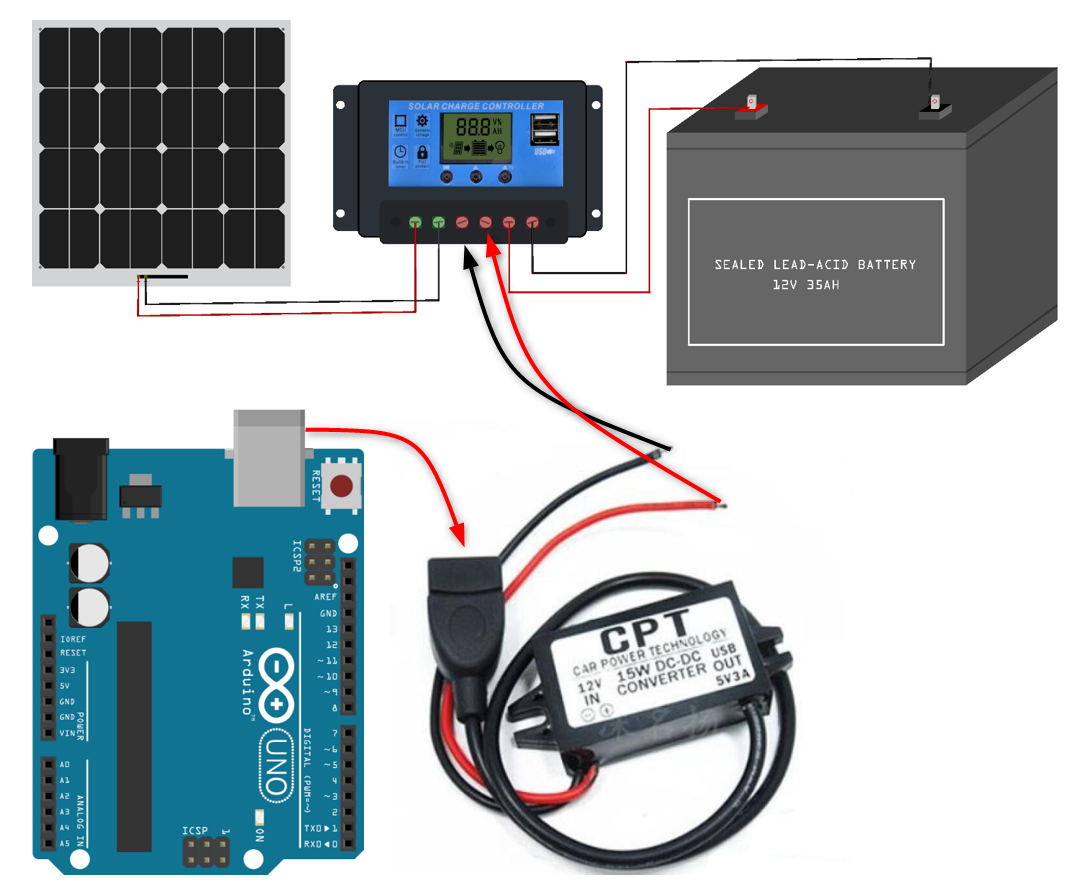
Here the solar panel output is given to the input terminal of the charge controller which then charges the 12V battery and on the other output terminals a DC converter is connected which then supplies 5V output to Arduino USB B port.
3: 5V Solar Power Manager Board
Last method on the list which we will cover today is powering ESP32 using the power manager boards. It is a highly efficient solar power management board that is designed for 5V solar panels. It works on MPPT (Maximum Power Point Tracking) function. It also can charge 3.7 V lithium batteries with charging current up to 900mA. It also features a 5V DC-DC converter which provides us output in a 5V USB port.
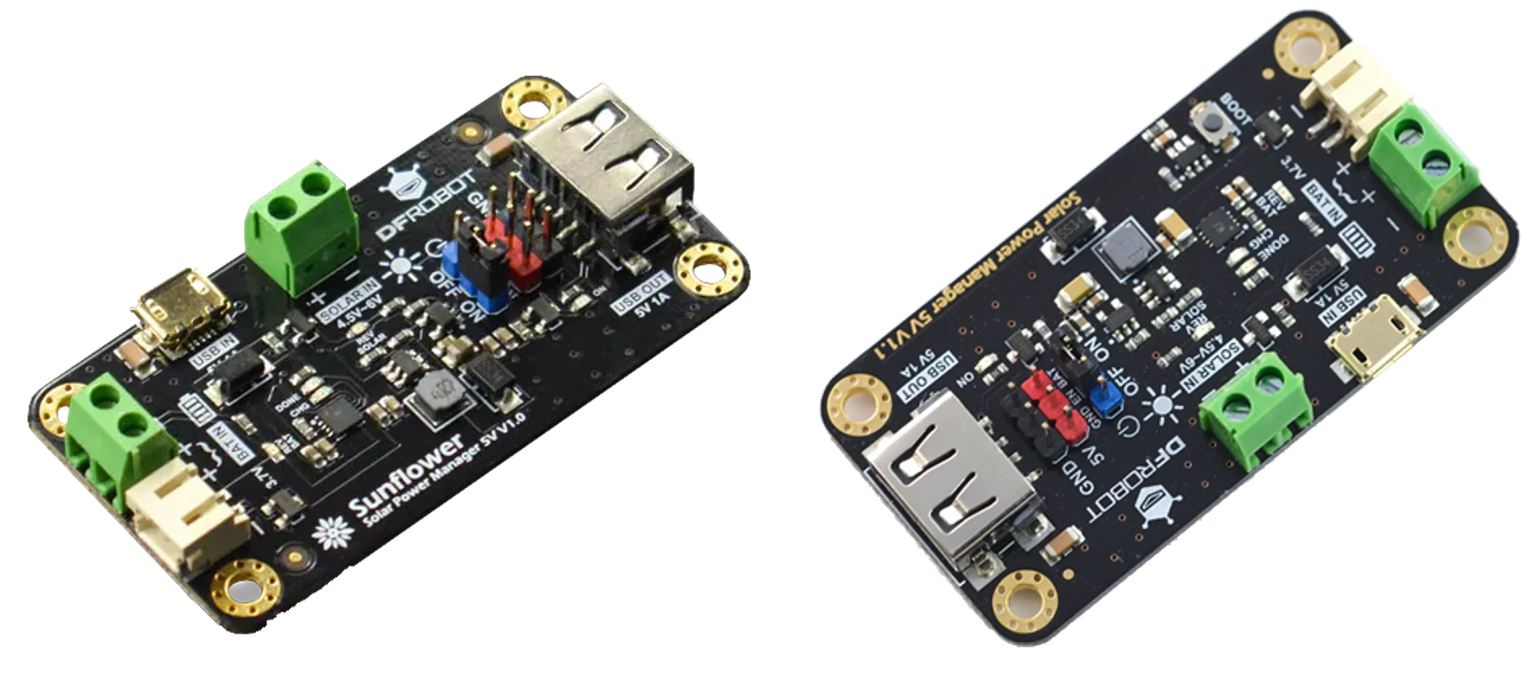
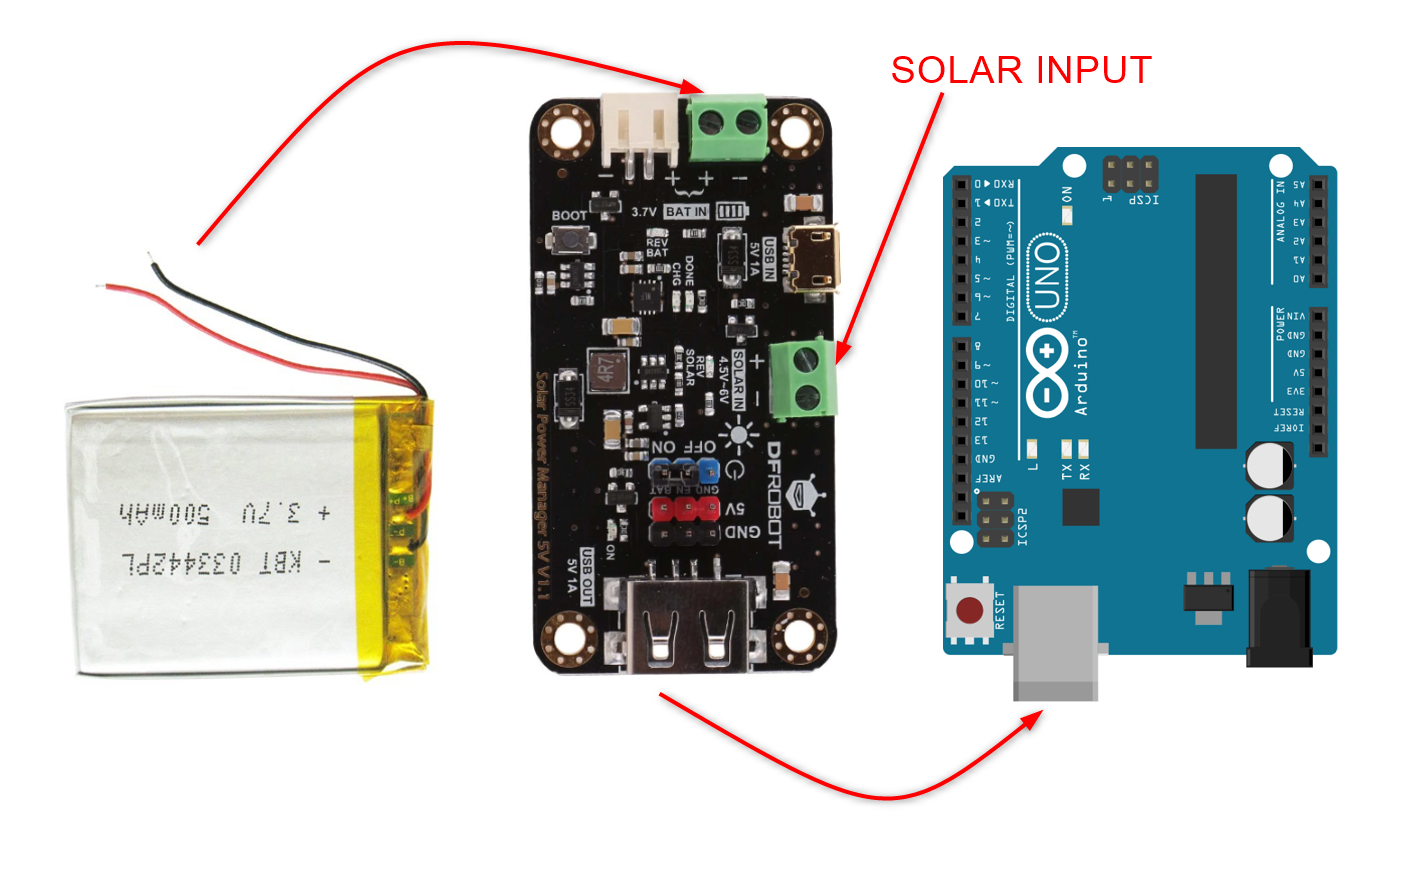
To connect solar power management boards with solar panels there are onboard SOLAR IN pins which take the input from solar and not only charge the 3.7V lithium batteries but also power Arduino using the 5V USB port.
Following images represent the solar management board working.
Here are some main highlights of solar power management board:
- Maximize solar efficiency
- Designed for 5V solar panel
- Dual charging mode is available (Battery 3.7V + USB charging)
- On board protection mechanism
- 5V USB connecter for IoT devices
Conclusion
Here we discussed three different ways of powering Arduino with solar cells. All three ways required different controllers that regulate the solar generated output into regulated 5V that can be fed to the Arduino USB B port. Among all, the solar charge controller method is reliable and efficient as it can charge the batteries and generate constant 5V without any external hardware.