Arduino boards can be programmed using a C/C++ language. Most of the concepts Arduino programming inherits from these two languages. Like in C/C++ arrays are also used in Arduino sketches. Arrays can store multiple elements with the same data type. Arrays in Arduino are commonly used with for loops to control voltage level at multiple pins. Let’s see how to create 2D arrays in Arduino.
2D Arrays in Arduino
2D or two-dimensional arrays are similar to one dimensional only difference is here we have multiple rows and multiple columns instead of a single line of characters. All elements of arrays are arranged inside a grid in the tabular form with rows and columns.
In simple words, arrays which require two different subscripts to call a specific element at a particular location are called 2D arrays. Any array having two or more dimensions is known as a multidimensional array.

Here in the above image, we can see a multi-dimensional 2D Array because it requires two subscripts to identify a specific element.

- First is the name of Array denoted by “a”.
- Second is Row subscript [2] telling us element location with respect to its Row number.
- Third one is the Column subscript [1] denotes column number of specific elements.
Initializing 2D Array in Arduino
Now to understand the 2D array concept we initialize a 2D array inside Arduino code and print it on a serial monitor. Following is the code for initializing a 2×3 2D array:
Serial.begin(115200); /*Serial Communication begins*/
int nRow = 2; /*Number of Rows*/
int nCol = 3; /*Number of Column*/
int twoDimArray[2][3] = /*Array defined with dimension*/
{
{1, 2, 3}, /*Array elements*/
{4, 5, 6}
};
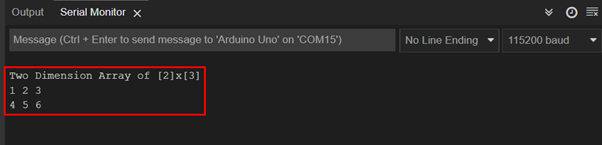
Serial.println("Two Dimension Array of [2]x[3]");
int curRow = 0;
while (curRow < nRow) /*While loop to print n value of row*/
{
int curCol = 0;
while (curCol < nCol) /*While loop to print n value of column*/
{
Serial.print(twoDimArray[curRow][curCol]);
Serial.print(" ");
curCol++; /*Print all Rows Elements*/
}
Serial.println();
curRow++; /*Print all Column elements*/
}
}
void loop()
{}
Here in the above code, we started by initializing serial communication to print results on the serial monitor. Next total number of rows and columns are initialized. To store data inside the array we initialized a two-dimensional array string which prints numbers from 1 to 6.
Next to store the initialized data inside array two while loops will be required one for number of rows and second for total number of columns. We can also do this manually but in case of large size 2D arrays we have to write a separate line for every element of the 2D array. To avoid this loop is initialized which will run for itself and increment their value to store the next element inside the array.
Lastly, we printed both the rows and columns using the Serial.print() function.

Output
Output displays a 2D array with 2×3 size.
Replacing 2D Array Elements with a Value in Arduino
As we have successfully printed a 2D array on serial monitor now we will replace a specific value with an element inside the 2D array.
Serial.begin(115200); /*Serial Communication begins*/
int nRow = 2; /*Number of Rows*/
int nCol = 3; /*Number of Column*/
int twoDimArray[2][3] = /*Array defined with dimension*/
{
{1, 2, 3}, /*Array elements*/
{4, 5, 6}
};
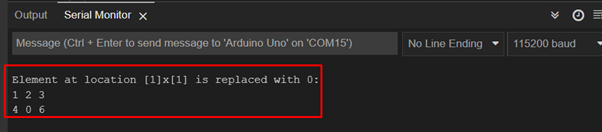
Serial.println("Element at location [1]x[1] is replaced with 0: ");
int curRow = 0;
while (curRow < nRow)
{
int curCol = 0;
while (curCol < nCol)
{
twoDimArray[1][1] = 0; /*Array element at [1]x[1] is replaced with 0*/
Serial.print(twoDimArray[curRow][curCol]);
Serial.print(" ");
curCol++; /*Print all Rows Elements*/
}
Serial.println();
curRow++; /*Print all Column elements*/
}
}
void loop()
{}
</tr>
</tbody>
</table>
Above code is similar in working like the code explained earlier. The only difference here is the addition of two lines using the following function: we can replace any array element with a given value.
[cce_bash width="100%" height="100%" escaped="true" theme="blackboard" nowrap="0"]
twoDimArray[1][1] = 0;
Here the [1]x[1] element which is equal to 5 will be replaced with a number 0. By defining the array element location any number can be replaced with a new one.

Output
In the serial monitor we can see that element at location [1]x[1] is replaced with number 0:
Getting a Value from a Specific Position in 2D Array in Arduino
Now we will retrieve a specific value of an element from any position inside the 2D array:
Serial.begin(115200); /*Serial Communication begins*/
int nRow = 2; /*Number of Rows*/
int nCol = 3; /*Number of Column*/
int twoDimArray[2][3] = /*Array defined with dimension*/
{
{1, 2, 3}, /*Array elements*/
{4, 5, 6}
};
int curRow = 0;
while (curRow < nRow)
{
int curCol = 0;
while (curCol < nCol)
{
Serial.print(twoDimArray[curRow][curCol]);
Serial.print(" ");
curCol++; /*Print all Rows Elements*/
}
Serial.println();
curRow++; /*Print all Column elements*/
}
int myValue = twoDimArray[1][1]; /*Print element al [1]x[1]*/
Serial.print("Value of Element at [1]x[1] is: ");
Serial.print(myValue);
}
void loop(){ }
Here at the end of code we defined a new variable myValue of int type. This variable will take the value of the defined element using its location and print it on the serial monitor.
Here we have initialized it to print elements at location [1]x[1].

Output
Output terminal represents the value at location [1]x[1] which is equal to 5:

Conclusion
Two-dimensional arrays (2D array) remove the hassle of handling various variables. Also using 2D arrays we can set different pin values HIGH or LOW. This article gives an introduction of 2D arrays in Arduino and guides on how to get or replace specific element values inside the 2D array.