This article will elaborate on what the “–net=host” option does in the Docker command.
What Does the “–net=host” Option do in the Docker command?
The “–net” option in the “docker run” command is utilized to specify the network for the Docker container. By default, containers are running on the bridge network. However, the “–net=host” option can be utilized to execute the container on the host network. It gives the Docker container more network access than it would typically have.
How to Execute the “docker run” Command With and Without the “–net=host” Option?
To check the difference between containers running on the default network and the host network, look at the listed examples:
- Use the “docker run” Command Without the “–net-host” Option.
- Use the “docker run” Command With the “–net-host” Option.
How to Use the “docker run” Command Without the “–net-host” Option?
By default, the Docker platform provides three networks: “bridge”, “host”, and “none”. In order to list all networks, take a look at the below example:
When the container is executed without specifying any network, by default, it will use bridge networking. For the demonstration, check out the below steps.
Step 1: Make a Dockerfile
Make a Dockerfile to containerize the “golang” program and paste the given instructions into the file:
WORKDIR /go/src/app
COPY main.go .
RUN go build -o webserver .
EXPOSE 8080:8080
CMD ["./webserver"]
Step 2: Build Docker Image
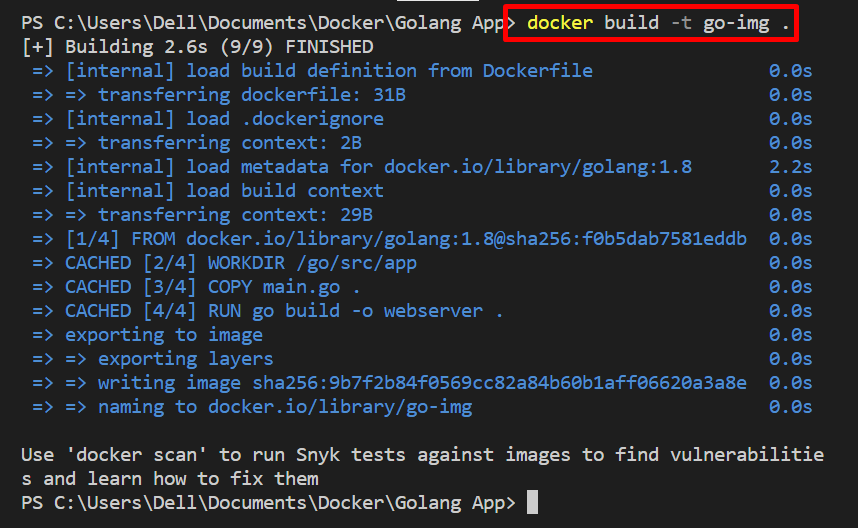
Next, generate the image from Dockerfile with the help of the provided command. The “-t” option in the below command specifies the image name:
Step 3: Execute the Docker Container
Utilize the “docker run” command to run the container on the default selected network. The “-d” option executes the container in detached mode:
Now, list the container and check whether the container is executed on the default network or not:
If the output shows any exposing port like “tcp/<port>” it means the container is running on some default network and if there is no output in “ports” column or output like “0.0.0.0:8080→8080/tcp” it means the container is executing on host:
From the above output, you can see that our container is executing on the default selected network “bridge”.
How to Use the “docker run” Command With the “–net-host” Option?
In order to execute the container on the host network, utilize the “–net=host” option as shown below:
For the verification, list down all the containers. Here, no output is shown in the “ports” column, which means our container is processing on the host network and can be accessed at any port of the host network:
This is all about what the “–net=host” option does and how to use it in Docker.
Conclusion
The “–net=host” option is utilized to execute the Docker container on the host network. If this option is not specified in the “docker run” command, its mean container will execute on the bridge network. In order to run the container on the host, utilize the “docker run –net=option <image>” command. This write-up has demonstrated what the “–net=host” option does in the Docker command.


