
With HAProxy, you can deploy it in a Docker container instead of running it as a package on your system. Using Docker ensures that you don’t interfere with other packages and is one way of having a secluded environment to run HAProxy as your reverse proxy or for other purposes. Running HAProxy on Docker is a straightforward task. This post discusses the steps to follow. Read on!
Deploying HAProxy in a Docker Container
When working with your applications or servers, HAProxy is handy in allowing you to control the traffic to achieve a high performance and scalability. Moreover, Docker gives you a platform to deploy and scale your application seamlessly. Combining the two, your scalability and other deployment needs will be well-met.
Besides, HAProxy technologies have built a set of Docker images that you can use to deploy HAProxy in a Docker container. The following are the steps that you should follow.
Step 1: Start Docker
Your system must have the Docker installed for you to start it before deploying HAProxy. Depending on what distro you are using, ensure that you installed Docker. For this tutorial, we will work with Ubuntu and check the Docker version to confirm that it is installed on our system.

Once you have the Docker installed, check its status to ensure that it is running. You can start it with the following command and then check its status:

Step 2: Get the HAProxy Official Docker Image
The official HAProxy Docker image is available from the Docker hub. You can download it by pulling it with the following command:

Confirm that we have HAProxy downloaded by checking the available Docker images.

Step 3: Create a Docker Network
Since we will use the web applications that we want to link to HAProxy, a bridge network is required. Besides, creating a network also helps separate the containers so that each uses its own.
To create a bridged network, use the following syntax:

Quickly verify that the network has been created by listing the available networks in your Docker container.
We have our “network1a” created and it appears in the following output:

Step 4: Create the Backend Web Applications
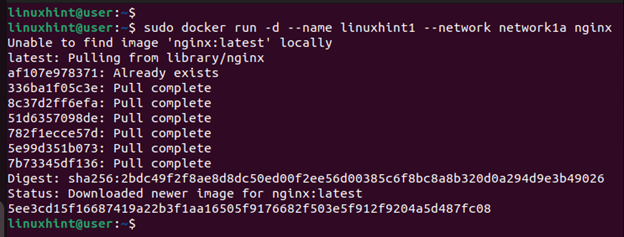
We create two web instances to use with our load balancer for the demonstration. Docker has different instances that you can use. For this case, we use a Nginx image to create the web applications.
Create the other instance.

We now have two web application instances on our Docker. Verify this by running the “docker ps” command.

Step 5: Create Your Configuration File
You must create a HAProxy configuration file that you will use with your Docker. Choose where to save your configuration file. Then, open it with a text editor. We are using nano for this case and have our configuration file stored in “/opt/haproxy/haproxy.cfg”.

Our configuration file looks as follows. Notice how each section shows how we want HAProxy to distribute the load on our web applications/servers:

Again, we are using port 80 for the frontend connections and port 8404 for the listeners.

Ensure that you added the correct name for your web application under the backend section of the config file. You can also use the IP addresses for your web applications instead of their hostnames. Lastly, save and exit the file. You can then restart HAProxy.

Instead of creating a configuration file, you can create a Docker file that copies an existing config file and then build the container. Feel free to use the method that works best for you.
Step 6: Deploy HAProxy
We must now create a HAProxy container, run it, and map its port to the one that we included in the configuration file. We name our container as “haproxycontainer2” and map the ports 80 and 8404 from the host to those on the Docker container.

With that, you managed to deploy HAProxy in a Docker container. You can now access your web applications/servers. Any traffic that is channeled to them will be distributed using HAProxy to ensure that the load balancing occurs.
Conclusion
HAProxy helps with load balancing and other applications. When working with Docker, it’s possible to deploy HAProxy such that your web applications or development environment gets a convenient way of load balancing. This post shared the steps to deploy HAProxy in a Docker container. Follow them and do the same for your case.