This article will explain comprehensively how to make USBs available on the guest operating systems.
Requirements
This article has some requirements for the demonstration:
- VirtualBox’s latest version should be installed on the host machine.
- A guest OS on the VirtualBox should be created.
- The USB drivers for the host OS must be updated.
- An external USB storage device is required.
- The extension pack for VirtualBox should be installed.
Install the VirtualBox Extension Pack
The USB passthrough feature can be experienced more optimally by installing the VirtualBox extension pack. The extension pack is an additional package that adds more functionalities to the VirtualBox and the main advantage is that the USB 2.0/3.0 version is not supported in the VirtualBox. This feature allows VirtualBox to support these versions.
Follow the steps to install the VirtualBox extension pack on the device.
Step 1: Check the Version of VirtualBox
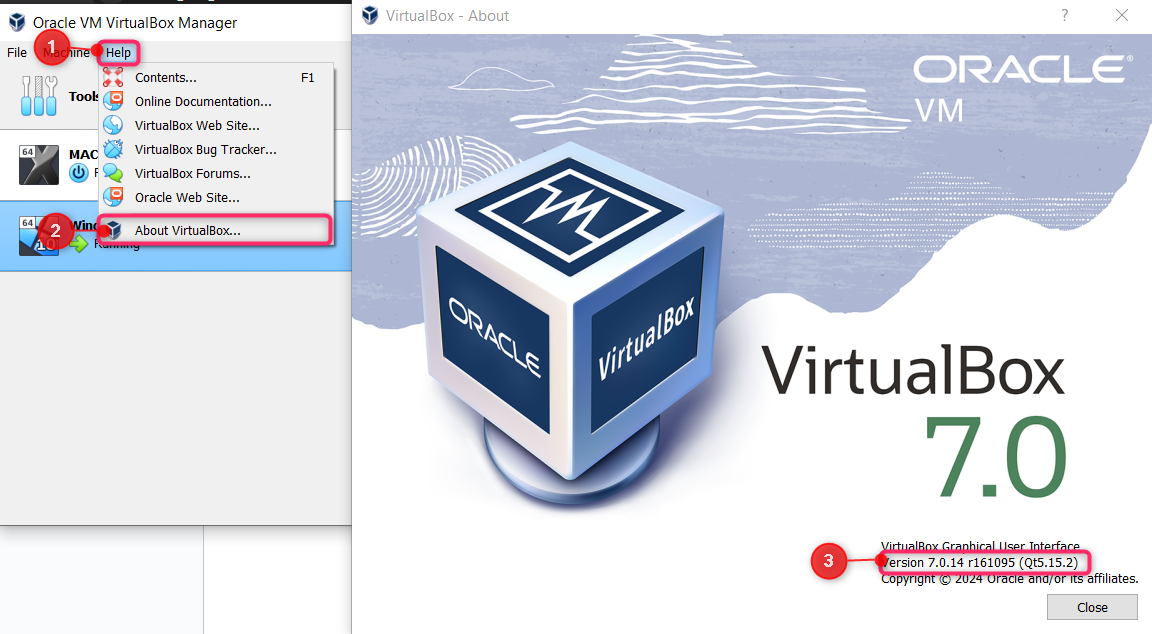
Open VirtualBox, click on the help button, and at the end of the dropdown menu, there is an option “About VirtualBox”, Click on that option. It is important to note the version of VirtualBox for installing the extension pack as it may cause problems in configuring the extension pack with an incompatible version of VirtualBox.
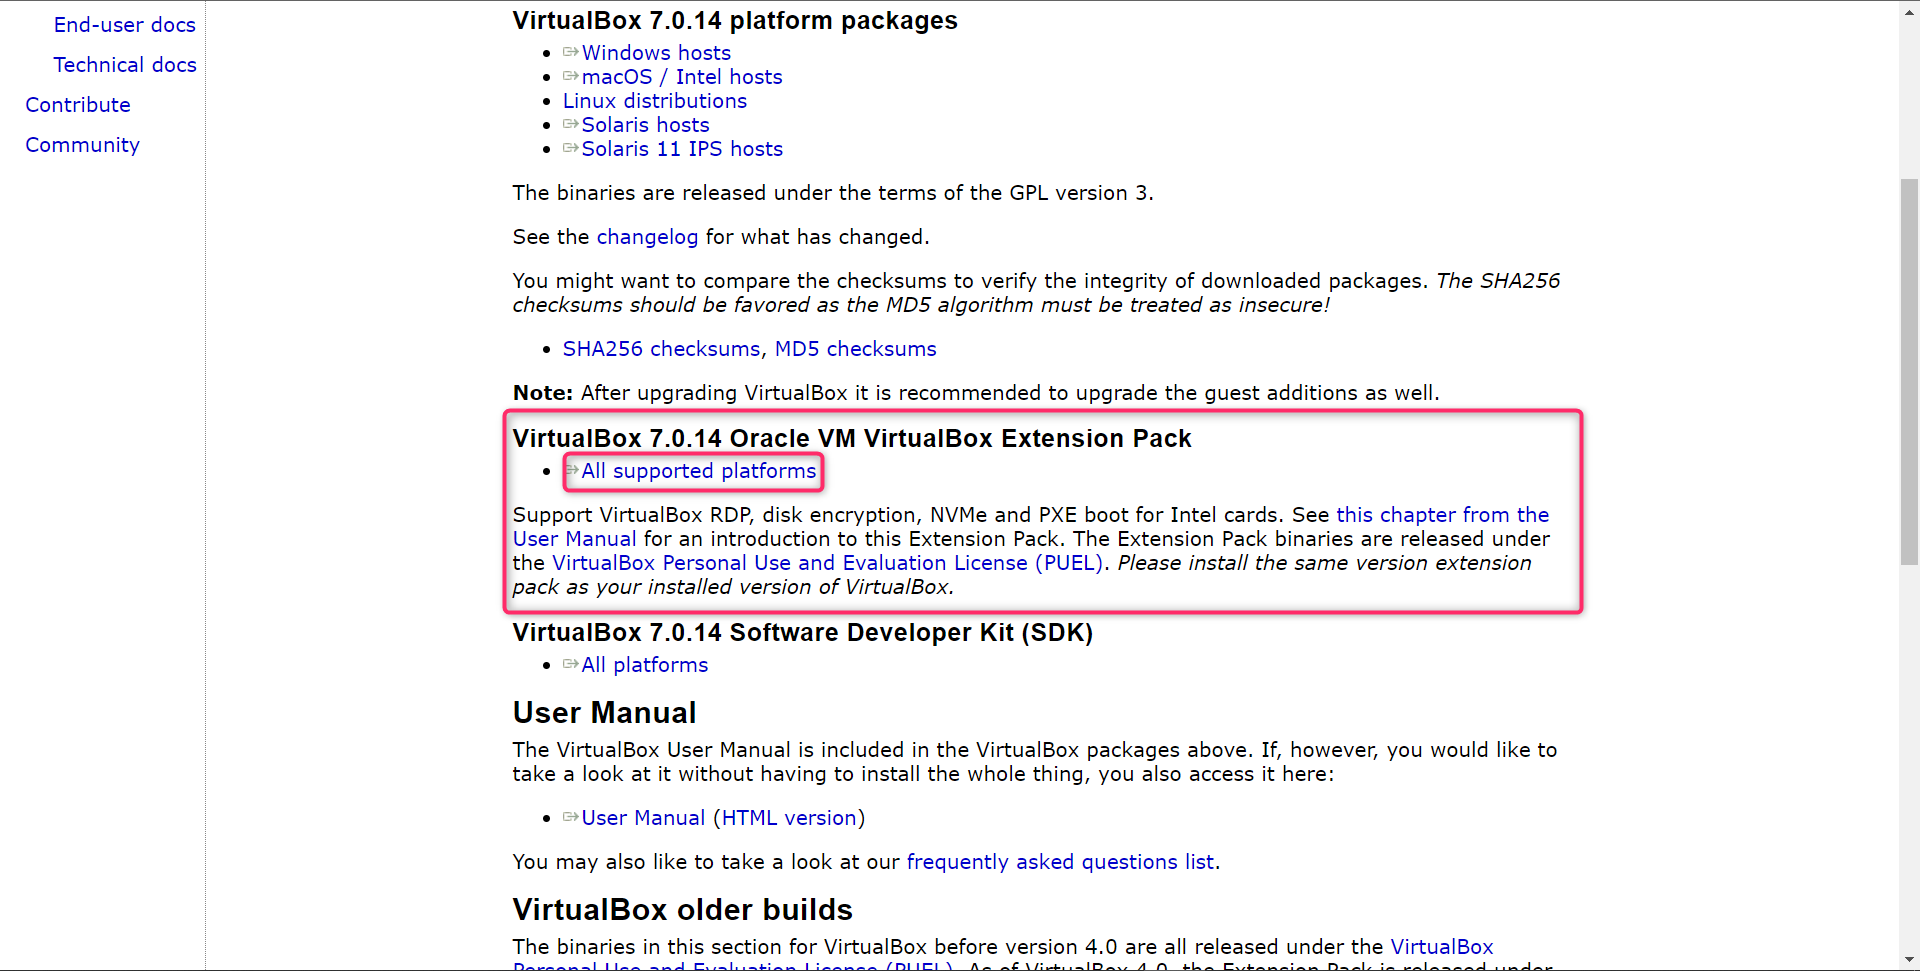
Step 2: Download the Extension Pack from the Oracle Downloads Page
Use any browser and search “VirtualBox Extension Pack download” and the top result will be for the Oracle downloads page or visit the following link:
https://www.virtualbox.org/wiki/Downloads
In the below window, locate a similar result on the downloads page and download that on the computer.
Step 3: Configure the Extension Pack with the VirtualBox
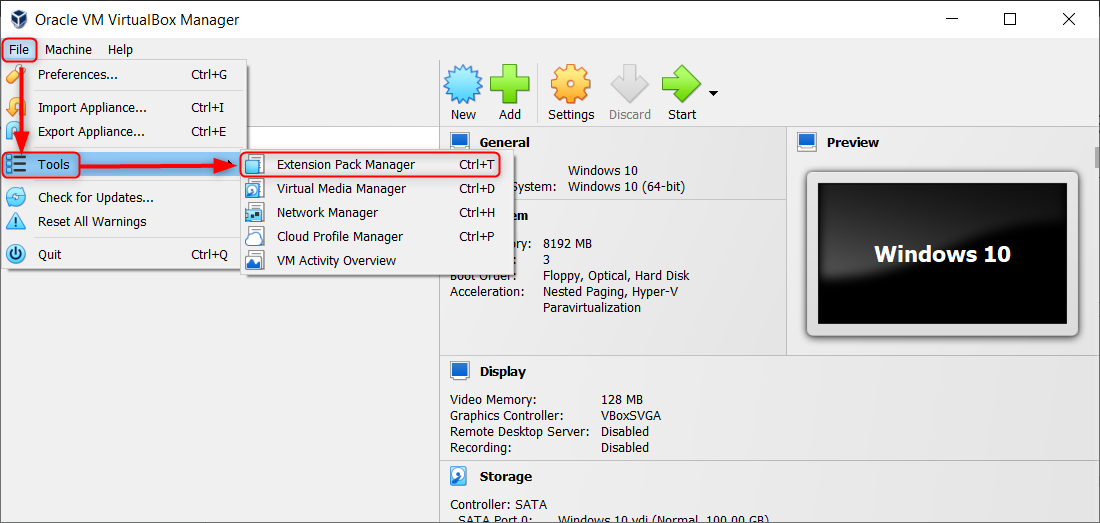
Power off any running virtual machine on the VirtualBox to ensure smooth installation for the extension pack. Click on the File menu, and from there hover the mouse over the “tools” option, and in the last menu select “Extension Pack Manager” or simply press “Ctrl + T” which is the shortcut key for Extension Pack Manager.
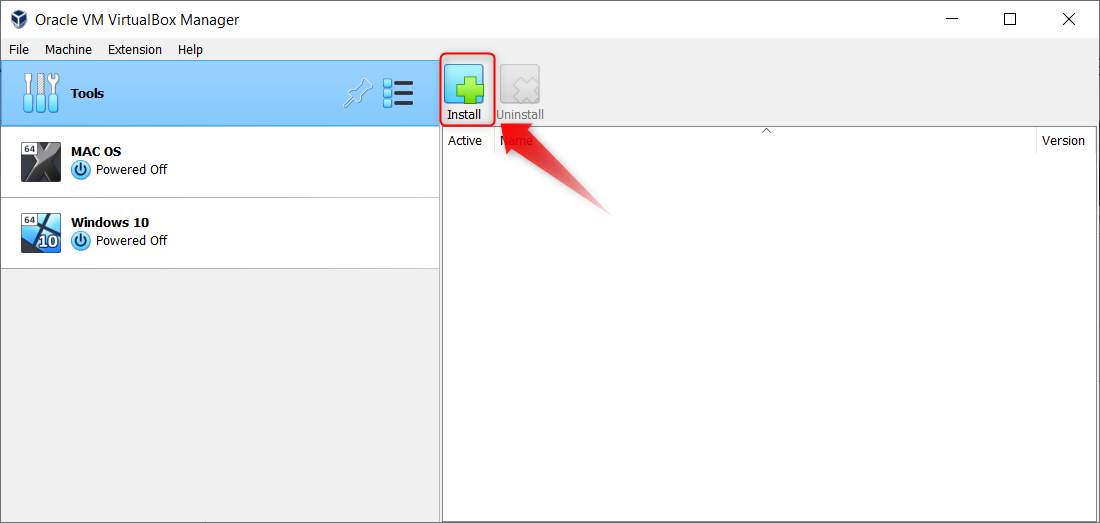
The extension pack manager will open up from where select the install option.
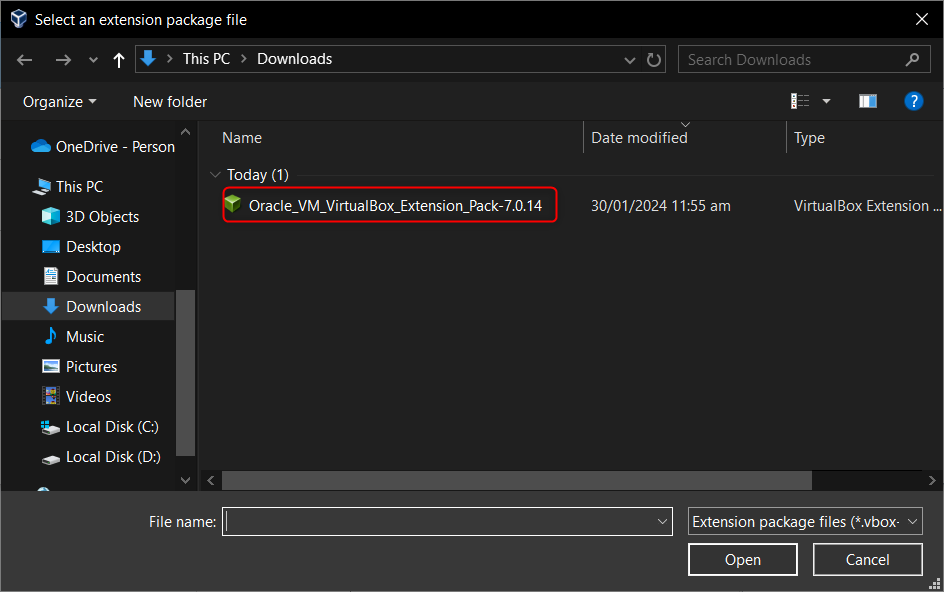
When you click on install browse the computer to locate the file downloaded for the Extension Pack.
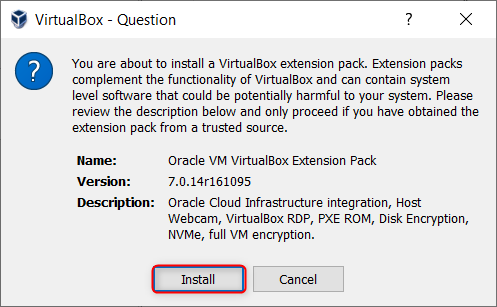
After selecting the extension pack, a dialog box will appear in which select the install button.
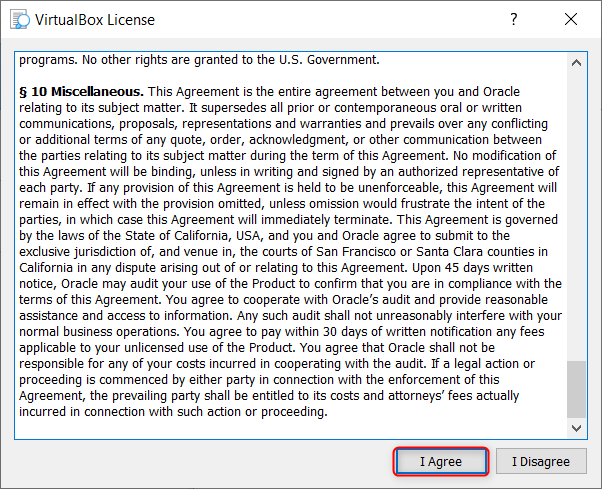
Then the license terms and agreements will appear, to which the user has to agree to allow the extension pack to access the required resources of the machine.
Step 4: Restart the VirtualBox
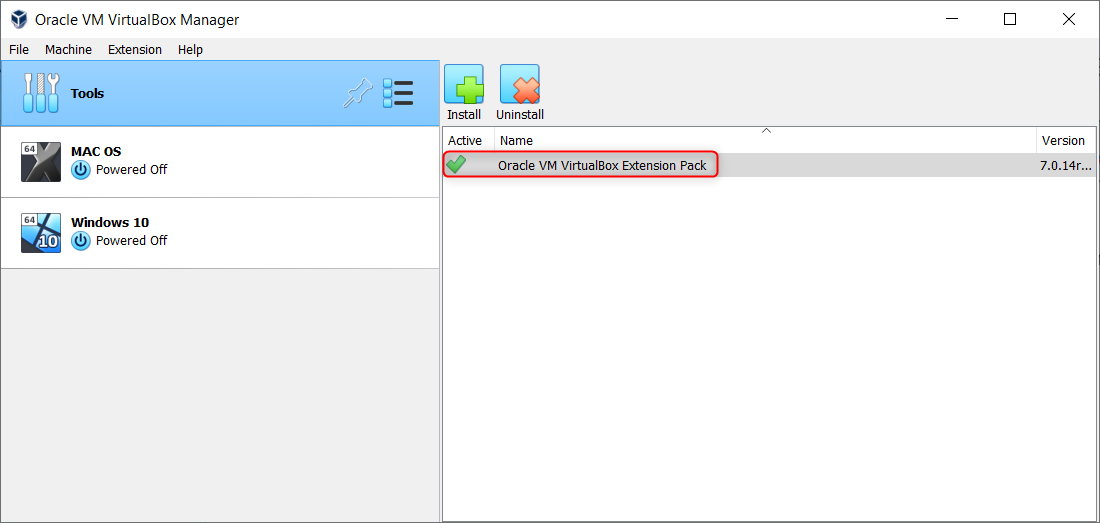
The extension pack has been installed and configured with the VirtualBox. For changes to take place it is advisable to restart the VirtualBox.
How to Configure the USB 2.0/3.0 Versions in VirtualBox?
For this step, a VM is needed with some guest OS(windows 10 in our case). The USB passthrough is done to permit the transfer of files between an external device(i.e. USB) and the guest OS. The USB 2.0/3.0 are faster versions and allow fast transfers.
To pass through a USB in VirtualBox, go through the steps given below.
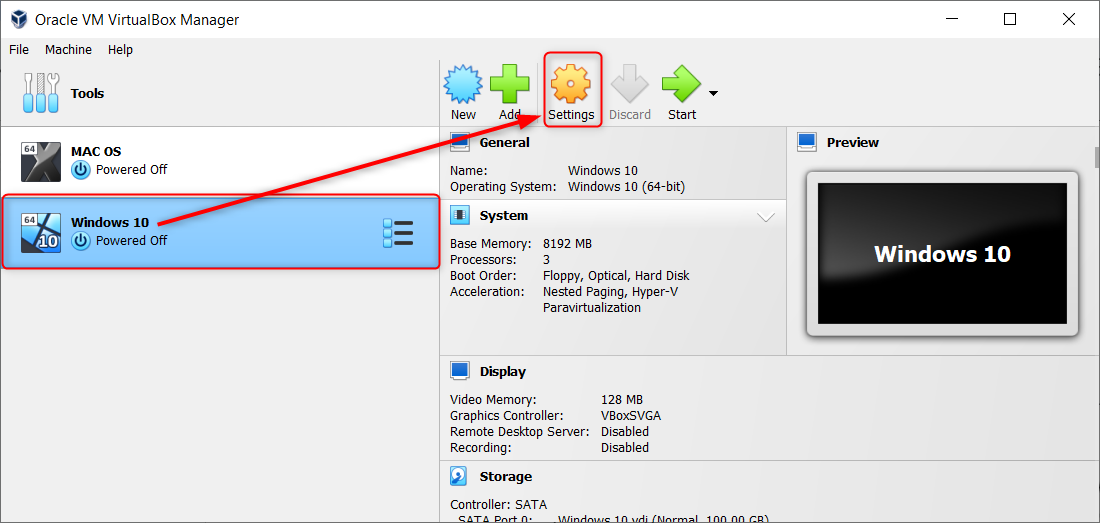
Step 1: Open the Settings of any VM
Select the VM with the guest OS you want to enable a USB passthrough in the VirtualBox and open the settings of that VM.
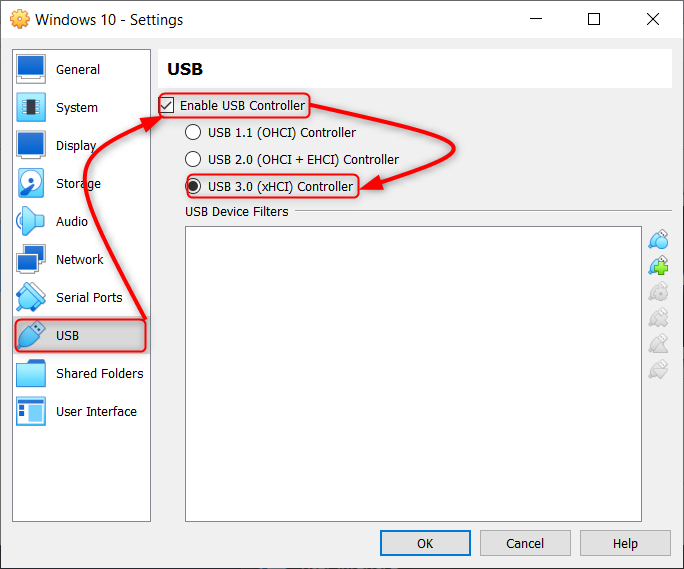
Step 2: Enable the USB Controller
In the settings open the “USB” settings and check the “Enable USB Controller” option. Then select the desired USB controller version. Here, the “USB 3.0” is selected.
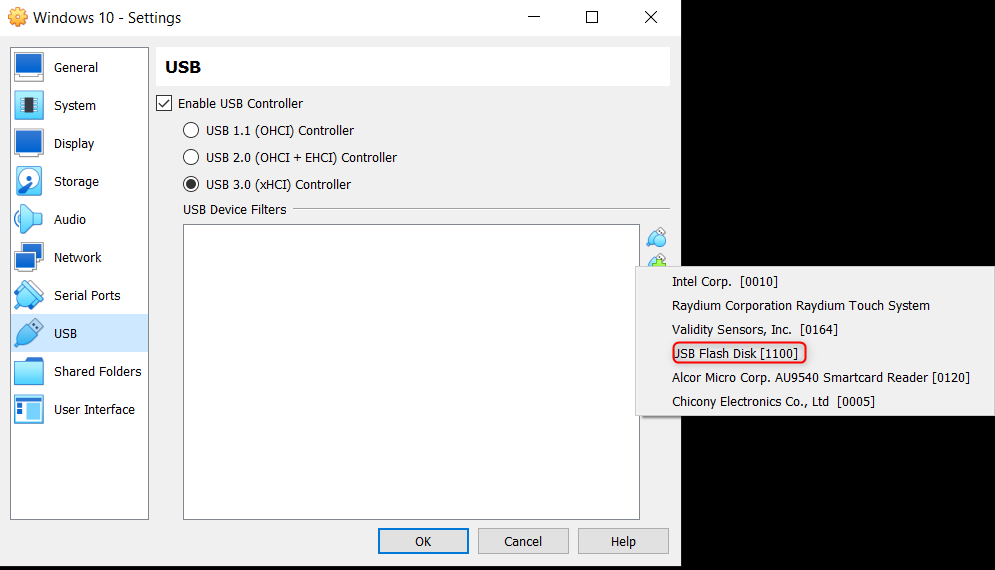
Step 3: Configure the USB
Attach the USB to the device and ensure it is working on the host machine. After that in the settings for the USB click the seconds USB connection icon and select the desired USB device. The menu will show all the devices connected to the Host Computer that can be passed through the VM.
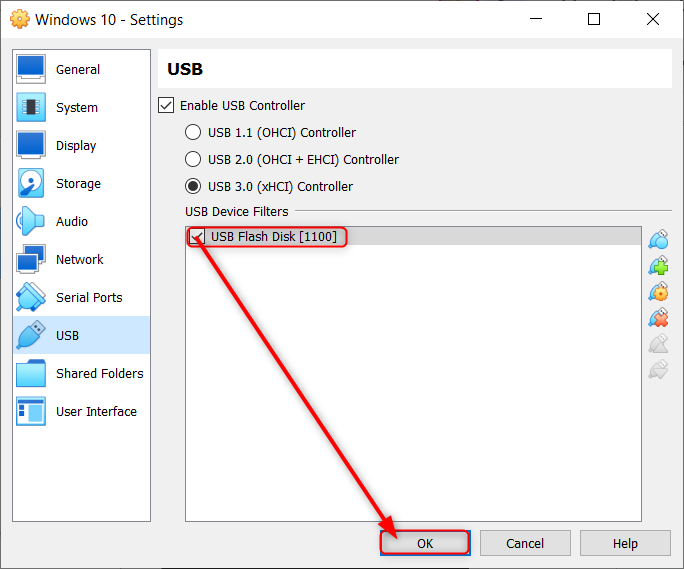
After that, the device will appear in the empty window pane, and proceed by clicking on the “OK” button by checking the box for the device.
Accessing the USB through VirtualBox USB passthrough
Now the USB has been configured with the VM so we can test it by running the VM. It is to be noted that the USB device must not be in use by the host machine before starting the VM.
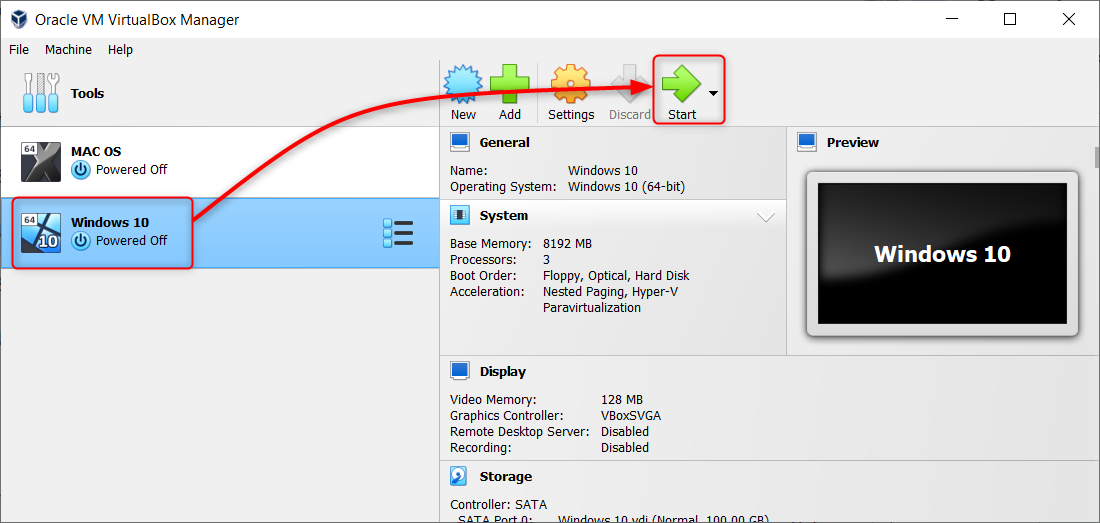
Step 1: Start the VM
Select the VM to which the USB has been configured and turn on the Virtual Machine:
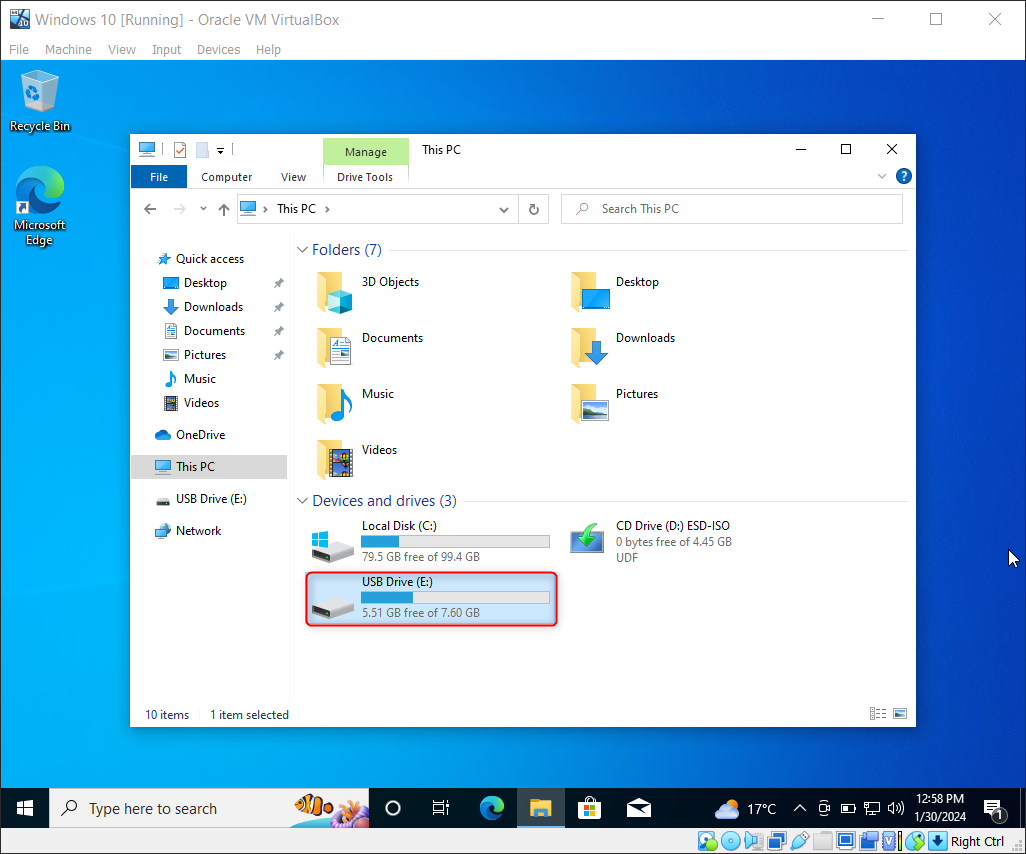
Step 2: Access the USB device in the File manager
Open the File Manager of the desired OS on the virtual machine and you will see the USB device in the menu.
Now, you can seamlessly transfer files between the USB device and the guest OS. There is an important point to note here when the USB is enabled for the virtual machine it is only available to the virtual machine and it won’t be visible to the host machine. To use it in the host machine, power off the VM and it can be accessed and used by the host machine.
Step 3: Disconnecting the USB device
Suppose there is a situation in which you need the USB device on the host machine but cannot power off the VM; in this case, you can go to the devices menu, then hover over USB, and unselect the USB device.
That’s all to enable the USB passthrough in the VirtualBox.
Conclusion
To enable the USB passthrough on VirtualBox first, install and configure the VirtualBox extension pack. After that enable the USB connection for the desired VM leveraging the advanced versions of USB 2.0/3.0 support. Then the transfer between the USB device and the guest operating system can be done smoothly. The process of disconnecting and connecting the USB is also demonstrated in the article.

