This article will comprehensively explain the process of setting up a new VM in VirtualBox and installing Windows 7 in that VM.
Before we start on the installation let’s have a look at how to set up a VM in the VirtualBox then we will have a look at the installation process.
How to set up a New VM on VirtualBox?
Before creating a VM and installing Windows 7 on VirtualBox, make sure to fulfill the prerequisites:
Window 7 ISO: Download the Windows 7 ISO file by clicking on the attached link(Official link provided by Microsoft for Windows 7):
After fulfilling the prerequisites, follow the below steps to create a VM in the VirtualBox.
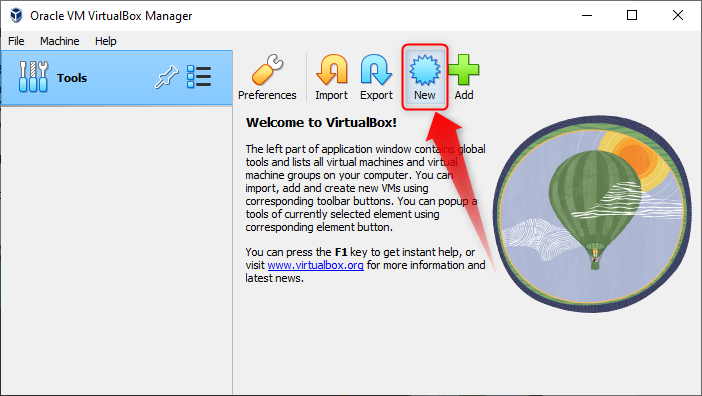
Step 1: Create a New VM
After opening the VirtualBox on your host operating system, click on the New button as highlighted below:
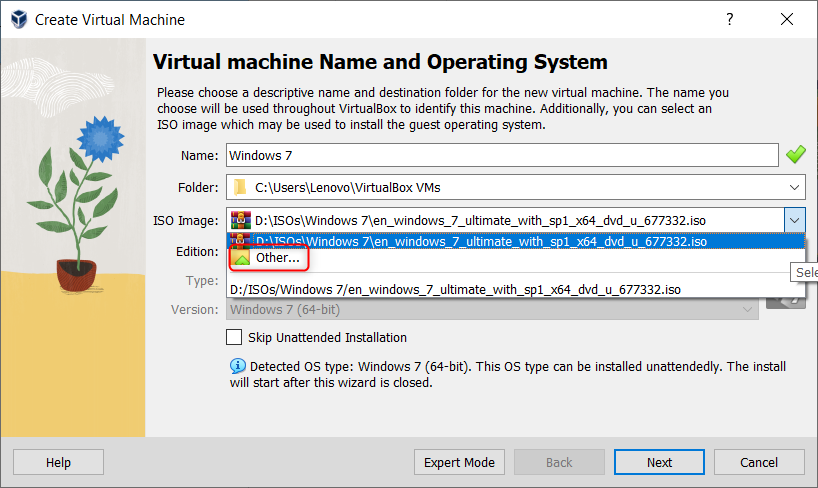
Step 2: Configure the Name for the VM
Type a suitable name for the VM and the VirtualBox will identify the OS you will be installing. In this case, we’ll be installing Windows 7 so typing Windows 7 as the name of the VirtualBox will set the architecture version 64-bit. If you want to install a 32-bit architecture, you must select manually:

Step 3: Configure the ISO file
To add the ISO file in the ISO image drop-down menu, select the other option to select the desired ISO file. A new window will appear where you can browse into the location where the image file is present:
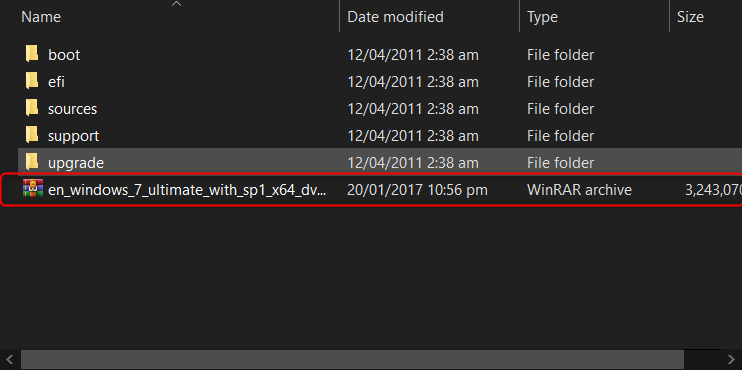
Then, choose the required ISO file from the folder and press the “Open” button:
Step 4: Manual Installation
In higher versions of VirtualBox, users can use the skip unattended installation feature to install a guest VM with preconfigured settings. It is advisable to install a VM with manual settings as it is more stable so select the “Skip Unattended Installation” checkbox and press the Next button”

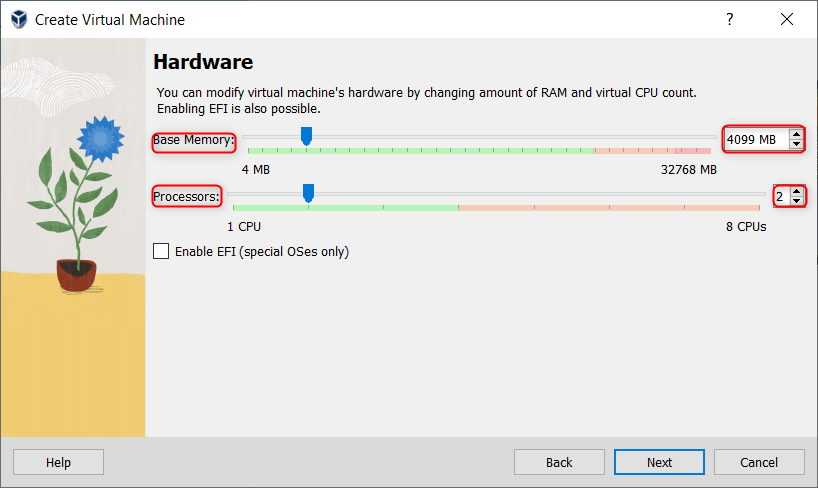
Step 5: Dedicate the RAM and Processors to the VM
Specify the amount of RAM to the VM depending upon the RAM of the host machine. For example, if your host machine has a RAM of 8 GB you can dedicate 4 GB to the host OS. It is not that the guest OS will take the 4GB all at once instead it’s the maximum limit it is allowed to use. Also, specify the processors that the guest VM can use:
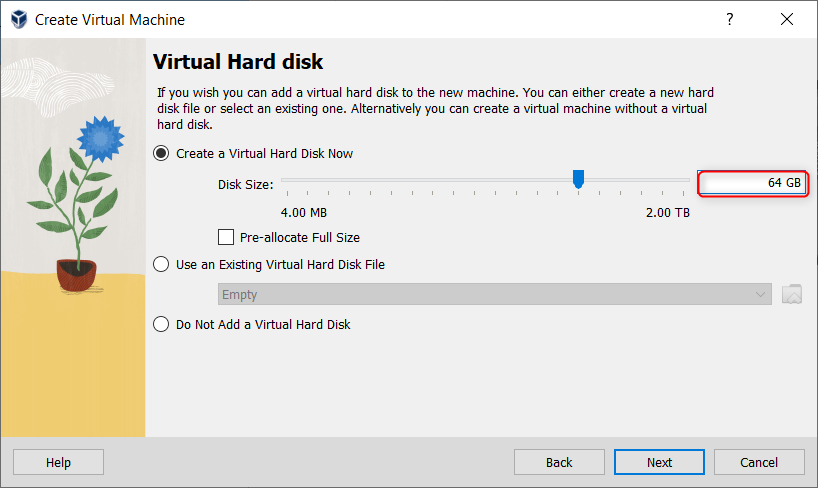
Step 6: Dedicate Space to the Virtual Hard Disk
Specify some space as a Virtual Hard Drive of a Virtual Machine. The space is allocated dynamically, which means that it won’t use it all at once or you can specify a fixed size that is more stable depending on the host machine:
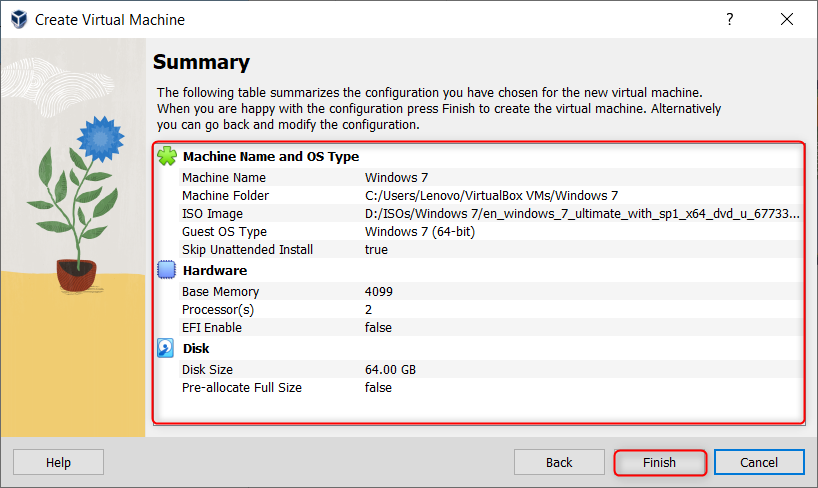
Step 7: Review the settings for the VM
Now all has been set up and a window will appear on which the user can review all the settings for the VM to be created. After the review, click on Finish:
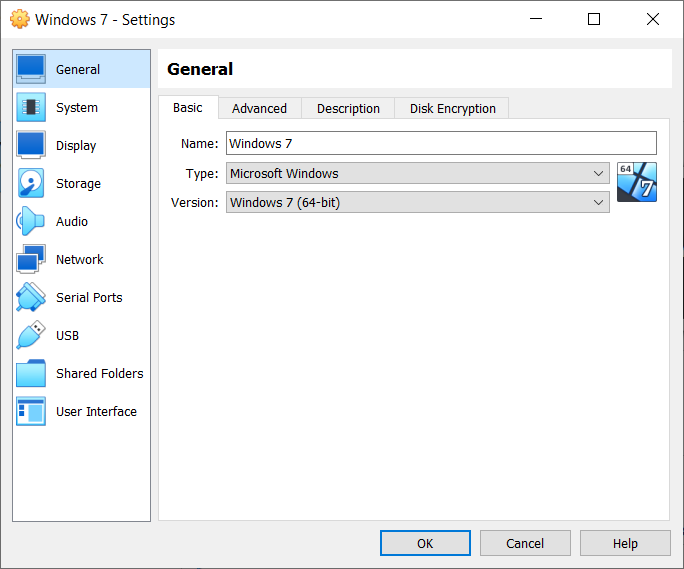
Step 8: Additional Configurations
The VM has been created and the users have the agility to change the required settings for the VM:
After this, proceed to the installation of Windows 7 on the VM.
How to Install Windows 7 in VirtualBox?
The Virtual Machine has been successfully set up and we can begin our installation of Windows 7 on this VM. Follow the steps below for the installation.
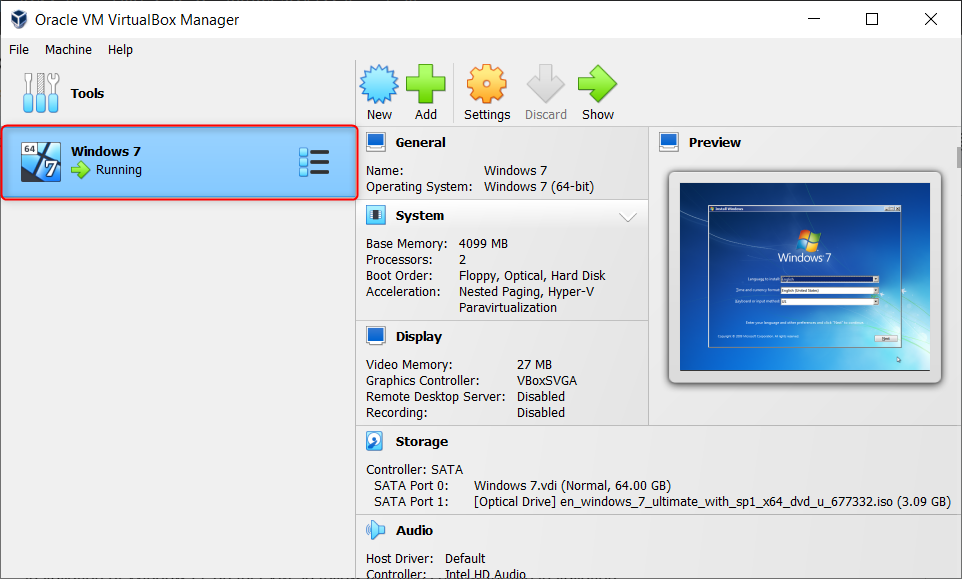
Step 1: Run the VM created in the above steps
Start the machine and once it is in the running position, a green arrow will appear with “Running” text indicating the machine has started:
Step 2: Set the Basics for the Windows
Choose the language format, currency and the essentials then click on Next:

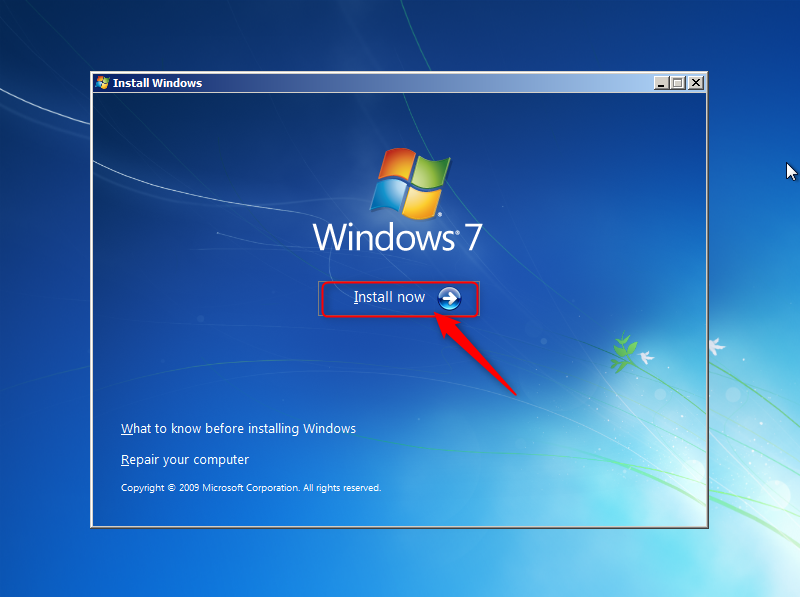
Step 3: Begin the Installation
Next, the Install Now button will appear, click on it to start the Windows 7 installation process:
Step 4: Accept the License and Term Agreements
Accept the license and term agreements for the installation of services of Windows 7 and then click on the Next button:

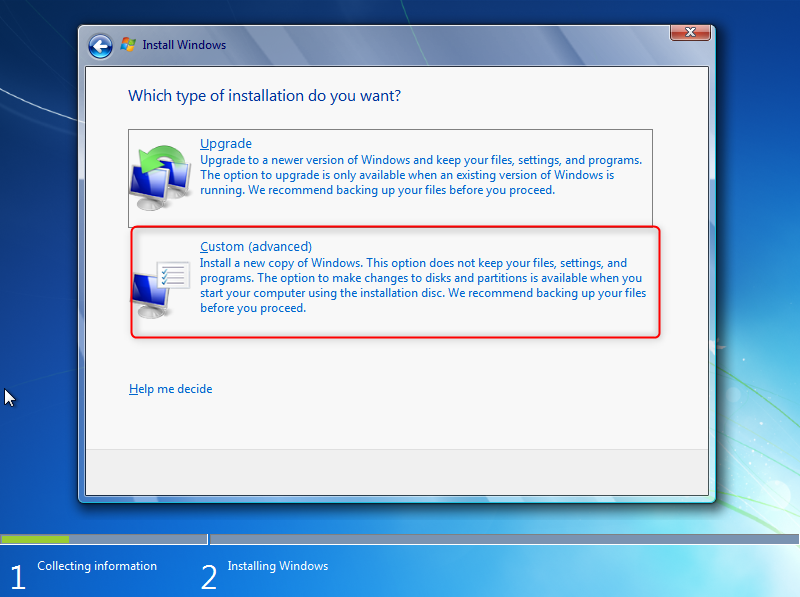
Step 5: Configure Installation Type
It is advisable to select the custom installation button for a proper and clean installation of windows:
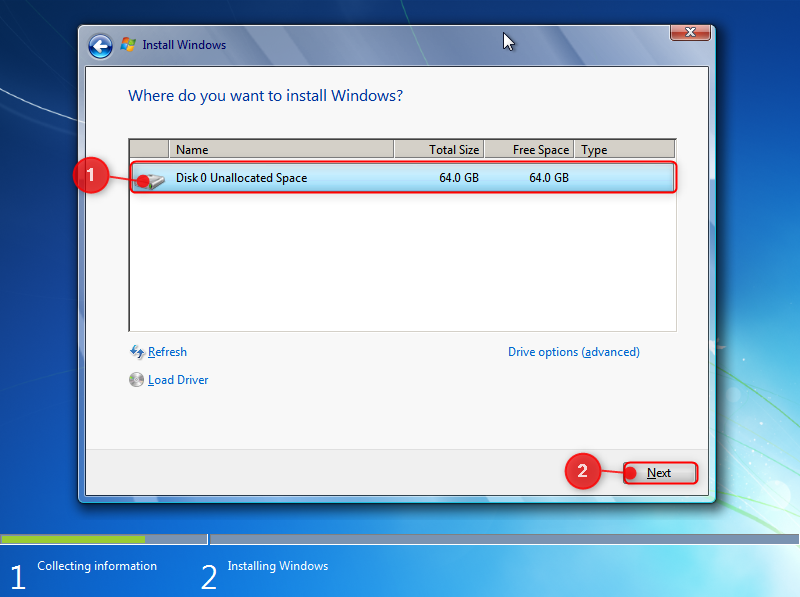
Step 6: Specify the Drive where you want to install
Select the drive that was specified for the VM in the creation phase to install Windows in that drive:
Step 7: Wait for the Setup
It will take some time for the setup wizard to install Windows files:

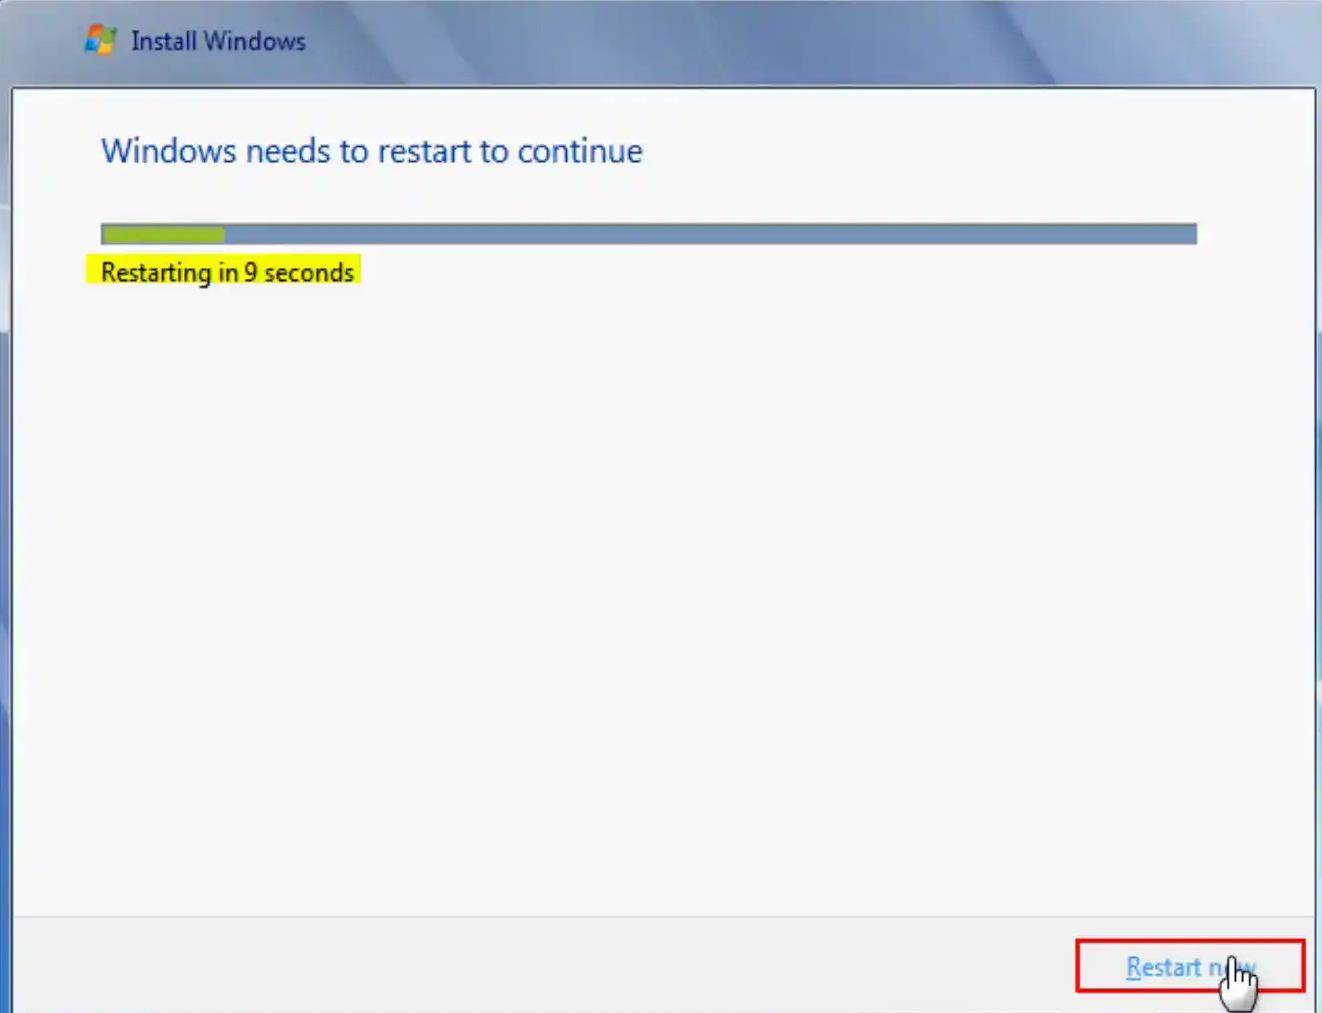
Step 8: Restart the VM
After the files for the Windows have been installed, wait for the computer time scheduled for the restart or click on the Restart Now button:
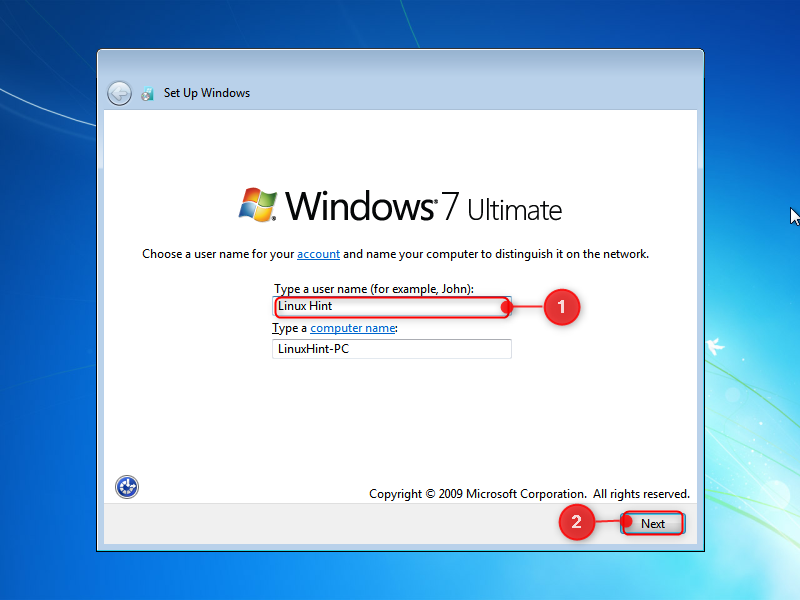
Step 9: Specify a Username and Computer Name
Specify the desired username and computer name you want to see whenever the computer starts and then click on Next:
Step 10: Specify a Password
Here, specify a password for the Windows that will be used whenever you start the machine. After specifying a strong password and a hint for it, click on the Next button:

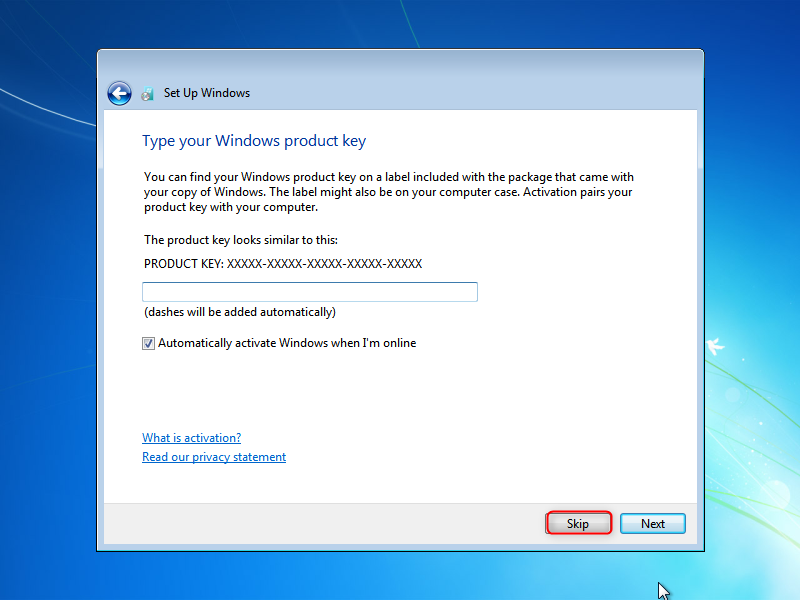
Step 11: Specify the Product Key for the Windows
In this step, specify the Product Key for the Windows installation else click on the Skip button to resume normal installation:
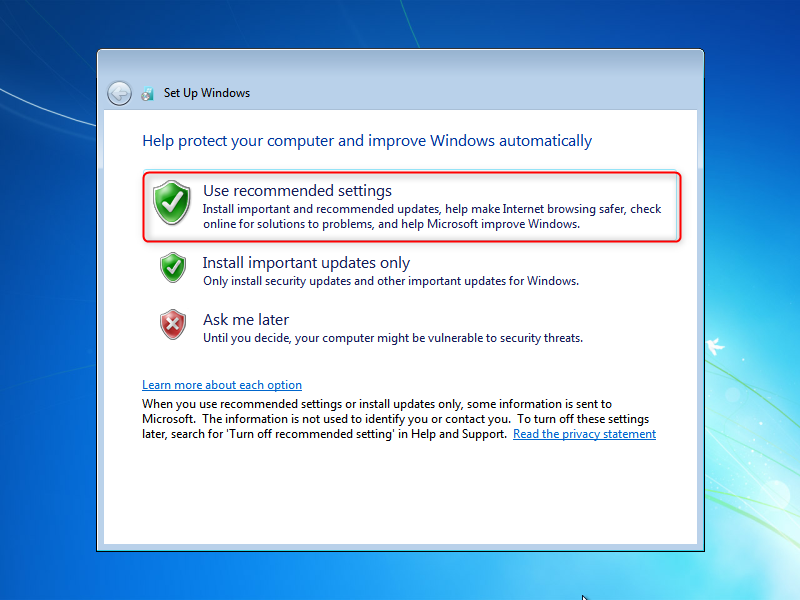
Step 12: Windows Update Settings
It is advisable to proceed with the recommended settings as it would look upon the internet and update the versions as soon as they are uploaded:
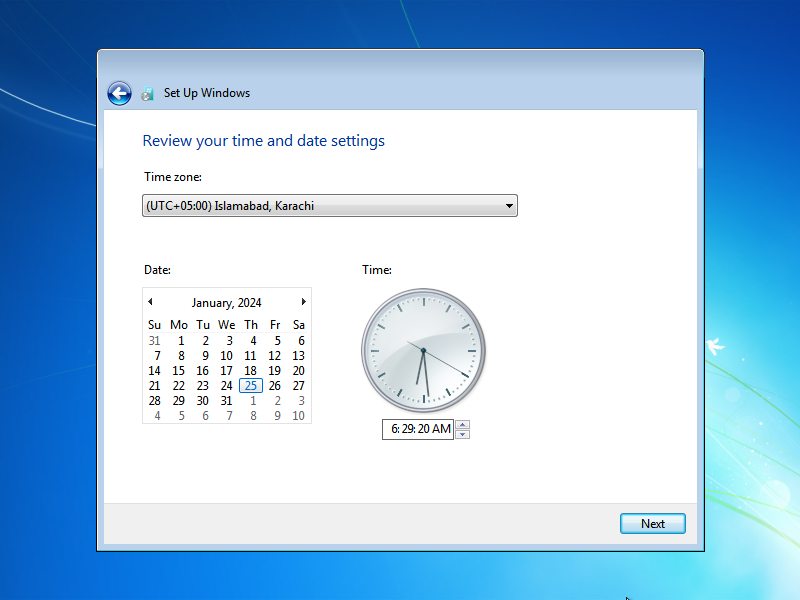
Step 13: Set the Date and Time
Now, select the time zone and the date and time will be adjusted as per the time zone:
Step 14: Select the Network for your Computer
Here you can select the desired network depending on the requirement of the computer and who uses the computer; we are going with the work network:

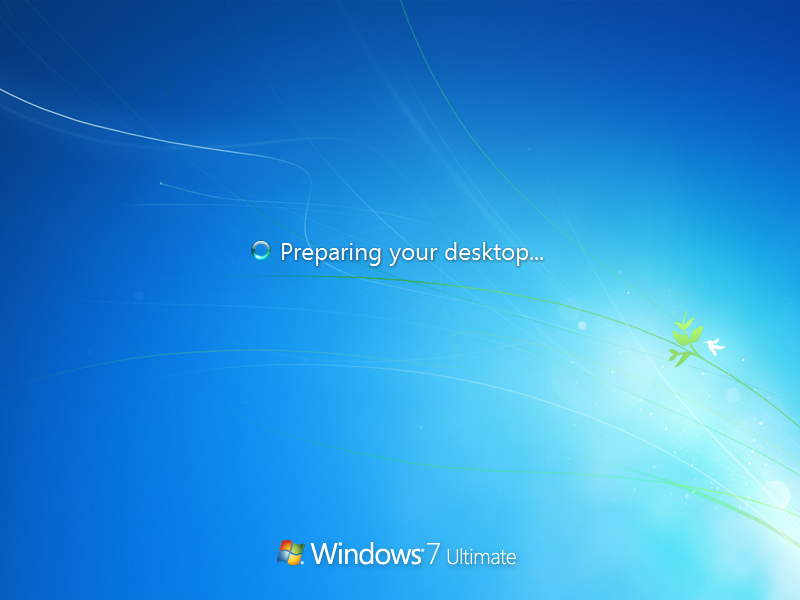
Step 15: Wait for the Windows to load the Desktop
Lastly, wait for the Windows to prepare and load the desktop for use:
Step 16: Check for Window Properties
You can check on the window properties by opening the properties of My Computer:

Great! You have completed the step-by-step procedure and installed a Windows 7 VM in your host machine and can now run Windows 7 on your host OS.
Conclusion
To install Windows 7 in VirtualBox first create a virtual machine, provide ISO, and specify the RAM and ROM for the guest machine. After that, run the VM and the Windows installation will start from the ISO file specified. Follow the step-by-step guide, configure the settings, and the Windows 7 will be successfully installed in VirtualBox.