In this article, you will learn how to search for strings in packets using Wireshark. There are multiple options associated with string searches. Before going further in this article, you should have a general knowledge of Wireshark Basic.
Assumptions
A Wireshark capture be in one state; either saved/stopped or live. We can perform string search in live capture also but for better and clear understanding we will use saved capture to do this.
Step 1: Open Saved Capture
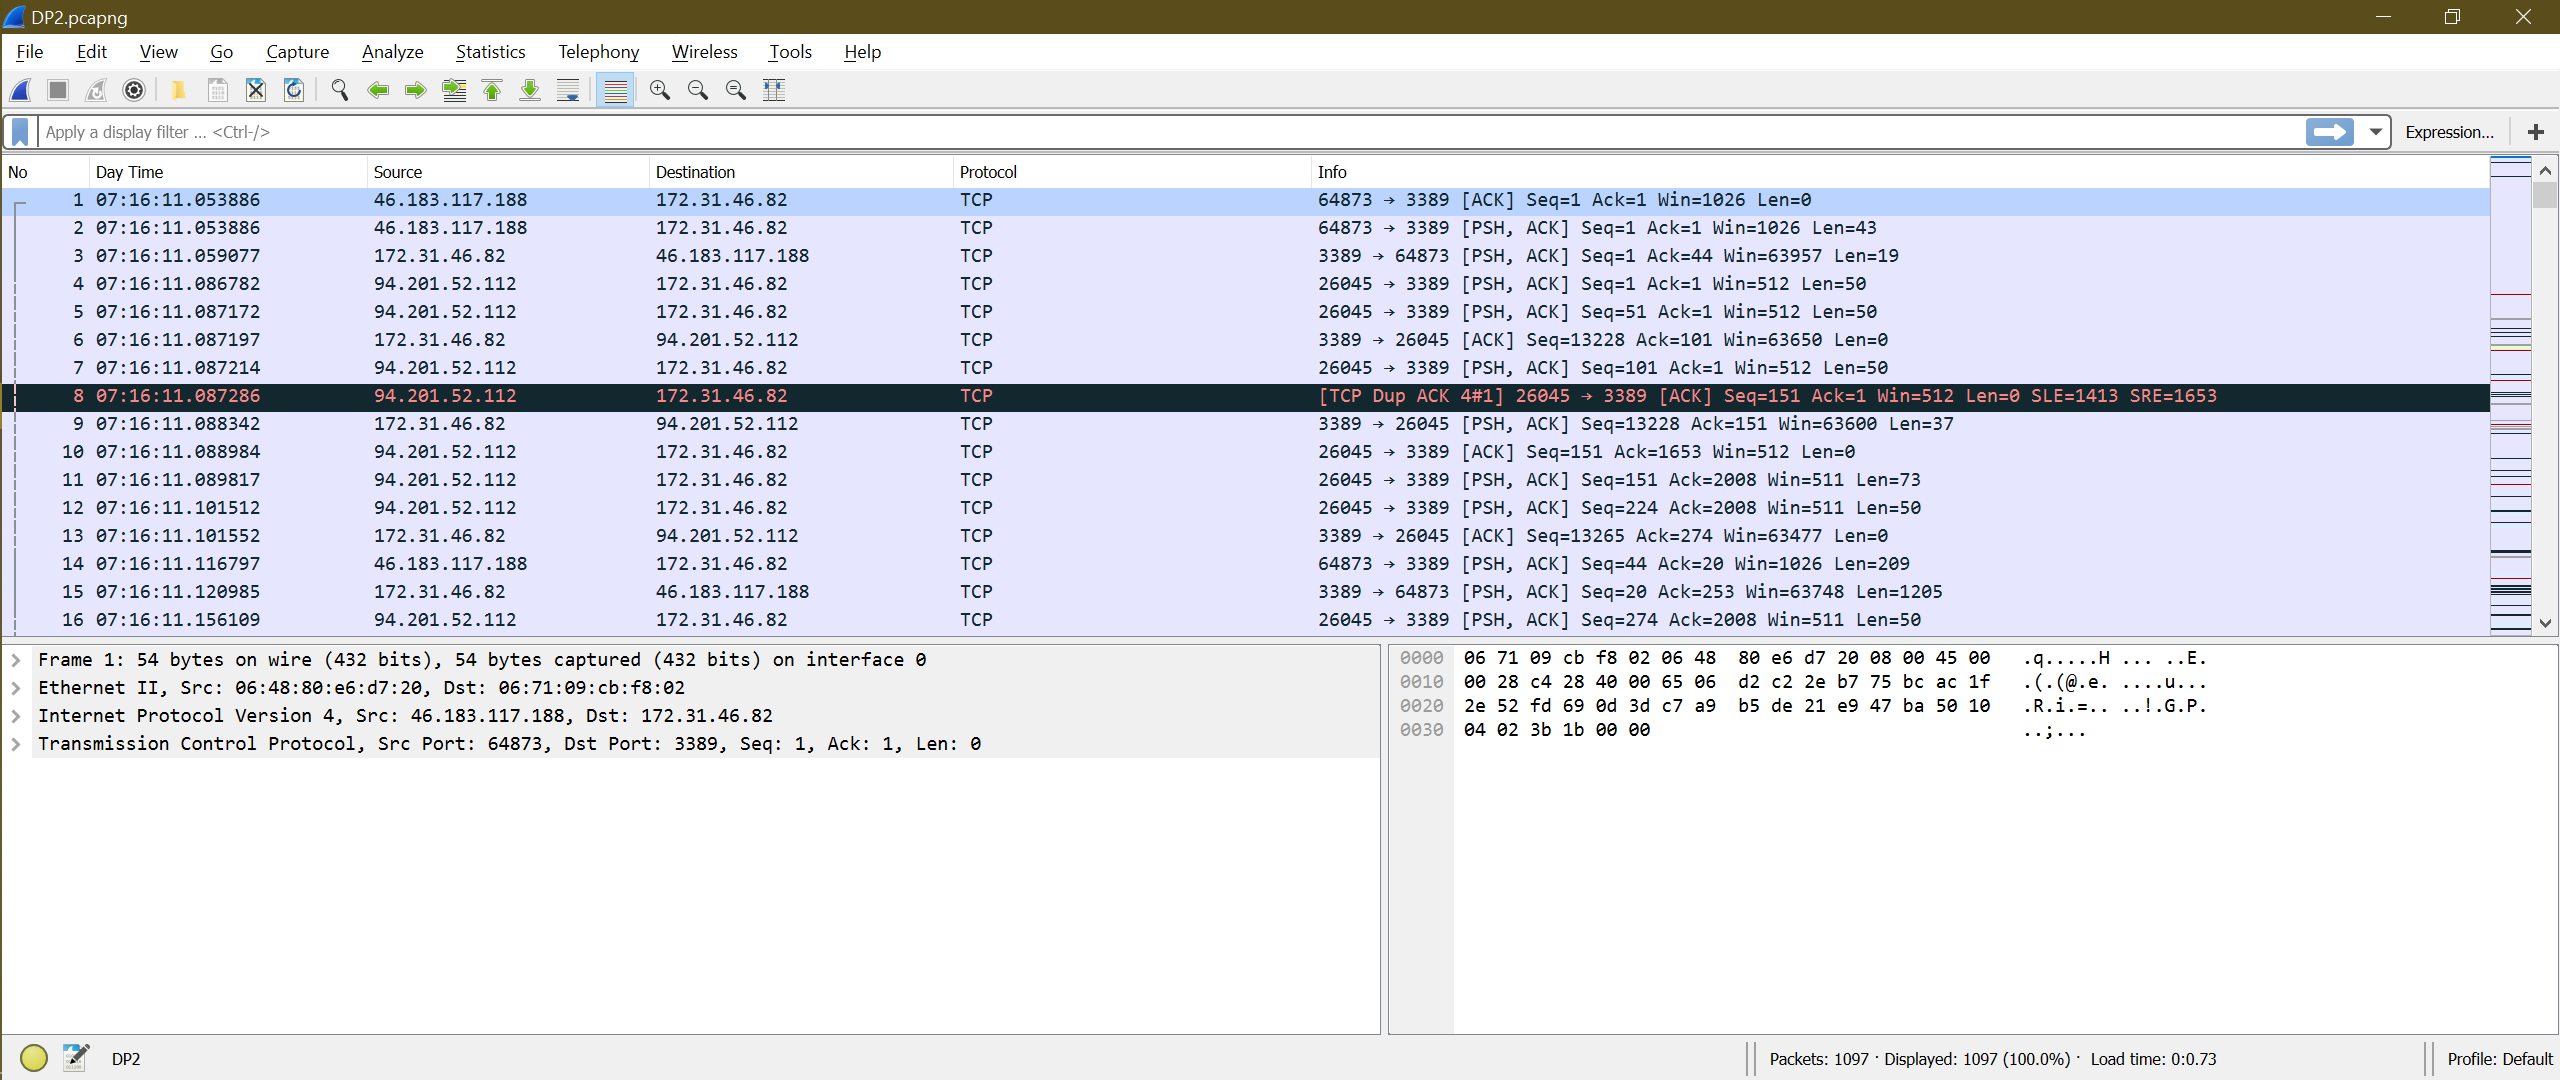
First, open a saved capture in Wireshark. It will look like this:
Step 2: Open Search Option
Now, we need a search option. There two ways to open that option:
- Use the keyboard shortcut “Ctrl+F”
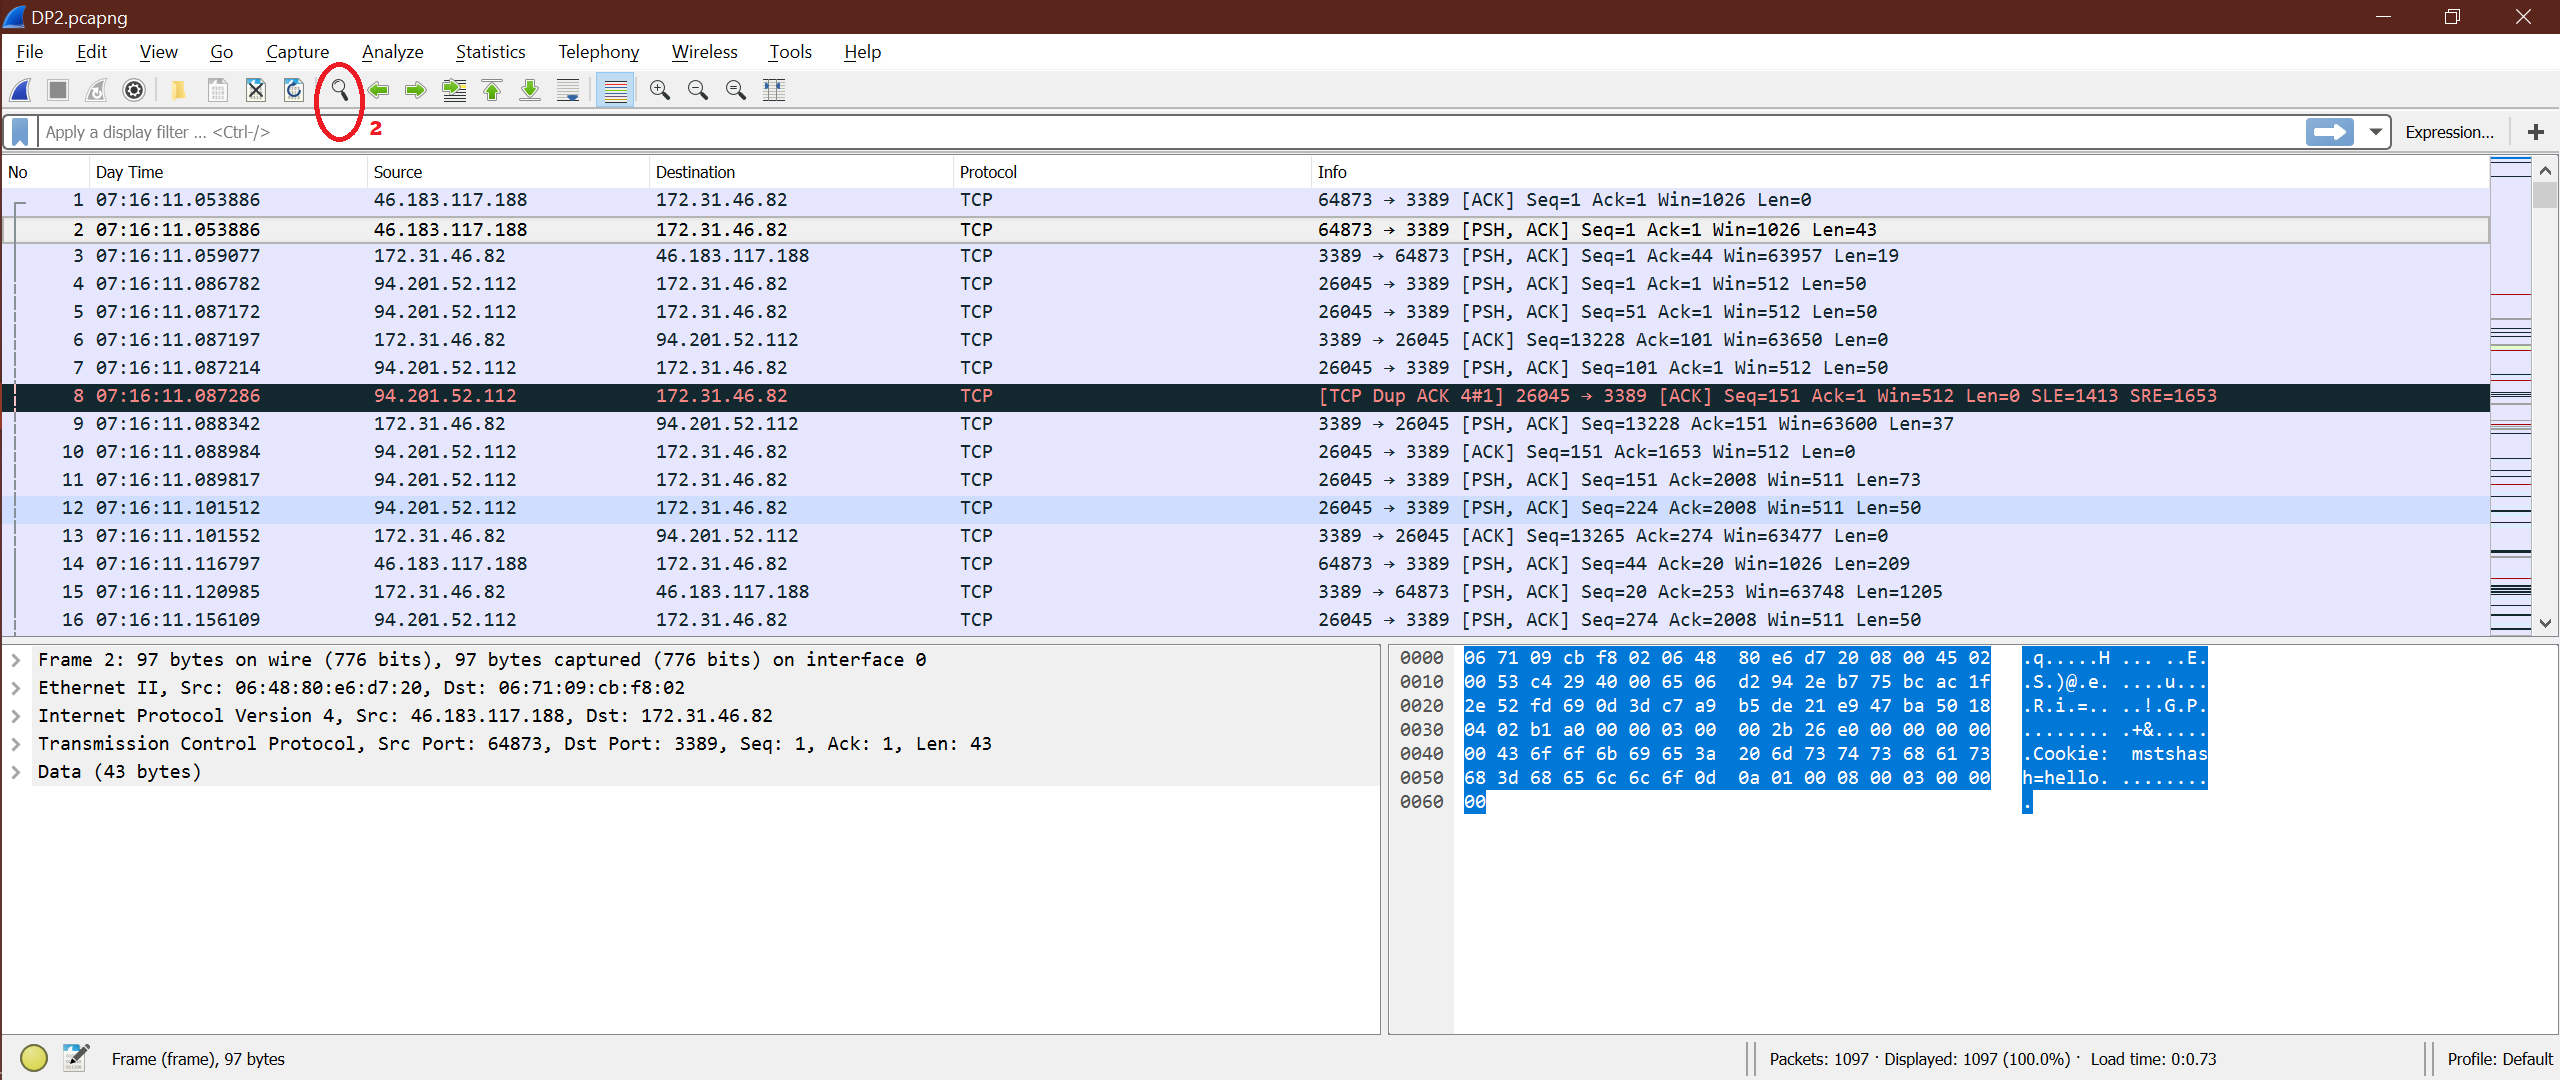
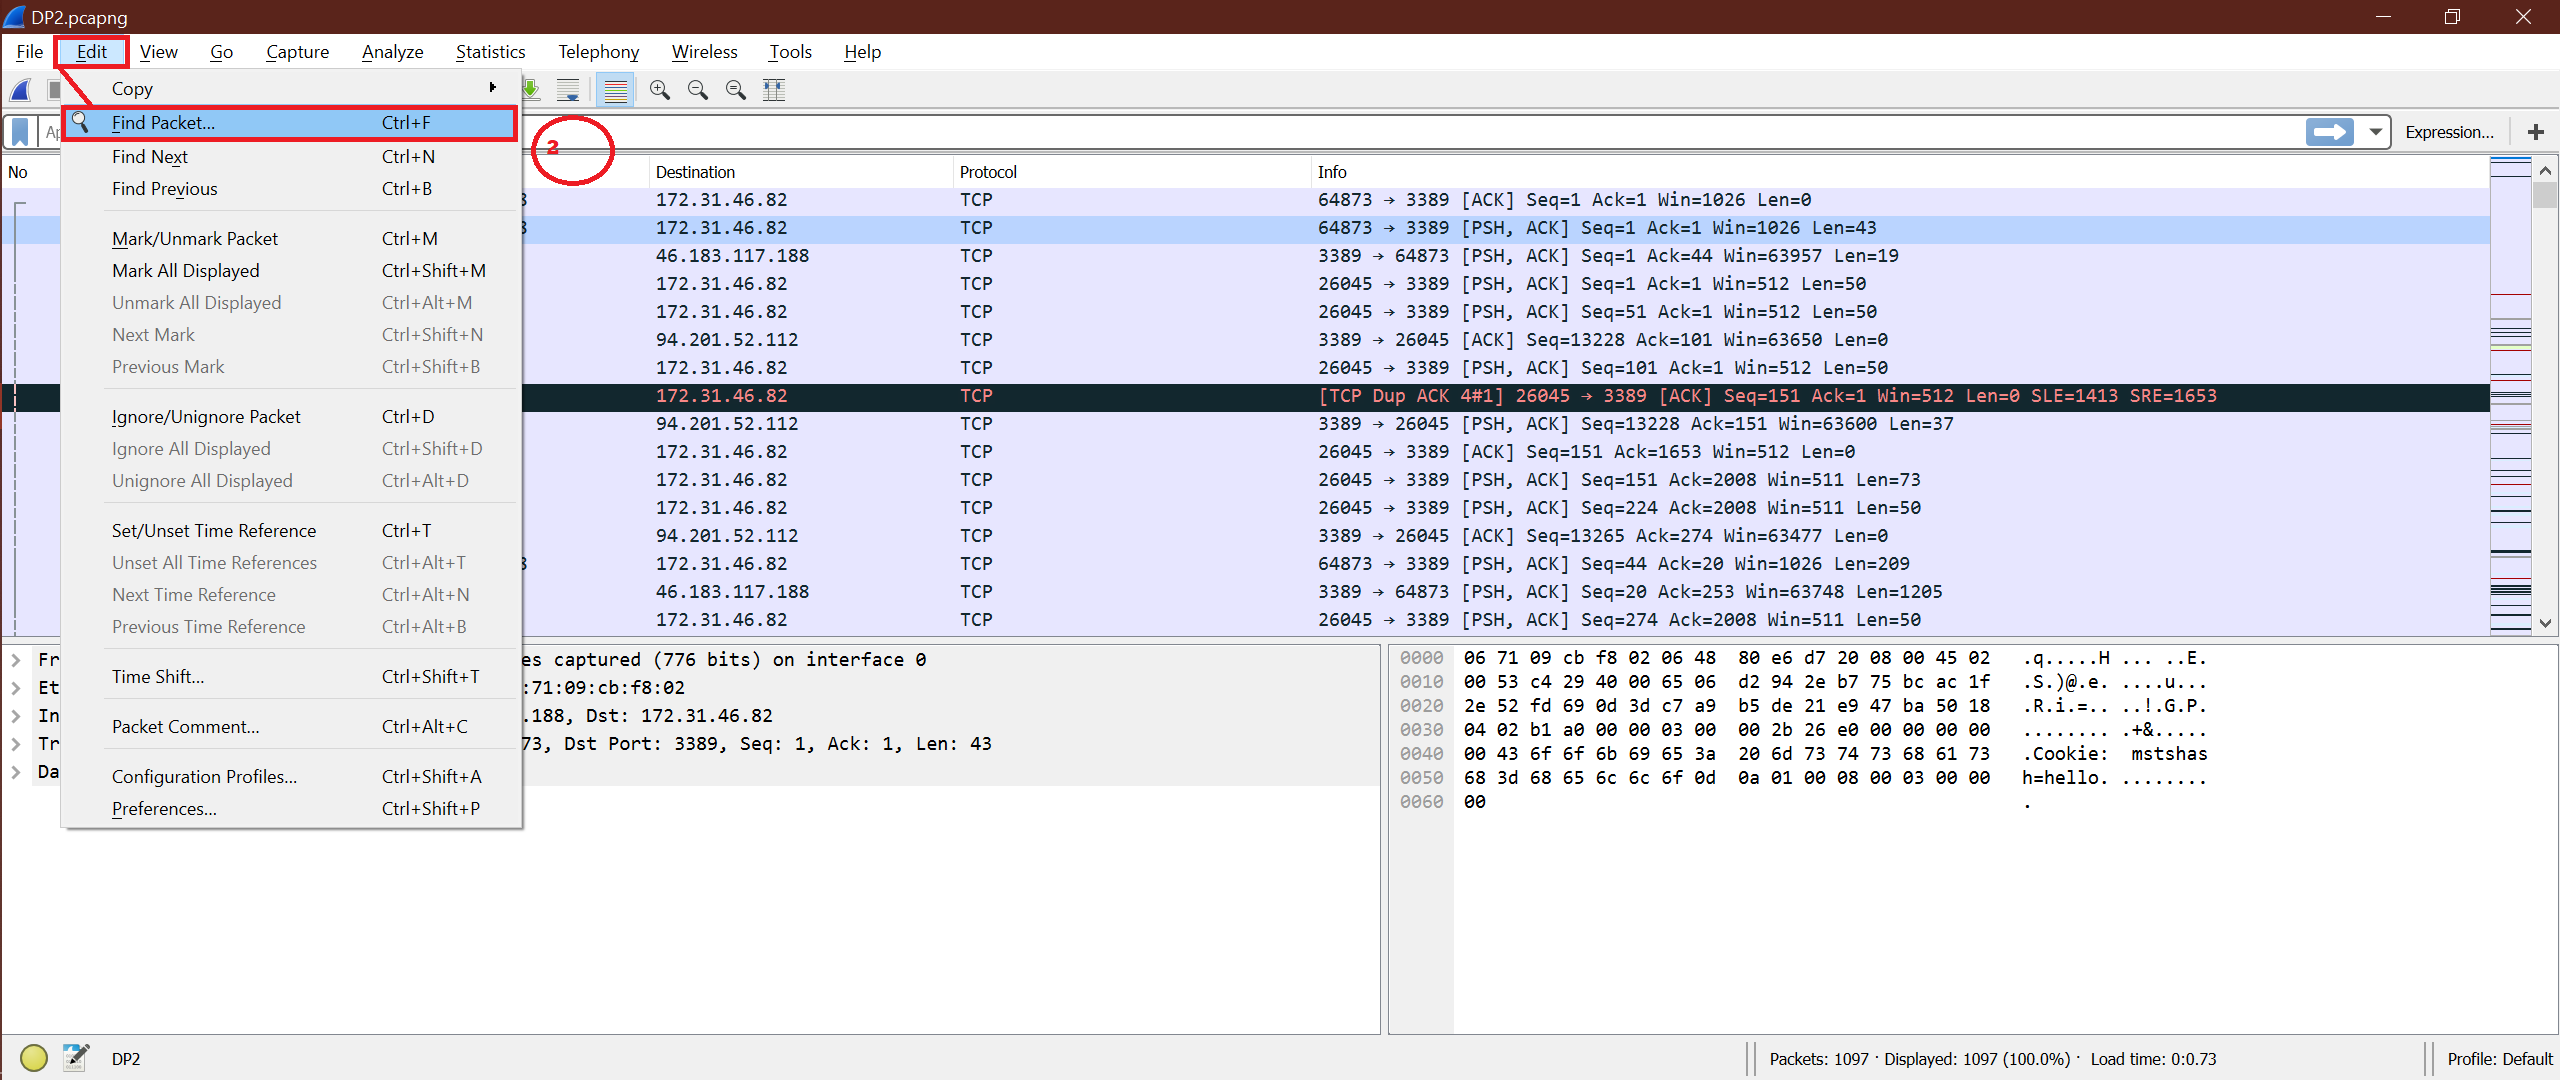
- Click “Find a packet” either from the outside icon or go to “Edit->Find Packet”
Check out the screenshots to view the second option.
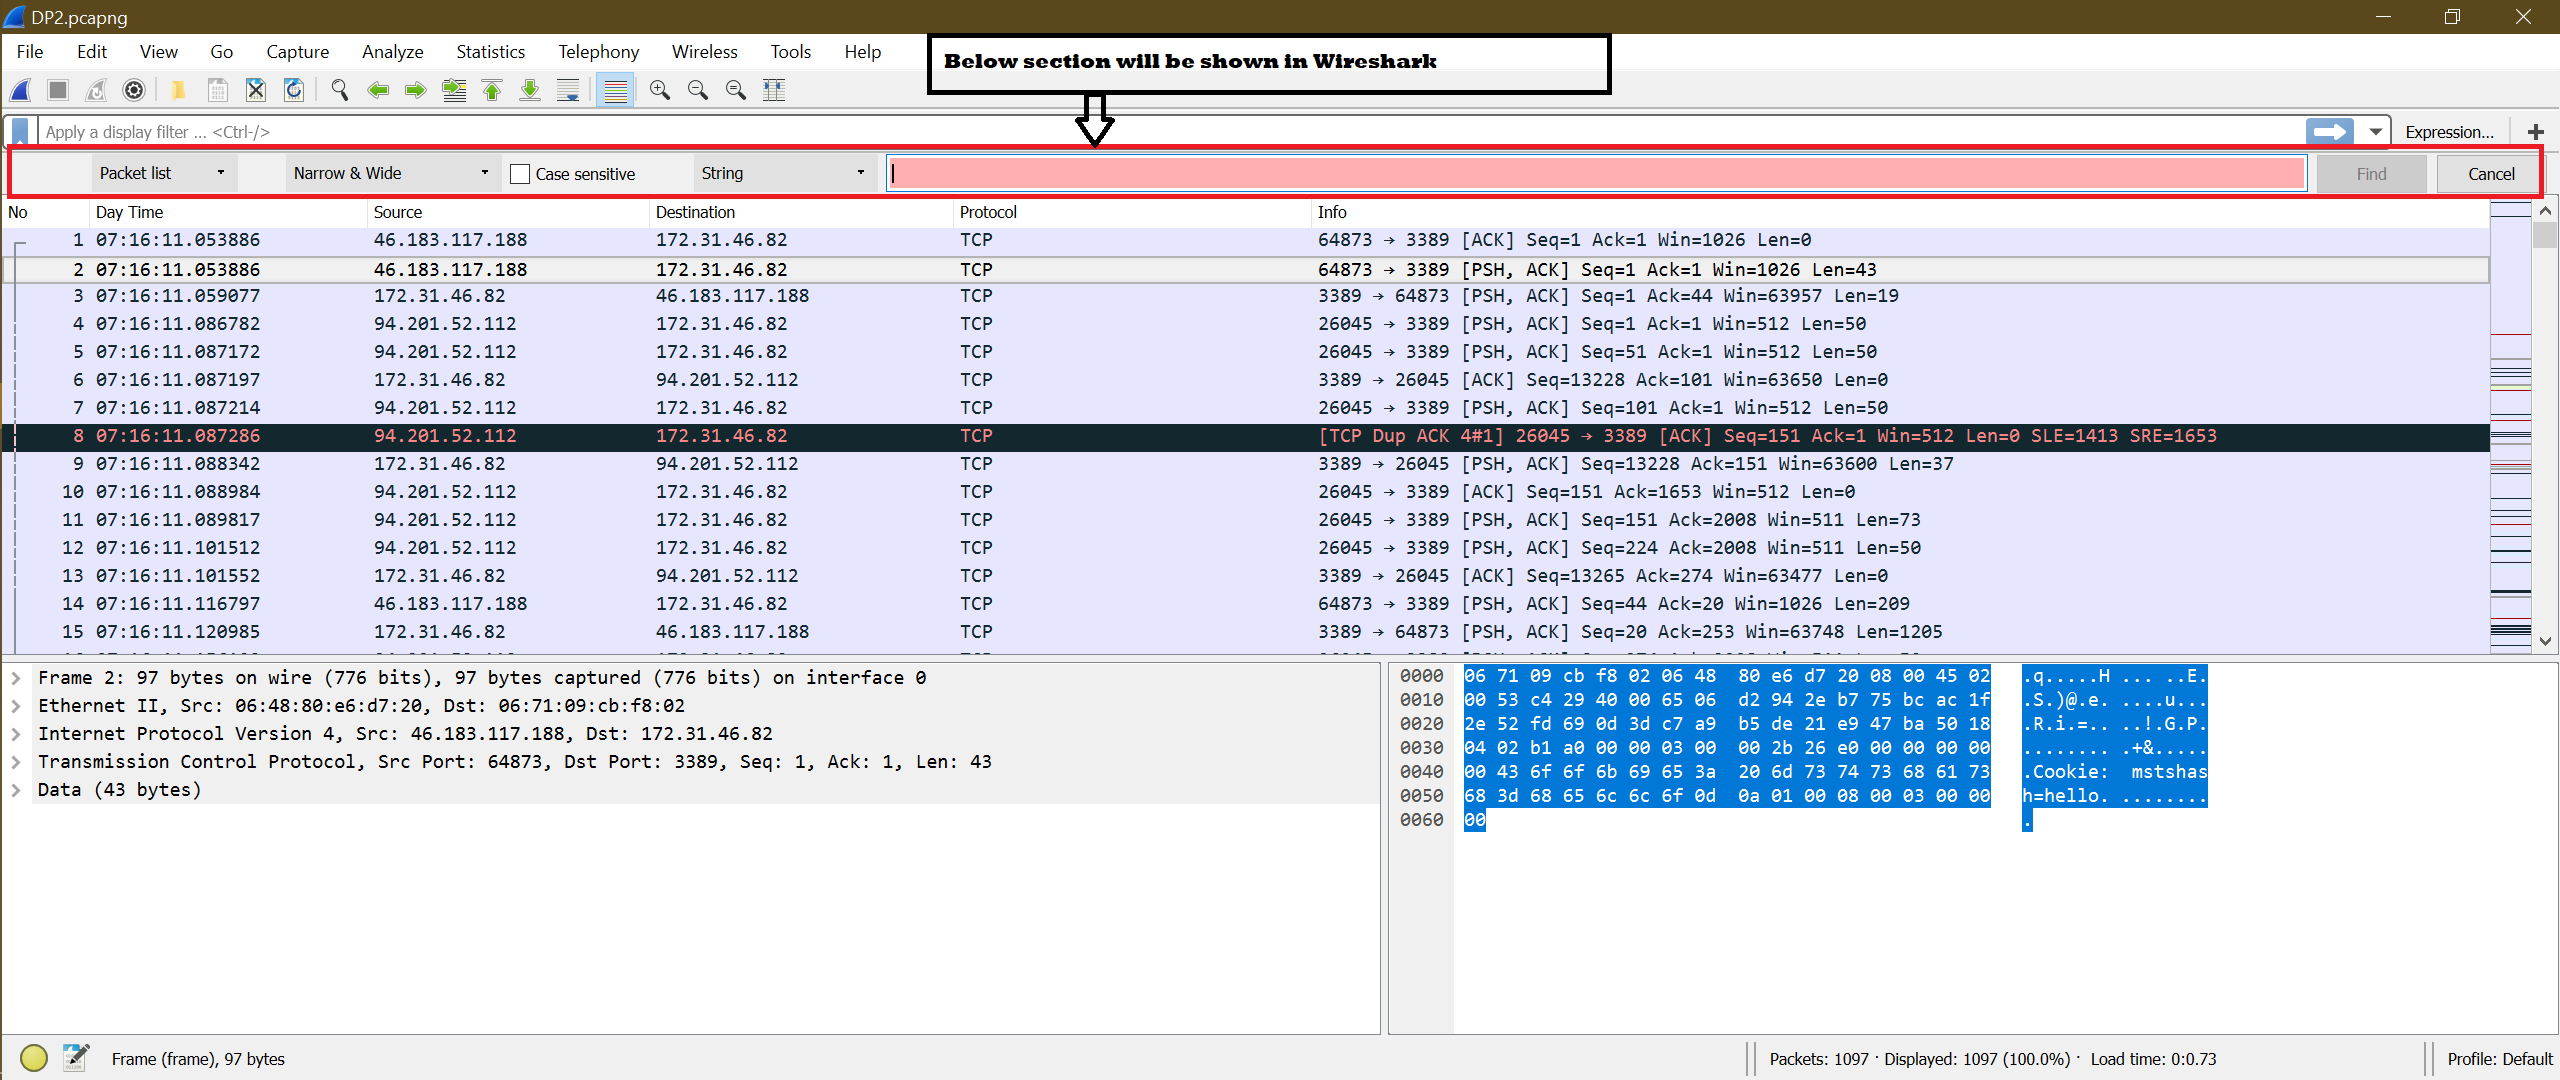
Whichever option you use, the final Wireshark window will look like the screenshot below:
Step 3: Label Options
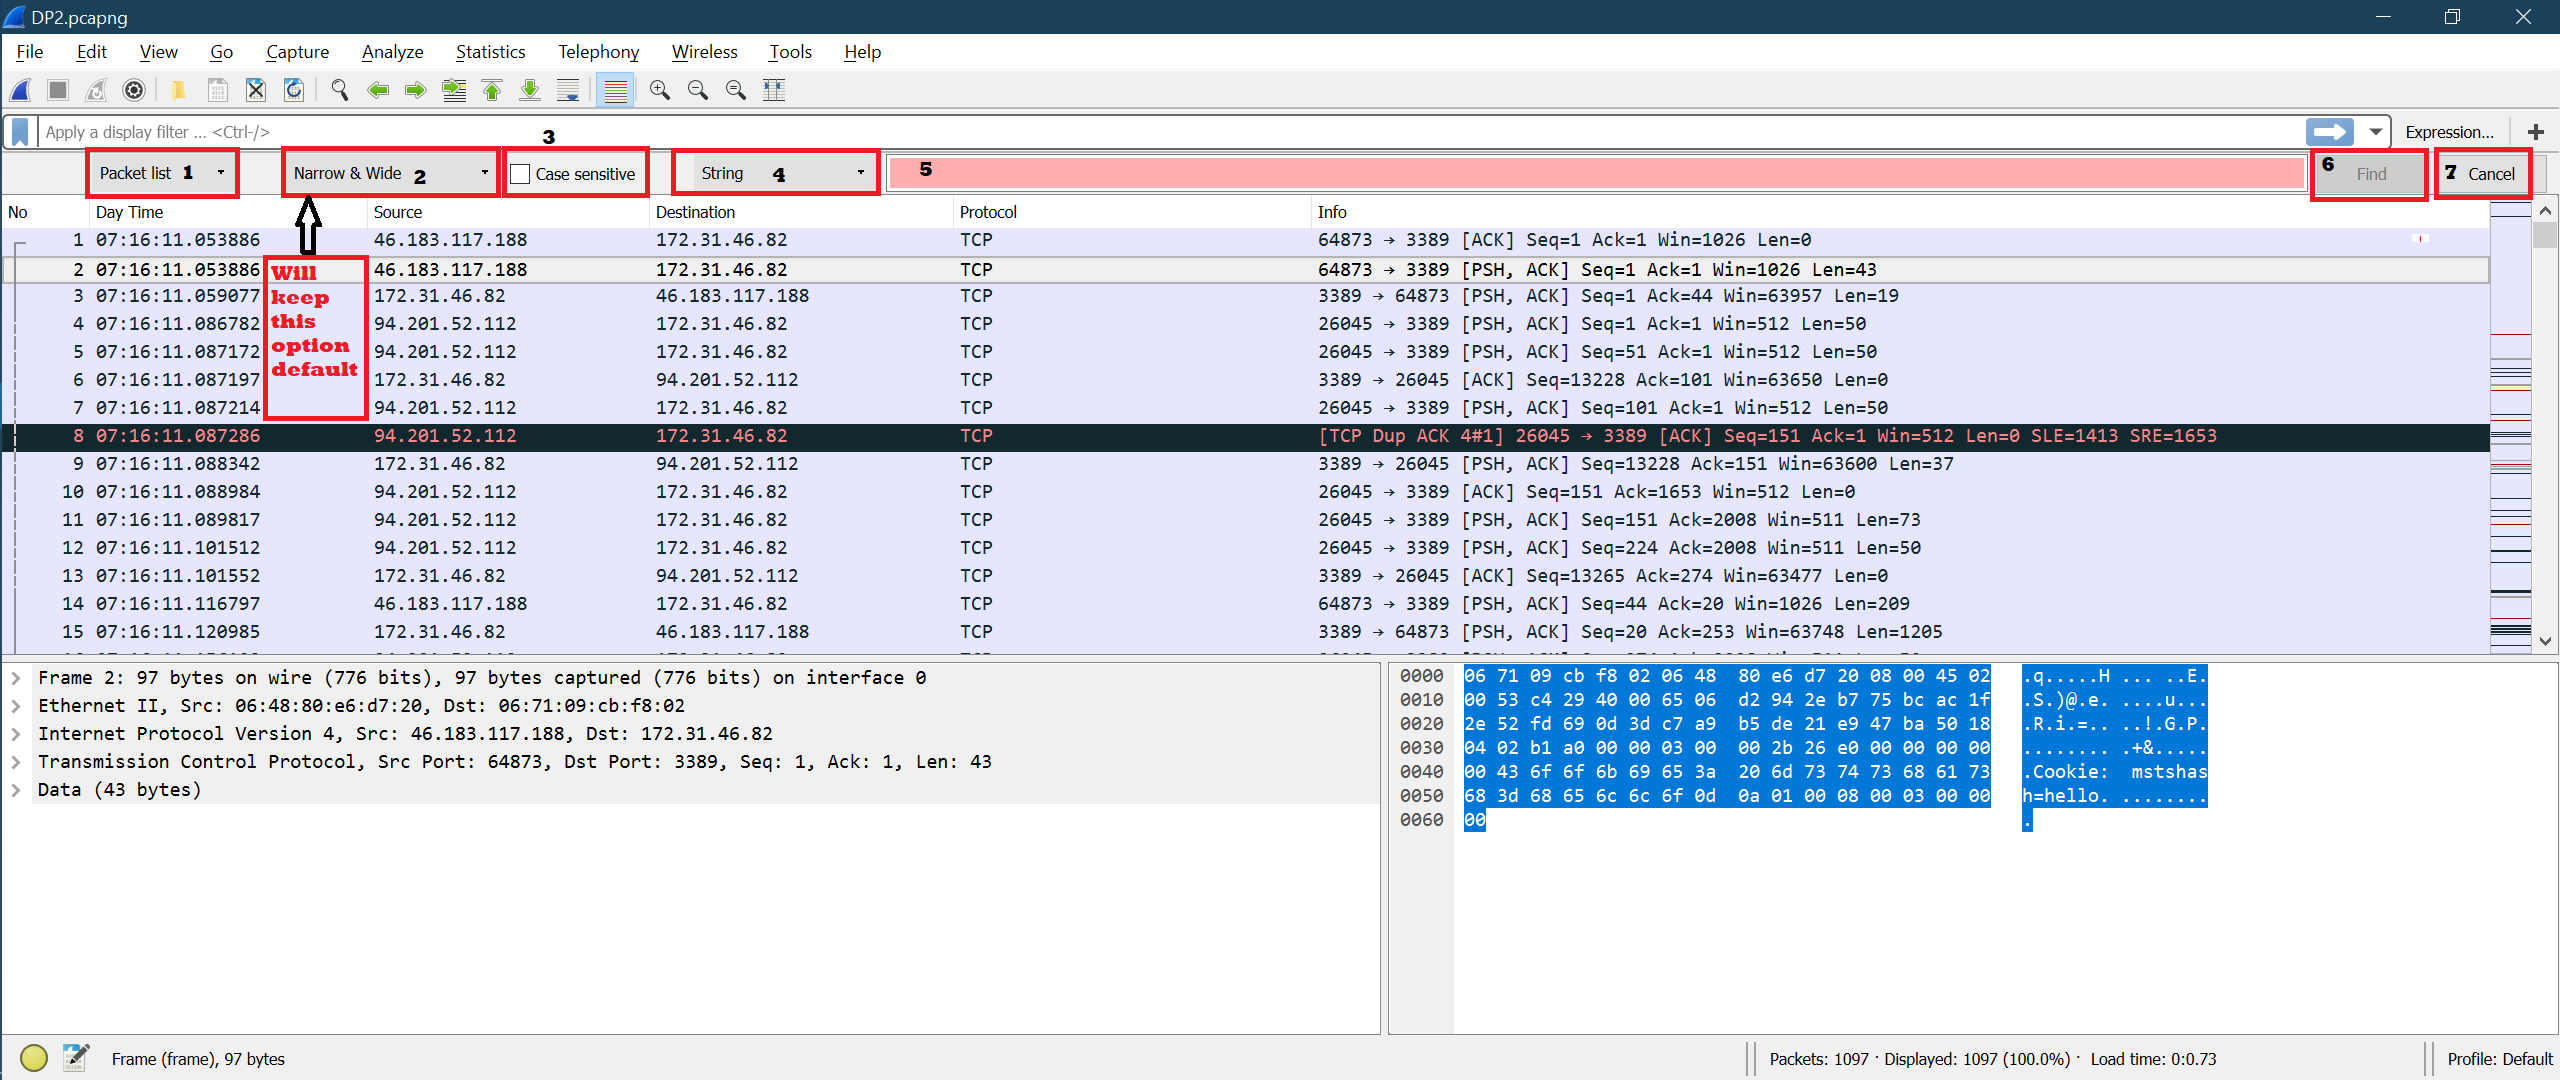
We can see multiple options (dropdowns, checkbox) inside the search window. You can label these options with numbers for easy understanding. Follow the screenshot below for numbering:
Label1
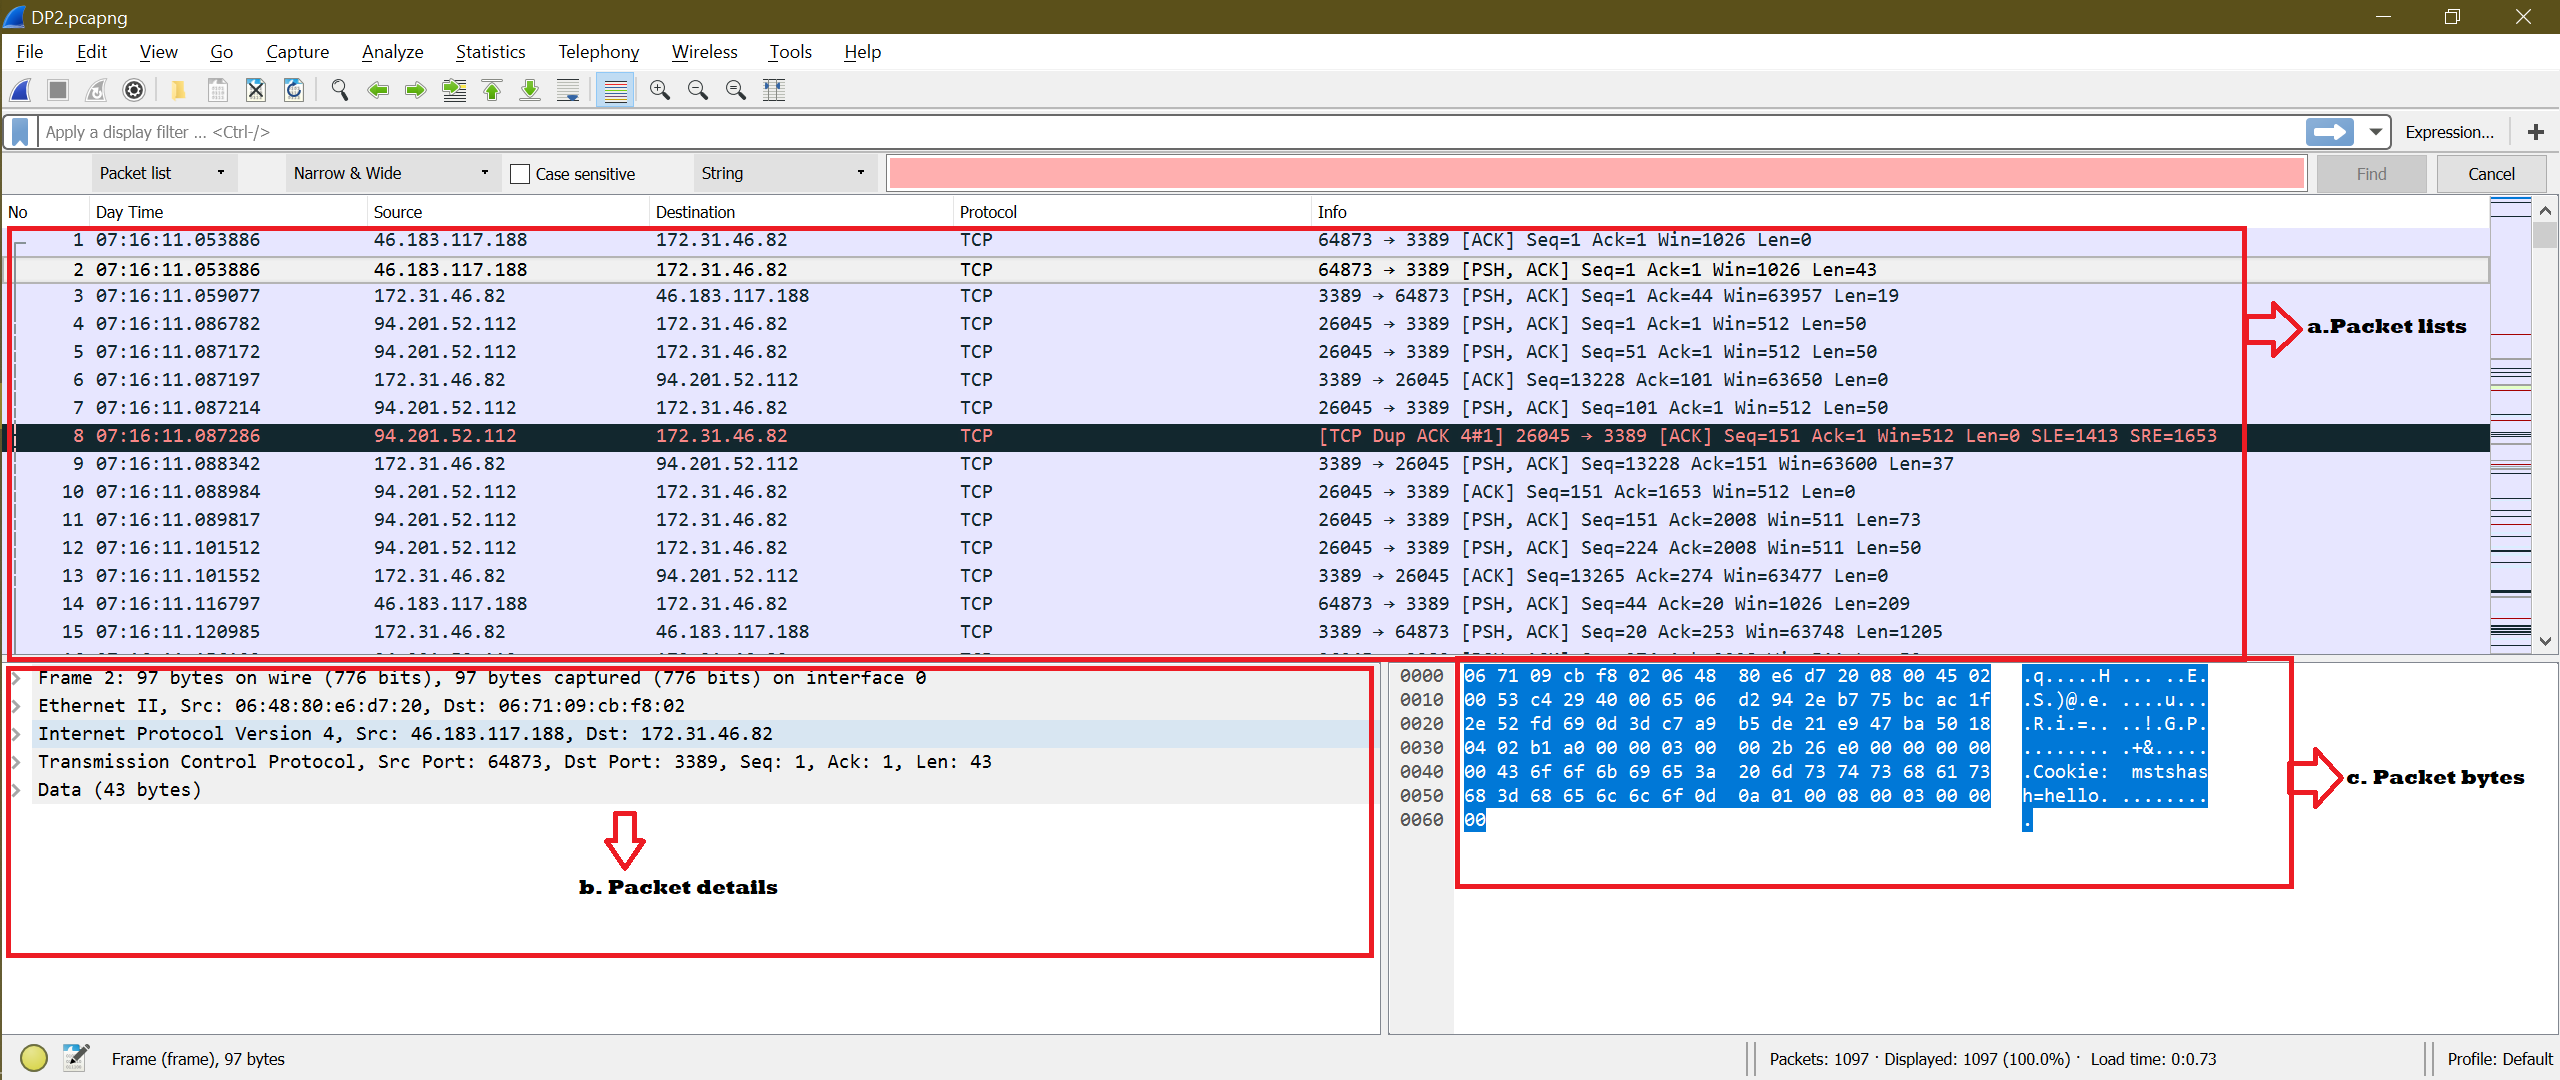
There are three sections in the dropdown.
- Packet list
- Packet details
- Packet bytes
From the below screenshot, you can see where these three sections in Wireshark are located:
Selecting section a/b/c means that the string will be done in that section only.
Label2
We will keep this option as the default, as it is the best for common searching. It is recommended to keep this option as the default unless it is required to change it.
Label3
By default, this option is unchecked. If “Case sensitive” is checked, then the string search will only find exact matches of the searched string. For example, if you search for “Linuxhint” and Label3 is checked, then this will not search for “LINUXHINT” in Wireshark capture.
It is recommended to keep this option unchecked unless it is required to change it.
Label4
This label has different types of searches, such as “Display filter,” “Hex value,” “String,” and “Regular Expression.” For the purposes of this article, we will select “String” from this dropdown menu.
Label5
Here, we need to enter the search string. This is the input for the search.
Label6
After the Label5 input is given, click the “Find” button to trigger the search.
Label7
If you click “Cancel,” then the search windows will close, and you need to return to follow Step 2 to get this search window back.
Step 4: Examples
Now that you understood the options for searching, let us try out some examples. Note that we have disabled the coloring rule to see the search packet we selected more clearly.
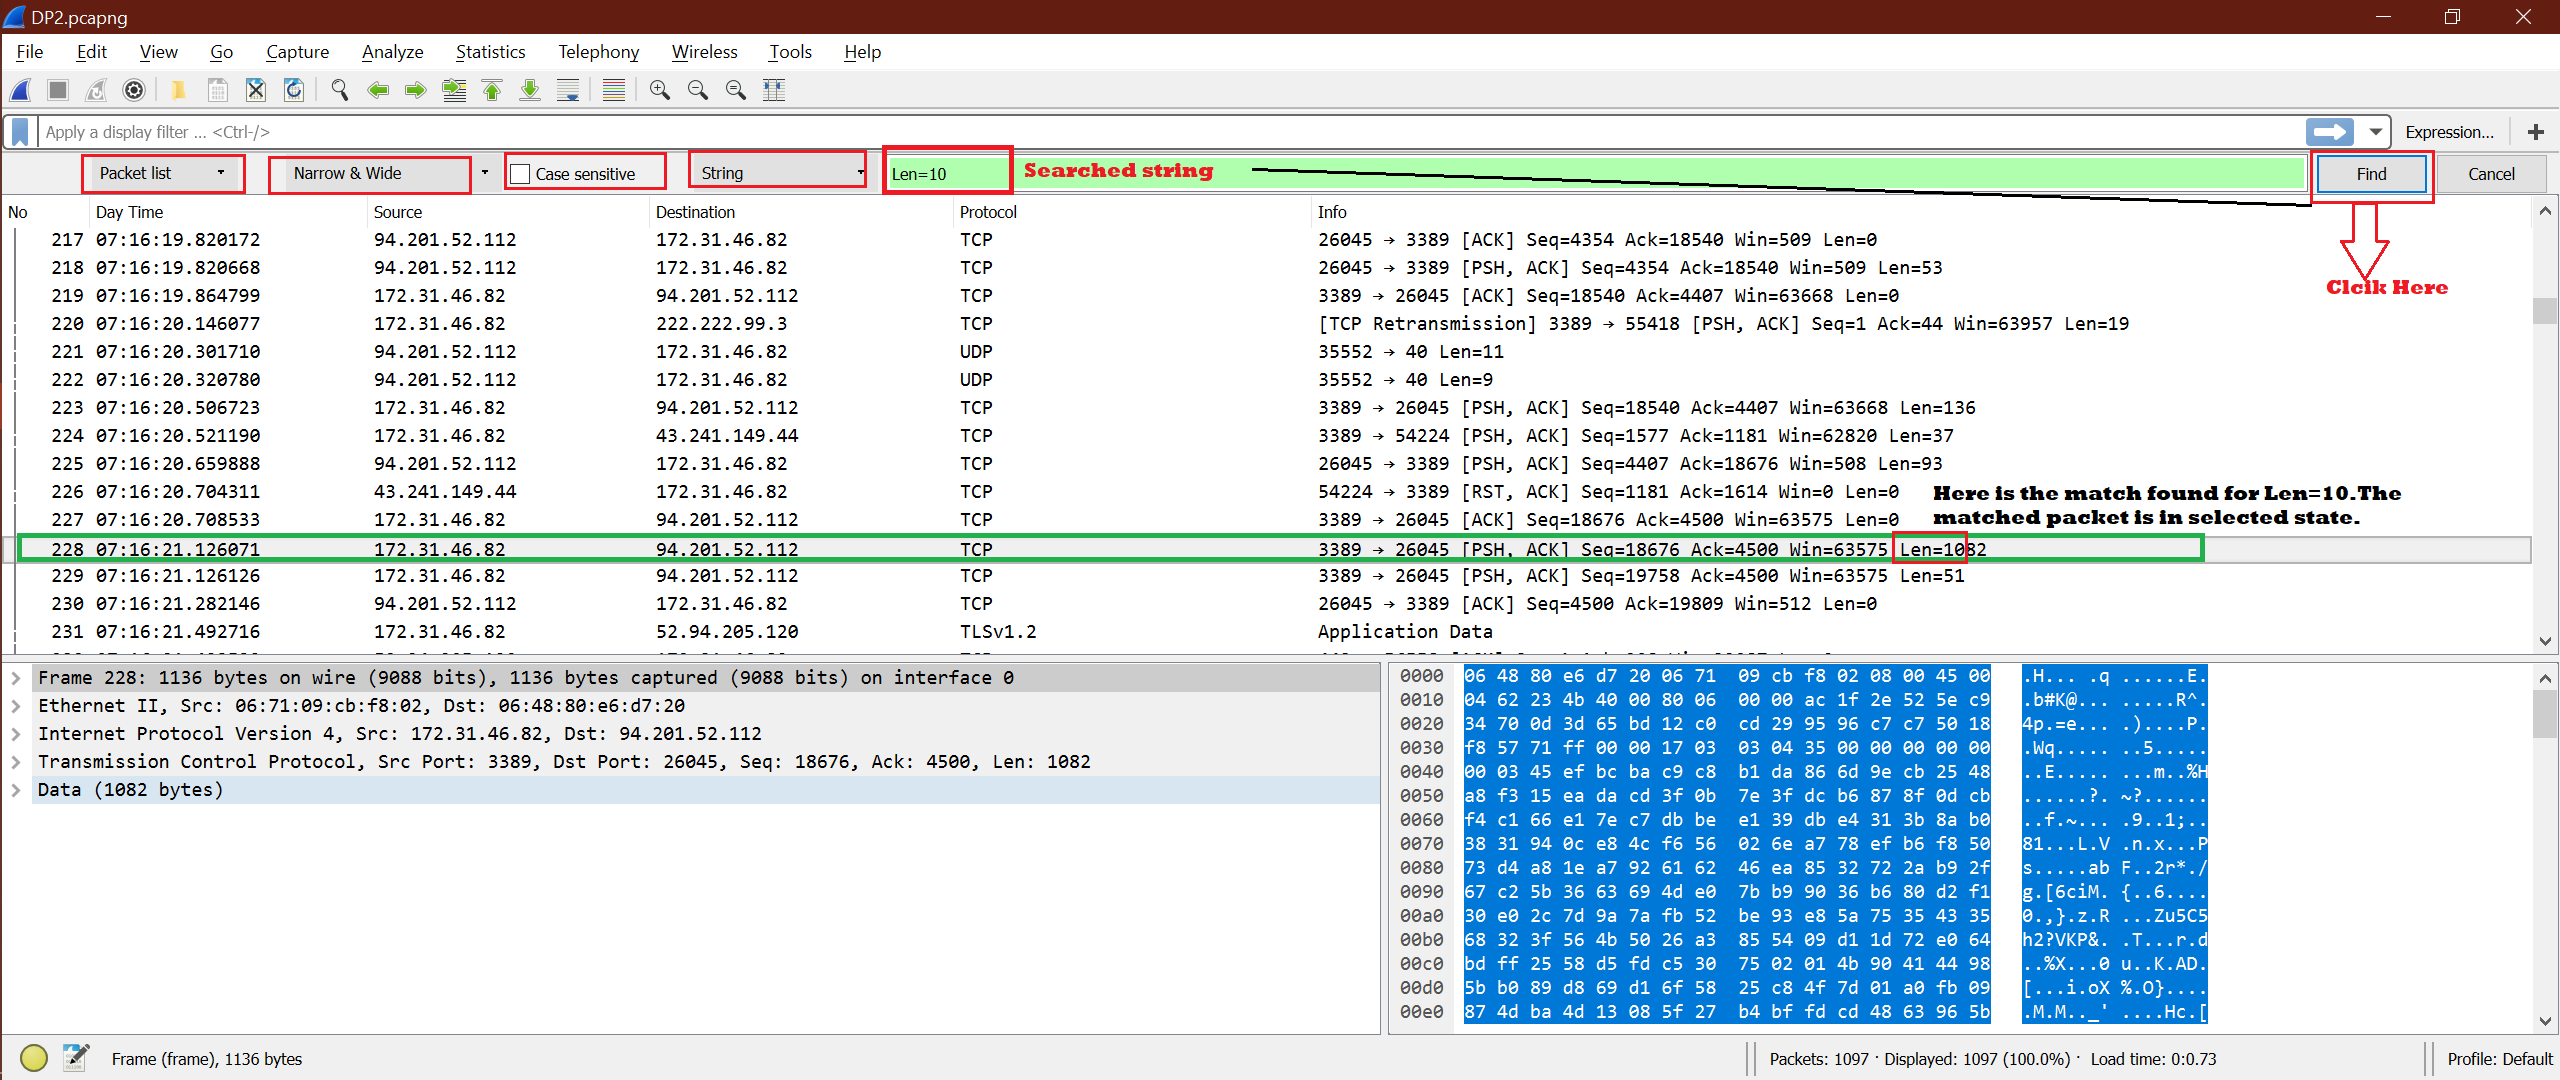
Try1 [Options combination used: “Packet List” + “Narrow & Wide” + “Unchecked Case Sensitive”+ String]
Search String: “Len=10”
Now, click “Find.” Below is the screenshot for the first click on “Find:”
As we have selected “Packet list,” the search was performed inside the packet list.
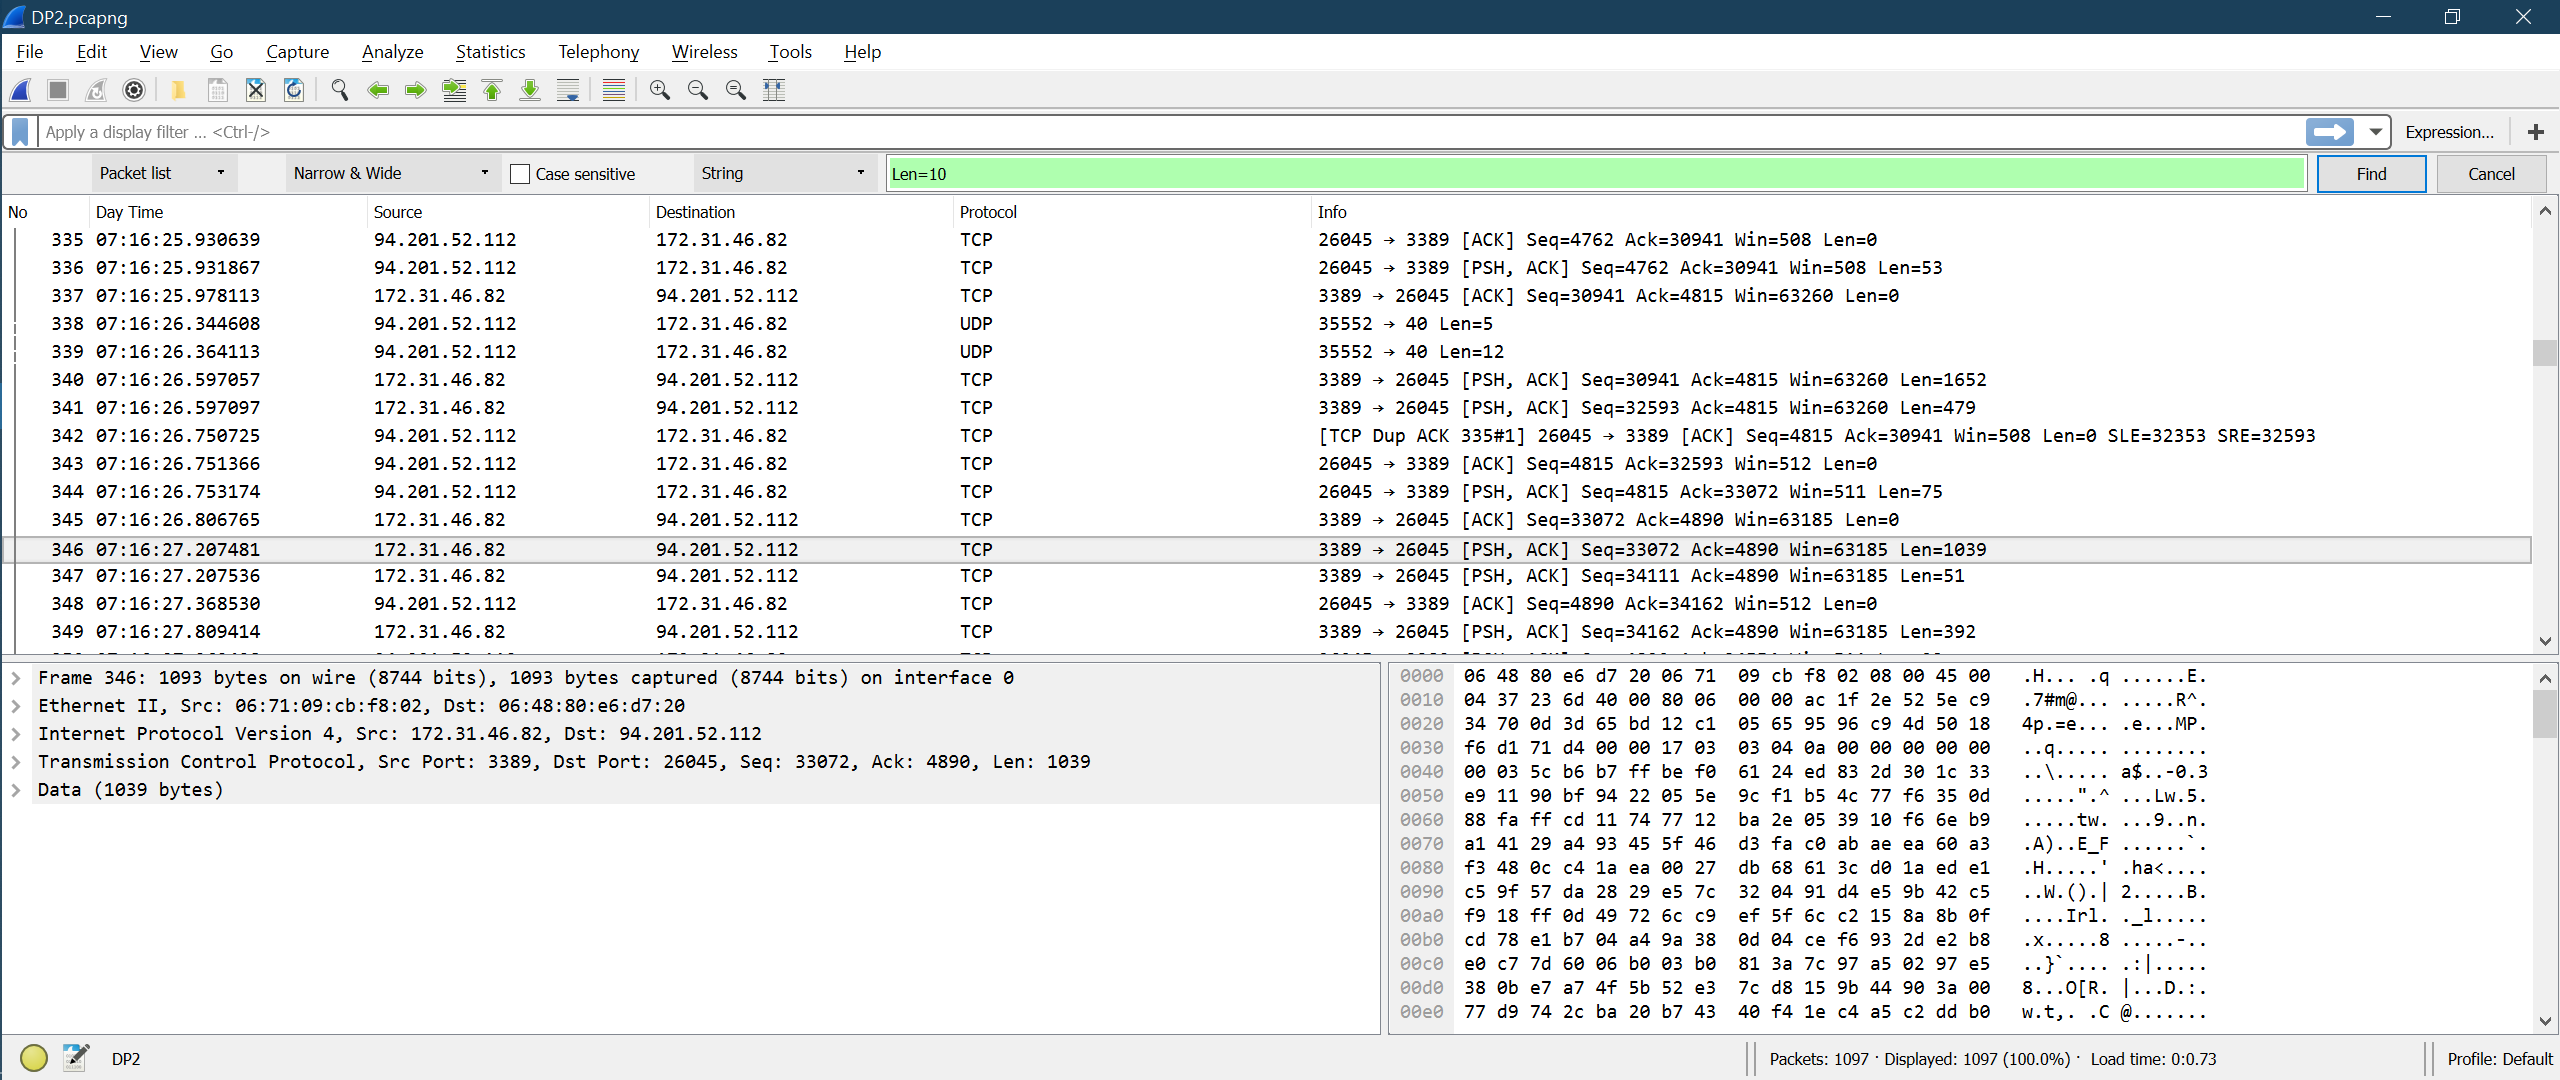
Next, we will click the “Find” button again to see the next match. This can be seen in the screenshot below. We did not mark any sections to allow you to understand how this search happens.
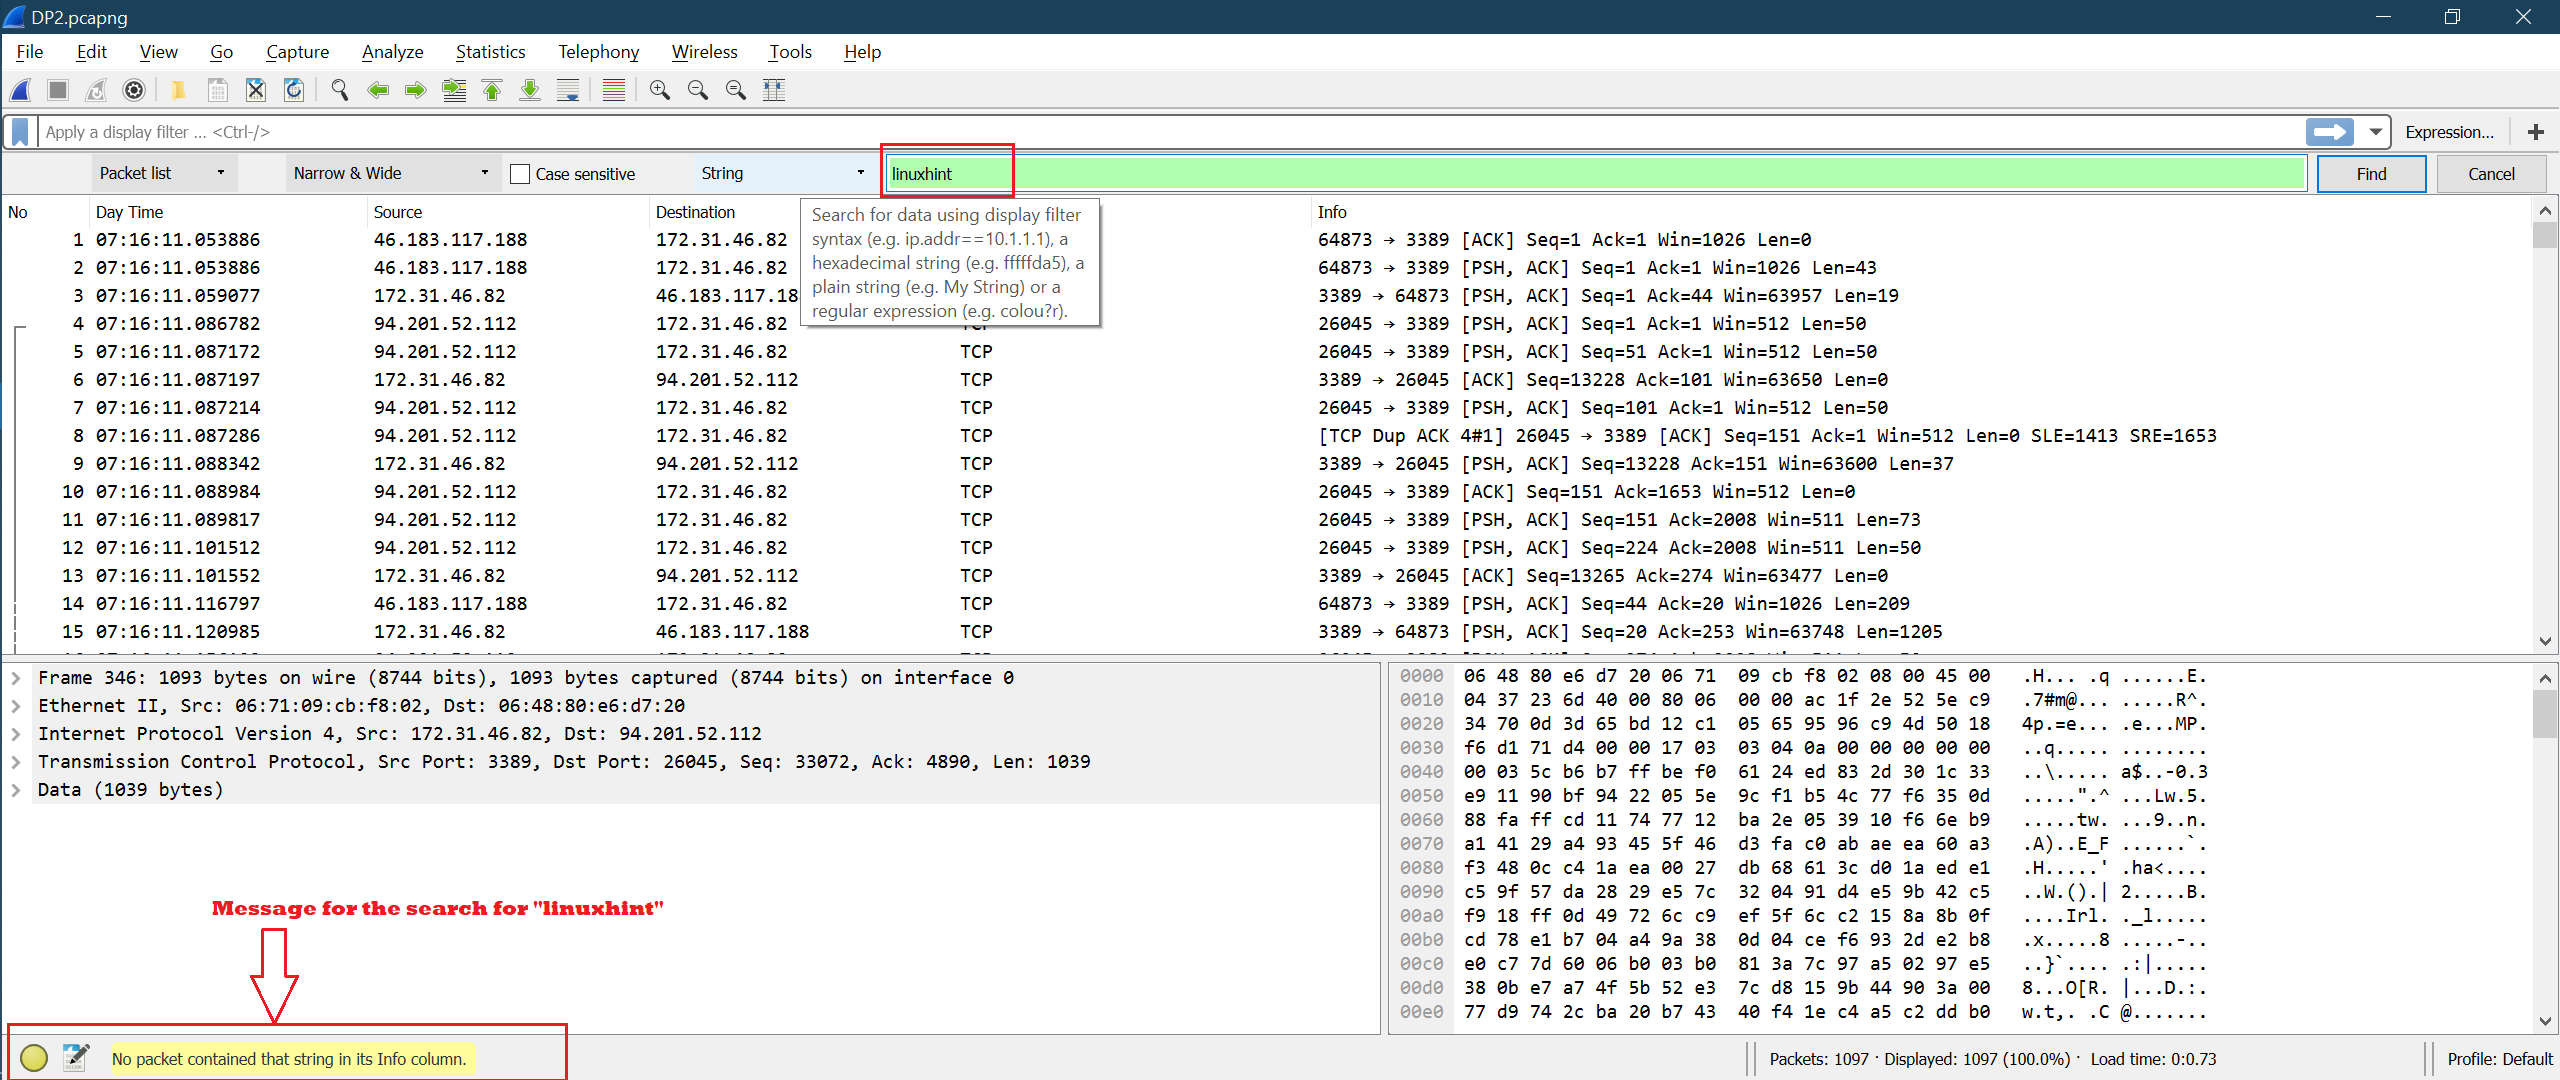
With the same combination, let us search the string: “Linuxhint” [To check not found scenario].
In this case, you can see the yellow-colored message at the left-bottom side of Wireshark, and no packet is selected.
Try2 [Options combination used: “Packet details” + “Narrow & Wide” + “Unchecked Case Sensitive”+ String]
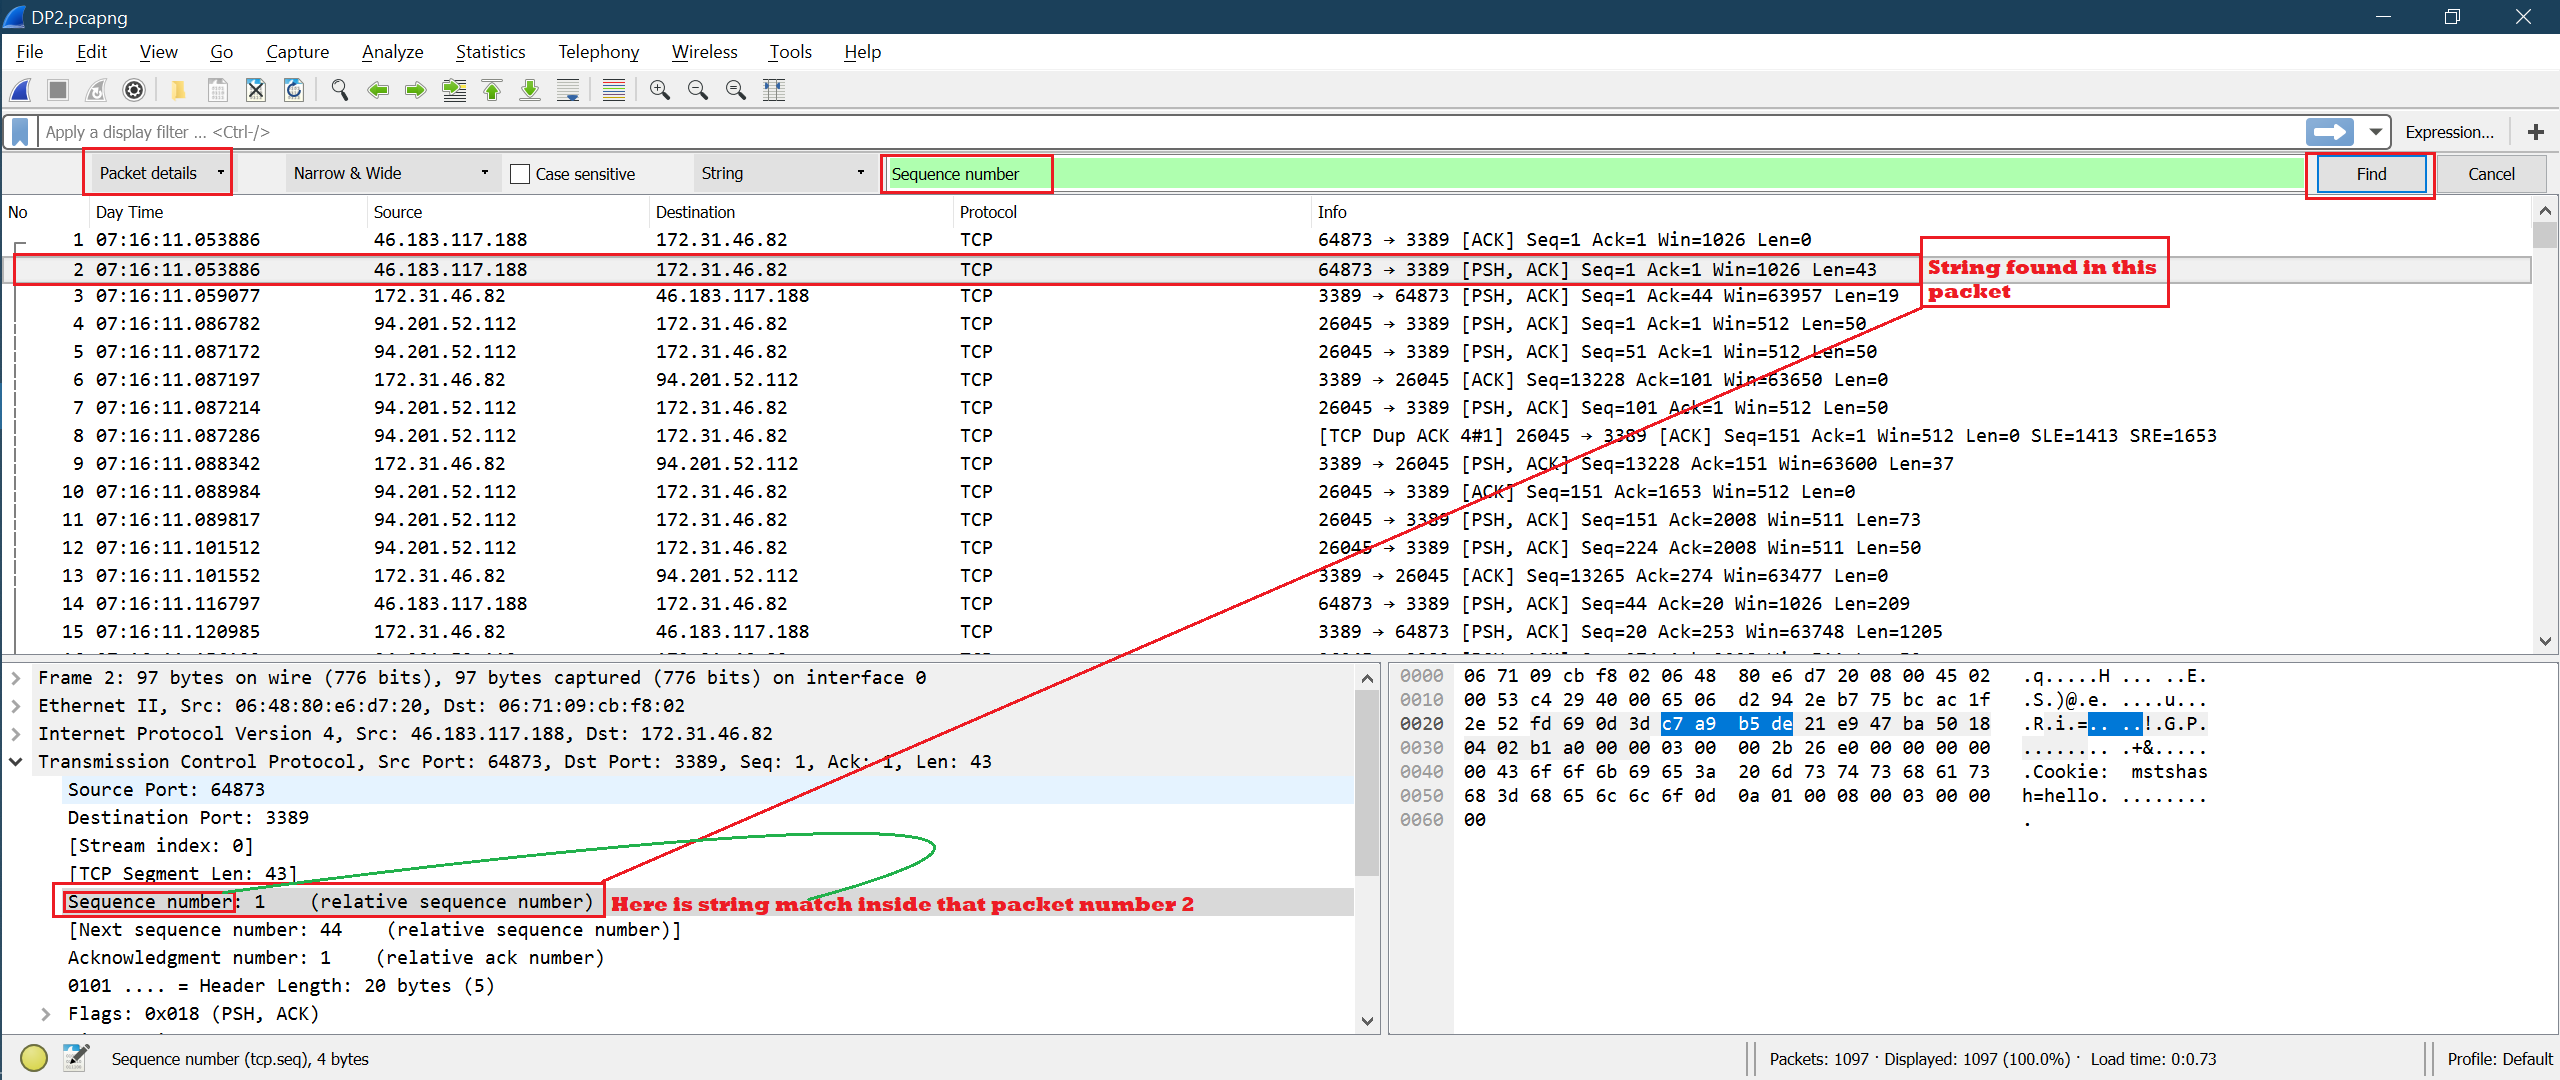
Search String: “Sequence number”
Now, we will click “Find.” Below is the screenshot for the first click on “Find:”
Here, the string found inside “packet details” was selected.
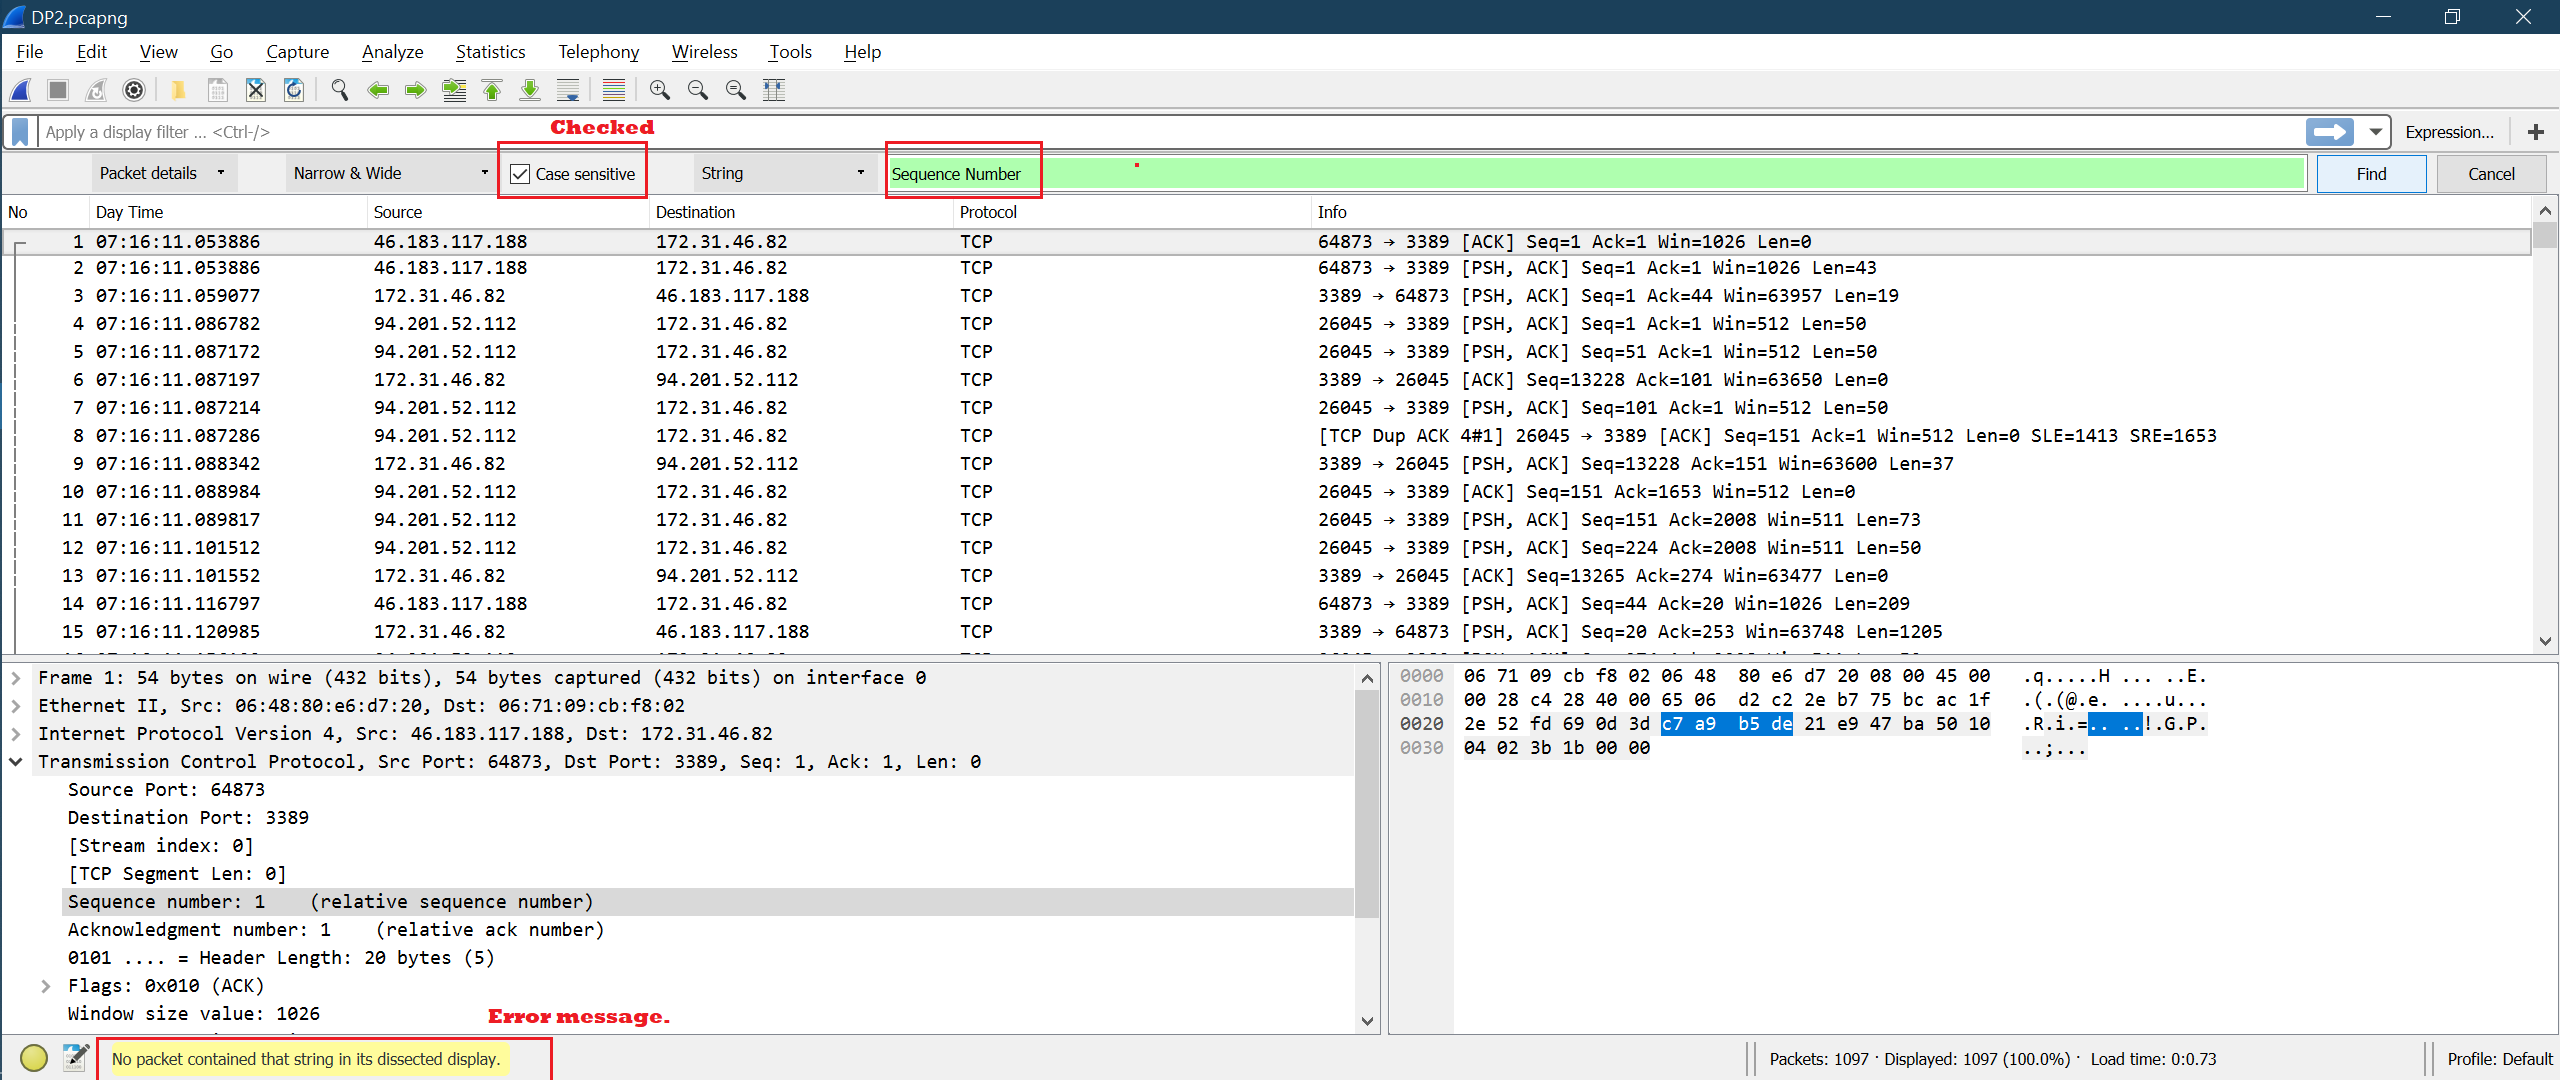
We will check the “Case sensitive” option and use the search string as a “Sequence Number,” keeping the other combinations as is. This time, the string will match the exact “Sequence Number.”
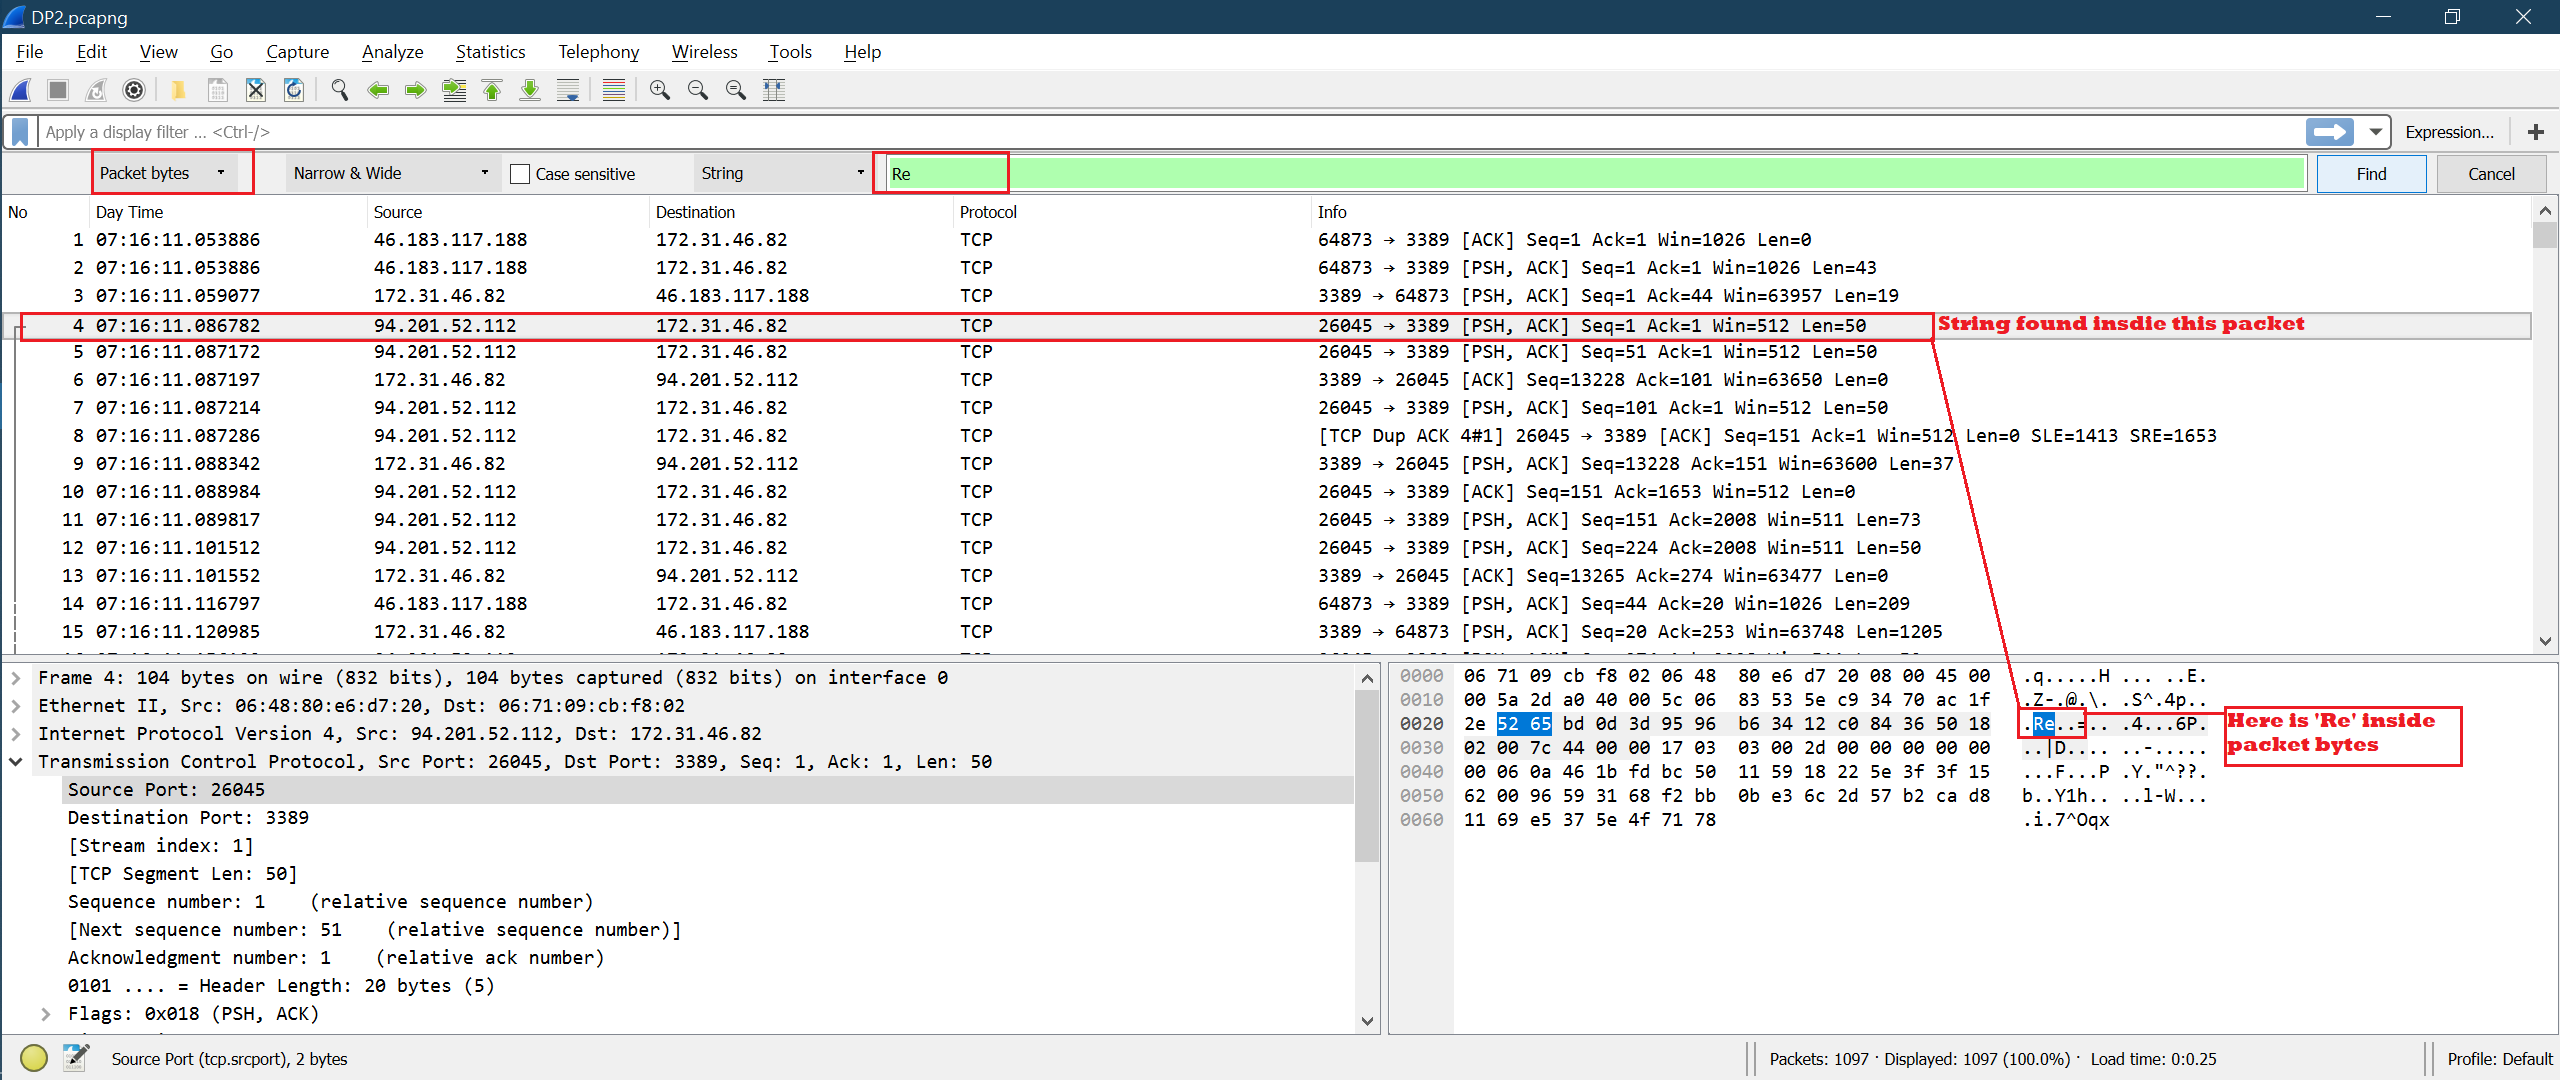
Try3 [Options combination used: “Packet bytes” + “Narrow & Wide” + “Unchecked Case Sensitive”+ String]
Search String: “Sequence number”
Now, click “Find.” Below is the screenshot for the first click on “Find:”
As expected, the string search is happening inside the packet bytes.
Conclusion
Performing a string search is a very useful method that can be used to find a required string inside of a Wireshark packet list, packet details, or packet bytes. Good searching makes analysis of large Wireshark capture files easy.

