
What is Wireshark?
Wireshark is an open source and free packet analyzer. It’s a widely used packet capturing tool among others.
How to download Wireshark and install for different OS?
Wireshark can be downloaded freely from the official website.
Here is the link to Download Wireshark. For Windows, MAC an installer will be downloaded and later it can be installed. For Linux, Wireshark can be installed through command also. Here is the command for Ubuntu:
Other than these three operating systems there are other Wireshark installer can be found on the official website.
Here is the screenshot for the download page

Intention of this article?
In this article we will understand how to use Wireshark for basic usages. Here we have used Windows 10 and Wireshark version is 3.0.1. So if you are using different Wireshark version then some options may be in different places.
Steps to work with Wireshark:
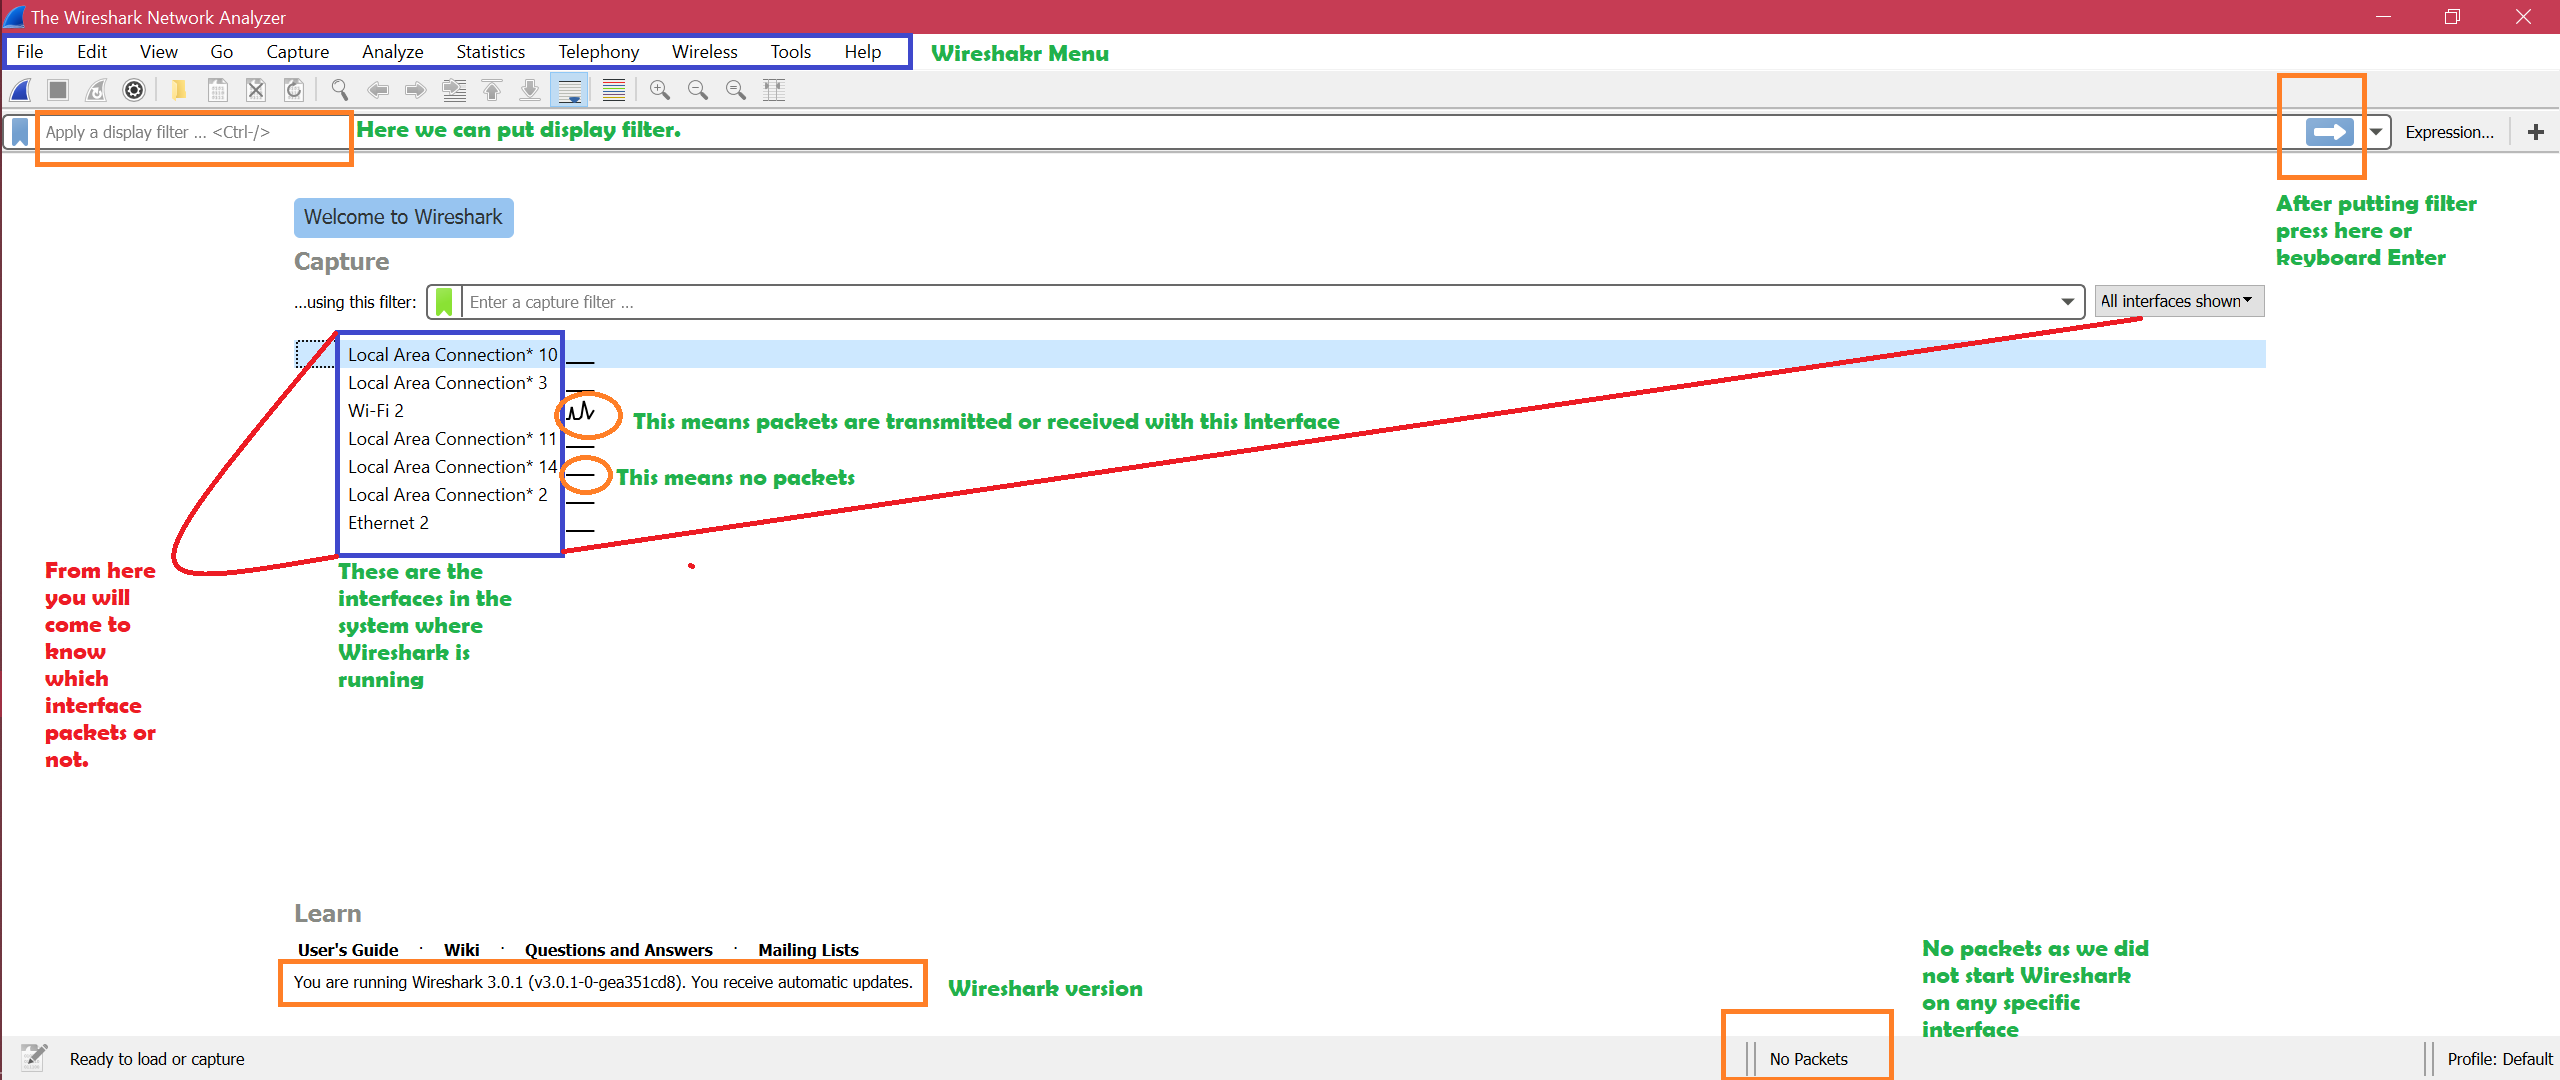
After Wireshark has been installed, we need to open the Wireshark application. Here is the screenshot for 1st window of Wireshark with explanation:
Now how to get what are the interfaces?
For windows -> open command line -> run command “ipconfig”
Here is the screenshot for ipconfig command
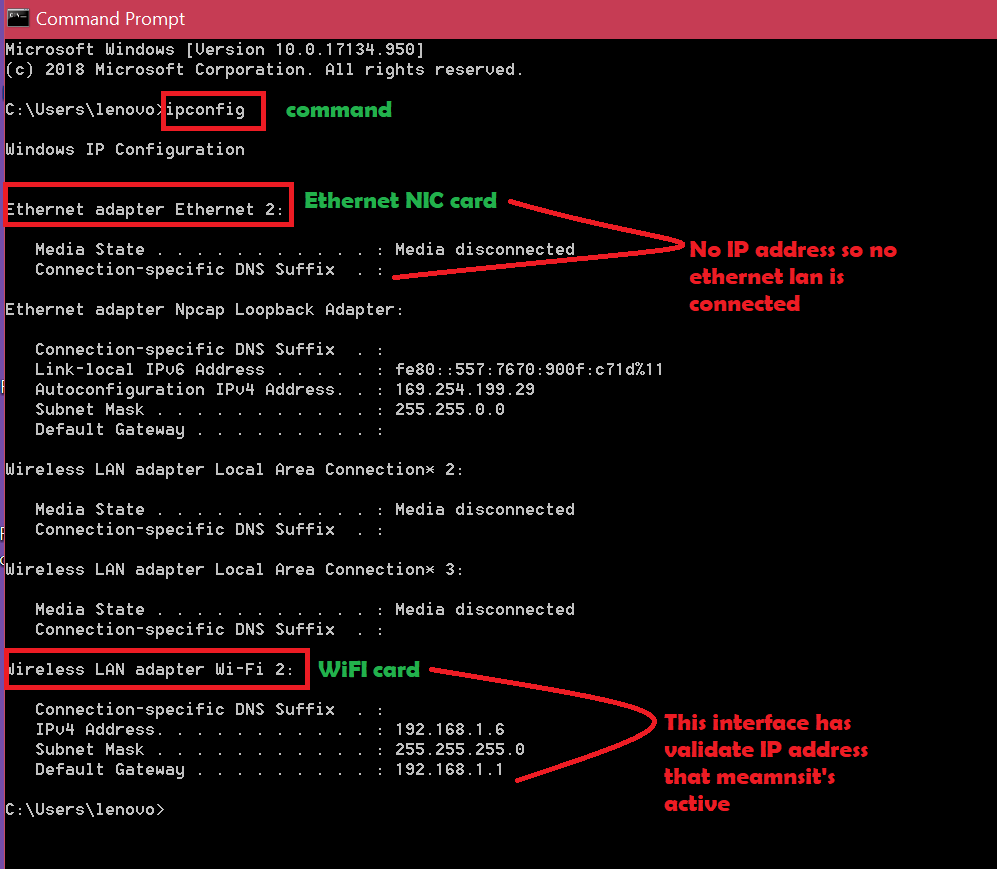
So the logic is first check ipconfig for active interfaces and then open Wireshark to capture on active interfaces. Follow the above screenshot to know which interface is active. Now as we know that Wi-Fi interface is active then we will capture on that interface. Just double click on that interface to capture packets. Here is the screenshot:

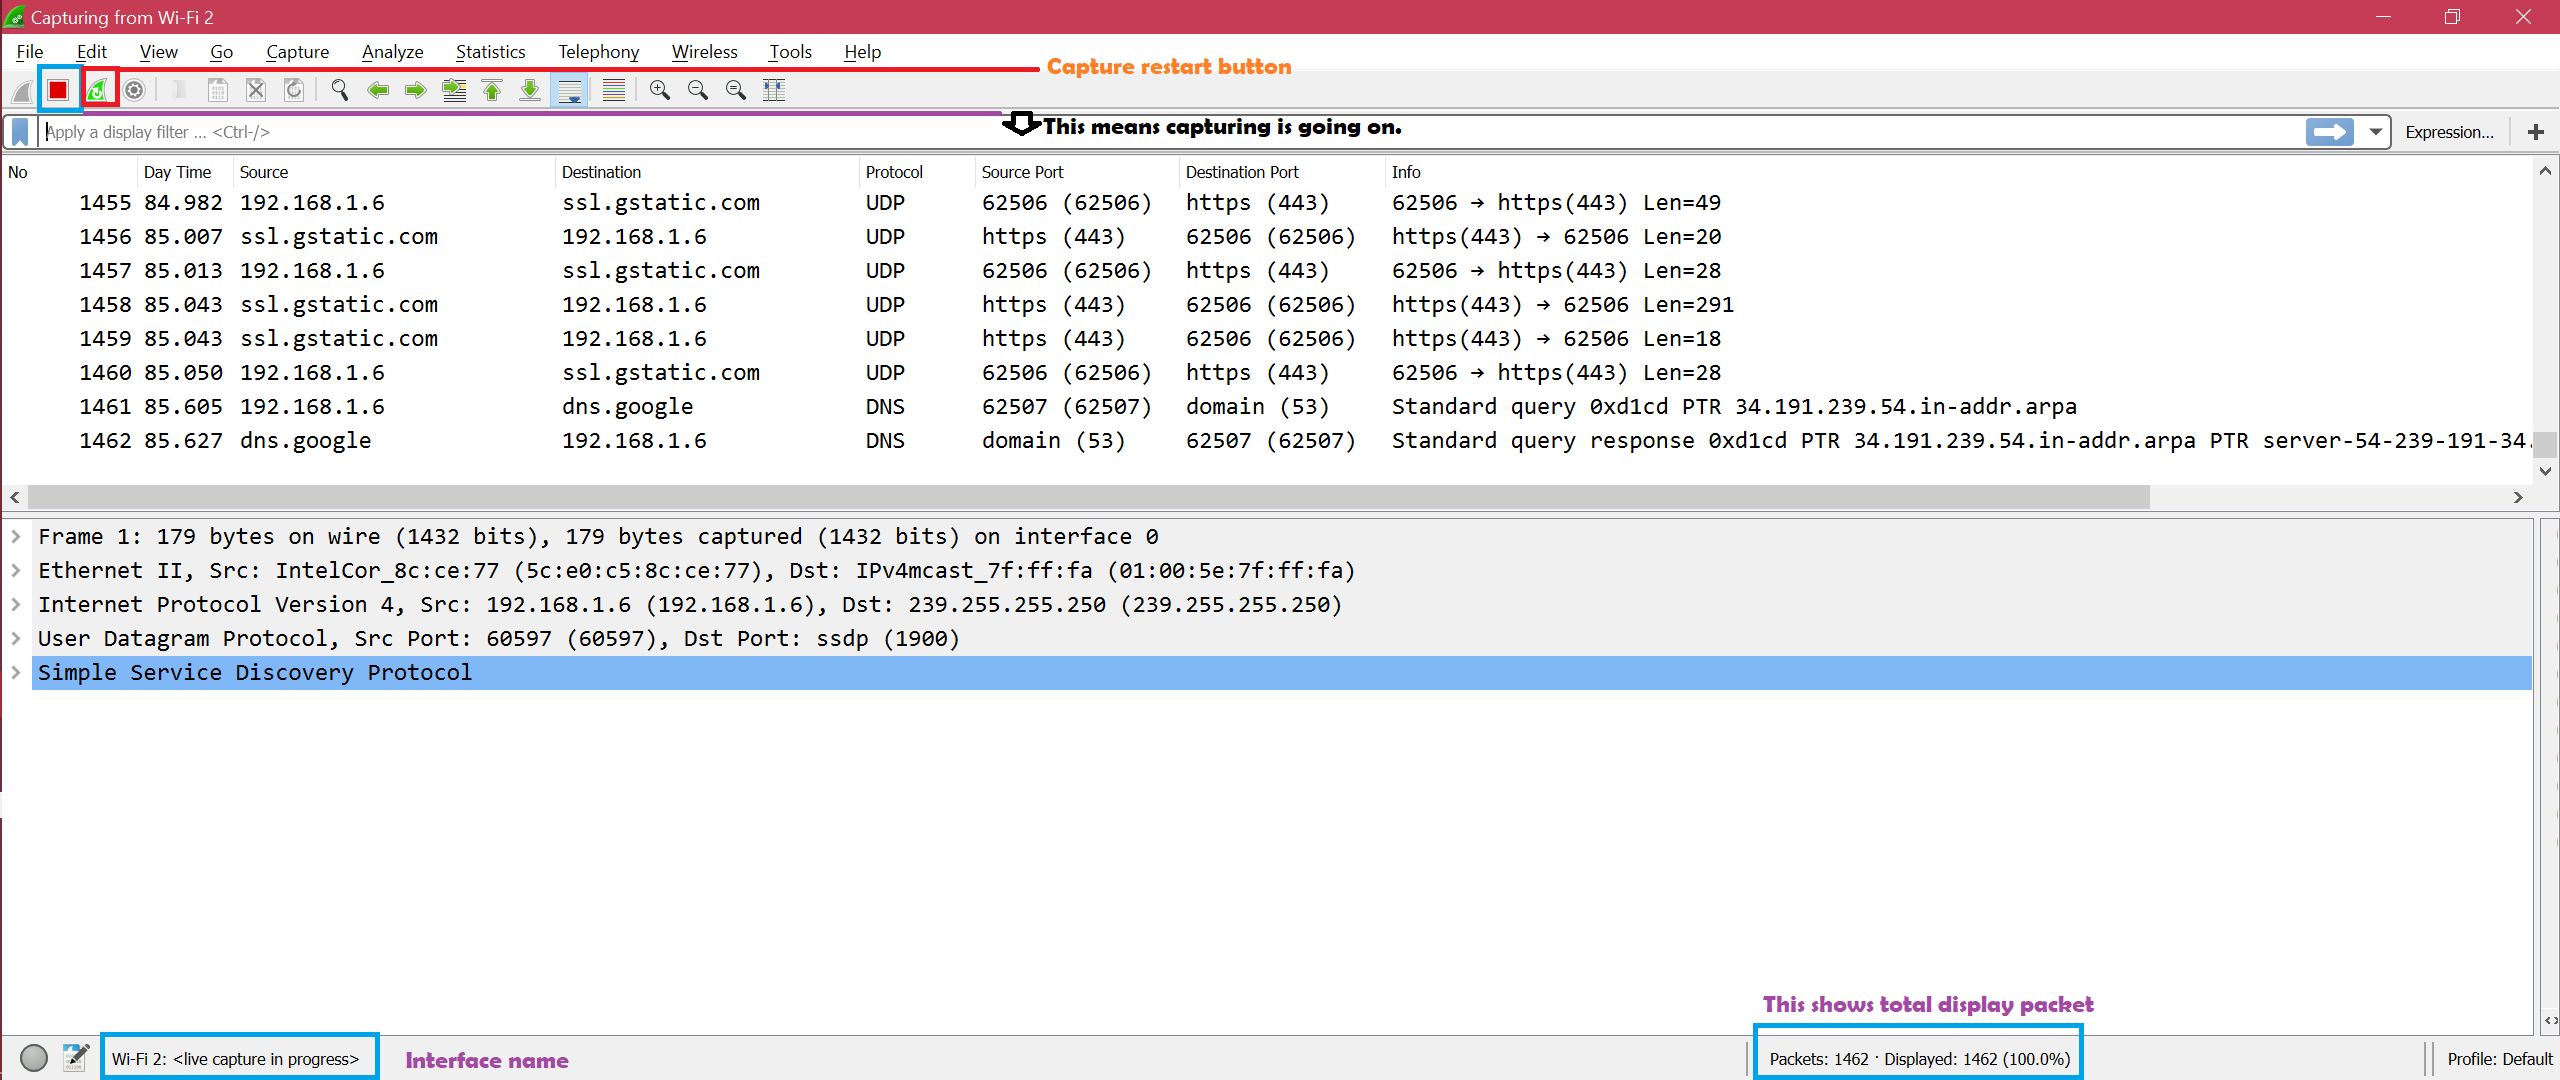
Here is the screenshot for live capturing
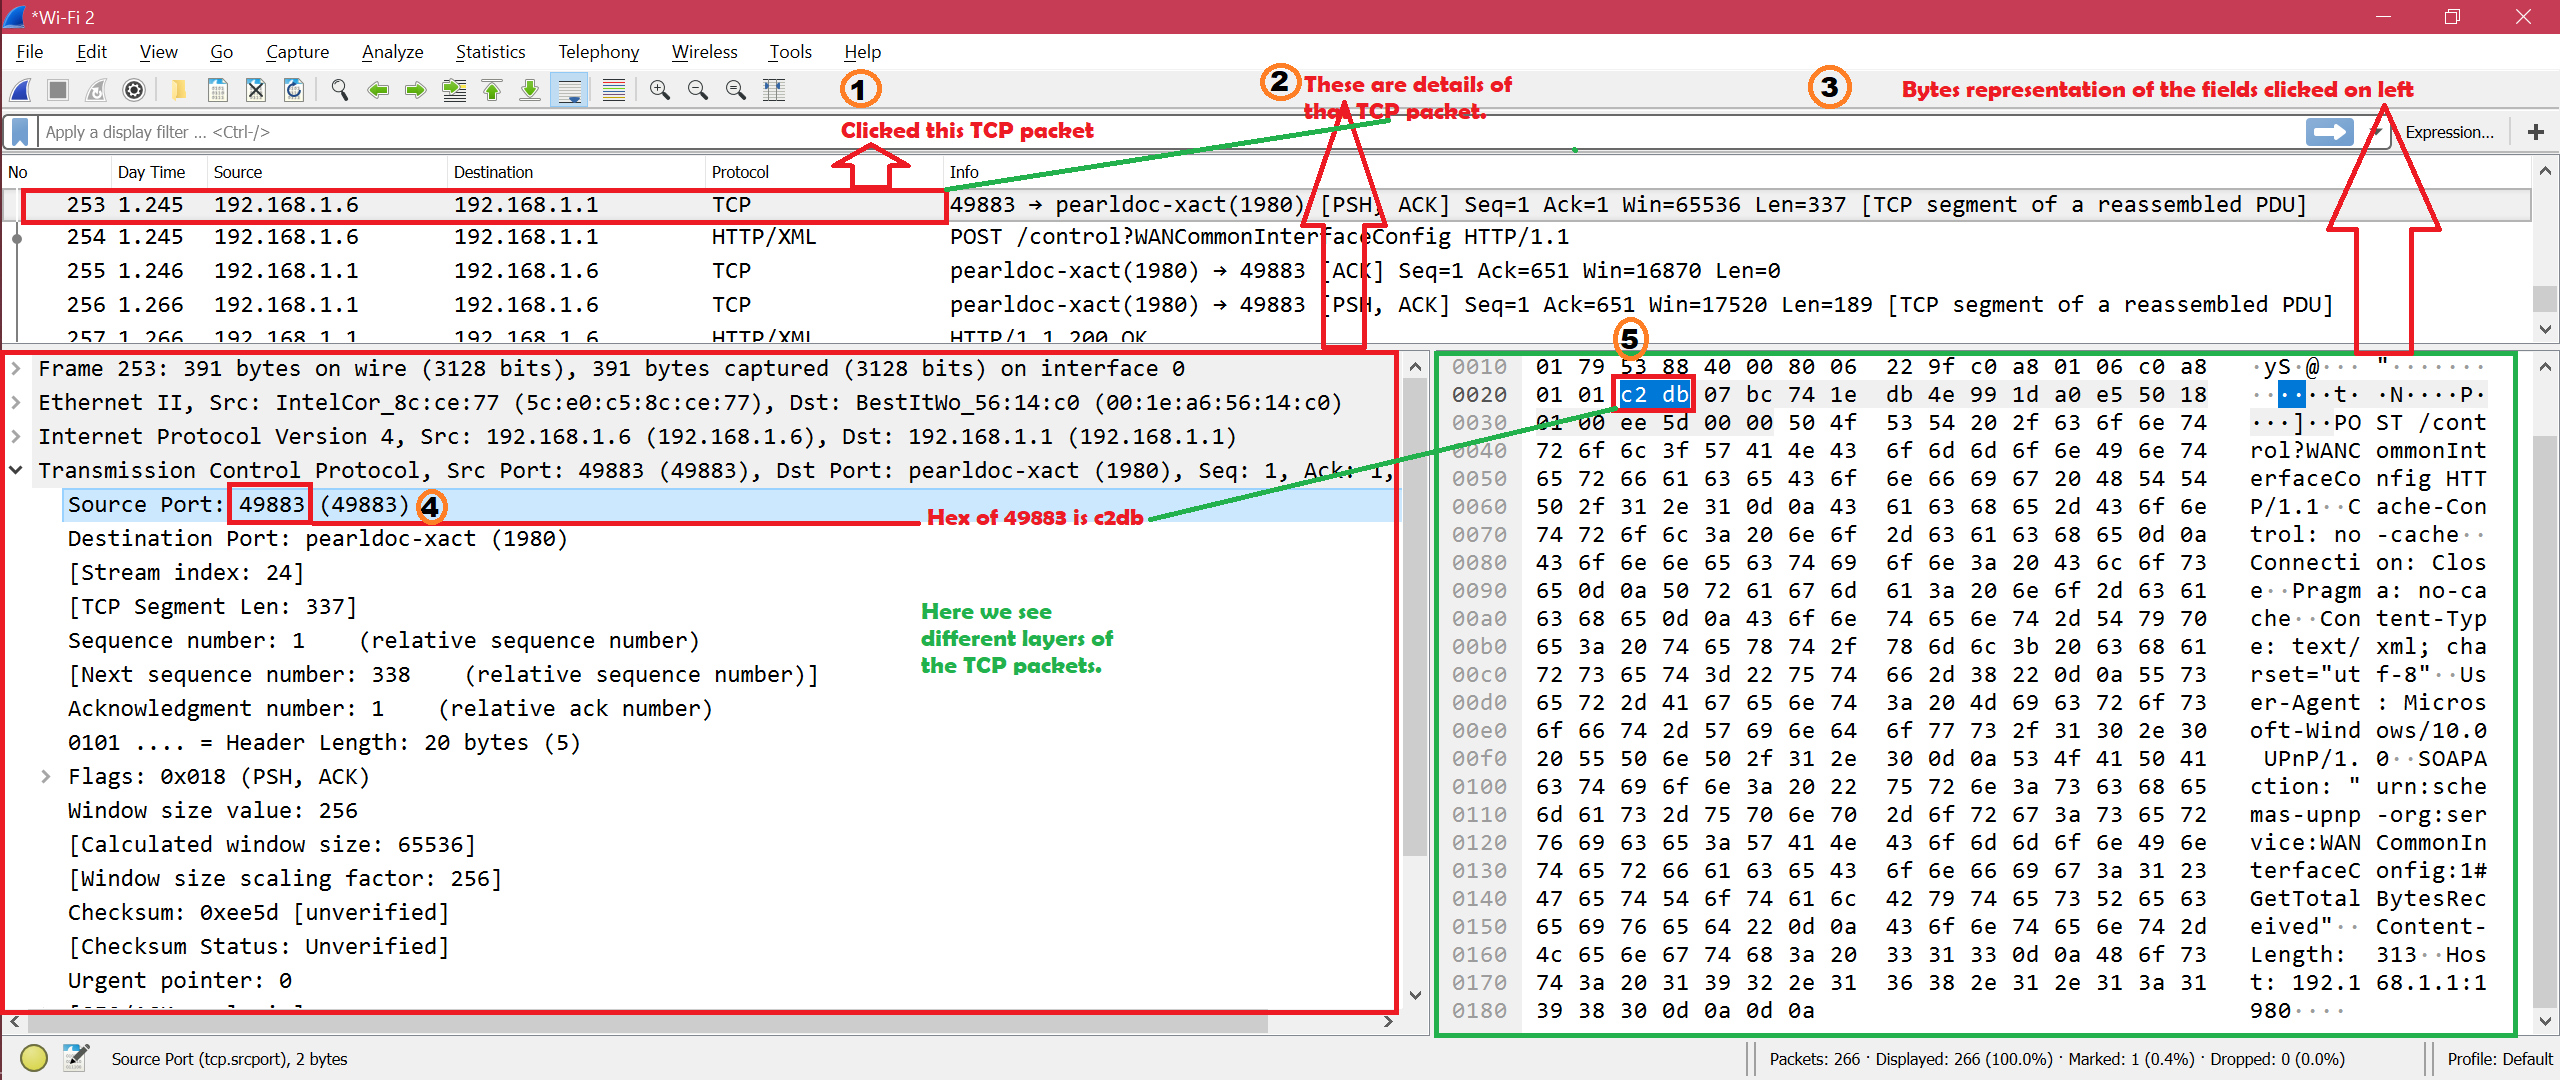
Now there are three main portions of Wireshark windows. Here is the screenshot [1, 2, 3]:

Here is the screenshot to show the overview of a clicked packet:
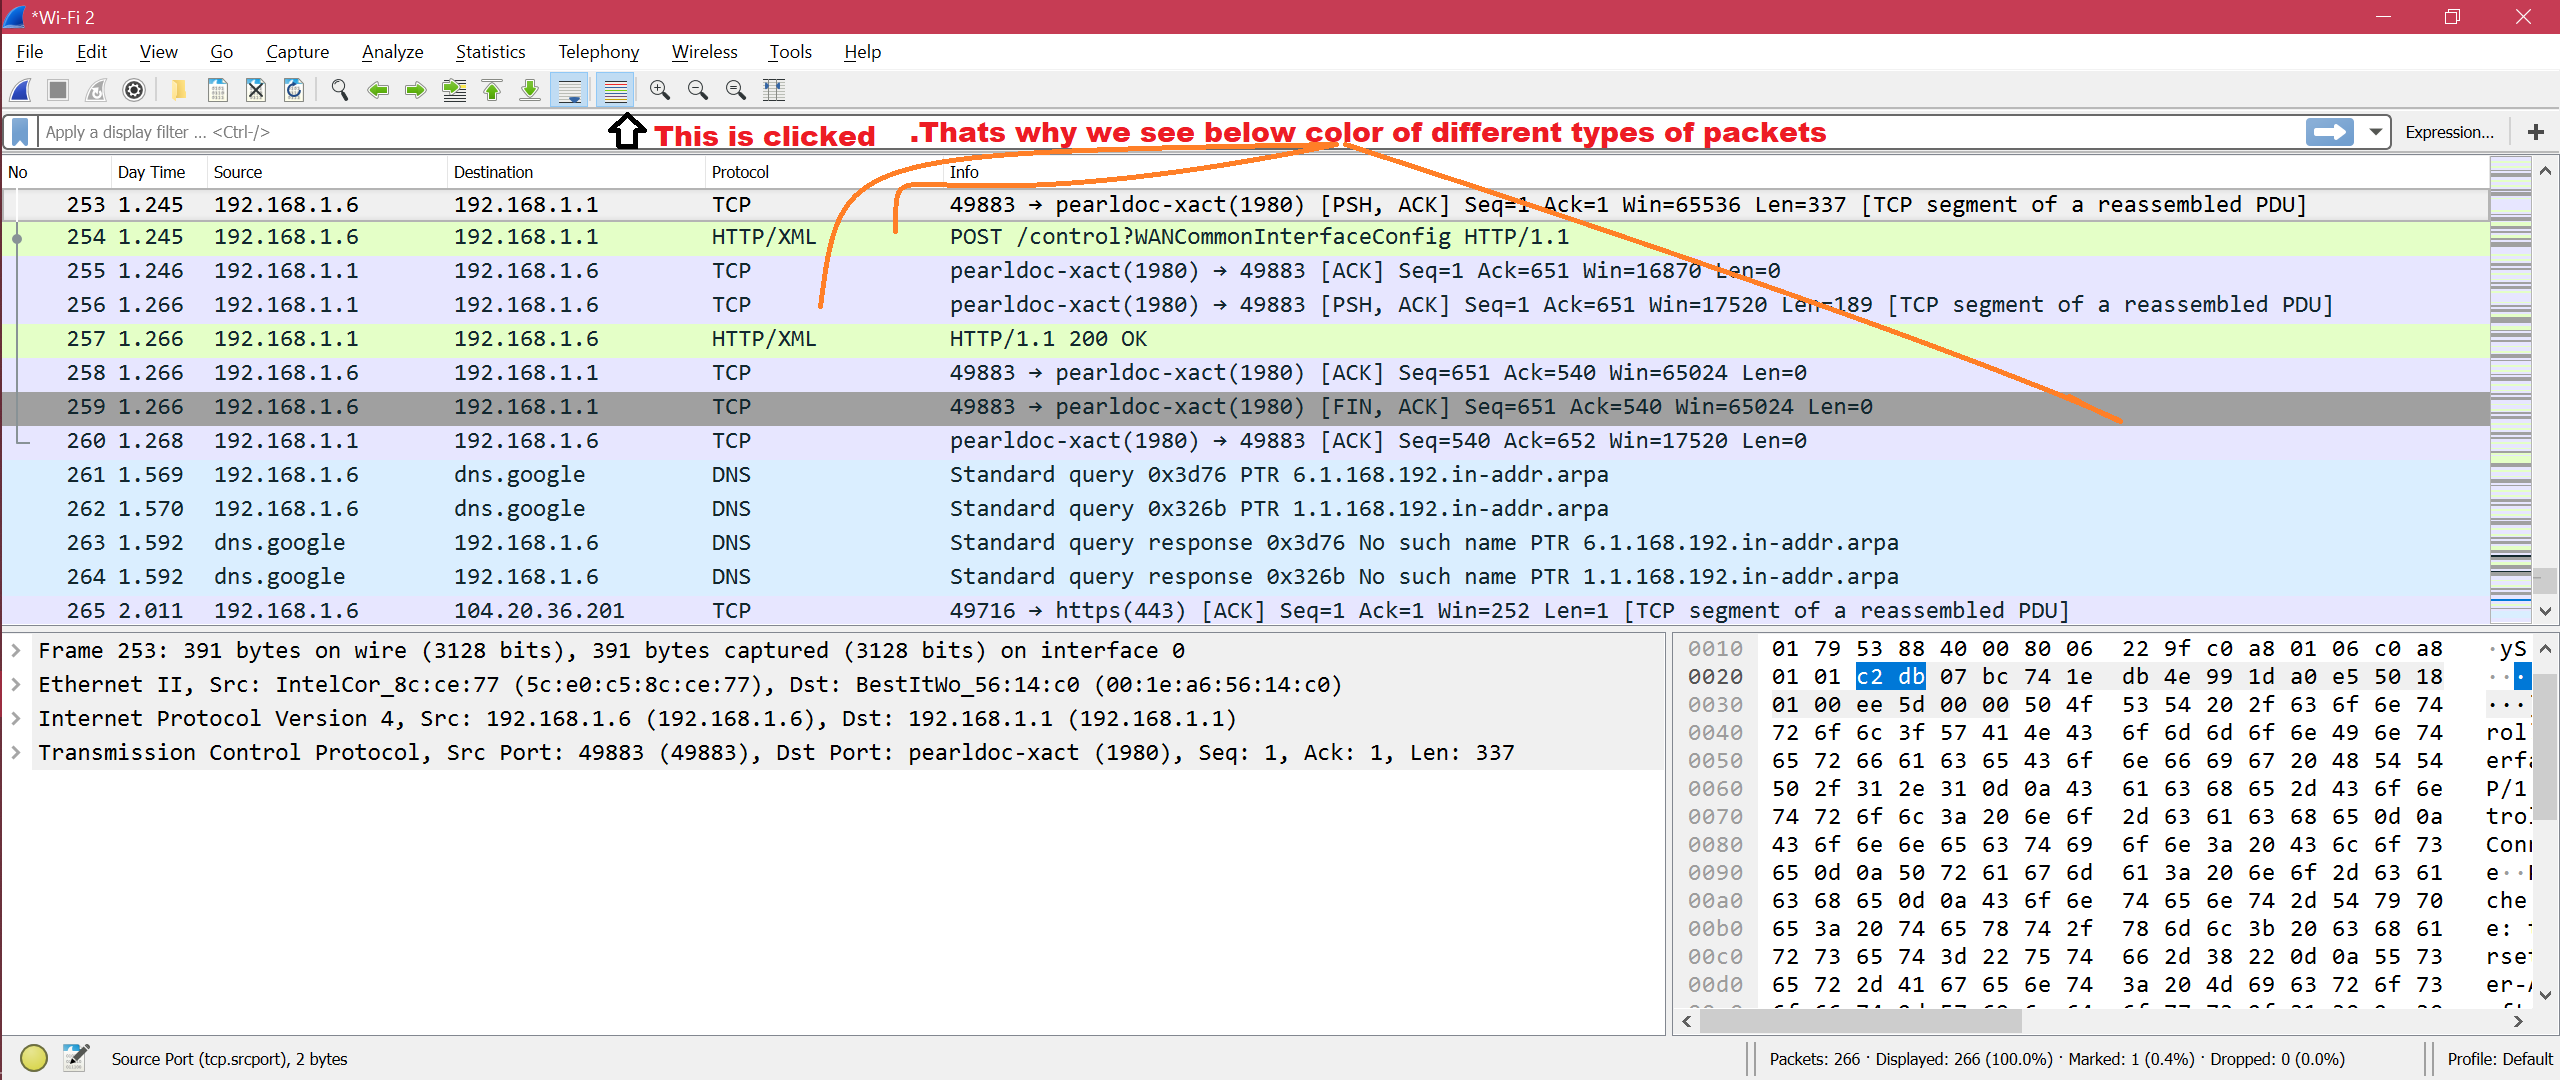
Coloring Rule: Here is the screenshot for default coloring rule for different types of packets:
Here is the screenshot if disable coloring rule:

Now we can customize coloring rule from View -> Coloring Rules. Here is the screenshot:
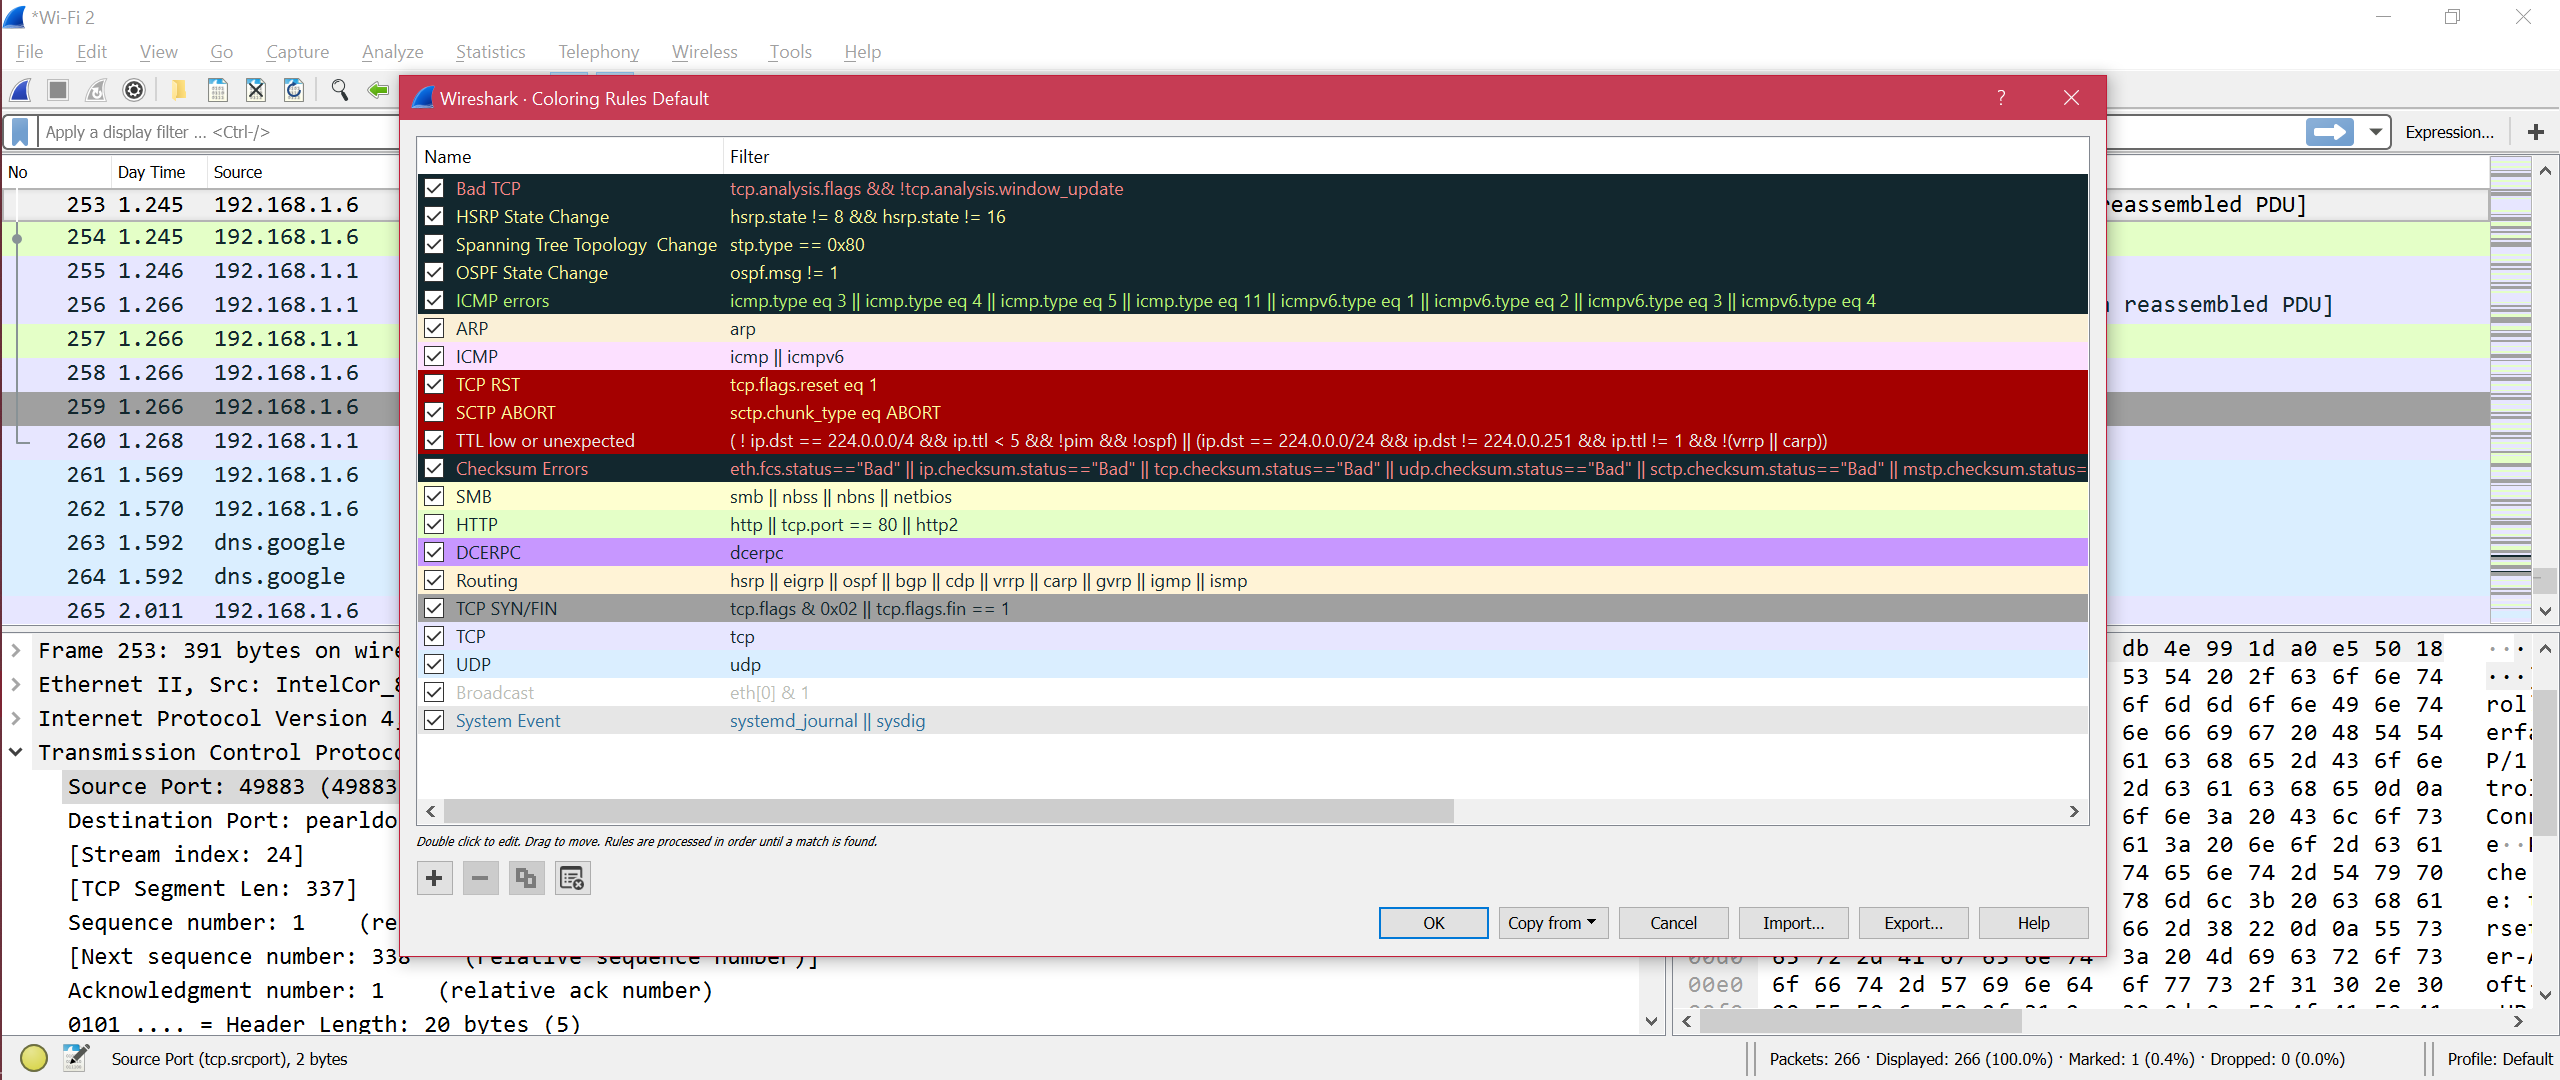
So now you can modify coloring rule according to your need.
Wireshark column: Here is the screenshot for Wireshark default columns: 
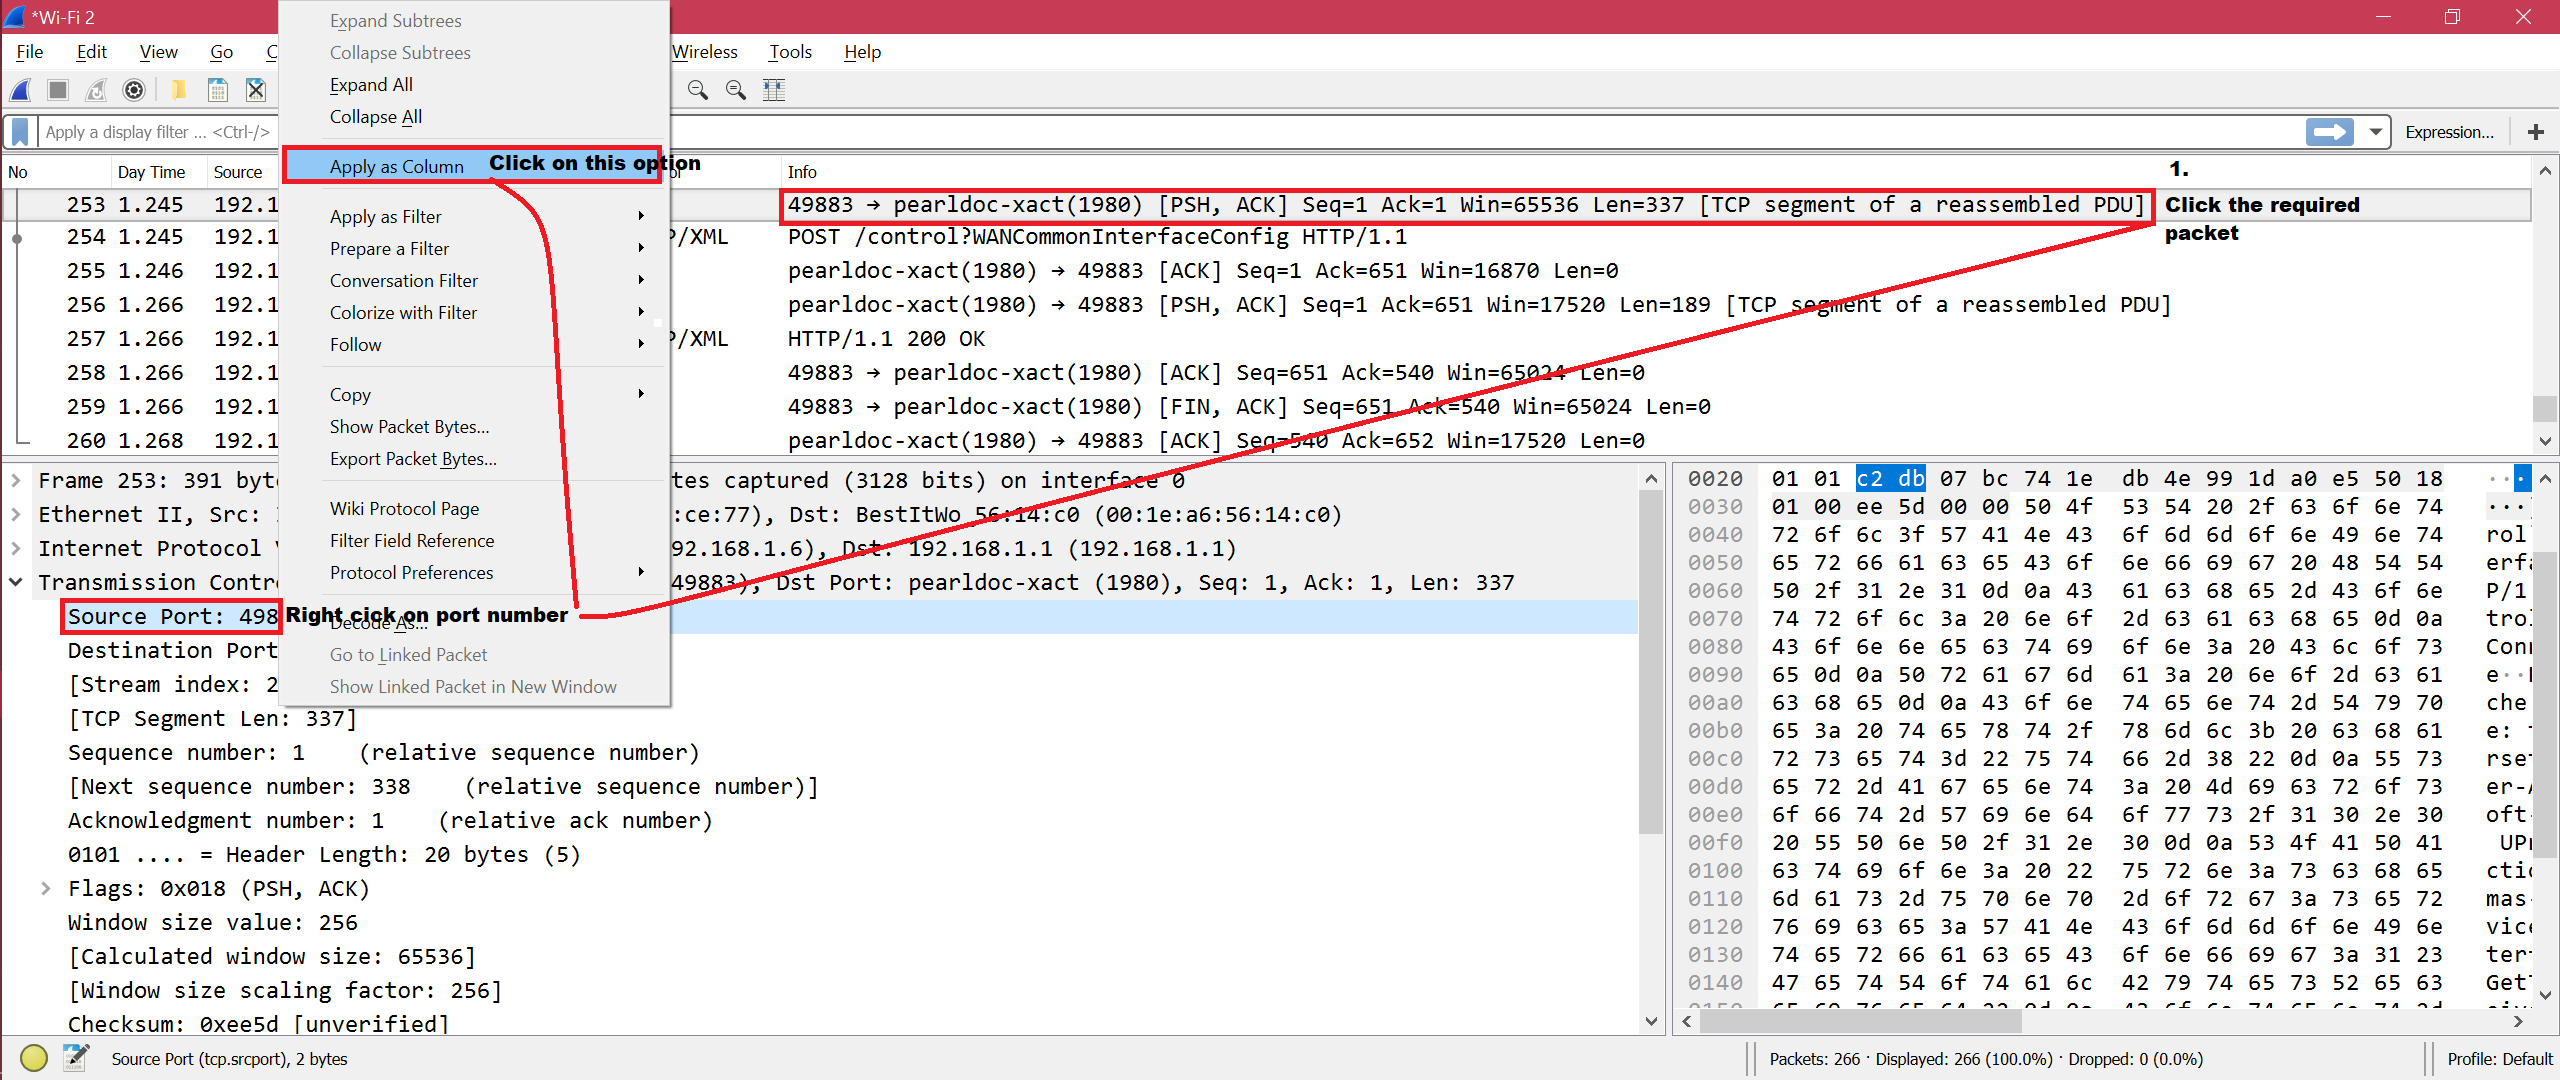
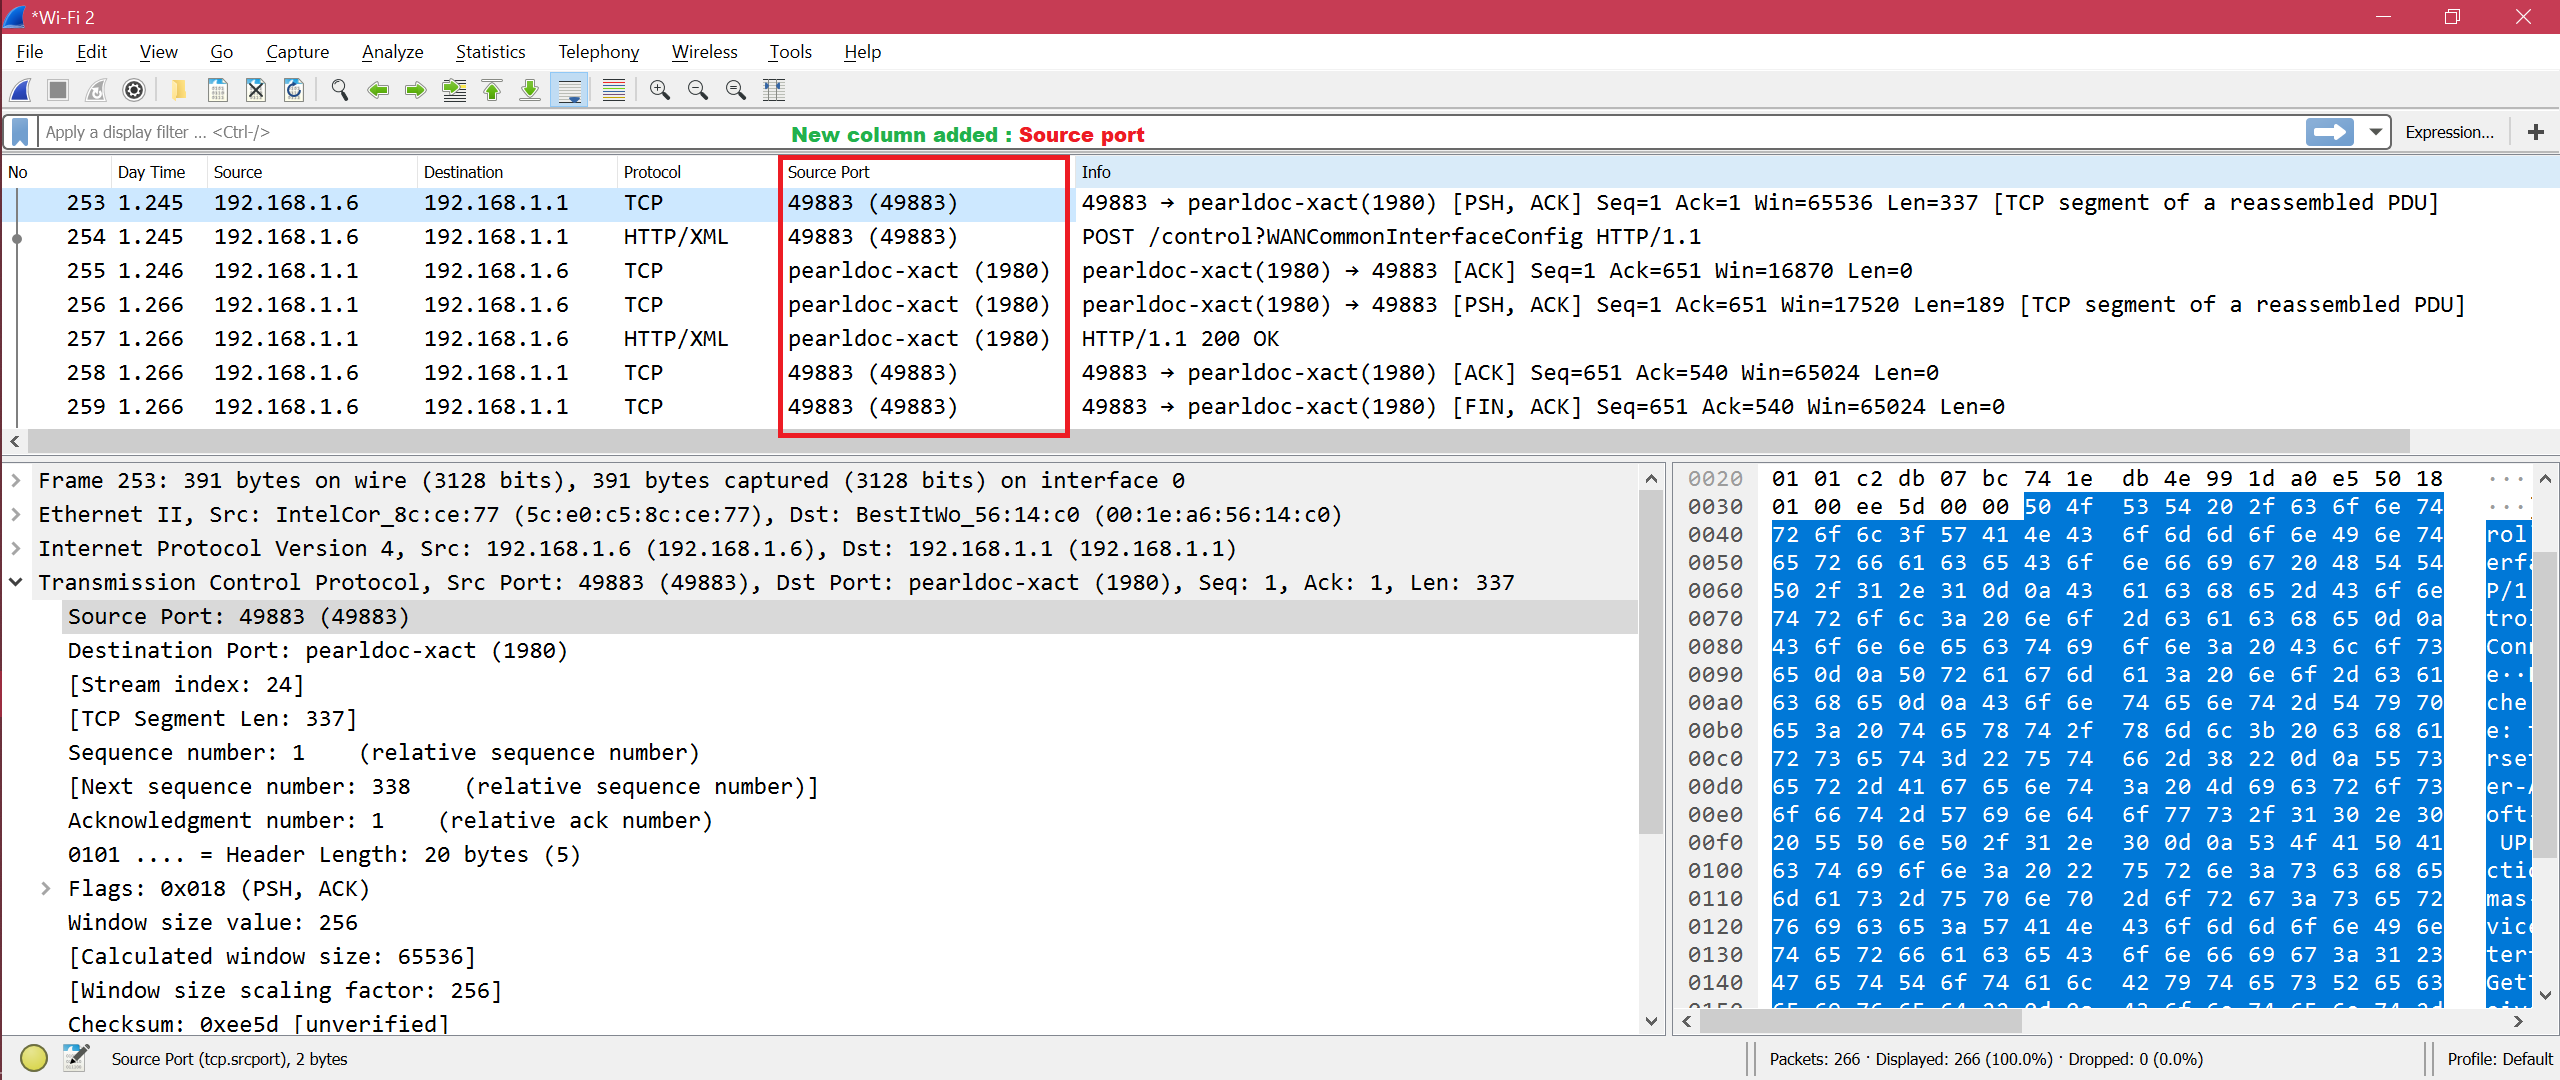
Now if we want to add port number as column, we have to follow below steps mentioned in screenshot
There are many settings we can modify under Edit->Preferences. Here is the screenshot:
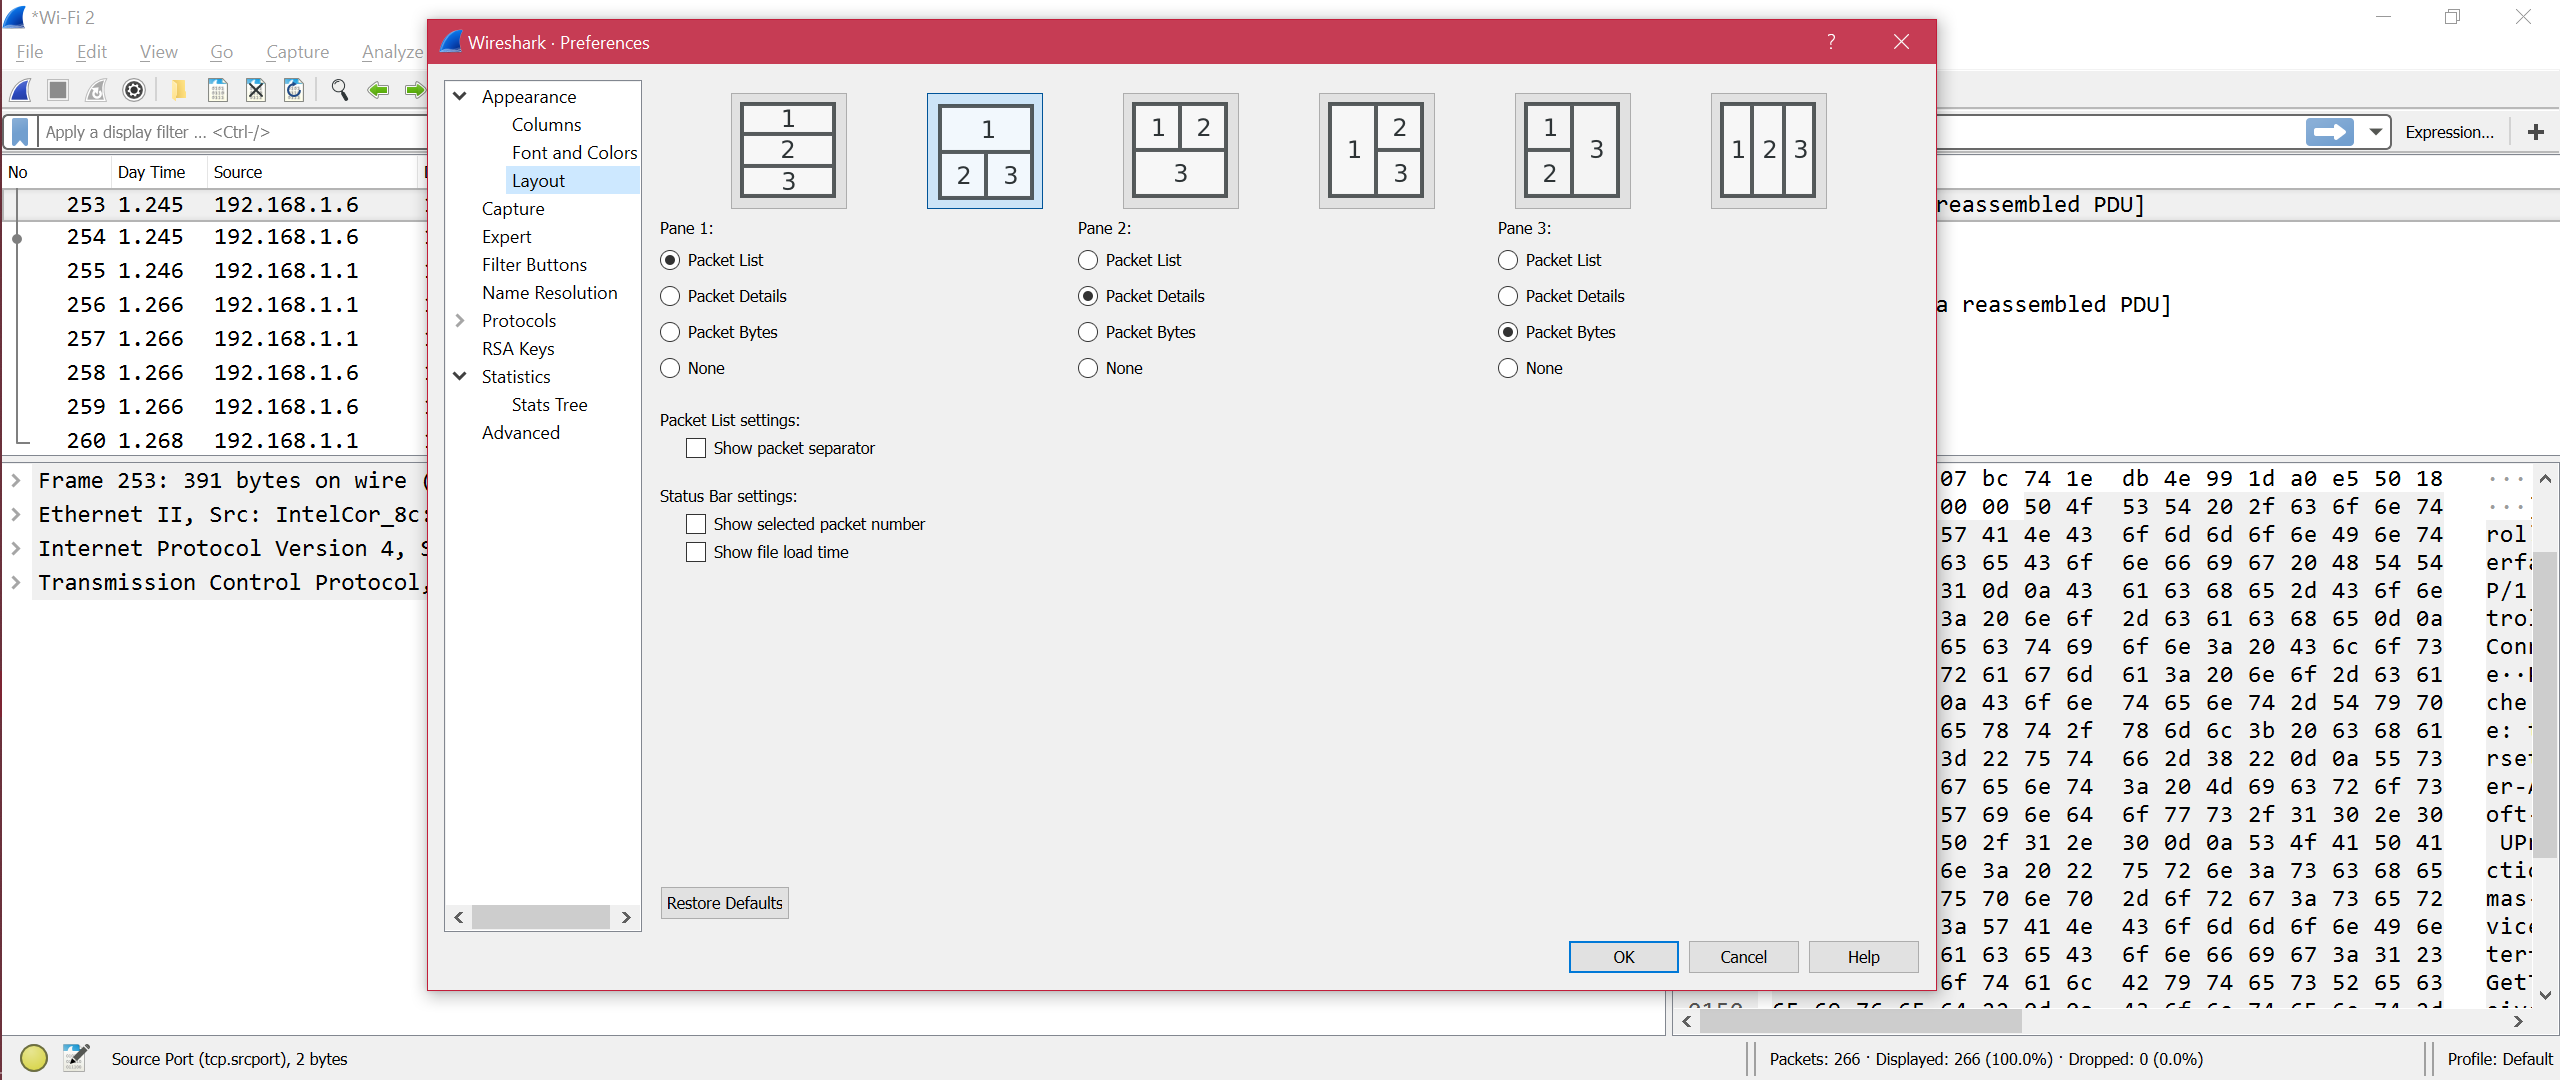
Here is the screenshot to show the important and useful options from preferences:

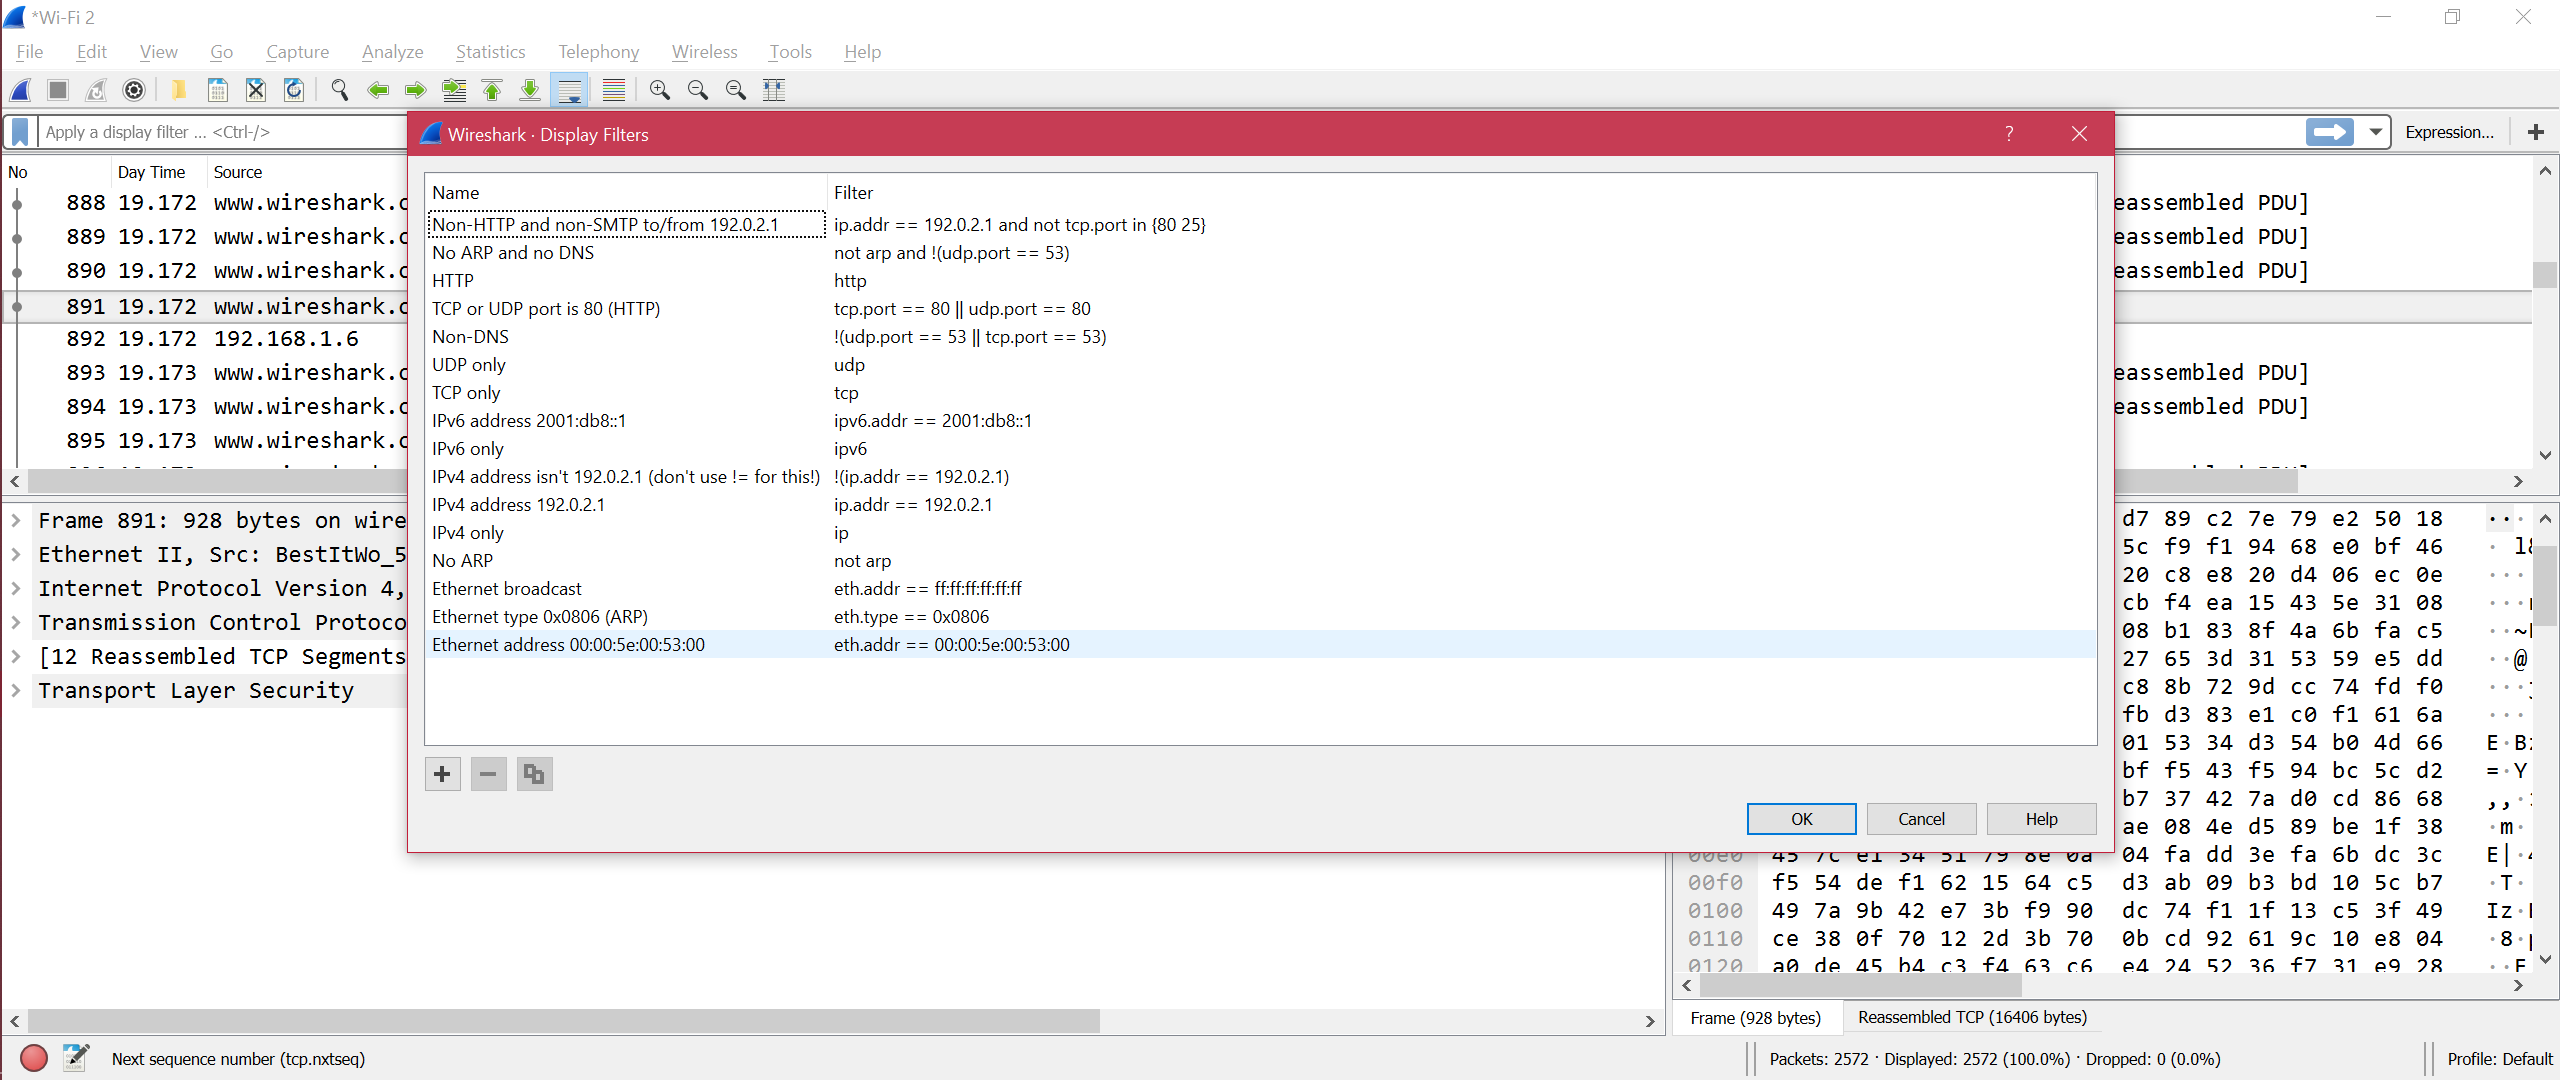
Here are some display filters from Wireshark. Analyze -> Display Filters
If you want to change the capturing interface follow below option:
Capture -> Options
Here is the screenshot for changing capturing interface:

After capturing is completed it’s is recommended to save the capture for future analysis. Here is the screenshot for saving a capture:

If you try to capture on an interface where no packets are there you will see below error message after you stop the capture.

And then you will be redirected to main page to select the correct interface.

For capture analysis there is on statistics Here is the screenshot for showing the important sub-menu.

Example: Here is the I/O graph to understand the packet exchanges through graph:

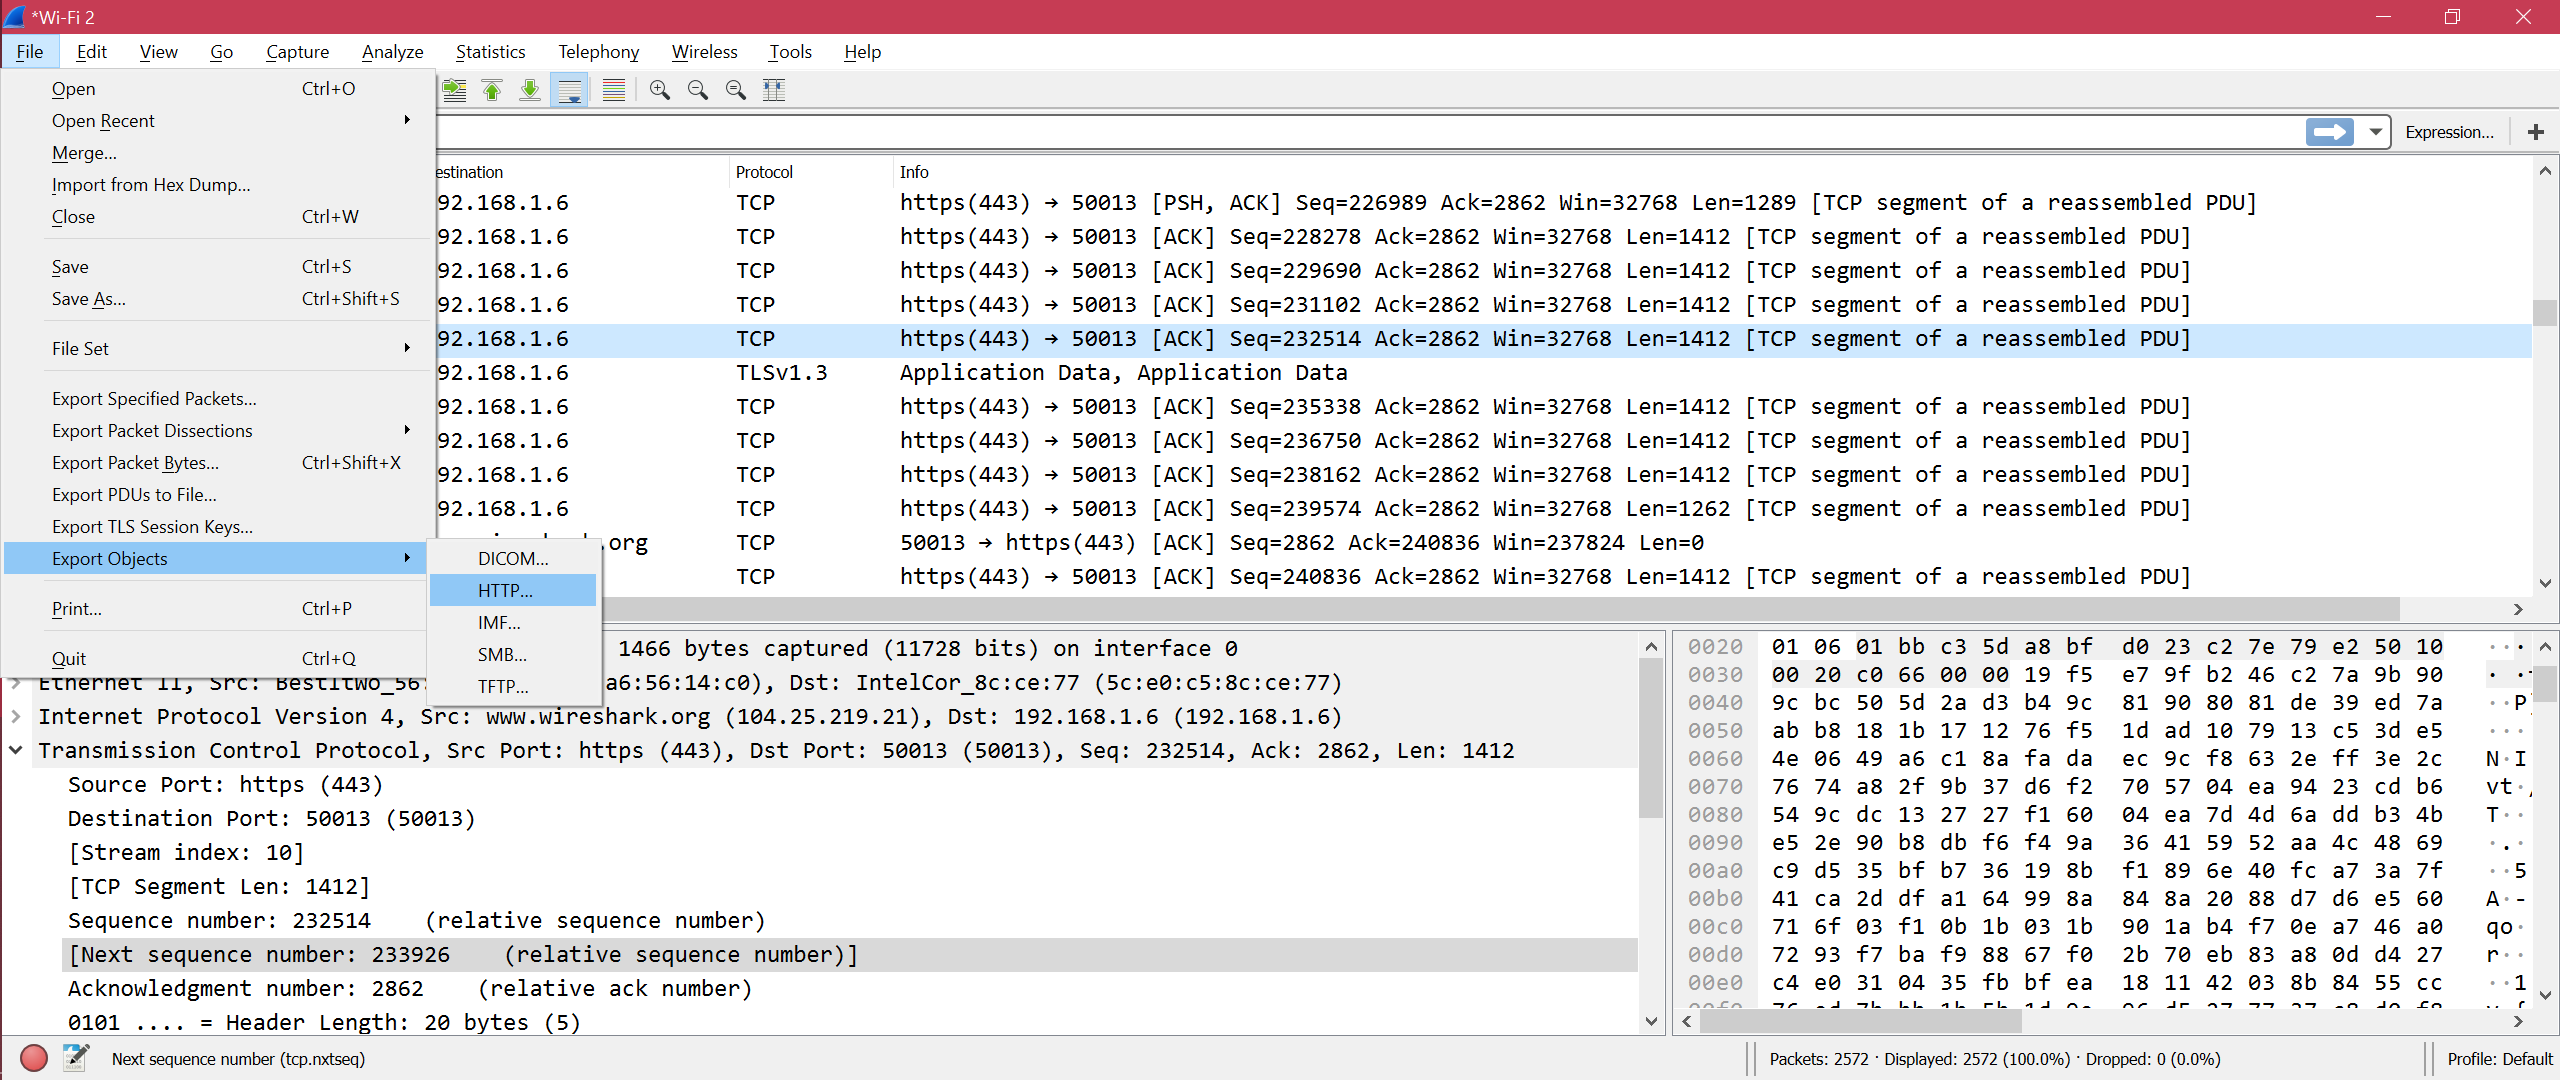
Here is the step to extract HTTP data like image, txt etc from capture:
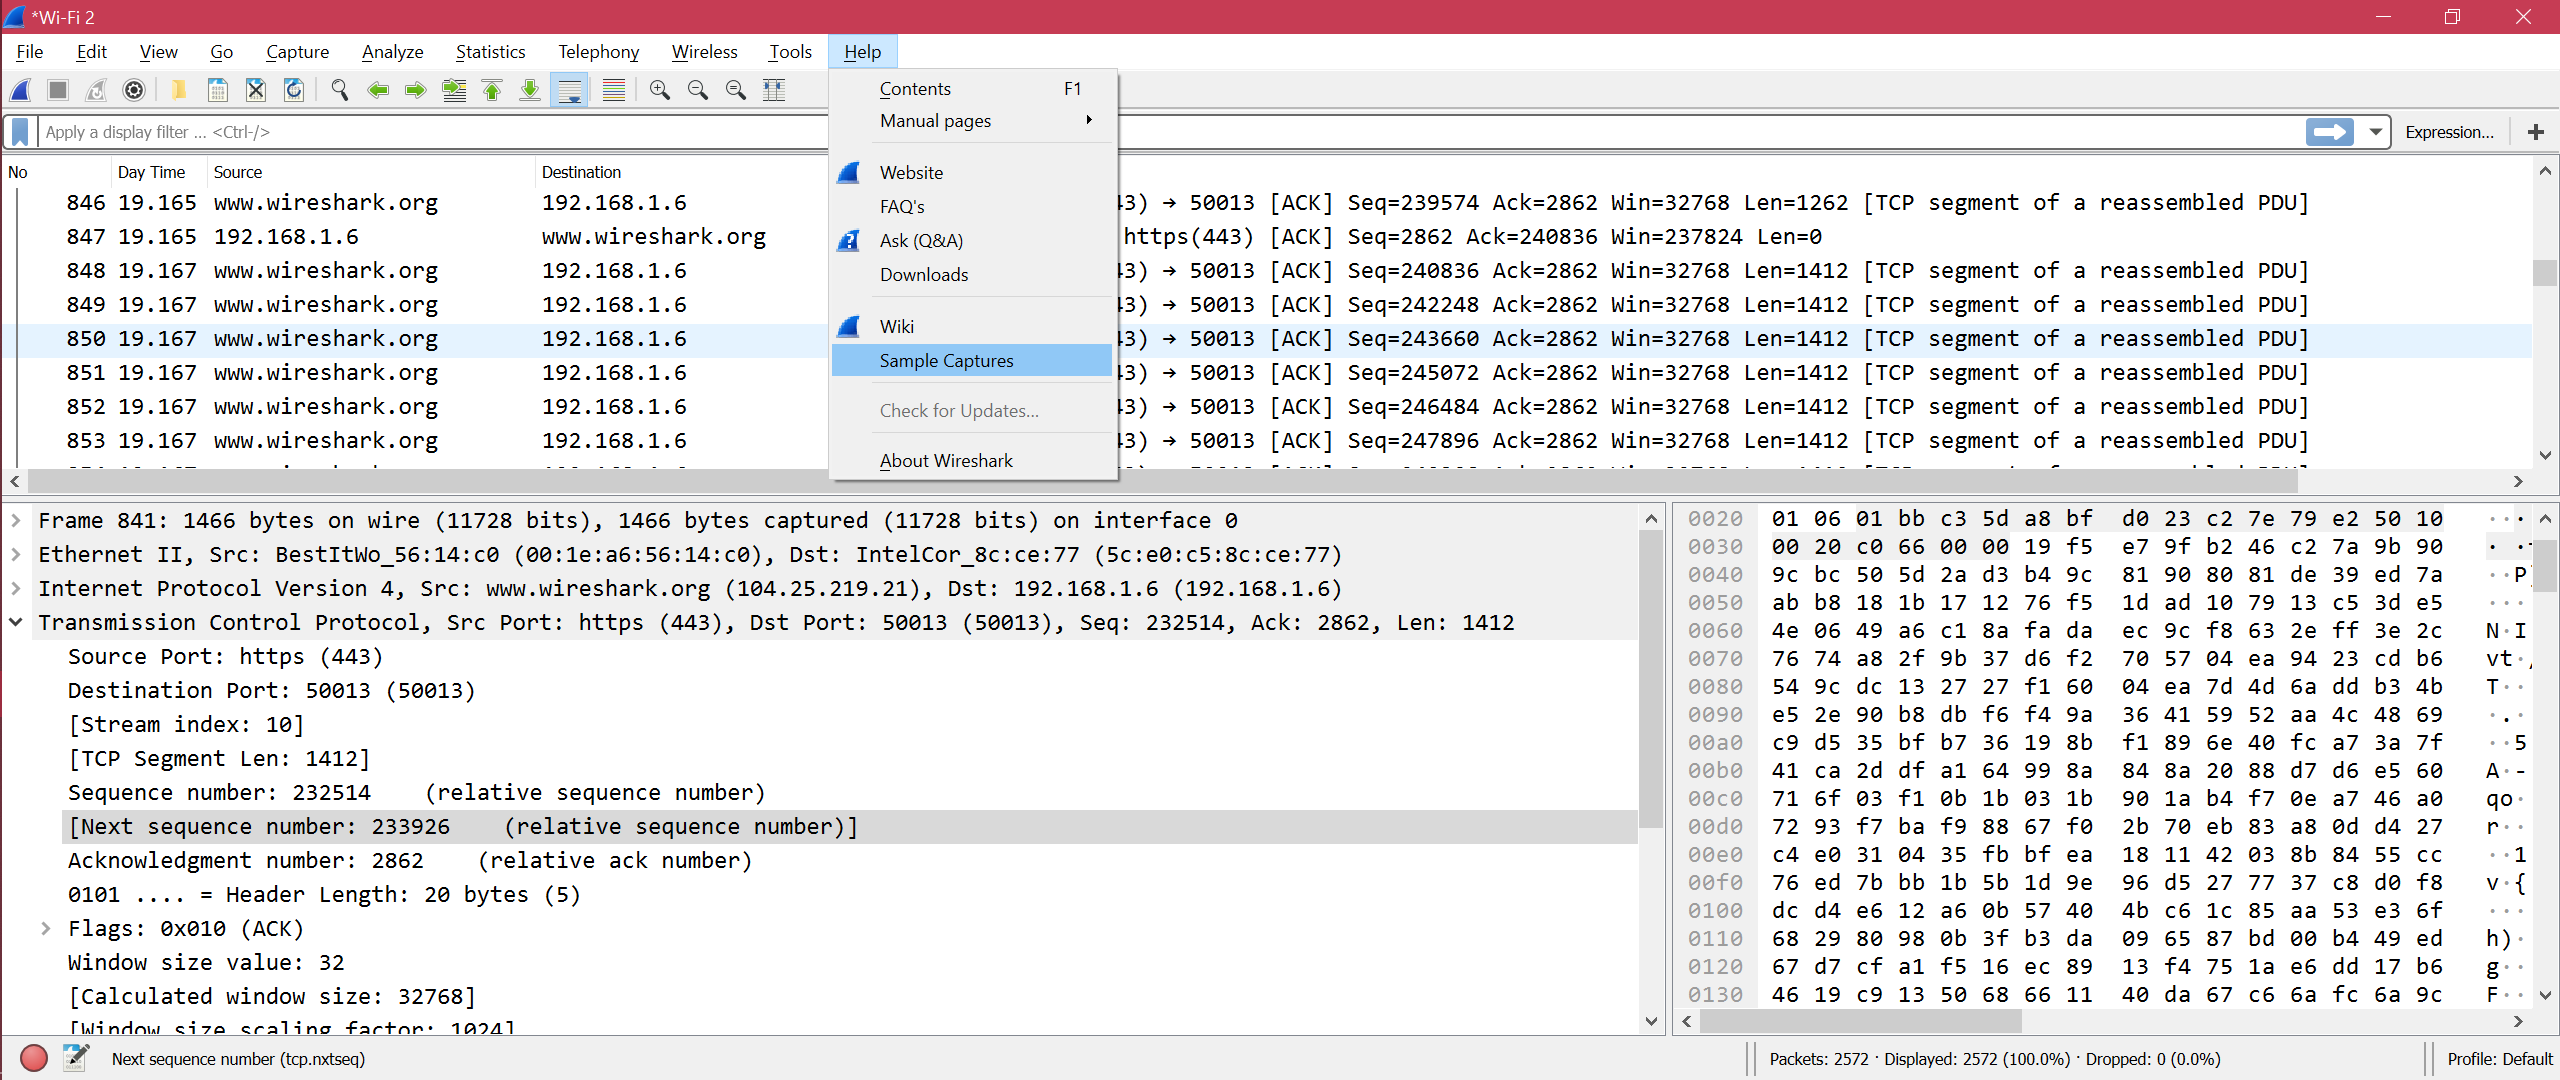
You can get access to samples capture for your analysis from here: SampleCaptures
- To know how to filter by IP check here: Filter By IP
- To know how to Filter By Port
- To know OSI layer understanding through Wireshark: OSI Network
- To know TCP through Wireshark: TCP Protocol
- To know HTTP through Wireshark: HTTP Analysis
- To know UDP through Wireshark: UDP Wireshark Analysis
- To know ARP through Wireshark ARP Packet Analysis
- To know ICMP through Wireshark: ICP Packet Analysis
Summary:
There are many options and ways to debug a capture through Wireshark. We have just discussed the basic and commonly used options from Wireshark. One more advantage of Wireshark is that it’s an open source , so you will get solution for each and every issues in internet.